Christmas Cactus Care: Light, Water, Soil & Blooms
Schlumbergera x buckleyi
Christmas cactus needs bright indirect light (no direct sun), watering every 7–10 days when the top 2–3 cm is dry, and a 6-week cool dark period (10–13°C nights, 14+ dark hours) in autumn to trigger flowering.
Christmas Cactus Care: Light, Water, Soil & Blooms
Start with wateringThe most common care mistake for Christmas CactusWatering guide →Christmas Cactus care essentials
Light
bright indirect light, medium indirect light
Water
Every 7–10 days growing season (top 2–3 cm dry). Reduce to every 14 days in pre-flowering dormancy. Never let sit in water.
Soil
Well-draining potting mix with 20% orchid bark. pH 6.0–7.0. Aerated, not compacted.
Humidity
50–60%
Temperature
18–24°C (65–75°F)
Fertilizer
Feed lightly during active growth. Half-strength balanced or high-potassium liquid fertilizer to promote blooms and stop if the plant is stressed, newly repotted, or not actively growing.
About Christmas Cactus
Christmas Cactus has a upright growth habit.
| Detail | Information |
|---|---|
| Growth habit | Upright |
| Scientific name | Schlumbergera x buckleyi |
Christmas Cactus Care: Light, Water, Soil & Blooms
What Is Christmas Cactus?
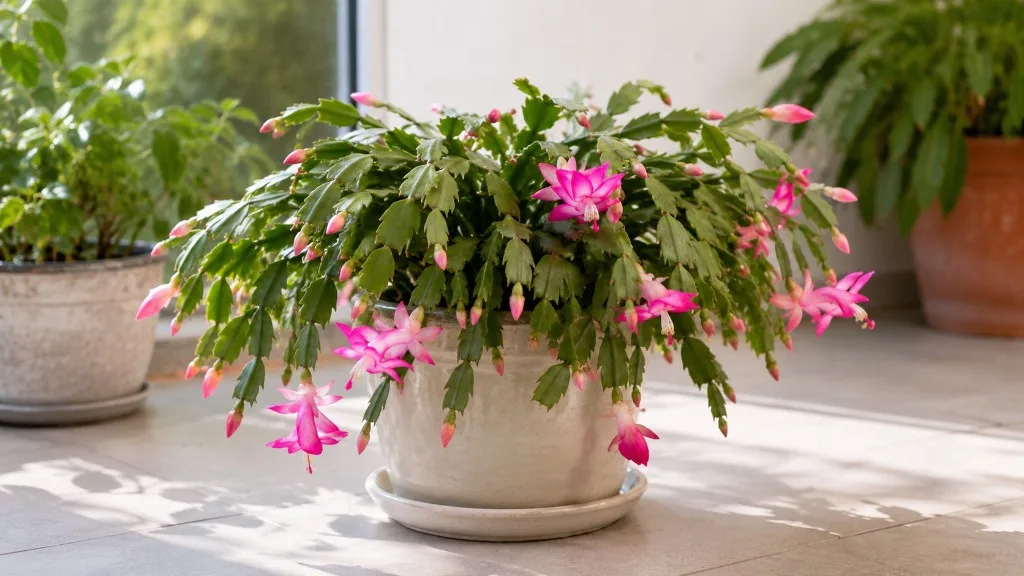
Christmas cactus is a long-lived flowering houseplant that produces tubular blooms in pink, red, white, purple, or orange around the winter holidays in the Northern Hemisphere. The name most often refers to Schlumbergera x buckleyi, a hybrid between Schlumbergera truncata and Schlumbergera russelliana, though garden centers frequently sell closely related Schlumbergera species and hybrids under the same common name. What they share is growth form: flattened, segmented stems called phylloclades that look like leaves but function as photosynthetic stems.
Indoors, a mature Christmas cactus typically reaches 12 to 24 inches (30 to 60 cm) in spread, forming a pendulous or arching plant that works well in hanging baskets or on elevated shelves where the stems can cascade. It is a moderate grower in most homes and can live for decades when repotted periodically and given the seasonal rhythm it expects. Unlike desert cacti, Christmas Cactus overview evolved as a tropical epiphyte - it wants regular moisture, filtered light, and stable humidity, not grit, blazing sun, and drought.
If you are deciding whether this plant fits your home, the honest summary is this: Christmas cactus is easier than its reputation suggests once you stop treating it like a desert succulent, but it is not a set-and-forget plant either. It rewards attention to seasonal watering, cool rest periods for rebloom, and careful placement away from hot drafts and harsh sun. For pet owners, it is also one of the safer holiday plants - the ASPCA lists Christmas cactus as non-toxic to cats and dogs.
Botanical Background and Holiday Cactus Identification
Christmas cactus belongs to the family Cactaceae, but its care profile is closer to a tropical orchid than to a saguaro. In the wild, Schlumbergera species grow in the coastal mountains of southeastern Brazil, where they attach to tree branches and rock crevices in humid, shaded forest. Rain falls regularly; roots breathe in airy organic debris; and light is dappled rather than direct. That origin explains nearly every indoor requirement: Christmas Cactus light guide, consistent but not waterlogged moisture, good drainage, and two annual rest periods that cue flowering.
Three “holiday cacti” are commonly confused at retail. Thanksgiving cactus (Schlumbergera truncata) usually blooms earlier, from late fall into winter, and has stem segments with sharply pointed, claw-like teeth along the margins. Christmas cactus (S. x buckleyi and related hybrids) tends to bloom later, closer to Christmas, with segments that have more rounded, scalloped edges. Easter cactus (Rhipsalidopsis gaertneri, formerly Hatiora gaertneri) is a different genus entirely, with star-shaped flowers and slightly bristled segment margins; it blooms in spring. Care overlaps among the Schlumbergera types, but bloom timing and margin shape help you identify what you actually own - useful when troubleshooting why flowers appear in November instead of December.
The plant’s “leaves” are phylloclades - flattened stem segments that store water and carry photosynthetic tissue. New segments emerge from the end of older ones, and flower buds form at the tips of mature segments. Each segment joint is a potential propagation point. Knowing this anatomy matters when you prune, propagate, or diagnose wrinkling: you are working with stems, not true foliage, and damage at the base of a segment affects the whole chain above it.
Why This Plant Is Not a Desert Cactus
The biggest beginner mistake is assuming the word cactus means dry soil, full sun, and rare watering. Christmas cactus is a tropical forest epiphyte. In cultivation it needs more water and humidity than most desert succulents, and it suffers quickly from prolonged drought or baking window sills. The Royal Horticultural Society describes the natural habitat as warm, humid rainforest in dappled shade - a direct blueprint for indoor placement.
That said, it is not a bog plant either. Epiphyte roots rot in stagnant, airless mix. The correct mental model is moist and airy, never soggy and never bone dry for long stretches. Segments that look thin, wrinkled, or reddish are often telling you the plant is too dry, too sun-stressed, or both. Segments that turn yellow and soft with wet mix point to overwatering on Christmas Cactus. The plant communicates through segment texture and color faster than many houseplants communicate through true leaves - learn to read those signals and your calendar becomes secondary.
Best Growing Conditions for Christmas Cactus
Christmas cactus performs best when your room approximates the stable, filtered conditions of its native range. The four variables that decide almost every outcome are light, water, soil, and temperature - with humidity and seasonal rest acting as the fifth and sixth levers that separate a surviving plant from one that reblooms reliably every year. Align those six factors and feeding, Christmas Cactus repotting guide, and propagation become routine. Misalign any one badly and the plant will show segment symptoms or drop buds long before the whole root system fails.
Light Requirements
Christmas cactus needs bright, indirect light. In practical home terms, that means strong ambient daylight without direct sun hitting the segments for more than a brief early-morning window. An east-facing windowsill is often ideal: gentle morning light, then bright indirect exposure the rest of the day. North windows work in bright rooms. West- and south-facing exposures can work if the pot sits at least 2 to 3 feet (60 to 90 cm) back from the glass or behind a sheer curtain that filters midday and afternoon rays.
Direct sun scorches phylloclades quickly. Segments exposed to harsh sun may turn red or purple, develop bleached patches, or look wrinkled despite adequate soil moisture because the plant is losing water faster than roots can replace it. The Old Farmer’s Almanac notes that too much direct sunlight can bleach sensitive segments - pull the plant back before assuming it needs more water.
Low light is survivable short term but poor for long-term health and rebloom. In dim corners, expect pale segments, weak new growth, and fewer flower buds even if watering is correct. Low light also slows drying, which increases overwatering risk if you keep a summer Christmas Cactus watering guide all year. A full-spectrum grow light on a 10–12 hour timer, positioned 12–18 inches above the plant, can supplement weak natural light without the heat stress of a sunny sill - useful in offices and north-facing apartments.
During summer, many growers move Christmas cactus outdoors to a shaded porch once nights stay above 50°F (10°C). Outdoor shade ripens new growth and often improves the next bloom cycle. Bring the plant back before frost and acclimate gradually when moving - sudden light shifts cause segment drop or bud abort.
Temperature and Humidity
During active growth and while in flower, Christmas cactus prefers daytime temperatures around 65 to 75°F (18 to 24°C) with nighttime temperatures roughly 5 to 10°F cooler. Most homes already sit in this range. Problem spots are the usual ones: cold winter window glass, hot air from radiators, and direct blasts from air-conditioning or heating vents. A few hours of cold draft can cause bud drop on a plant that was ready to bloom.
Flowering is where temperature becomes decisive. The RHS recommends cool rest periods at 12 to 15°C (55 to 59°F) in the run-up to bud formation in early autumn and again after flowering in late winter. The Old Farmer’s Almanac similarly notes that flower buds form best between 50 and 60°F (10 and 15°C). Cool nights signal the plant to initiate buds; warm, stable nights after buds appear help them develop without aborting. If your home stays above 70°F (21°C) at night through fall, you may need longer dark periods or a cooler room to trigger bloom - more on that in the blooming section below.
Humidity in the 50 to 60% range supports healthy segment texture and reduces spider mite pressure in dry winter air. Many homes drop to 30–40% when heat runs, which is tolerable but not ideal. A pebble tray (pot elevated above water, not sitting in it), grouping plants together, or a small humidifier near the plant all help more reliably than misting, which raises humidity only briefly and can encourage fungal spotting if segments stay wet overnight. Bathrooms and kitchens with bright windows often provide naturally higher humidity if light is adequate.
Soil and Drainage
Use a well-draining, airy potting mix with added organic structure - not straight cactus grit and not heavy, compacted peat that stays wet for days. A workable home recipe is roughly two parts quality houseplant or peat-free potting mix, one part perlite, and one part orchid bark or coco chips. LeafyPixels plant-care data targets pH 6.0–7.0 with mix that is aerated, not compacted. The principle matters more than the exact brand: roots need moisture, oxygen, and quick drainage at the same time.
Always use a pot with a drainage hole. Decorative cachepots are fine only if you empty runoff after every watering. Christmas cactus roots are relatively fine and vulnerable to rot in stale water; a saucer left full is one of the fastest paths to yellow, soft segments and lost buds. Repot into fresh mix every one to two years because organic components break down, compact, and hold water longer than the plant can safely use.
How to Water Christmas Cactus
The general rule for Christmas cactus is water when the top of the mix is dry and the root zone is approaching dry - never on a blind calendar schedule. During active growth from spring through early autumn, check when the top 2 to 3 cm (about 1 inch) of mix feels dry, then water thoroughly until a small amount runs from the drainage hole. In many homes that works out to roughly every 7 to 10 days in the growing season, but light, pot size, and room temperature change that interval constantly. The Old Farmer’s Almanac suggests checking the top one-third of the potting mix - for a 6-inch pot, that is about the top 2 inches - and soaking only when that zone is dry.
Water deeply and evenly, then empty the saucer so the pot is not standing in runoff. Shallow sips every day keep the surface damp while the core stays stale - a pattern that causes more rot than occasional thorough watering followed by proper dry-down. Because phylloclades store water, the plant can tolerate a brief dry spell better than prolonged soggy roots, but repeated drought makes segments wrinkle and buds abort.
Watering Rhythm During Active Growth
From April through September, Christmas cactus is usually in active growth and uses water steadily. The goal is consistent moisture without waterlogging: mix that feels like a wrung-out sponge through most of the root zone, not wet mud and not dusty dry. New segments should look plump and firm; wrinkling on the newest growth often means the plant dried too far between waterings.
While the plant is in bloom, maintain slightly more attentive watering - flowers are water-intensive, and drought during flowering can shorten the display. The RHS notes that once buds appear, resume regular watering through the bloom period, then taper again for the post-flowering rest. Do not let the plant go completely dry for long stretches while flowers are open, but also avoid keeping the mix soggy, which promotes bud drop and root issues simultaneously.
Seasonal Adjustments and Rest Periods
Christmas cactus needs two rest periods of reduced watering per year to flower reliably, according to the RHS. The first runs from mid-September until buds develop with shortening days in early autumn. During this pre-bloom rest, let the mix dry slightly more between waterings - roughly every 14 days is a common starting point in cool fall rooms, but always verify with a finger or skewer before assuming the interval. Once you see pinpoint buds at segment tips, gradually resume normal watering and keep the plant stable; do not swing from drought to flood.
The second rest period runs after flowering, from late January through late March. Post-bloom, reduce watering again while the plant recovers and sets new growth for the next cycle. Resume regular spring watering when new segments begin to elongate and the pot dries on a normal active-growth rhythm. These rest periods pair with cooler temperatures; watering reduction without some cool-night exposure rarely triggers the same bud response.
In winter outside the rest windows, stretch intervals modestly if the plant is in lower light, but never treat “winter” as permission to ignore the pot for weeks unless the mix is genuinely dry and the room is cool. The most common winter failure is continuing a summer watering frequency in a dim, cool room - the mix stays wet, roots suffocate, and lower segments yellow first.
Common Watering Mistakes
The single most damaging mistake is watering on a fixed weekly schedule without checking the pot. The second is letting the plant sit in a full saucer or cachepot, which suffocates fine roots within days. The third is treating Christmas cactus like a desert cactus and waiting until segments shrivel before watering - recovery is possible, but bud initiation suffers and segments may not refill fully if roots were damaged.
Another frequent error is increasing water when buds drop without checking whether the cause was overwatering, moving the plant, or warm nights. Bud drop has multiple causes; adding moisture to an already wet root zone makes the problem worse. Always pair visual symptoms with moisture at depth and pot weight before changing your rhythm. If segments are yellow and soft, pause watering and inspect roots. If segments are thin and wrinkled with dry mix, water thoroughly and review light and humidity.
How to Feed Christmas Cactus
Christmas cactus does not need heavy feeding. A balanced, water-soluble houseplant fertilizer diluted to one-quarter to one-half of the label rate is sufficient from after blooming until early autumn. Michigan State University Extension aligns: feed during active growth, not during rest periods when the plant cannot use nutrients efficiently.
Apply fertilizer to already-moist soil so the solution distributes evenly and does not burn roots. If your potting mix contains a starter charge, delay supplemental feeding for the first month after repotting. Pause feeding entirely during both rest periods, while buds are initiating in fall darkness, and for several weeks after repotting or root damage. Salt buildup from overfeeding shows as crisp brown segment margins and white crust on the soil surface - flush the pot with plain water at two to three times pot volume and pause fertilizer for six to eight weeks if that appears.
For most indoor growers, a dilute liquid feed every four weeks from spring through August is the easiest approach. Bloom-booster products are optional - cool rest and short-day conditions matter more than fertilizer type for this species.
Getting Christmas Cactus to Bloom
If your Christmas cactus grows green segments year-round but rarely flowers, the issue is almost always missing rest cues, not missing fertilizer. Schlumbergera is a short-day plant: it initiates buds when nights lengthen and temperatures drop. You can have a healthy plant that never blooms if your home stays bright and warm through autumn.
Short Days, Cool Nights, and Rest Periods
To encourage blooming, combine six to eight weeks of long nights, cooler temperatures, and reduced watering starting in early to mid-September in the Northern Hemisphere. Practical targets from RHS and multiple horticultural references:
- 12 to 14 hours of uninterrupted darkness each night. Even brief light from lamps or car headlights passing a window can interrupt the signal. A spare room you do not enter at night, a closet with ventilation, or a light-proof cover over the plant from late afternoon until morning all work.
- Cool nights around 50 to 60°F (10 to 15°C), ideally 55 to 59°F (13 to 15°C). Daytime temps can be slightly warmer, but warm nights above 65°F (18°C) often delay or prevent bud set unless darkness is extended.
- Reduced watering during initiation, as described above. Dry-ish, cool, and dark together mimic the seasonal shift in Brazil’s coastal mountains.
After roughly six weeks, tiny buds should appear at segment tips. Once buds are visible, move the plant as little as possible - Christmas cactus is notorious for bud drop when relocated, rotated, or exposed to drafts after buds form. Increase watering slightly, keep temperatures moderate, and accept that some bud loss may still happen if the room is hot or dry.
If buds fail to appear after a honest dark-and-cool cycle, check whether your plant is a Thanksgiving cactus that already bloomed, whether light leaks interrupt darkness, or whether the plant is too young. Mature, well-cared-for plants can bloom annually for decades.
After flowering, give the second cool rest in late winter to reset the cycle. Prune lightly after bloom if you want a bushier shape - twist or cut segments at a joint, and use the trimmings for propagation.
Repotting and Root Health
Repot Christmas cactus roughly every one to two years, or when roots circle drainage holes, water runs straight through without soaking in, or the mix breaks down and stays wet too long. The best timing is early spring as active growth resumes, which gives the plant a full season to fill the new pot with roots. Avoid repotting during bud initiation, peak bloom, or the post-flowering rest unless the situation is urgent - root rot on Christmas Cactus cannot wait, but convenience repotting during bloom often costs you the flower display.
Choose a pot only one size larger than the current root ball - typically 1 to 2 inches (2.5 to 5 cm) wider. Oversized pots hold excess wet mix around roots that cannot use it, a common trigger for rot after repotting. Use fresh, well-draining mix with orchid bark and perlite, replant at the same depth, and water lightly once. Resume normal watering as new growth appears.
Signs that repotting is overdue include roots at the surface, sour-smelling mix, chronic yellowing lower segments despite corrected watering, and a plant that dries out in a day or two because roots have replaced most of the mix. If you unpot and find brown, mushy roots, trim them with clean shears, dust cuts if you wish with cinnamon (optional home practice), repot into fresh mix, and water sparingly until new growth confirms recovery.
Propagation Methods for Christmas Cactus
The standard home propagation method is stem-segment cuttings, not seeds. Each phylloclade segment is a potential cutting. Choose healthy, plump segments from a plant that is not stressed, diseased, or pest-infested - weak parent material produces weak cuttings.
To propagate, twist or cut two to four connected segments from the end of a stem. Let the cutting callus in a dry, shaded spot for 24 to 48 hours so the cut surface seals and is less vulnerable to rot. Then insert the bottom segment one segment deep into moist, well-draining mix - the same bark-perlite blend you use for the parent plant. Some growers root cuttings in water first; that works for many growers, but transition to mix promptly once roots are 1 to 2 cm long to avoid water-root fragility.
Place cuttings in bright indirect light with stable humidity and temperatures around 70°F (21°C). Water sparingly until roots form - usually three to six weeks - then increase watering as new segment growth appears. A clear plastic bag with ventilation holes can raise humidity around the cutting, but avoid sealing wet cuttings in stagnant air, which invites mold.
Do not propagate during active flowering or from a plant recovering from root rot until you have fixed the parent’s environment. Multiple cuttings rooted in one pot create a fuller display faster than single segments, a common nursery technique you can replicate at home.
Common Christmas Cactus Problems
Most Christmas cactus problems are environmental, not mysterious diseases. The plant shows stress through segment color, firmness, and bud behavior long before the entire plant collapses. Check moisture, light, temperature stability, and recent moves before reaching for pesticide or extra fertilizer.
Yellow, soft segments usually mean overwatering, poor drainage, or compacted sour mix. Inspect roots if yellowing progresses up the stem chain. Wrinkled, thin segments with dry mix mean underwatering on Christmas Cactus or root loss that prevents uptake even when you water - unpot if wrinkling persists after a thorough soak.
Red or purple segment color often signals too much direct sun or drought stress. Move to filtered light and review watering. Bud drop is commonly caused by moving the plant after buds form, overwatering during initiation, hot dry air, or drafty windows. Once buds are set, keep the plant stationary and moderately watered.
Pests include mealybugs in segment joints, scale along stems, spider mites in dry winter air, and fungus gnats if the mix surface stays constantly wet. Inspect weekly, especially undersides and joints. Manual removal, a gentle shower, and insecticidal soap applied per label directions handle most early infestations. Fungus gnats respond to letting the top layer dry slightly and avoiding decorative mulch that stays damp on the surface.
Failure to rebloom is usually a rest-period problem, not a disease - revisit the dark, cool, reduced-water protocol in autumn rather than repotting or feeding harder. Segment drop after a sudden move to a much brighter or dimmer spot is often temporary acclimation stress; stabilize light and wait for new growth before making further changes.
Is Christmas Cactus Safe for Pets?
Christmas cactus is non-toxic to cats and dogs according to the ASPCA listing for Christmas cactus (Schlumbergera bridgesii, family Cactaceae). The ASPCA also lists it as non-toxic to horses. That makes it a safer holiday choice than poinsettia, mistletoe, or true lilies, though poinsettia’s toxicity is often overstated compared with lilies - Christmas cactus still sits on the low-risk end of the spectrum for pet-friendly seasonal plants.
Non-toxic does not mean intended for eating. ASPCA Poison Control notes that ingestion of plant material can still cause mild gastrointestinal upset - vomiting, diarrhea, or reduced appetite - because of fibrous plant matter rather than poisonous compounds. Rare reports in cats include ataxia (loss of coordination) after large ingestion. Discourage chewing when you can, especially on recently fertilized plants. If your pet consumes a large amount and shows persistent vomiting, lethargy, or loss of coordination, contact your veterinarian or the ASPCA Animal Poison Control Center at (888) 426-4435.
For households with curious cats, use a stable pot placement. The risk is mostly mild stomach upset, not systemic poisoning.
Conclusion
Christmas cactus (Schlumbergera) is a Brazilian rainforest epiphyte that rewards growers who respect its seasonal rhythm. Give it bright indirect light, well-draining bark-amended mix, thorough watering when the top of the mix dries (with reduced water during two annual rest periods), cool nights in autumn to set buds, and stable placement once flowers form, and you can enjoy decades of winter blooms from the same plant.
When something looks wrong, read the segments in context: wrinkling with dry mix means thirst; yellow softness with wet mix means rot risk; red tint often means too much sun; bud drop usually means movement, heat, or watering imbalance during initiation. Fix environment first, adjust watering second, and treat fertilizer or repotting as later steps once the basic conditions are stable. Propagate from stem segments in spring if you want backups or fuller pots. And if you share your home with pets, this is one holiday plant you can keep on display with reasonable peace of mind - non-toxic, long-lived, and genuinely suited to indoor life once you stop caring for it like a desert cactus.
When to use this page vs other Christmas Cactus guides
- Christmas Cactus overview - Canonical hub for this species - care topics and problems branch from here.
- Christmas Cactus problems - Symptom-first path when you already know something is wrong.
Related Christmas Cactus guides
- Christmas Cactus watering
- Christmas Cactus light
- Christmas Cactus soil
- Christmas Cactus propagation
- Christmas Cactus fertilizer
- Christmas Cactus repotting
- Christmas Cactus pruning
- No Flowers on Christmas Cactus
- Root Rot on Christmas Cactus
- Yellow Leaves on Christmas Cactus
- Brown Tips on Christmas Cactus
- Overwatering on Christmas Cactus
How to care for Christmas Cactus?
How much light does Christmas Cactus need?
bright indirect light, medium indirect light
- bright indirect light, medium indirect light - bright indirect light, medium indirect light.
When should you water Christmas Cactus?
Every 7–10 days growing season (top 2–3 cm dry). Reduce to every 14 days in pre-flowering dormancy. Never let sit in water.
- Check top 2 inches - Every 7–10 days growing season (top 2–3 cm dry).
- Drain excess water - Never let sit in water.
What soil works best for Christmas Cactus?
Well-draining potting mix with 20% orchid bark. pH 6.0–7.0. Aerated, not compacted.
- Well-draining mix - Well-draining potting mix with 20% orchid bark.
Grower notes for Christmas Cactus
What matters most with Christmas Cactus
Christmas Cactus stores water in leaves, stems, roots, or a swollen base, so overcare is usually more dangerous than short dry spells. Strong light and drainage are the safety net. In practice, the care checkpoint is simple: bright indirect light, medium indirect light. Pair that with well-draining potting mix with 20% orchid bark; pH 6.0–7.0. Aerated, not compacted, and avoid changing water, pot size, and placement all at once.
Best placement in a real home
Christmas Cactus belongs where bright indirect light, medium indirect light is realistic for most of the day, not only where the pot looks good. Every 7–10 days growing season (top 2–3 cm dry). Reduce to every 14 days in pre-flowering dormancy. Never let sit in water. If the pot stays wet longer than expected, move the plant into better light or reassess the mix before watering again. Humidity target: 50–60%. Temperature comfort zone: 18–24°C (65–75°F).
Before you buy this plant
Choose Christmas Cactus with firm new growth, clean leaf undersides, and soil that does not smell sour or feel compacted. Be cautious if you see no-flowers, sticky residue, collapsed crowns, or a pot that is wet in poor light. Cosmetic old-leaf damage is less worrying than weak roots or active pests.
First month after bringing it home
Do not repot Christmas Cactus on day one unless the mix is failing or pests are obvious. Quarantine it, learn how fast the pot dries, and keep care boring while it adjusts. Watch especially for no-flowers and root-rot. If problems appear, correct the condition first rather than stacking fertilizer, repotting, and pruning together.
Safety note for Christmas Cactus
Christmas Cactus is not a plant to keep within reach of pets or children. Treat it as an inaccessible display plant. Use gloves if sap or plant tissue is irritating, and pick a pet-safe alternative for floor pots or low shelves.
How to tell Christmas Cactus is settling in
If you plan to multiply it later, common methods include Stem segment cuttings. If root-rot shows up early, inspect light, watering, and roots before assuming the plant is permanently weak.
Is it pet safe?
Christmas Cactus is generally considered pet safe.
Watering Christmas Cactus
Every 7–10 days growing season (top 2–3 cm dry). Reduce to every 14 days in pre-flowering dormancy. Never let sit in water.
Soil & potting for Christmas Cactus
Well-draining potting mix with 20% orchid bark. pH 6.0–7.0. Aerated, not compacted.
Humidity & temperature for Christmas Cactus
Christmas Cactus prefers 50–60%, though normal home humidity is usually fine. Keep temperatures around 18–24°C (65–75°F).
| Detail | Information |
|---|---|
| Humidity | 50–60% - normal home humidity is fine. |
| Ideal temperature | 18–24°C (65–75°F) |
Fertilizer & pruning for Christmas Cactus
Use feed lightly during active growth. Half-strength balanced or high-potassium liquid fertilizer to promote blooms and stop if the plant is stressed, newly repotted, or not actively growing. for Christmas Cactus.
| Detail | Information |
|---|---|
| Fertilizer type | Feed lightly during active growth. Half-strength balanced or high-potassium liquid fertilizer to promote blooms and stop if the plant is stressed, newly repotted, or not actively growing. |
Common problems on Christmas Cactus
No Flowers
MediumLikely cause: Insufficient cool dark period in autumn - plant needs 6 weeks of 10–13°C nights and 14+ hours of uninterrupted darkness to trigger bud formation.
Quick fix: Cool windowsill away from artificial light at night starting September. 10–13°C nights, 14+ hours dark. Six weeks minimum.
Full fix guide →Root Rot
MediumLikely cause: Overwatering - the forest cactus origin does not mean it requires wet soil.
Quick fix: Allow top 2–3 cm to dry between waterings. Well-draining orchid bark mix. Never leave in standing water.
Full fix guide →Yellow Leaves
MediumLikely cause: Common on this plant type; confirm with recent watering, light, and root checks.
Quick fix: Inspect the plant and correct the most likely care stressor before stacking treatments.
Full fix guide →Brown Tips
MediumLikely cause: Common on this plant type; confirm with recent watering, light, and root checks.
Quick fix: Inspect the plant and correct the most likely care stressor before stacking treatments.
Full fix guide →Overwatering
MediumLikely cause: Common on this plant type; confirm with recent watering, light, and root checks.
Quick fix: Inspect the plant and correct the most likely care stressor before stacking treatments.
Full fix guide →Underwatering
MediumLikely cause: Common on this plant type; confirm with recent watering, light, and root checks.
Quick fix: Inspect the plant and correct the most likely care stressor before stacking treatments.
Full fix guide →Spider Mites
MediumLikely cause: Common on this plant type; confirm with recent watering, light, and root checks.
Quick fix: Inspect the plant and correct the most likely care stressor before stacking treatments.
Full fix guide →Mealybugs
MediumLikely cause: Common on this plant type; confirm with recent watering, light, and root checks.
Quick fix: Inspect the plant and correct the most likely care stressor before stacking treatments.
Full fix guide →Aphids
MediumLikely cause: Common on this plant type; confirm with recent watering, light, and root checks.
Quick fix: Inspect the plant and correct the most likely care stressor before stacking treatments.
Full fix guide →Leggy Growth
MediumLikely cause: Common on this plant type; confirm with recent watering, light, and root checks.
Quick fix: Inspect the plant and correct the most likely care stressor before stacking treatments.
Full fix guide →Slow Growth
MediumLikely cause: Common on this plant type; confirm with recent watering, light, and root checks.
Quick fix: Inspect the plant and correct the most likely care stressor before stacking treatments.
Full fix guide →Wilting
MediumLikely cause: Common on this plant type; confirm with recent watering, light, and root checks.
Quick fix: Inspect the plant and correct the most likely care stressor before stacking treatments.
Full fix guide →Drooping Leaves
MediumLikely cause: Common on this plant type; confirm with recent watering, light, and root checks.
Quick fix: Inspect the plant and correct the most likely care stressor before stacking treatments.
Full fix guide →Low Humidity
MediumLikely cause: Common on this plant type; confirm with recent watering, light, and root checks.
Quick fix: Inspect the plant and correct the most likely care stressor before stacking treatments.
Full fix guide →Not Enough Light
MediumLikely cause: Common on this plant type; confirm with recent watering, light, and root checks.
Quick fix: Inspect the plant and correct the most likely care stressor before stacking treatments.
Full fix guide →Fungus Gnats
MediumLikely cause: Common on this plant type; confirm with recent watering, light, and root checks.
Quick fix: Inspect the plant and correct the most likely care stressor before stacking treatments.
Full fix guide →Mold on Soil
MediumLikely cause: Common on this plant type; confirm with recent watering, light, and root checks.
Quick fix: Inspect the plant and correct the most likely care stressor before stacking treatments.
Full fix guide →Likely cause: Common on this plant type; confirm with recent watering, light, and root checks.
Quick fix: Inspect the plant and correct the most likely care stressor before stacking treatments.
Full fix guide →Bud Drop
MediumLikely cause: Common on this plant type; confirm with recent watering, light, and root checks.
Quick fix: Inspect the plant and correct the most likely care stressor before stacking treatments.
Full fix guide →Small Flowers
MediumLikely cause: Common on this plant type; confirm with recent watering, light, and root checks.
Quick fix: Inspect the plant and correct the most likely care stressor before stacking treatments.
Full fix guide →Faded Flowers
MediumLikely cause: Common on this plant type; confirm with recent watering, light, and root checks.
Quick fix: Inspect the plant and correct the most likely care stressor before stacking treatments.
Full fix guide →