Indoor Fern Care: Light, Water, Soil and Humidity
Learn indoor fern care with practical steps for light, watering, humidity, soil mix, repotting, and fixing brown tips across common fern types.
Quick Answer: How to Care for Indoor Ferns
Indoor fern care comes down to five things: bright indirect light, consistently moist but not soggy soil, high humidity, good drainage, and stable warmth. Most indoor ferns struggle because one of those pieces is missing. A fern placed in a dark corner, watered on a rigid schedule, and exposed to dry air from air conditioning or heating will usually decline even if the owner is watering it regularly.
The safest care routine is simple. Place the fern where it receives gentle, filtered light, check the soil before watering, water thoroughly when the upper layer begins to lose moisture, and never let the pot sit in drainage water. University of Minnesota Extension notes that tropical ferns do best indoors in medium light, such as an east-facing window or a few feet from a west- or south-facing window, and that “evenly moist” does not mean constantly wet.
Here is a practical care snapshot:
| Care factor | Best indoor fern care target |
|---|---|
| Light | Bright indirect or medium light; avoid harsh direct sun |
| Water | Keep soil lightly and evenly moist, not waterlogged |
| Humidity | Higher than typical dry indoor air; humidifier is most reliable |
| Temperature | Stable room warmth; avoid cold drafts and hot radiators |
| Soil | Moisture-retentive but well-draining potting mix |
| Pot | Drainage holes are non-negotiable |
| Feeding | Light feeding only during active growth |
| Repotting | Repot when root-bound or soil breaks down, usually in spring |
The main mistake is treating ferns like either succulents or swamp plants. They are neither. Most popular indoor ferns want moisture around the roots, oxygen in the potting mix, and humidity around the fronds. That balance is what keeps the plant lush instead of crispy, yellow, or mushy.
How This Guide Relates to Our Fern Species Guides
Use this page as a category starter — the cross-species checklist for light, water, humidity, and soil before you dive into species-specific depth. LeafyPixels maintains dedicated care hubs for six common indoor ferns. Each hub carries taxonomy, calendar watering ranges, propagation steps, and dedicated problem guides this page does not duplicate.
| Your fern | Start here for depth |
|---|---|
| Boston fern | Boston fern care hub |
| Maidenhair fern | Maidenhair fern care hub |
| Bird’s nest fern | Bird’s nest fern care hub |
| Staghorn fern | Staghorn fern care hub |
| Blue star fern | Blue star fern care hub |
| Asparagus fern (not a true fern) | Asparagus fern care hub |
If general watering logic is new to you, pair this guide with how to water indoor plants the right way and the houseplant humidity guide. For choosing between humidity methods, see pebble tray vs humidifier.
East-facing windows give gentle morning light without the heat stress of harsh afternoon sun — often the easiest placement for indoor ferns.
What Indoor Ferns Need to Stay Healthy
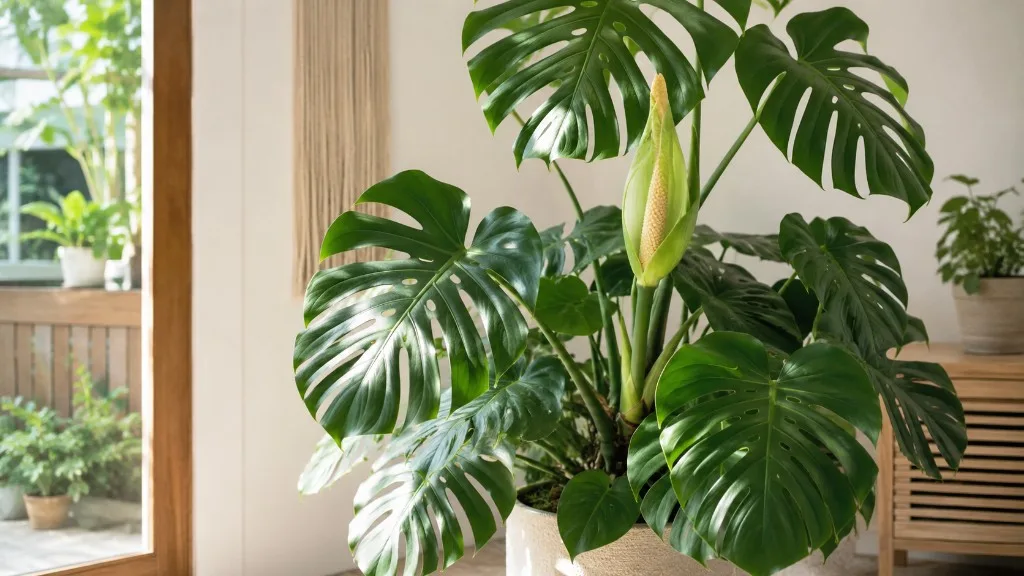
Ferns are ancient plants, but indoor fern care is not mysterious. Most houseplant ferns sold for homes are tropical or subtropical species adapted to sheltered habitats where light is filtered, air is humid, and organic matter keeps the root zone damp without staying stagnant. That is why a fern can look perfect in a nursery and then collapse in a living room with dry air, low winter light, and a decorative pot with no drainage.
The best way to care for an indoor fern is to recreate the conditions it was built to use, not to follow a one-size-fits-all houseplant schedule. A Boston fern, bird’s nest fern, maidenhair fern, rabbit’s foot fern, and staghorn fern do not all grow in the same exact way, but they share a pattern: they dislike harsh dryness, sudden stress, and neglected root zones. Their fronds are often thin, finely divided, or broad and tender, which makes them quick to show stress through browning edges, curling, shedding, or limp growth.
There is also a difference between true ferns and plants with “fern” in the common name. Boston fern and maidenhair fern are true ferns. Asparagus fern is not a true fern and has different care and pet-safety considerations. This matters because a reader looking for “fern care” may unknowingly group very different plants together. When in doubt, identify the plant by botanical name or at least by a clear photo before applying advice too aggressively.
The Forest-Floor Rule
The easiest mental model is the forest-floor rule: give an indoor fern filtered light, moisture that moves through the soil, and air that does not feel desert-dry. In a forest or tropical understory, rainwater drains through organic matter, roots breathe, and sunlight is softened by taller plants. Indoors, you recreate that with a bright window, a proper potting mix, drainage holes, and humidity support.
This rule also explains why ferns fail in “almost right” conditions. A fern in bright light but bone-dry air may still develop brown tips. A fern in humid air but a dark corner may stay weak, thin, and slow. A fern watered often in a heavy potting mix may rot because the roots are wet but not oxygenated. Good fern care is not about doing one thing intensely; it is about keeping the whole environment balanced.
Calendar watering often causes trouble for this reason. A fern beside a warm window in summer may need water far more often than the same fern in winter. A fern in a plastic nursery pot may dry more slowly than one in terracotta. A fern in an air-conditioned apartment may lose moisture differently than a fern in a naturally humid bathroom. The plant’s condition, soil moisture, pot type, and season should guide the routine.
Which Fern Do You Have? Species Comparison
Not every fern wants the same humidity band or pot style. Use this table to pick your species guide next, then read the RH column with a hygrometer at plant height — not at ceiling level.
| Fern | Beginner rank | Humidity target (RH) | Forgiveness on drought | Pot vs mount |
|---|---|---|---|---|
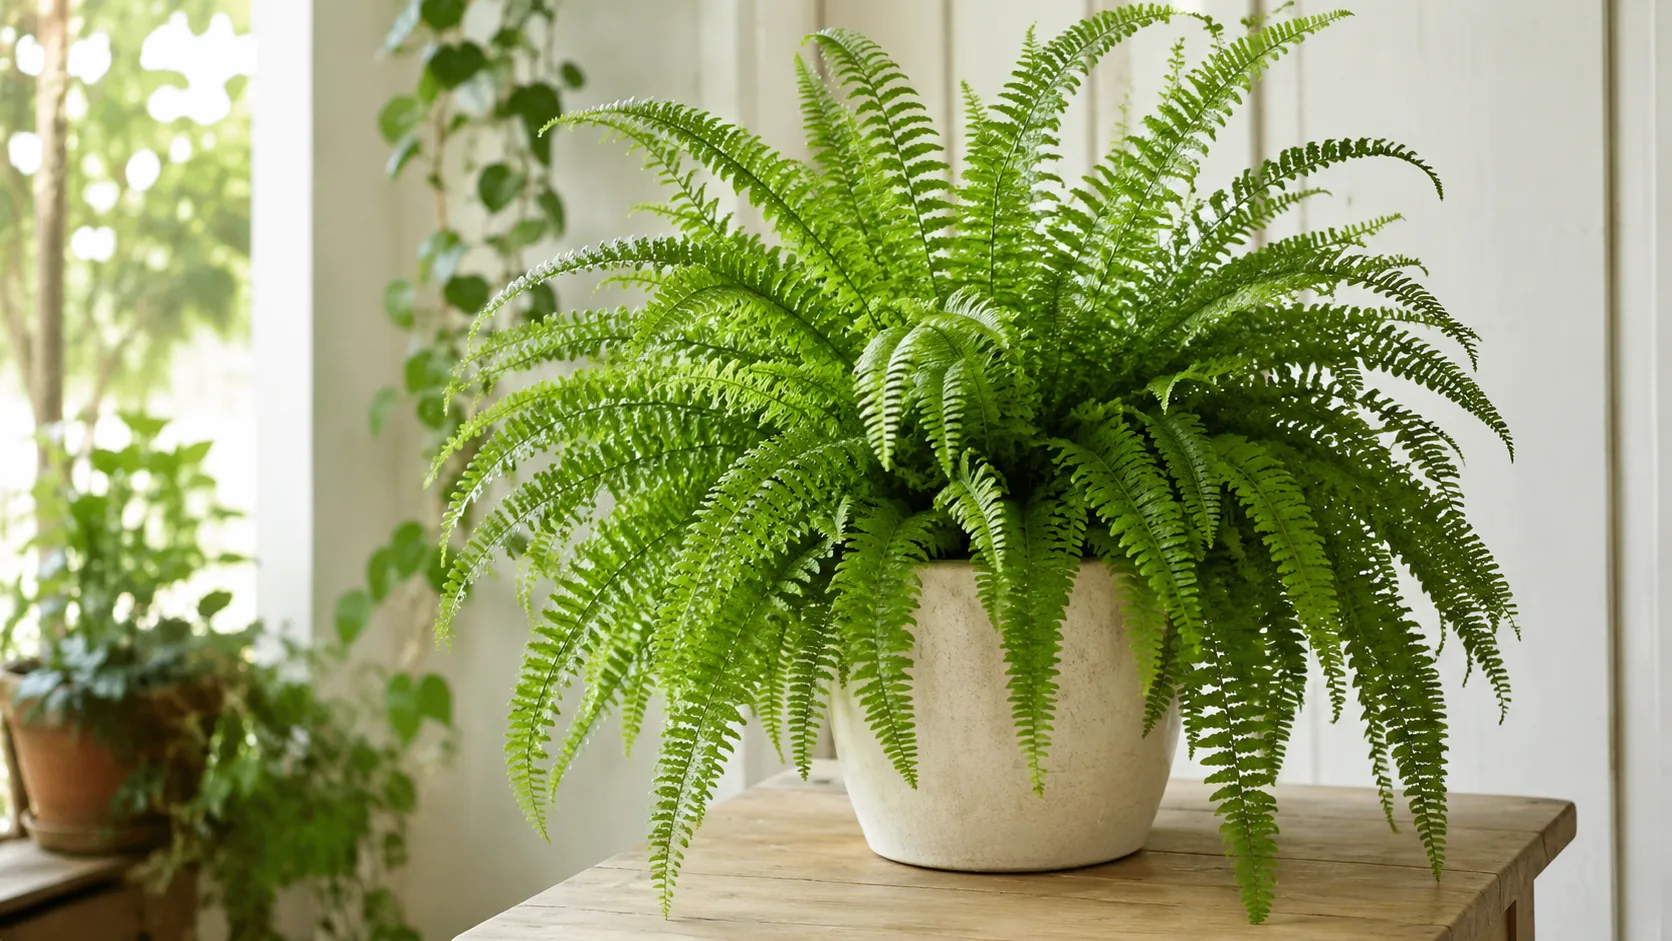
| Boston fern | Easier | 50–70% | Moderate | Pot or hanging basket |
| Bird’s nest fern | Moderate | 50–60% | Moderate | Pot; keep crown dry |
| Blue star fern | Moderate | 50–60% | Moderate | Pot |
| Staghorn fern | Harder | 50–70% | Low when mounted | Mount or airy basket |
| Maidenhair fern | Hard | 60–80% | Very low | Pot or terrarium |
| Asparagus fern | Easier (different plant) | 40–50% | Higher than true ferns | Pot |
NC State Extension targets 50–70% relative humidity for Boston fern indoors, while maidenhair types appreciate levels toward the upper end of the table. Rabbit’s foot fern is not covered by a dedicated LeafyPixels hub yet; treat it like a moisture-loving terrestrial fern similar to Boston fern until you confirm the species.
Indoor Fern Light Requirements
Most indoor ferns prefer bright indirect light or medium light. They need enough light to photosynthesize and maintain dense growth, but many have delicate fronds that scorch in strong direct sun. Missouri Botanical Garden recommends bright indirect light with no direct sun for Boston fern grown indoors, while University of Minnesota Extension describes medium indoor light as an east-facing window or a position a few feet back from stronger west or south light.
The phrase “low-light fern” is often misunderstood. Many ferns tolerate lower light better than sun-loving plants, but tolerance is not the same as thriving. In low light, a fern may survive while producing thinner, weaker growth. The soil may also stay wet for too long because the plant uses water more slowly. That creates the classic indoor fern trap: a plant looks sad, the owner waters more, and the roots decline further. See Boston fern not enough light for what weak growth looks like in practice.
Direct morning sun is usually safer than harsh afternoon sun. A few soft rays through an east-facing window can be beneficial, especially in winter. Strong midday or afternoon sun through glass can burn fronds, particularly on maidenhair, Boston fern, and other delicate types. If the only available window is south- or west-facing, use a sheer curtain, move the plant back from the glass, or place it where the light is bright but filtered.
Pale, stretched growth means too little light; crispy patches on the window-facing side mean too much direct sun.
Best Window Positions for Ferns
An east-facing window is often the easiest place for an indoor fern because it gives gentle morning light without the worst heat of the day. A north-facing window can work for more shade-tolerant ferns if the room is bright, but a very dim north room may not be enough. A west-facing window can work if the fern is several feet back or protected by a sheer curtain. A south-facing window can be excellent in winter but too intense in summer unless filtered.
Distance from the window matters as much as direction. Light drops sharply as a plant moves away from the glass, especially in rooms with deep overhangs, tinted windows, small windows, or surrounding buildings. A fern six feet from a window in a bright-looking room may actually be living in poor plant light. Human eyes adjust to darkness; plants do not.
For species-specific window guidance, open your fern’s light guide — Boston, maidenhair, bird’s nest, and staghorn each have dedicated pages with placement notes.
Watch the fern’s response over several weeks. Pale, stretched, sparse growth suggests insufficient light. Crispy patches on the side facing the window suggest too much direct sun. A healthy fern should produce firm new fronds, hold color, and dry at a steady but not frantic pace between watering.
When Grow Lights Help
A grow light is useful when a room is attractive to humans but weak for plants. This is common in apartments, offices, interior rooms, winter climates, and spaces with shaded windows. Ferns do not usually need intense grow-light setups designed for fruiting crops. They benefit more from consistent, moderate supplemental light that prevents weak growth.
Place the grow light far enough away that it does not heat or dry the fronds. The goal is not to blast the plant; it is to replace missing daylight. A timer helps because ferns respond better to consistency than random bursts of light. If the plant starts drying much faster after adding a grow light, adjust watering by soil feel rather than keeping the old routine.
Grow lights do not replace humidity, proper watering, or drainage. A fern under a good light can still brown if the air is dry or the potting mix is compacted. Treat lighting as one part of the care system, not a magic fix.
How to Water Indoor Ferns
Watering is where most indoor fern care succeeds or fails. Ferns generally want soil that stays lightly moist, but they do not want their roots sitting in stale water. University of Minnesota Extension makes this distinction clearly: fern care tags may say “evenly moist,” but that means the soil should not become very dry, not that it should always stay wet.
The best method is to check the soil, not the calendar. Press a finger into the top layer of potting mix. If the surface is dry but the mix below still feels faintly cool and moist, wait a little longer for many fern types. If the upper layer is drying and the pot feels lighter, water thoroughly. For moisture-sensitive ferns like maidenhair, you may need to water before the mix dries as much as you would for tougher houseplants. The Boston fern watering guide walks through seasonal rhythm in more detail.
Water thoroughly enough that the whole root ball is moistened. A tiny splash on top encourages shallow wetting while the inner root ball may remain dry. Let excess water drain out, then empty the saucer or cachepot. Missouri Botanical Garden’s houseplant guidance recommends moistening soil completely until water comes out of the bottom of the pot and not letting the plant sit in drainage water; it also identifies overwatering as one of the most common causes of houseplant problems.
How to Water Without Causing Root Rot
Root rot is not caused by water alone. It is caused by roots sitting too long in conditions with too little oxygen. A fern in a free-draining, moisture-retentive mix can be watered often and stay healthy. A fern in dense, compacted soil inside a pot without drainage can rot even if you water less often. That is why drainage holes, potting mix structure, and watering technique matter together.
Use a pot with drainage holes. If you love decorative planters, keep the fern in a plastic nursery pot and place that inside the decorative outer pot. After watering, lift the nursery pot out or check the bottom to make sure it is not standing in water. This simple habit prevents many mystery fern deaths.
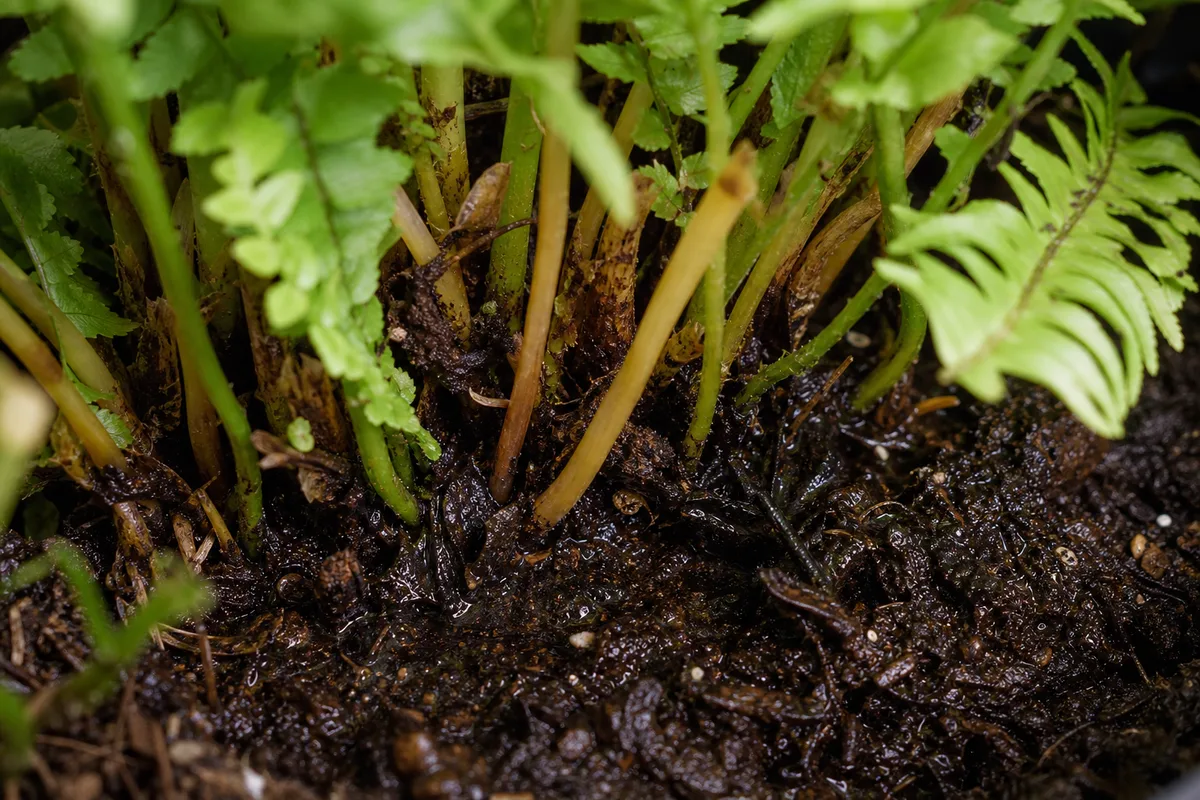
A nursery pot lifted out of a cachepot lets you confirm drainage — standing water at the bottom is a root-rot setup.
Signs of underwatering and overwatering can overlap, which confuses people. A dry fern may wilt, crisp, shed leaflets, and brown from the tips. An overwatered fern may yellow, wilt, drop fronds, and smell sour at the soil. The difference is in the root zone. Dry soil pulls away from the pot and feels light. Overwatered soil stays heavy, wet, and sometimes slimy or stale. If the plant is declining and the soil is constantly wet, stop adding water and inspect the roots — see Boston fern overwatering and root rot for recovery steps.
Water Quality and Temperature
Use room-temperature or lukewarm water for tropical ferns. University of Minnesota Extension specifically recommends room-temperature or lukewarm water because cold water can damage tropical roots. This is easy to overlook, but it matters when a fern is already stressed by winter, drafts, or dry air.
Some ferns are sensitive to mineral buildup, especially when grown in small pots and watered repeatedly with hard tap water. Brown tips can come from dry air, underwatering, too much fertilizer, or salts accumulating in the potting mix. If you see crust on the soil surface or pot rim, flush the pot thoroughly with water and let it drain well. Rainwater, filtered water, or distilled water may help sensitive ferns, especially maidenhair ferns, but most common ferns do not need perfection if the rest of the care is solid.
Avoid softener-treated water. Water softeners often replace calcium and magnesium with sodium, and sodium buildup is not good for potted plants. If your home has a softener, use an untreated tap, filtered water, rainwater, or another source when possible.
Humidity for Indoor Ferns
Humidity is the care factor people notice only after the fern starts browning. Many indoor ferns evolved for humid environments, and heated or air-conditioned homes can be much drier than they prefer. RHS notes that tropical epiphytic ferns like humid air and suggests damp gravel trays, grouping plants, misting, steamy bathrooms, and terrariums for humidity-loving ferns.
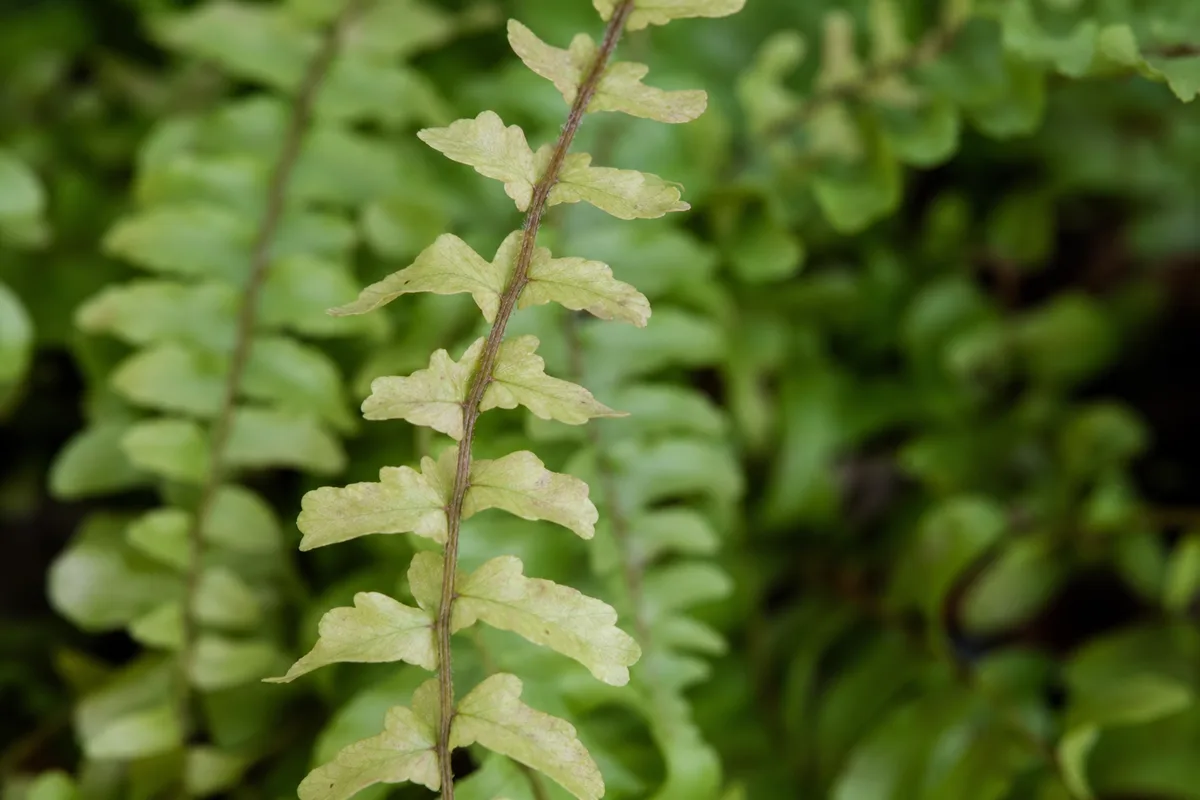
Low humidity usually shows as brown tips, crispy edges, curled leaflets, and fronds that age quickly. It is especially common in winter when heating dries indoor air. It can also happen in hot climates with constant air conditioning. A fern may be watered correctly at the roots but still look dry because the air around the fronds is too harsh. For symptom depth, see Boston fern low humidity and brown tips.
The most reliable fix is a humidifier near the plant, ideally paired with a small hygrometer so you can measure the room instead of guessing. Many homes feel comfortable to people at humidity levels that still stress ferns. The goal is not to make the room damp or moldy; it is to raise the immediate plant area enough that fronds stop crisping. Good air movement still matters, because stagnant wet air can encourage fungal issues.
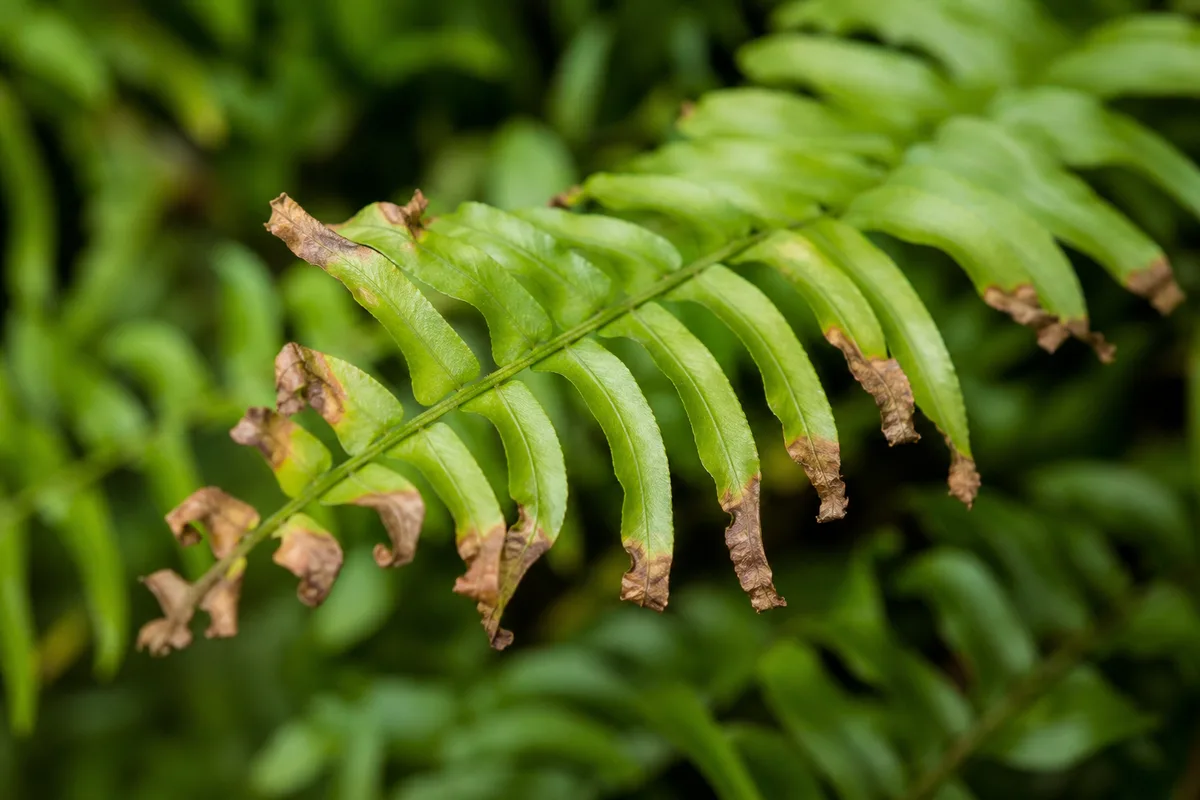
Tip burn on new growth usually means humidity or watering consistency — not a problem you can trim away permanently.
Humidifier, Pebble Tray, Bathroom, or Misting?
A humidifier is the most consistent option for serious fern growers. It can raise humidity across the plant’s actual environment for hours. A pebble tray is less powerful, but it may slightly improve the microclimate if the pot sits above the water rather than in it. Grouping plants can help because multiple pots release moisture through evaporation and transpiration. A bright bathroom can be excellent if it has enough light and stable warmth.
Misting is the most debated method. It can temporarily wet the fronds and make the owner feel proactive, but the humidity boost is usually brief. Misting may help a little when combined with other methods, but it should not be the main strategy for a fern that is badly crisping in dry air. If leaves stay wet for long periods in a stagnant room, misting can also increase disease risk. The pebble tray vs humidifier guide compares methods with extension context.
Terrariums or glass cabinets can work beautifully for small humidity-loving ferns, especially maidenhair-type ferns, but they need care. Closed environments can overheat in direct sun, trap too much moisture, or develop mold if there is no balance. Use them for small ferns that genuinely need high humidity, and keep them in bright indirect light.
Soil, Pots, and Repotting
Indoor ferns need a potting mix that holds moisture but still drains well. This sounds contradictory until you think about structure. The mix should retain enough moisture that the roots do not dry hard between waterings, but it should also contain enough air space that water can move through and oxygen can reach the roots. Missouri Botanical Garden recommends a peaty, soil-based potting mix for Boston fern and consistently moist, well-drained conditions.
A heavy garden soil is a poor choice for indoor ferns. It can compact in a pot, drain badly, and bring pests or pathogens indoors. A very chunky orchid mix may dry too fast for many terrestrial ferns, though epiphytic ferns such as staghorn ferns have different needs — see the staghorn fern soil guide. Most common indoor ferns do well in a high-quality houseplant mix amended for moisture and aeration.
The pot also shapes the watering routine. Plastic pots hold moisture longer. Terracotta pots dry faster because moisture evaporates through the clay. Hanging baskets dry quickly because air moves around the pot and the fronds. Small pots dry faster than large pots. None of these is automatically wrong, but each changes how often you should check the soil.
Best Potting Mix for Indoor Ferns
A good indoor fern mix is usually built around moisture retention plus drainage. For many terrestrial ferns, start with a quality indoor potting mix and improve it with ingredients such as fine bark, perlite, coco coir, peat moss, or leaf-mold-like organic matter, depending on what is available. The exact recipe matters less than the result: the mix should become evenly moist when watered, drain freely, and not turn into a dense block.
For Boston fern and similar ferns, a moisture-retentive mix with good drainage is ideal. For bird’s nest fern, keep the crown from sitting wet and avoid burying it too deeply. For staghorn fern, remember that it is an epiphytic fern often grown mounted or in a very airy medium rather than a standard dense potting mix. For maidenhair fern, the mix should not dry hard, but it still needs oxygen.
Do not keep a fern forever in old nursery soil if it has become compacted, hydrophobic, or sour-smelling. Old mix can repel water when dry and stay soggy when wet, which is the worst of both worlds. If water runs down the sides of the pot but the root ball remains dry, soak and rehydrate the root ball, then consider repotting into fresher mix when the plant is stable.
When and How to Repot a Fern
Repot an indoor fern when the roots fill the pot, water runs through too quickly, growth stalls despite good care, or the potting mix has broken down. Spring is usually the best time because the plant is entering active growth and can recover faster. Avoid repotting a stressed fern in the middle of a crisis unless the soil is clearly rotten or the roots need urgent attention.
Move up only one pot size in most cases. A pot that is much larger than the root ball holds extra wet mix, which can increase rot risk. Gently loosen the outer roots, remove dead material, and keep the crown at the correct level. After repotting, water thoroughly and keep the fern in stable bright indirect light while it adjusts. Species-specific timing lives on each hub’s repotting page.
Many ferns can be propagated by division during repotting. This works well for clumping ferns with multiple crowns or obvious sections. Use clean tools, divide only healthy plants, and avoid creating tiny weak divisions with too few roots. A large fern divided into two strong plants usually recovers better than one chopped into many struggling pieces.
Feeding, Pruning, and Seasonal Care
Ferns are not heavy feeders indoors. Feed lightly during active growth, usually spring through early autumn, and reduce or stop feeding in winter when growth slows. University of Minnesota Extension recommends fertilizing tropical ferns only when they are actively putting on new growth or when foliage appears paler green than normal. Overfertilizing can burn roots, create brown tips, and build salts in the potting mix.
Use a diluted balanced houseplant fertilizer rather than a strong dose. Ferns respond better to gentle consistency than aggressive feeding. If the plant is in low light, newly repotted, drought-stressed, pest-infested, or root-damaged, fertilizer is not the solution. Fix the growing conditions first. Feeding a stressed fern can make problems worse because damaged roots cannot use nutrients properly.
Pruning is mostly about cleanliness and energy management. Remove fully brown, dead, or damaged fronds at the base with clean scissors. Do not trim every brown tip obsessively if the underlying cause is still present; the plant will keep browning. A light cleanup improves airflow and appearance, but aggressive pruning should be reserved for plants that still have healthy crowns and roots.
Seasonal care matters indoors. In winter, light is weaker and days are shorter, so a fern may need to sit closer to a brighter window than it did in summer. At the same time, heating can dry the air and stress fronds. In summer, growth may speed up and watering may increase, but harsh sun through glass can scorch foliage. Adjust the fern’s position and watering by season instead of expecting one care routine to work all year.
Troubleshooting Common Indoor Fern Problems
A struggling fern is not always dying. Ferns are expressive plants, and their symptoms usually point to a care imbalance. The key is to read the whole plant: frond texture, soil moisture, light exposure, pot drainage, pest signs, and recent changes. A fern that browned after being moved to a sunny window has a different problem from one that yellowed in heavy wet soil.
Start with the simplest checks. Is the pot draining? Is the soil dry, wet, or evenly moist? Is the fern near a heater, air conditioner, drafty window, or direct sunbeam? Has it recently been repotted, shipped, divided, or brought home from a nursery? Ferns often shed some fronds after environmental change, but ongoing decline means the new setup is not meeting the plant’s needs.
Pests are another common issue, especially indoors. Mississippi State University Extension lists common houseplant pests including aphids, whiteflies, mealybugs, scales, thrips, spider mites, and broad mites, many of which spend time on leaf undersides. University of Minnesota Extension also identifies spider mites as a major houseplant pest and notes that they thrive in warm, dry indoor conditions, especially in winter.
Brown Tips, Yellow Fronds, Pests, and Root Rot
Brown tips usually point to dry air, inconsistent watering, mineral buildup, too much fertilizer, or natural aging of older fronds. Work through this order: humidity → watering consistency → salts in soil → direct sun → normal aging. If only the oldest fronds are browning while new growth looks good, the plant may simply be cycling old foliage. If new growth browns quickly, check humidity, watering consistency, and salts in the soil. Move the fern away from vents and consider a humidifier. For species-specific recovery, open Boston fern brown tips or maidenhair fern brown tips if your plant matches.
Yellow fronds can come from overwatering, underwatering, low light, nutrient deficiency, or normal aging. The soil tells you which direction to investigate. Yellowing with wet, heavy soil and a sour smell suggests root trouble. Yellowing with dry, shrinking soil suggests drought stress. Yellowing in a dark corner may mean the plant is not receiving enough light to maintain growth.
Crispy collapse often happens when a fern dries too far. Boston ferns can sometimes recover if the crown is alive, but maidenhair ferns are less forgiving. Trim dead fronds, rehydrate the root ball carefully, improve humidity, and keep the plant in bright indirect light. Do not fertilize immediately. Wait for new growth before feeding.
Root rot requires action. Slide the plant out of the pot and inspect the roots. Healthy roots are usually firm; rotten roots are mushy, dark, and may smell bad. Remove dead roots, repot into fresh airy mix, use a pot with drainage, and water more carefully. If the crown is rotten, recovery may not be possible.
Spider mites can cause stippling, dull foliage, fine webbing, and general decline. They like dry conditions, which is another reason humidity and regular inspection matter. Isolate the fern, rinse foliage gently if the plant can tolerate it, and treat with an appropriate houseplant-safe control such as insecticidal soap according to label directions. Repeat treatment is often needed because pests have life cycles.
Fungus gnats usually point to consistently wet organic potting mix. Adult gnats are annoying, but larvae thrive when the top layer stays damp. Let the upper layer dry slightly where the fern species allows, improve airflow, avoid standing water, and consider sticky traps for adults. Do not solve gnats by drying a moisture-loving fern to death; solve the wet-soil pattern.
Pet Safety and the Air-Purification Myth
The ASPCA lists Boston fern as non-toxic to dogs and cats. Many true ferns are considered pet-friendly, but not every plant with “fern” in its name is safe. Asparagus fern, for example, is not a true fern and should not be treated as pet-safe just because of the name. If pets chew plants, verify the exact plant before relying on common-name advice. Contact a veterinarian if a pet ingests a large amount of foliage or shows persistent vomiting after chewing any houseplant.
One more myth needs context: ferns and air purification. NASA’s well-known indoor plant research tested pollutant removal in sealed chambers, not normal lived-in homes. Later review and analysis have argued that potted plants do not meaningfully improve indoor air quality in typical buildings at realistic plant numbers, because ventilation and air exchange dominate. Ferns are worth growing for beauty, texture, and the satisfaction of caring for living plants, but they should not be treated as a substitute for ventilation, source control, or proper air filtration.
Next Steps: Choose Your Fern Species Guide
You now have the cross-species framework. Open the hub that matches your plant and use its topic guides when one variable needs deeper treatment:
- Boston fern — easiest true fern for most homes; start with watering and propagation
- Maidenhair fern — highest humidity demand; read watering before buying a humidifier
- Bird’s nest fern — broad fronds; crown placement matters on soil
- Staghorn fern — epiphytic; see propagation for mounting
- Blue star fern — blue-green fronds; moderate humidity on watering
- Asparagus fern — not a true fern; check pet safety before placing within reach
Conclusion
Indoor ferns are honest plants. They show stress quickly when the air is too dry, the light is wrong, the soil is too wet, or the root ball dries hard. Once you understand the forest-floor balance — filtered light, moisture through the soil, humidity around the fronds — care becomes much less frustrating.
The best routine is not complicated, but it does require attention. Watch the plant, check the soil, adjust with the season, and open your species guide when symptoms persist. Do that, and your fern has a real chance to stay full, green, and worth the space it takes in your home.