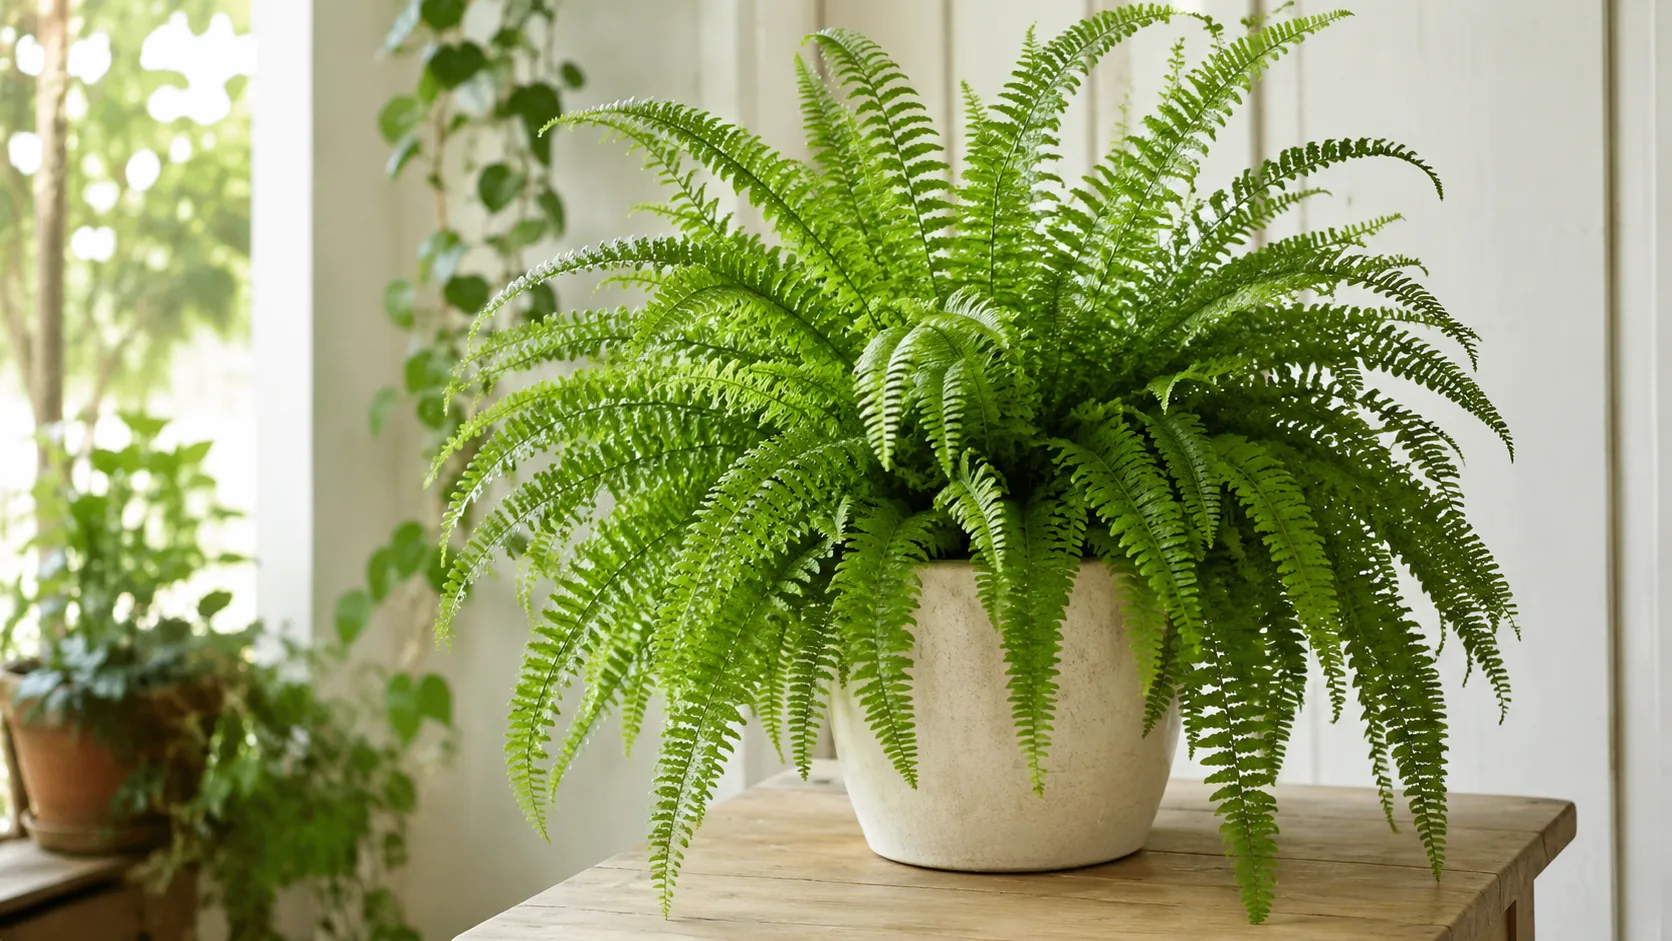
Best Soil for Boston Fern: Mix, Drainage & Repotting
Best Soil for Boston Fern: Mix, Drainage & Repotting
Best Soil for Boston Fern: Mix, Drainage & Repotting
Boston fern soil is not a background detail you can leave to whatever the nursery stuffed into the hanging basket. For Nephrolepis exaltata - especially the widely grown cultivar N. exaltata var. Bostoniensis - the mix around the roots decides whether your plant becomes a cascading fountain of green fronds or a brittle, brown-tipped disappointment by February. Boston ferns have fine, fibrous roots and paper-thin pinnae that react fast to moisture swings. The leaves tell you when air is too dry, but the soil tells you whether the roots are getting steady hydration with enough oxygen to breathe. Get the substrate wrong and you can water on a perfect schedule and still lose the plant.
In nature, Boston fern grows in humid forests across tropical and subtropical America, from northern South America through Mexico, Florida, and the West Indies. NC State Extension describes it as terrestrial or epiphytic, thriving in Boston Fern light guide, high humidity, and soil that stays moist without drying completely. That forest-floor logic - loose organic debris, constant humidity, rapid drainage after rain - is what your indoor pot needs to approximate. Dense, stale, greenhouse-style soil that never dries is one of the most common reasons a Boston fern declines within its first year at home.
Why Boston Fern Soil Is the Hidden Success Factor
Most Boston fern care advice leads with watering and humidity, and both matter enormously. But experienced growers know that chronic problems often trace back to the substrate, not the watering can. If the mix drains too slowly, compacts within months, or holds water in the lower half of the pot while the surface looks merely damp, you can follow conservative watering and still suffocate roots. University of Wisconsin Extension notes that Boston fern does best in a well-drained but moisture-retaining medium, such as a mixture of peat and vermiculite, kept evenly moist but not saturated. That single sentence captures the entire challenge: moisture retention and drainage are not opposites when the mix structure is right.
Think of soil as the plant’s reservoir and ventilation system combined. Every time you water, water fills pore spaces and pushes air out temporarily. In a good Boston fern mix, excess water exits through the drainage hole within minutes, and fresh air refills the gaps as the upper layers begin their gradual dry-down. In a poor mix - especially the heavy peat blend many commercial growers use - water lingers, oxygen gets locked out of the root zone, and fine roots die back before the fronds show obvious distress. By the time leaf tips brown and entire fronds collapse, the damage underground is often well underway.
Fine Roots and Moisture-Sensitive Fronds
Boston fern roots are fine, fibrous, and relatively shallow compared with woody houseplants. They spread through the upper and middle layers of the pot rather than driving deep anchors. Those roots evolved to colonize decomposing leaf litter and loose forest humus, substrates that hold moisture in their organic matrix while still allowing air movement between particles. They are not built for heavy garden loam, pure sand, or the dense, water-retentive mixes designed for outdoor containers in full sun.
The fronds reinforce the same story. Each pinna loses water quickly in dry indoor air, which is why humidity matters so much for Boston Fern overview. But the roots cannot compensate for chronic anaerobic conditions underground. A healthy Boston fern in the right soil produces firm, bright green new croziers regularly, holds fronds without widespread tip burn, and recovers within a day when you miss a single watering. A plant in the wrong soil often looks vaguely underwatering on Boston Fern while the pot is still heavy - a classic sign that roots are compromised and cannot take up moisture properly even when it is physically present in the mix.
Boston fern is also the most drought tolerant of the commonly cultivated ferns, according to Wisconsin Extension, which surprises many growers who treat it as fragile. That tolerance does not mean the plant wants to dry out. It means the species can survive brief dry spells better than maidenhair or button ferns if the soil system recovers quickly. Your goal is still consistent, light moisture - not a cycle of swamp and desert.
What Good Boston Fern Soil Must Do
A suitable Boston fern potting mix must perform four jobs at once: anchor the plant in a hanging basket or container, retain enough moisture that fine roots do not desiccate between waterings, drain excess water immediately so the root zone never sits in stagnant saturation, and resist compaction long enough to remain workable for at least one growing season. If any one of those jobs fails, the other three cannot compensate indefinitely.
The texture you are aiming for is light, spongy, and visibly open. When you squeeze a slightly moist handful, it should hold its shape briefly and then crumble apart when you open your hand. If it forms a tight, muddy ball, it is too dense. If water runs straight through and the root ball dries within a day, the mix may be too coarse or too hydrophobic. The sweet spot is a medium that feels moist to the touch two to three days after a thorough watering in an average indoor room - adjusting, of course, for your specific light, pot size, and season.
The Quick Answer: Light, Peaty, and Never Waterlogged
The best soil for Boston fern is a light, peaty, well-draining potting mix that stays consistently moist without becoming waterlogged. A dependable starting recipe is 50% quality peat-based or coco coir potting compost, 30% peat moss or coconut coir for moisture and acidity, and 20% perlite or fine orchid bark for aeration and drainage. The finished mix should feel fluffy, not heavy, and water should exit the drainage hole within a minute or two of a full soak.
For growers who prefer equal parts, a 1:1:1 blend of peat moss or coir, perlite, and standard potting soil also works well as a baseline. Adjust from there: if the pot stays wet longer than four to five days in summer, increase perlite. If the fronds wilt between waterings every two days in a dry, air-conditioned room, add a little more peat or vermiculite. The recipe is a starting point, not a law. Your room’s dry-down speed is the real test.
Best Boston Fern Soil Mix Recipes
The best Boston fern soil mix balances moisture retention against oxygen availability in a way that matches how you actually grow the plant - hanging in a basket, sitting on a shelf, or double-potted for humidity. No single ratio is perfect for every home, but several formulas consistently outperform straight bagged potting soil in indoor conditions.
Before mixing, moisten dry peat slightly so it blends evenly. Dry peat can repel water at first, creating a false impression of drainage: water runs down the inside wall of the pot while the root ball stays dry. Use a clean bucket or tarp, measure by volume with a scoop or cup, and mix until perlite and bark are evenly distributed. The finished batch should look visibly speckled with white perlite throughout - if you cannot see aeration materials clearly, you probably have not added enough.
The 50-30-20 Peat, Perlite, and Potting Soil Formula
Here is the baseline recipe most Boston fern growers settle on after experimentation:
- 50% high-quality indoor potting compost - provides a stable organic framework and baseline nutrients
- 30% sphagnum peat moss or coconut coir - increases moisture retention and supports the slightly acidic pH ferns prefer
- 20% perlite or fine orchid bark - creates air channels and prevents the mix from collapsing into a dense mat
This blend produces a medium that holds moisture in the organic fraction while draining freely through the perlite and bark pores. It suits most indoor hanging baskets in rooms with moderate humidity (around 50–70%) and bright indirect light. If you grow in a very dry, heated apartment, the 30% moisture-retention component can creep toward 35% without causing problems, provided you still maintain at least 20% drainage material.
For a slightly simpler two-part version, blend 2 parts peat-based potting mix with 1 part perlite. That is less refined than the three-part formula but still a major upgrade over unamended commercial soil, especially if you tend to water conservatively and grow in a plastic hanging basket that dries slowly.
Alternative Recipes for Hanging Baskets and Humid Rooms
Not every setup needs the same formula. Hanging baskets dry faster than floor pots because air circulates on all sides. Humid bathrooms slow evaporation. Adjust the recipe to your environment rather than copying a ratio that works in someone else’s greenhouse.
- Fast-drying hanging basket mix: Use 40% potting compost, 30% peat or coir, 30% perlite. The extra perlite compensates for rapid edge drying and prevents the center from staying wet while the surface looks dry.
- Humid room or bathroom mix: Use 55% potting compost, 35% peat or coir, 10% perlite. Less aeration material is needed when evaporation is slow, but never drop perlite below 10% in a closed room with low air movement.
- Rescue mix for root rot on Boston Fern recovery: After trimming black, mushy roots, repot into 40% fresh potting compost, 30% perlite, 20% peat or coir, 10% orchid bark. This keeps some moisture buffer while maximizing oxygen around damaged roots.
- Peat-free option: Substitute coconut coir for all peat components and add 10% worm castings for organic nutrition. Coir rewets more easily than dried peat and starts closer to neutral pH, so monitor leaf color for signs of nutrient lockout in the first month.
A small amount of composted bark fines (not raw wood chips) can improve long-term structure, but keep it under 15% of the total volume. Too much partially decomposed wood pulls nitrogen during breakdown and can harbor fungus gnats if the mix stays wet.
Understanding Each Soil Ingredient
Each component in a Boston fern soil recipe should have a clear job. When you understand the job, you can adjust the recipe for your home instead of treating a blog ratio as immutable fact.
Peat Moss vs Coconut Coir for Boston Ferns
Sphagnum peat moss is the traditional backbone of fern mixes because it is lightweight, holds moisture evenly, and naturally trends acidic - a range Boston fern tolerates well. Peat creates a spongy matrix that fine roots can penetrate easily, and it buffers moisture so the plant rides out short gaps between waterings. The drawbacks are environmental concerns around peat harvesting, tendency toward compaction after 12–18 months indoors, and hydrophobic behavior when allowed to dry completely. If your fern wilts and the peat repels water, you get runoff down the pot sides while the root ball stays dry - a frustrating cycle that looks like underwatering but is really a soil-structure failure.
Coconut coir is the most common peat alternative. It holds moisture well, rewets more reliably after a dry spell, and typically starts closer to neutral pH. Coir works especially well for growers who bottom-water or use pebble trays, because it distributes moisture laterally without becoming mud. The trade-offs: some coir products hold salts if poorly rinsed during processing, and coir can stay wetter than expected in cool, low-light rooms if paired with insufficient perlite.
Choose peat when you want maximum acidity buffering and are willing to refresh the mix annually. Choose coir when you want a peat-free mix, struggle with rewetting dried peat, or grow in a warm room where the pot dries quickly. Either works if drainage material is generous and you match watering to actual pot weight.
Perlite, Vermiculite, and Orchid Bark
Perlite is expanded volcanic glass - the white granules in most potting mixes. Its job is to create permanent air space and accelerate drainage. Perlite does not decompose, which makes it ideal for long-term aeration in a moisture-retentive fern mix. It can float upward over time with heavy top-watering, but that cosmetic issue does not mean it has stopped working.
Vermiculite is a heat-expanded mineral that holds moisture and nutrients in its layered structure. Wisconsin Extension specifically recommends peat-vermiculite blends for Boston fern, because vermiculite helps maintain even moisture distribution - particularly useful in hanging baskets where the bottom can dry faster than the top. The risk is using too much vermiculite in a cool, dim room, where the mix may stay wet too long. A practical approach: use vermiculite as part of the 30% moisture-retention fraction, balanced with perlite in the 20% drainage fraction, rather than replacing perlite entirely.
Orchid bark adds chunk structure that slows compaction and mimics the decomposing timber and leaf litter Boston fern encounters on forest floors. Fine-grade orchid bark mixes well without creating huge voids that roots cannot bridge. It is especially valuable in rescue repots and in blends for established plants that will stay in the same pot for two years.
pH, Tap Water, and Long-Term Soil Health
Boston fern prefers a slightly acidic root zone, typically in the pH 5.0–6.5 range depending on source and growing conditions. Several experienced growers target the narrower 5.0–5.5 band because ferns can show chronic nutrient deficiency symptoms - pale fronds, slow crozier production, tip burn despite careful feeding - when pH drifts alkaline and micronutrients become chemically unavailable. That pattern is often misdiagnosed as a fertilizer problem when the real issue is pH-driven lockout.
Most peat-based fern mixes start acidic enough for the first year. Alkaline tap water is the silent pH shifter in many homes. If you water with hard, high-pH municipal water over months, the mix can creep upward even when the original recipe was perfect. Occasional watering with rainwater, distilled water, or filtered water helps slow that drift. You do not need to abandon tap water entirely unless your plant shows persistent deficiency symptoms despite appropriate feeding and watering.
Salt buildup is the other long-term enemy. Fertilizer residues and mineral deposits from tap water accumulate near the soil surface and along the pot walls, sometimes appearing as white crust. Boston fern fronds react to salt stress with tip burn that mimics low humidity damage. Flush the mix every few months by watering thoroughly until excess runs freely from the drainage hole, then empty the saucer. If crust is heavy or the mix smells sharp rather than earthy, refresh the soil at Boston Fern repotting guide rather than layering more fertilizer on top.
Home pH test kits are helpful but not mandatory for most growers. If texture, drainage speed, and plant response all look good, exact pH numbers matter less than behavior. If growth stays weak despite good light, humidity, and feeding, then testing becomes worth the effort.
Drainage Speed and the One-Minute Pot Test
Drainage is the quality most Boston fern owners underestimate because the plant visibly wants moisture. Moist does not mean soggy. A mix that drains well can still stay consistently damp in the root zone - that is the goal. A mix that drains poorly stays saturated, and saturated soil excludes oxygen within hours.
Run this simple test after your next full watering. Water the Boston fern until excess flows from the drainage hole, then start a timer. Within one to two minutes, water should stop streaming and begin occasional drips. Within 24 hours, the top inch should feel moist but not muddy when you press a finger in. Within three to five days in active summer growth, the top layer should begin its dry-down while the middle still holds moisture - the pattern Wisconsin Extension describes as evenly moist but not saturated.
If water pools on the surface for more than 30 seconds, runs straight down the pot edge without wetting the center, or the pot still feels heavy and cold at the bottom after a week in moderate light, the mix needs correction. Add perlite, reduce pot size, or both. If the pot becomes feather-light within 48 hours and fronds wilt, the mix is too fast-draining for your Boston Fern watering guide - increase peat, coir, or vermiculite slightly.
Drainage holes are non-negotiable for long-term Boston fern care. A holeless decorative pot or a cachepot that holds runoff will eventually destroy roots even if the soil recipe is perfect. If you use a cover pot, lift the fern out after watering and empty standing water every time - no exceptions.
Pot Choice, Double Potting, and Drainage Holes
Soil and pot function as one system. The best Boston fern soil mix in an oversized plastic pot with no airflow will still fail.
Pot size: Go only one size up at repotting - roughly 2–5 cm (1–2 inches) wider in diameter than the current root ball. Boston fern does not need deep pots; its roots spread horizontally. A pot that is too large holds wet mix in unused volume, creating a permanent saturated zone the roots never colonize. An established fern in a 25–30 cm (10–12 inch) hanging basket is often happier than the same plant buried in a floor pot twice as wide.
Pot material: Plastic and glazed ceramic retain moisture longer, which suits growers who check pots frequently and live in dry homes. Unglazed terracotta dries faster on the walls, which can help prevent stagnation but demands more attentive watering in summer. Hanging baskets - the classic Boston fern presentation - dry faster on all surfaces; compensate with slightly more moisture-retentive mix, not with a heavier, denser soil.
Double potting is a technique Wisconsin Extension recommends for humidity management: place the fern in its inner pot inside a larger outer container lined with moist sphagnum moss. The moss raises humidity around the fronds without forcing the root zone to sit in standing water - provided the inner pot has a drainage hole and is never submerged. This is especially useful in winter when indoor air is dry and heating systems pull moisture from fronds faster than roots can supply it.
Never rely on gravel or pot shards at the bottom of a container to fix poor drainage. That layer creates a perched water table where the soil above meets a sudden texture change, often keeping the bottom wetter rather than drier. Fix drainage in the mix itself.
Hanging Baskets vs Floor Pots for Boston Fern
Boston fern is most often sold and displayed in hanging baskets, and for good reason. The arching fronds need room to cascade, and elevated placement keeps plants away from heating vents and pet traffic. Hanging baskets also dry faster on all sides because air circulates around the entire container. That faster dry-down means you should lean slightly toward moisture retention in the mix - the 50-30-20 formula with its 30% peat or coir fraction - rather than a heavily perlite-dominant blend that might leave a basket wilting every 48 hours in summer.
Floor pots and plant stands work well for larger specimens, but they change the soil math. Moisture sits longer at the bottom, and fronds near the floor collect less ambient humidity. Use a bit more perlite in floor pots (toward the fast-drying hanging-basket variant of the recipe) if you notice the lower half of the mix staying cold and heavy while the surface looks merely damp. Either way, ensure the crown sits above the soil line and fronds do not drag on a wet floor or saucer where fungal problems start.
When to Repot Boston Fern
Boston fern benefits from fresh soil every one to two years, even if the plant has not outgrown its pot. Peat and coir decompose, perlite can wash to the surface, and salt accumulates. Wisconsin Extension advises repotting and dividing every few years in spring, cutting the root ball vertically with a sharp knife while keeping as many fronds as possible per division.
Repot when you see multiple signals together: roots circling the drainage hole, water running straight through without moistening the root ball, new crozier production slowing despite good light and feeding, sour or musty smell from the mix, or visible compaction where the soil has shrunk away from the pot wall. A single yellow frond is not a repotting trigger. Structural soil failure is.
Timing: Spring and early summer are ideal because the plant is entering active growth and can repair root disturbance quickly. Avoid winter repotting unless the roots are clearly rotting or the mix is actively failing - dormancy and low light slow recovery. If you must repot a stressed plant, keep it in bright indirect light, hold fertilizer for four to six weeks, and maintain humidity without overwatering on Boston Fern the fresh mix.
Step-by-Step Repotting Without Transplant Shock
Repotting Boston fern is straightforward if you respect the fine roots and avoid unnecessary bare-rooting.
Water the plant one day before repotting so the root ball holds together. Choose a new pot one size larger with a clean drainage hole. Prepare fresh mix using one of the recipes above. Gently remove the fern from its current pot, supporting the fronds upward so they do not snap under their own weight. Loosen the outer inch of old soil and tease circling roots at the bottom, but leave the core root mass intact - stripping all soil destroys fine root hairs that take weeks to regrow.
Add a shallow layer of fresh mix to the new pot, set the root ball so the crown sits at the same depth as before (never bury growing points), and fill around the sides with new mix. Tamp lightly with your fingers or a chopstick to remove large air pockets without compressing the blend. Water thoroughly until drainage runs clear, then empty the saucer. Keep the plant out of direct sun for one week and skip fertilizer for at least a month. Mild wilting for a few days is normal; widespread frond loss after two weeks usually means the pot is too large or the mix is too wet.
Common Soil Mistakes That Kill Boston Ferns
Certain errors appear so often in Boston fern care threads that they deserve direct naming.
Using straight garden soil or dense outdoor topsoil is the fastest way to suffocate roots. Garden soil compacts in a pot, harbors pests and pathogens, and drains unpredictably indoors. Boston fern needs a sterile or soilless-style potting medium, not backyard dirt.
Keeping the original nursery soil indefinitely causes slow decline. Commercial growers use mixes optimized for greenhouse bench life - heavy peat that holds water while plants ship and sit under mist systems. In your living room, that same mix often stays wet too long. Refresh at the first spring repot after purchase.
Oversized pots are a close second behind dense soil. A beautiful oversized hanging basket looks dramatic empty, but unused soil volume holds water the small root system cannot use. One pot size up is the safe rule.
Bottom gravel layers, holeless pots, and permanent cachepot water create anaerobic conditions regardless of mix quality. Fix the container system before blaming humidity or fertilizer.
Repotting into dry, dusty peat without pre-moistening leads to uneven wetting and dry pockets in the root zone. Always blend and slightly moisten mix before potting.
Stacking changes - new soil, bigger pot, new location, and fertilizer in the same week - makes troubleshooting impossible. Change one variable at a time so you can read the plant’s response accurately.
Troubleshooting Browning Fronds and Stagnant Mix
Brown frond tips are the signature Boston fern complaint, and soil is only one possible cause - but it is the cause you can fix most directly. Low humidity browns tips while roots remain healthy and white. Salt buildup and alkaline pH browns tips while growth slows and new croziers stay small. Root rot from stagnant mix browns tips, yellows entire fronds, and produces a sour smell when you lift the plant from the pot.
Pull the plant from its container when symptoms persist despite raised humidity and careful watering. Healthy Boston fern roots are tan to white, firm, and fibrous. Black, slimy, or hollow roots indicate rot. Trim damaged tissue with clean scissors, discard all old mix, wash the pot with hot water, and repot into fresh, airier soil in a appropriately sized container. Hold fertilizer and keep humidity high but avoid misting so heavily that water pools in the crown.
If the mix smells earthy and roots look healthy but the surface stays wet for a week, the problem is usually insufficient aeration or excessive pot size, not disease. Add perlite to the next batch, downsize if the root ball floats in the pot, and move the plant to slightly brighter indirect light to speed evaporation - without exposing fronds to direct sun, which burns them quickly.
Stolons - the thin runners Boston fern sends over pot edges - are normal and not a sign of bad soil. They root when they touch moist medium and produce new plantlets. You can leave them for a fuller display or trim them to redirect energy into the main crown.
Conclusion
The best Boston fern soil is a light, peaty, well-aerated mix that holds even moisture without ever turning into a swamp. Start with the 50-30-20 formula - potting compost, peat or coir, and perlite - then adjust based on how your specific pot dries in your specific room. Run the one-minute drainage test after every repot, use containers with real drainage holes, and resist the urge to plant a small fern in an oversized basket because it looks better on installation day.
Repot every one to two years in spring with fresh mix, go up only one pot size, and treat the soil as a living system that decomposes and accumulates salts over time - not a permanent fixture you set once and forget. When fronds brown and growth stalls, inspect the root zone before reaching for the fertilizer bottle or misting station. Boston fern rewards consistency more than complexity. Give the roots a breathable, moist home and the cascading fronds largely take care of themselves.
When to use this page vs other Boston Fern guides
- Boston Fern overview - Start here for whole-plant context before deep-diving this topic.
- Boston Fern problems hub - Jump to symptom-specific fix guides when this care topic does not resolve the issue.
- Root Rot on Boston Fern - Escalate here when soil adjustments are not enough.
- Mold on Soil on Boston Fern - Escalate here when soil adjustments are not enough.