Best Soil for Bird's Nest Fern: Mix Recipe, Drainage
Best Soil for Bird's Nest Fern: Mix Recipe, Drainage, and Container Tips
Best Soil for Bird's Nest Fern: Mix Recipe, Drainage, and Container Tips
Why Bird’s Nest Fern Soil Is Different From Ordinary Potting Mix
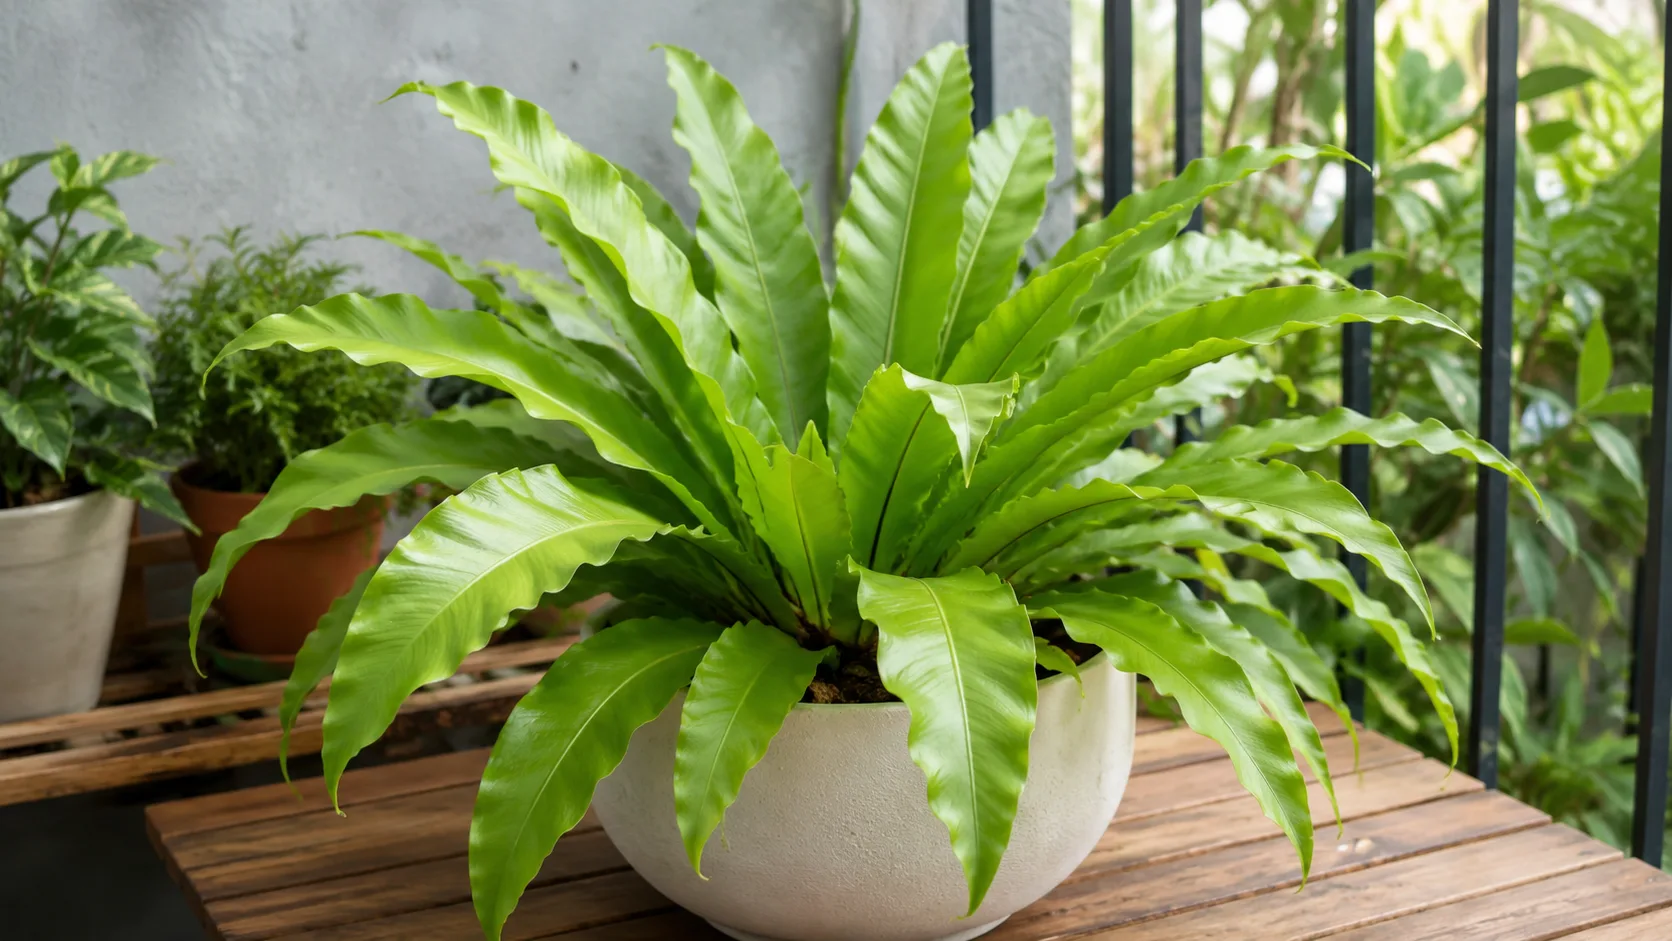
Bird’s nest fern (Asplenium nidus) is sold in a pot, but it does not grow like a typical terrestrial houseplant in the wild. NC State Extension describes it as an epiphytic herbaceous perennial that usually perches on tree trunks and limbs in tropical rainforests, catching falling leaves and debris in its funnel-shaped rosette. That debris breaks down into a loose, organic root zone with constant airflow around the anchoring roots. Indoor soil has to imitate that environment: rich in organic matter, moist but never stagnant, and open enough for roots to breathe.
Most bird’s nest fern problems that look like watering mistakes start in the soil. A dense bagged mix holds water too long in a cool room. A mix that drains too fast leaves fine roots dry at the center while the surface still looks damp. A pot that is too large surrounds healthy roots with wet, unused mix. Once you understand how Asplenium nidus actually lives in nature, the soil recipe stops feeling arbitrary and starts feeling like a set of logical constraints.
When the mix is too dense, the first failure mode is root rot on Bird’s Nest Fern: roots lose oxygen, stop absorbing water properly, and the plant may look thirsty even though the soil is wet. Yellowing fronds starting at the base, a sour smell from the pot, and a mix that stays cold and heavy for days after watering are classic signs. When the mix is too coarse or too dry for your conditions, the failure mode is different but equally frustrating: crisp, pale fronds, stalled new growth, and a pot that feels feather-light every few days because the root ball never holds an even moisture band. Bird’s nest ferns are less forgiving of these swings than tough foliage plants like pothos or ZZ plants. They want steady moisture with oxygen, not a swamp and not a desert.
Epiphytic roots and the litter-trapping rosette
The bird’s nest fern’s rosette is not just decorative. It is a litter trap. Falling leaves and forest debris collect in the crown and slowly compost around the base of the plant, feeding it in place without any deep mineral soil involved. The roots that matter most are relatively fine, adapted to cling to bark and organic matter, not to push through heavy clay or compacted peat.
That ecology explains three non-negotiable soil traits. First, the mix needs chunky structure so water moves through instead of pooling. Second, it needs steady moisture retention in the organic components so roots do not swing between drought and flood. Third, the crown must stay above the soil line and must not be buried during Bird’s Nest Fern repotting guide, because the same rosette that collects useful debris in the wild will hold stagnant water in a pot if you pack mix into it or water directly into the center.
What Good Bird’s Nest Fern Soil Must Do
The best soil for bird’s nest fern is not one magic bag from a garden center. It is a mix that performs four jobs at once in your actual home. If any one job fails, the plant shows stress in the fronds long before you think to check the roots. Hold the plant upright without being so heavy that it compacts around roots. Retain moderate moisture so the root ball does not dry into a hard block between waterings. Drain excess water quickly so the lower third of the pot is not sitting in saturation after every drink. Stay open and airy for months, not just on the day you repot.
NC State Extension recommends rich, moist, porous soil such as a fern potting mix for container-grown bird’s nest fern, with cultural conditions that include acidic soil (pH below 6.0), high organic matter, and good drainage that still stays moist rather than bone dry. The RHS epiphytic fern guide agrees on the principle: loose soil rich in organic matter with excellent drainage, loamy and moist but not soggy.
When you squeeze a slightly moist handful of a good bird’s nest fern mix, it should hold together briefly and then crumble apart. You should see bark pieces and perlite clearly distributed through the coir or peat. If it forms a tight mud ball or if water runs straight through leaving dry pockets, adjust the recipe before repotting a healthy plant.
Best DIY Bird’s Nest Fern Soil Mix Recipes
No single recipe is perfect for every home. The best starting point is one that matches epiphytic fern guidance from growers and extension sources, then gets tuned based on how fast your pot dries, how humid your room is, and whether you tend to overwater or underwater.
Standard 1:1:1 epiphyte mix (beginner default)
The most widely recommended bird’s nest fern soil mix follows a simple equal-parts formula:
- 1 part orchid bark (medium coarse fir bark or orchid mix)
- 1 part peat moss or coconut coir
- 1 part perlite
This is the mix RHS epiphytic fern guidance points toward when it calls for peat-free ericaceous compost blended with perlite and medium orchid bark. It gives you moisture retention from the coir or peat, structure and airflow from the bark, and extra drainage insurance from perlite. For many indoor growers in plastic pots with Bird’s Nest Fern light guide and moderate humidity, this is the recipe to mix first.
Moisten coir or peat slightly before blending so it distributes evenly. Dry peat can repel water at first, which creates a false sense of drainage: water runs down the pot sides while the root ball stays dry. Mix in a clean tub or bucket, not on a surface where old garden soil might introduce pests.
Peat-free indoor recipe with extra structure
If you prefer peat-free materials or your home runs dry, try this variation:
- 60% peat-free potting compost or ericaceous compost
- 20% medium orchid bark
- 20% perlite
Add a small handful of horticultural grit per liter of mix if you are in a humid bathroom or tend to overwater. The grit increases pore space without collapsing the way a gravel layer at the bottom of a pot would. RHS epiphytic fern guidance notes that epiphytic ferns appreciate open, moisture-retentive but well-drained ericaceous compost, and warns against overpotting because excess wet compost around a small root ball is a direct path to rot.
In dry apartments where the mix dries in two or three days, reduce perlite slightly and increase coir or compost so the root zone holds a wider moisture band. In cool, dim corners where the same pot takes ten days to dry, push bark and perlite closer to one-third each.
Rescue mix after root stress or rot
If your bird’s nest fern has been sitting in heavy, sour soil or you found mushy roots during inspection, do not repot into another moisture-heavy blend. A rescue mix prioritizes oxygen while still holding enough moisture for recovery:
- 2 parts perlite
- 1 part coconut coir or peat-free compost
- 1 part orchid bark
Trim soft, brown roots with clean scissors, remove badly damaged fronds, and repot into a container only slightly wider than the remaining root system. Keep the plant in bright indirect light, avoid fertilizing until new growth appears, and water only when the upper portion of the mix begins to dry. The goal is to let roots re-establish in an open zone, not to push lush top growth on a compromised root system.
Core Ingredients and What Each One Does
Understanding ingredients by function makes recipe adjustment easier than memorizing one ratio. Each component should earn its place.
Orchid bark and coarse organic structure
Orchid bark is the ingredient most bird’s nest fern guides treat as non-negotiable, and for good reason. Coarse bark creates air pockets, mimics the debris layer the plant collects in the wild, and keeps the mix from collapsing into a solid block as organic matter breaks down. Medium-grade bark pieces last longer than fine dust and do a better job maintaining structure around epiphytic roots.
Without enough bark-or an equivalent coarse material like chunky coco husk- even a “well-draining” peat mix can turn dense after a few months of watering and root pressure. If you open a bagged fern mix and it looks like fine black peat with almost no visible particles, add bark and perlite before using it for Asplenium nidus.
Coco coir, peat, and moisture retention
Coconut coir and peat moss both hold moisture without behaving exactly the same. Coir rewets more easily than dry peat, tends toward a more neutral pH, and is the usual peat-free choice. Peat is traditional in fern mixes and holds moisture predictably when fresh, but it compacts over time and is naturally very acidic unless buffered.
For bird’s nest fern, you want moisture retention in the organic fraction, not saturation. A mix that stays evenly damp for four to six days in your conditions is usually healthier than one that is wet for twelve days or dry in twenty-four hours. Adjust the coir or peat fraction based on that dry-down speed, not based on a calendar.
Perlite, grit, charcoal, and aeration
Perlite is expanded volcanic glass that creates permanent air space. It improves drainage and reduces compaction. Horticultural grit adds weight and pore space without breaking down quickly. Activated charcoal is optional; some growers add a small amount to keep mix fresh in constantly moist conditions, though it is not required for a healthy plant.
Vermiculite holds more moisture than perlite. It can help in very dry homes but should be used sparingly if you already struggle with wet soil, because it keeps water available longer than perlite does. A practical rule: perlite protects air; vermiculite protects moisture. Bird’s nest ferns need both qualities, but most indoor growers should bias toward perlite unless the plant is drying too fast.
Can You Use Regular Potting Soil for Bird’s Nest Fern?
You can use regular potting soil only if you amend it heavily. Straight all-purpose mix is often too fine, too moisture-retentive, and too slow to dry for epiphytic roots in a typical indoor pot. Many general blends are designed for a wide range of container plants and may include wetting agents, slow-release fertilizer, and composted forest products that behave differently depending on room temperature and light.
If you already have a quality peat-based or coir-based potting soil, a workable shortcut is:
- 2 parts potting soil
- 1 part orchid bark
- 1 part perlite
Mix thoroughly and test drainage before repotting. If water still sits on the surface or the pot feels heavy a week after watering in moderate light, increase bark and perlite again. Store-bought cactus or succulent mix alone is usually too fast-draining for bird’s nest fern unless you blend it back with coir or compost; these ferns want consistent moisture, not a desert root zone.
Bagged fern mixes can be excellent or disappointing depending on the brand. Read the texture, not only the label. Visible bark and perlite, a light feel in the hand, and quick initial drainage are good signs. Fine, dark, heavy mix that clumps when squeezed needs amendment even if the bag says “fern.”
Soil pH, Minerals, and Water Quality
Bird’s nest fern prefers slightly acidic conditions. NC State Extension lists soil pH as acid (below 6.0) for Asplenium nidus, with high organic matter and moist but well-drained texture, while some commercial mixes sit closer to 6.0 to 6.5. In practice, an airy epiphyte blend with ericaceous or peat-free acidic compost usually lands close enough for healthy growth without laboratory precision.
pH matters because it affects nutrient availability and because hard, alkaline tap water can shift compost pH upward over time. RHS epiphytic fern guidance recommends rainwater or filtered water when possible to help maintain acidic compost conditions. That is especially relevant if you see slow growth, pale fronds, or fertilizer sensitivity despite good light and watering. Flushing the pot with rainwater or distilled water every few months can reduce mineral buildup on the mix surface.
If leaf tips brown and a white crust forms on the soil, suspect salt or mineral accumulation before reaching for more fertilizer. Flush the mix thoroughly, let the pot drain completely, and refresh the top layer or repot into new mix if the problem returns quickly. Bird’s nest ferns are not heavy feeders; a toxic root zone from accumulated salts feels a lot like “bad soil” even when the texture started out fine.
Drainage Speed: How to Test Whether Your Mix Works
Drainage is not a single event. It is the relationship between how fast water leaves the pot and how long the mix stays evenly moist afterward. Bird’s nest fern wants moderate drainage: excess water should exit, but the root ball should not go crisp within a day unless your room is unusually hot and dry.
The one-minute drainage check and root-zone smell test
After a full watering until water runs from the drainage holes, watch how the mix behaves. Within a minute, water should not pool on the surface. Within an hour, the pot should feel heavier but not sloshing. Within your normal dry-down window-often four to eight days in average indoor conditions-the top 2 to 3 cm should begin to dry while the center still holds slight moisture.
Lift the pot the day after watering. If it still feels waterlogged and cold near the base, the mix or container is too wet for your conditions. Stick a skewer or your finger into the drainage hole area: sogginess at the bottom while the top looks dry often means a perched water problem or a mix that has separated.
Smell matters too. Fresh, healthy mix smells earthy. Sour, swampy, or stagnant odor means anaerobic conditions are developing and roots may already be stressed. For bird’s nest fern, that smell test is sometimes the earliest warning before fronds yellow.
If drainage is too slow, add bark and perlite, reduce pot size, switch from glazed ceramic to terracotta, or improve light and airflow. If drainage is too fast, increase coir or compost slightly and check whether the root ball has separated from the pot walls, letting water bypass the roots entirely.
Choosing the Right Container for Bird’s Nest Fern
Soil and pot work as one system. The best bird’s nest fern soil mix in the wrong container will still stay too wet or dry too fast.
Drainage holes are essential for long-term indoor care. A hole lets you water thoroughly and flush salts without turning the root zone into a bathtub. Decorative cachepots are fine only if you empty runoff after watering and never let the inner pot sit in standing water. Clemson HGIC warns against letting the pot sit in a saucer of standing water, which can cause root rot.
Pot size should stay modest. Bird’s nest ferns are slow growers and tolerate being somewhat root-bound. Repot into a container only one size larger-typically 2 to 5 cm wider-when roots crowd or the plant becomes unstable. Oversized pots surround small root systems with wet, unused mix, which is one of the most common causes of root rot after repotting. The Spruce notes that repotting is often driven by instability rather than roots hitting the walls, and that a heavier ceramic pot may anchor a top-heavy rosette better than lightweight plastic.
Pot material changes dry-down speed. Terracotta breathes and wicks moisture, which helps heavy-handed waterers. Plastic retains moisture longer, which can be useful in dry air but risky in low light. Glazed ceramic sits between the two but still needs a drainage hole and careful saucer management. Match material to your watering habits: if you tend to overwater, terracotta and a smaller pot often forgive more than plastic and overpotting combined.
When repotting, set the plant at the same depth as before or slightly higher, never buried deeper into the frond base. Firm the mix gently around the root ball without packing it. Water once to settle, then let the plant acclimate before changing light, fertilizer, and Bird’s Nest Fern watering guide all at once.
When to Refresh or Replace the Soil
Even a good mix breaks down. Organic components decompose, perlite floats upward, and repeated watering compacts the center. Refresh soil when you see slow drainage, sour smell, white mineral crust, gnats tied to constantly wet surface peat, or new growth stalling despite reasonable light and watering.
Full repotting is usually needed every two to three years for a slow-growing bird’s nest fern, or when roots emerge from drainage holes and the plant wobbles in its pot. Spring, as new fronds begin to unfurl, is the safest timing. You can sometimes top-dress by removing the top 2 to 3 cm of old mix and replacing it with fresh epiphyte blend, but top-dressing alone will not fix a badly compacted or contaminated root ball.
Do not repot on day one after bringing a plant home unless the existing mix is clearly failing or pests are present. Quarantine new plants, learn how fast the current pot dries in your room, and repot when you have a reason-not because a calendar says so.
Common Bird’s Nest Fern Soil Mistakes
Using heavy garden soil or unamended potting mix is the most common error. Garden soil introduces pathogens, compacts in pots, and drains poorly indoors.
Adding a gravel layer at the bottom does not improve drainage in the way many people expect; it often creates a perched water table above the gravel while taking away root space. Mix drainage materials throughout instead.
Overpotting after repotting leaves wet dead space around roots. One pot size up is enough.
Burying the crown or allowing mix to pile against the emerging frond bases invites crown rot, especially if water collects in the rosette.
Ignoring the outer cachepot turns a well-drained inner mix into a swamp when runoff sits for days.
Changing everything at once-new soil, bigger pot, new location, and fertilizer-makes it impossible to diagnose what failed if the plant declines. Change the soil system first, stabilize care, then adjust light or feeding separately if needed.
Conclusion
The best soil for bird’s nest fern is a chunky, organic, slightly acidic epiphyte mix that holds even moisture without going stale. Start with equal parts orchid bark, coco coir or peat-free compost, and perlite, then adjust for your home: more bark and perlite if the pot stays wet too long, more coir or compost if it dries out in a day or two. Pair that mix with a modest pot, a drainage hole, and a crown kept above the soil line, and you give Asplenium nidus the root zone it actually evolved for-air, moisture, and organic structure working together.
Test your setup with simple checks: water should drain freely, the mix should smell earthy not sour, and the top few centimeters should dry on a realistic schedule for your room. When those signals drift, refresh the mix before the fronds tell the whole story. Soil is not a background detail for Bird’s Nest Fern overview. It is the system that decides whether every watering helps or hurts.
When to use this page vs other Bird’s Nest Fern guides
- Bird’s Nest Fern overview - Start here for whole-plant context before deep-diving this topic.
- Bird’s Nest Fern problems hub - Jump to symptom-specific fix guides when this care topic does not resolve the issue.
- Root Rot on Bird’s Nest Fern - Escalate here when soil adjustments are not enough.
- Mold on Soil on Bird’s Nest Fern - Escalate here when soil adjustments are not enough.