Watering Bird's Nest Fern: Schedule, Soil Checks & Mistakes
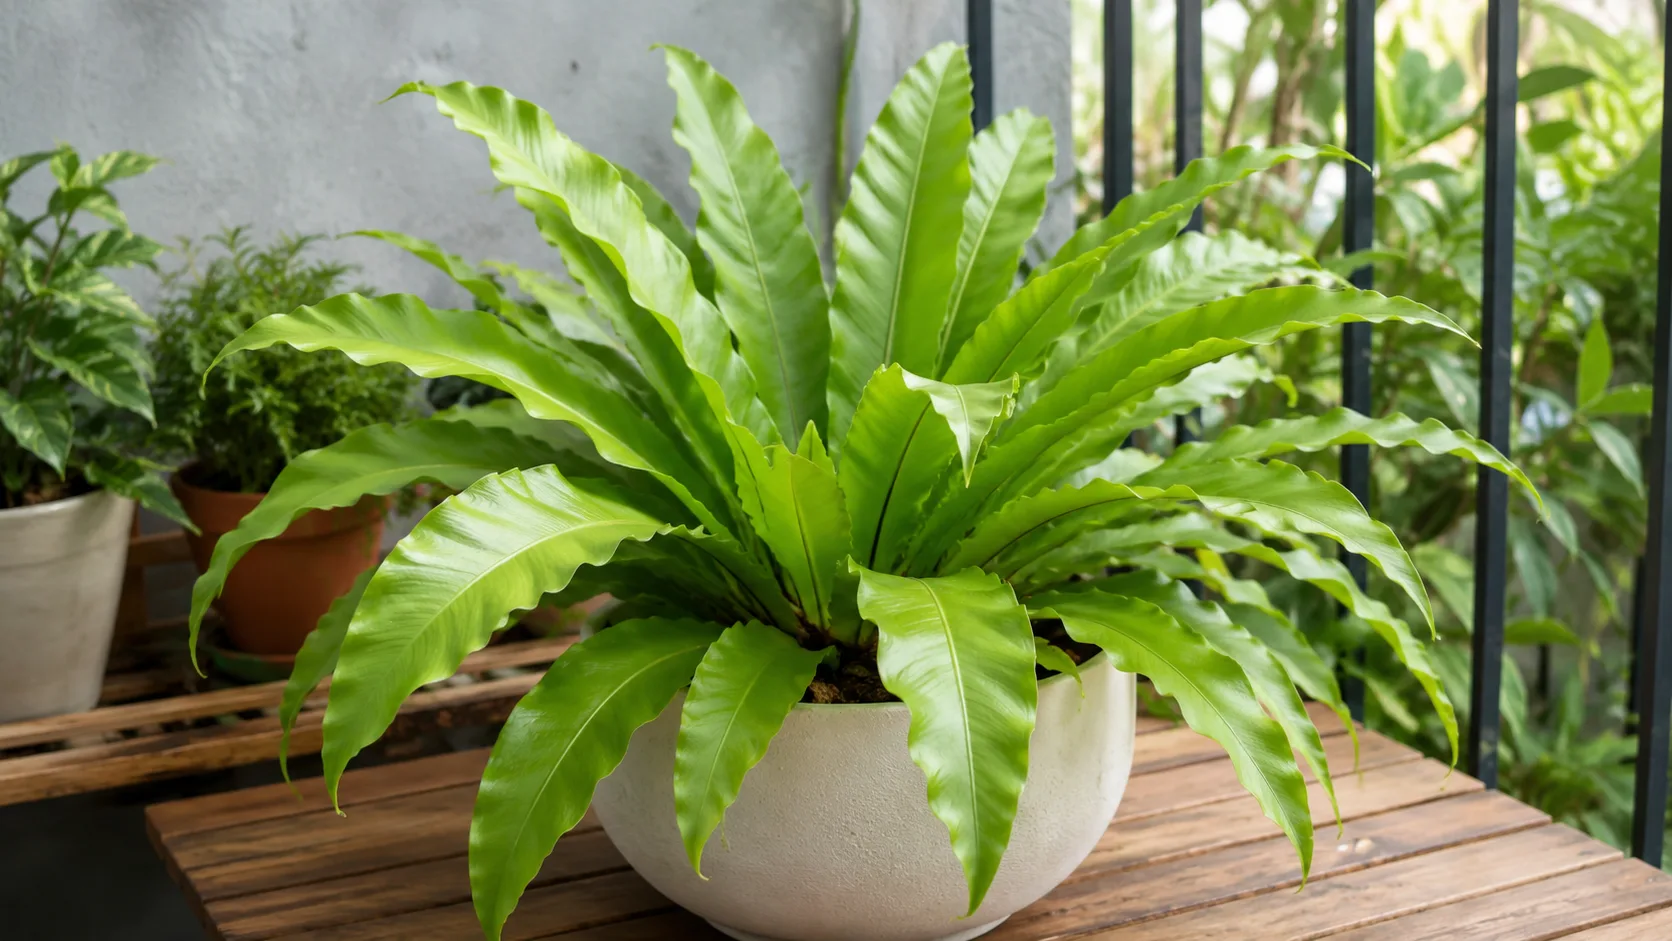
Watering Bird's Nest Fern: Schedule, Soil Checks & Mistakes
Watering Bird's Nest Fern: Schedule, Soil Checks & Mistakes
Quick Answer: How to Water Bird’s Nest Fern Correctly
Water Bird’s Nest Fern (Asplenium nidus) when the top inch of soil feels dry, then water thoroughly along the outer edge of the pot, never into the central rosette. For many indoor plants, that works out to roughly every 7 to 10 days in warm, bright months and every 10 to 14 days in cooler, slower months, but the calendar is only a reminder to check the soil. Clemson University’s Home & Garden Information Center recommends watering when the top inch is dry, watering carefully along the pot’s outer edge to keep water out of the plant’s center, and never letting the pot sit in a saucer of standing water because that can cause root rot on Bird’s Nest Fern. (Clemson HGIC)
The goal is evenly moist, airy soil, not a permanently wet pot. Bird’s Nest Fern is not drought-tolerant. NC State Extension notes that it does not tolerate dry conditions and does best in rich, moist, porous soil indoors. (NC State Extension) At the same time, stale, waterlogged mix suffocates fine roots and invites crown rot if water repeatedly pools in the nest. After every watering, let excess drain freely and empty the saucer or cachepot within 15 to 30 minutes.
Use room-temperature water, check moisture with your finger or pot weight before you pour, and treat a weekly schedule as a starting guess rather than a rule. Two simple checks-surface dryness plus pot weight-are more reliable than either one alone.
Why Bird’s Nest Fern Watering Feels Tricky
Bird’s Nest Fern has a reputation for being easy until watering goes wrong. The plant often looks fine for weeks, then declines quickly once the soil rhythm swings between bone dry and swampy. That happens because fern roots are fine and shallow relative to the broad frond canopy, so the visible plant and the hidden root zone can be out of sync. A pot that feels light on top may still hold moisture lower down, and a dark peat surface can look damp while the upper layer has already dried.
The plant also sends mixed signals. Pale, limp fronds can mean thirst, but they can also mean damaged roots from too much water. Yellowing at the base can follow overwatering on Bird’s Nest Fern, low light, or normal older-frond drop. Crispy edges may come from underwatering on Bird’s Nest Fern, low humidity, salt buildup, or root stress. Good watering is therefore less about memorizing a day of the week and more about learning how your pot dries in your room.
Epiphyte roots and fine moisture needs
In nature, Bird’s Nest Fern grows as an epiphyte on tree trunks and limbs across tropical Asia, Hawaii, Australia, and nearby regions. The fern’s funnel-shaped rosette catches falling leaves and organic matter, creating a self-feeding compost layer that stays lightly moist in humid rainforest air.
That biology matters indoors. The roots want steady access to moisture and oxygen at the same time. A mix that holds water like a sponge but collapses when dry will stress the plant. A mix that drains too fast forces you to chase dryness daily. The watering routine and the soil system work together. If your mix stays wet for a week after one drink, fix drainage or pot size before blaming yourself for “underwatering.”
The crown rot problem most guides mention
The most important watering rule for Bird’s Nest Fern is also the most commonly broken: do not pour water into the center of the rosette. New fronds unfurl from the nest center, and water that sits there promotes crown rot, a condition where the growing point browns, collapses, and may not recover. Clemson HGIC specifically advises watering along the outer edge of the pot to prevent water from entering the center of the plant. (Clemson HGIC)
Think of the nest as a funnel that should collect humidity and debris, not a cup that should collect irrigation. Water the soil surface under the frond skirt, moving the spout around the pot perimeter. If you accidentally splash the crown, blot moisture gently and improve your angle next time. One splash is not a death sentence. Repeated center flooding is.
How Often to Water Bird’s Nest Fern
The honest answer is: when the top inch of soil is dry and the root zone is approaching the dry side of evenly moist, but not desiccated. Clemson HGIC says not to allow the soil to dry out completely between waterings. (Clemson HGIC) That puts Bird’s Nest Fern closer to “steady moisture” than to “let it dry halfway down like a pothos.”
For a typical indoor plant in a 6-inch pot with Bird’s Nest Fern light guide and a well-draining tropical mix, many growers land near once a week during active growth. In lower light or cooler rooms, the interval often stretches toward 10 to 14 days. In a very bright, warm, or dry home, some pots need attention every 5 to 7 days. None of those numbers is a rule until you confirm them against your own soil checks for two or three weeks.
Check the plant twice a week at first. Do not water on autopilot. After you learn the pattern, you can reduce checks to once or twice weekly. The habit that saves ferns is consistent observation, not perfect memory.
Summer and winter watering rhythm
Bird’s Nest Fern grows most actively in warm, humid months when light is stronger and new fronds unfurl from the center. During that period, the plant pulls water steadily and the pot dries on a shorter cycle. Water when the top inch is dry, give a full drink, and let the pot drain. UF/IFAS Gardening Solutions notes that bird’s nest fern is not drought-tolerant and should not be allowed to dry out. (UF/IFAS Gardening Solutions)
In fall and winter, indoor heating and shorter days slow growth even though the plant remains evergreen. The same watering rhythm that worked in July can overwater the plant in January. Stretch the interval, rely more heavily on the finger and weight tests, and pause fertilizer rather than compensating with extra water. NC State Extension lists ideal indoor temperatures around 60 to 70°F, and cooler, slower conditions usually mean slower soil dry-down.
If your fern sits near a heating vent or a bright grow light year-round, treat it as a year-round active grower and adjust by soil moisture, not by month on the calendar.
Soil Moisture Checks That Actually Work
Calendar watering fails because pots, mixes, and rooms differ. A Bird’s Nest Fern in a porous terracotta pot under a skylight dries faster than the same cultivar in a glazed cachepot across a dim living room. The reliable approach is to combine two or three quick checks until you know your plant’s rhythm.
The best checks read the root zone, not just the surface color. Peat-based mixes can look dark when slightly dry. Bark-heavy mixes can look pale while still holding moisture lower down. Surface appearance alone is a weak signal.
Finger test at the right depth
The finger test remains the most accessible tool. Press into the soil about 1 inch deep, roughly the top 2 to 3 cm, near the pot edge where roots are active but the crown is not disturbed. If the mix feels cool and clearly damp, wait. If it feels lightly dry at that depth, it is time to water. If it is hard, dusty, and pulling away from the pot wall, the plant has gone too dry and needs a careful rehydration, not a panic flood into the rosette.
Clemson HGIC’s top-inch guidance is a practical match for this depth. (Clemson HGIC) Do not jam your finger deep into a small pot because you can damage fine roots. For routine care, the upper inch is enough. If you want a deeper read without disturbance, use a wooden skewer inserted near the edge, leave it for a minute, and see whether it comes out with clinging moist particles.
Moisture meters can help, but they are not always accurate in chunky bark mixes. Use them as a secondary signal, not the final authority.
Pot weight and skewer checks
The pot weight test is simple and surprisingly accurate. Lift the pot right after a thorough watering, then lift it every day or two as the mix dries. A freshly watered pot feels noticeably heavier. As moisture leaves the root zone, the pot lightens. When the top inch is dry and the pot feels clearly lighter than its freshly watered baseline, watering is usually appropriate.
Weight is especially useful for preventing overwatering. Many growers add water because the surface looks dry even though the lower root zone is still wet. If the pot feels heavy, wait another day and test again. Bird’s Nest Fern prefers consistency, but consistency means watering when ready and draining properly afterward, not keeping the soil constantly saturated.
The skewer test adds nuance when a peat-heavy mix confuses your finger. Insert a thin wooden skewer near the pot wall, withdraw it, and look for a moisture line. Combine skewer, finger, and weight for the first month in a new home and you will quickly learn which signal matters most for your setup.
The Right Way to Water at the Soil Level
Good technique is boring on purpose. Move the watering can or narrow-spout bottle around the outer rim of the soil, under the frond skirt, until water flows from the drainage hole. Avoid the central nest. Water evenly so the whole root mass gets moisture, not just one side. Stop when excess runs freely, then empty the saucer or lift the nursery pot out of any decorative outer pot so nothing sits in runoff.
Clemson HGIC advises watering carefully so water does not collect on the leaves and directs irrigation along the outer edge to keep the center dry. (Clemson HGIC) That matters because wet fronds in bright light can develop spotting, and wet crowns rot.
Aim for a full drink followed by a real dry-down, not perpetual dampness. After watering, the mix should feel evenly moist. Over the next days, the top inch should dry while the lower zone remains lightly moist. If the entire pot stays soggy for many days, the problem is usually mix compaction, poor drainage, oversized pot, or too little light and airflow-not a need for more frequent small sips.
Bottom watering can work for Bird’s Nest Fern if you manage it carefully. Set the pot in shallow room-temperature water until the surface just moistens, then remove it and let it drain fully. Do not leave the pot soaking for hours. Bottom watering reduces crown splashing, but it can also hide salt buildup over time, so an occasional top-edge flush is still useful.
Signs You Are Overwatering Bird’s Nest Fern
Overwatering is the more common serious mistake indoors because growers interpret tropical moisture needs as “keep it wet all the time.” The warning signs usually appear together rather than one at a time.
Watch for yellowing fronds starting at the base, a sour or musty smell from the mix, soil that stays wet for many days after watering, and browning or collapse at the crown center. Soft, limp fronds with wet soil are especially concerning because they can indicate root damage rather than thirst. Clemson HGIC warns against letting the pot sit in a saucer of water because that can cause root rot. (Clemson HGIC)
Overwatering risk rises when a Bird’s Nest Fern lives in low light, an oversized pot, a pot without drainage, or a decorative cachepot that traps runoff. Peat-heavy mixes that have broken down into a dense block also stay wet too long. If several symptoms appear at once, pause watering, empty standing water, and inspect the root zone before fertilizing or Bird’s Nest Fern repotting guide on impulse.
Crown rot from center watering can look like overwatering even when the soil moisture seemed reasonable. If the nest center turns brown and new fronds stop emerging, treat it as a crown problem first. Severe crown rot is often not reversible, which is why edge watering is non-negotiable.
Signs Bird’s Nest Fern Needs Water Soon
Underwatering shows up as pale or dull green fronds, dry, crispy leaf edges, and soil that has dried well below the top inch. The pot feels very light, and the mix may shrink slightly from the pot wall. A single dry episode is usually recoverable if you rehydrate thoroughly and then return to regular checks.
Repeated drought is more damaging than many growers expect. Fine fern roots do not bounce back as quickly as succulent roots. When a plant is stressed by chronic dryness, it may wilt oddly after you finally water because damaged roots cannot move moisture efficiently. The fix is steady moisture going forward, not a cycle of neglect and rescue.
NC State Extension emphasizes that Bird’s Nest Fern does not tolerate dry conditions. (NC State Extension) That does not mean you should water daily. It means you should not treat it like a snake plant that prefers long dry spells. If the top inch is dry and the pot is light, water now rather than waiting another four days because the fronds still look mostly green.
Low humidity can mimic underwatering with crispy margins even when soil moisture is acceptable. If the soil checks say “moist enough” but edges crisp in winter, address humidity with a humidifier or pebble tray while keeping the watering rhythm stable. Clemson HGIC suggests a humidifier nearby in winter or a pebble tray with the pot above the water line. (Clemson HGIC)
Light, Humidity, and Temperature Effects on Water Use
Water use is not only about the plant. It is about the whole environment pulling moisture from the pot. Light is the biggest modifier. A Bird’s Nest Fern near a bright east window or under supplemental grow lights transpires faster and dries sooner than one in a shaded interior corner. NC State Extension notes that too much direct sun can yellow fronds and stop growth, while bright or dappled indirect light suits the species. (NC State Extension) More usable light generally means more frequent checks, not automatically more water each time.
Temperature changes evaporation and root activity. Comfortable indoor warmth around 65 to 80°F keeps growth steady. Cold drafts below about 55°F stress the plant and slow water uptake. Hot, dry air from radiators or heat vents can dry the pot faster while also pulling moisture from frond surfaces, which is why winter watering is a balancing act rather than a simple “water less” rule.
Humidity affects how quickly fronds lose moisture to the air. Bird’s Nest Fern tolerates average household humidity better than many ferns, but very dry winter air below roughly 30 to 40 percent can stress foliage. Higher humidity does not remove the need to check soil. It can slightly slow dry-down and reduce edge crisping, but it will not fix chronic overwatering or a dense, airless mix.
Treat light, humidity, and temperature as reasons to check more often, not as excuses to water without testing.
Water Quality, Temperature, and Drainage
Bird’s Nest Fern is moderately sensitive to harsh tap water, especially when you water frequently in a small pot. Room-temperature water is the baseline. Cold water shocks tropical roots and can slow uptake. Let tap water sit out until it warms if your faucet runs cold, or draw water into a jug a day ahead in winter.
Many growers do fine with tap water. Others see brown tips, pale new growth, or crusty soil surfaces from chlorine, chloramine, fluoride, or dissolved minerals. If your tap water is hard or heavily treated, alternate with filtered, distilled, or rainwater for part of your waterings. You do not need an expensive system to start; a simple carbon-filter pitcher often reduces the most obvious leaf-tip burning.
Drainage matters as much as water chemistry. Every indoor Bird’s Nest Fern should sit in a pot with a drainage hole unless you are extremely experienced at reading moisture in sealed containers. After watering, runoff must escape. If you use a decorative cachepot, lift the inner pot out, water at the sink, and only return it after draining. Never let the plant marinate in a hidden pool of water.
Clemson HGIC’s saucer warning is direct: standing water causes root rot. (Clemson HGIC) That single habit-emptying the saucer-prevents more fern losses than any special watering gadget.
Pot Size, Soil Mix, and How They Change the Schedule
The pot is part of the watering system. A too-large pot holds extra mix that stays wet around a modest root ball, which is one of the fastest routes to root rot in ferns. A too-small pot dries quickly and forces constant rescue watering. Bird’s Nest Fern grows slowly, so growers often keep it slightly snug, but not in a container so tight that water runs straight through without soaking the root mass.
Pot material changes dry-down speed. Unglazed terracotta breathes and dries faster, which can be helpful for cautious overwaterers. Glazed ceramic and plastic retain moisture longer, which suits attentive underwaterers who still check soil every time. Neither material is automatically better; match it to your habits and room conditions.
Soil texture is equally important. Bird’s Nest Fern wants rich, porous, well-draining mix with enough organic matter to hold light moisture and enough bark or perlite to keep air moving. NC State Extension recommends rich, moist, porous soil such as a fern potting mix indoors. (NC State Extension) A mix with roughly 20 percent orchid bark or coco coir for aeration, targeting slightly acidic conditions around pH 5.5 to 7.0, supports the wet-but-not-soggy balance this fern prefers.
When the mix compacts over time, water behaves strangely. It may channel down the pot wall without wetting the center, or it may stay saturated for a week with no obvious reason. If dry-down no longer makes sense, refresh the soil at repotting rather than compensating with guesswork.
Common Bird’s Nest Fern Watering Mistakes
The most damaging mistake is watering the rosette center. It feels intuitive because the plant looks like a bowl, but the nest is not a reservoir. Water the soil edge every time.
The second mistake is treating “tropical” as “always wet.” Even moisture means the root zone recovers after a thorough drink and partial dry-down. It does not mean the soil never dries at the surface or that the saucer should stay full.
The third is calendar watering without checks. “Every Sunday” is fine only if Sunday matches the soil state. A fixed schedule in a changing indoor climate is how healthy ferns develop root problems in winter and drought stress in summer heat waves.
Other common errors include leaving the pot in a cachepot full of runoff, using a pot with no drainage hole, giving tiny daily sips instead of one thorough watering, and responding to limp leaves with more water before checking soil moisture. Limp foliage with wet soil is a stop signal, not a pour signal.
Misting is often mistaken for watering. Brief misting can help humidity around fronds, but it does not replace root-zone moisture and can encourage foliar issues if water sits on leaves in bright light. Water the soil; manage humidity separately.
Recovering From Overwatering or Underwatering
Recovery starts with diagnosis, not drama. If the soil is wet and the plant looks unhappy, stop watering, remove standing water, and place the pot where it gets bright indirect light and gentle airflow. Let the top half of the mix approach dryness before the next drink. If the plant keeps declining, unpot it, trim mushy brown roots with clean scissors, and repot into fresh, airy mix in a pot that fits the remaining root ball.
If the soil is very dry and fronds are pale or crispy, rehydrate thoroughly at the soil edge until water drains, then empty the saucer. Do not pour into the crown as a “rescue.” Over the next week, check every couple of days and avoid letting the plant swing back into drought. One good soak does not fix weeks of neglect if the roots were damaged.
For crown rot, recovery depends on severity. If only a small area browns and new fronds still emerge, dry out the center, improve technique, and watch closely. If the crown collapses and growth stops, the plant may not survive even with perfect care afterward. Prevention is far more effective than repair.
Hold off on fertilizer during recovery. Stressed roots do not need feeding pressure while they are re-establishing. Resume normal care only when new growth looks stable and soil dry-down returns to a predictable pattern.
Watering New Plants and After Repotting
A Bird’s Nest Fern in its first month at home needs observation more than intervention. Do not repot on day one unless the mix is clearly failing or pests are obvious. Quarantine new plants briefly, learn how fast the nursery pot dries in your light, and keep care steady while the fern acclimates. Store-bought ferns are often watered heavily before sale; your home may dry the pot slower or faster.
After repotting, water lightly to settle fresh mix, then let the plant rest in bright indirect light. Roots disturbed during repotting are more vulnerable to rot in saturated soil. For the first two weeks, check moisture more often but water only when the top inch dries. Do not fertilize immediately. Fresh mix plus a careful watering rhythm is enough.
Recently repotted plants in larger containers dry more slowly until roots explore the new space. That is normal. Many post-repot deaths are overwatering deaths, not transplant shock alone. If you sized up only one inch and used airy mix, patience usually solves the adjustment.
When buying, choose plants with firm emerging fronds, no sour soil smell, and no brown collapsed center. A wet pot in a dark store corner is a warning sign that problems may appear after you bring it home.
Conclusion
Bird’s Nest Fern watering comes down to a few steady habits: check the top inch of soil, water thoroughly at the pot edges, never flood the central rosette, and empty drainage runoff every time. A weekly rhythm is a useful starting point in active growth, but your real schedule is whatever keeps the mix evenly moist and airy in your light, pot, and season.
Watch for yellow base fronds, sour soil, and crown browning as overwatering warnings. Watch for pale fronds, light pots, and crispy edges as signs the plant needs a drink soon. Combine finger, weight, and skewer checks until the pattern feels obvious. Get those habits right and Bird’s Nest Fern becomes a reliable, glossy houseplant rather than a mystery that punishes one missed week or one overly generous Sunday pour.
When to use this page vs other Bird’s Nest Fern guides
- Bird’s Nest Fern overview - Start here for whole-plant context before deep-diving this topic.
- Bird’s Nest Fern problems hub - Jump to symptom-specific fix guides when this care topic does not resolve the issue.
- Overwatering on Bird’s Nest Fern - Escalate here when watering adjustments are not enough.
- Underwatering on Bird’s Nest Fern - Escalate here when watering adjustments are not enough.
- Root Rot on Bird’s Nest Fern - Escalate here when watering adjustments are not enough.
Related Bird’s Nest Fern guides
- Bird’s Nest Fern overview
- Bird’s Nest Fern light
- Bird’s Nest Fern soil
- Bird’s Nest Fern propagation
- Bird’s Nest Fern fertilizer
- Bird’s Nest Fern repotting
- Overwatering on Bird’s Nest Fern
- Underwatering on Bird’s Nest Fern
- Root Rot on Bird’s Nest Fern
- Wilting on Bird’s Nest Fern
- Drooping Leaves on Bird’s Nest Fern
- Mold on Soil on Bird’s Nest Fern