How to Propagate Bird's Nest Fern: Spores and Division
How to Propagate Bird's Nest Fern: Spores and Division
How to Propagate Bird's Nest Fern: Spores and Division
How Bird’s Nest Fern Reproduces in Nature
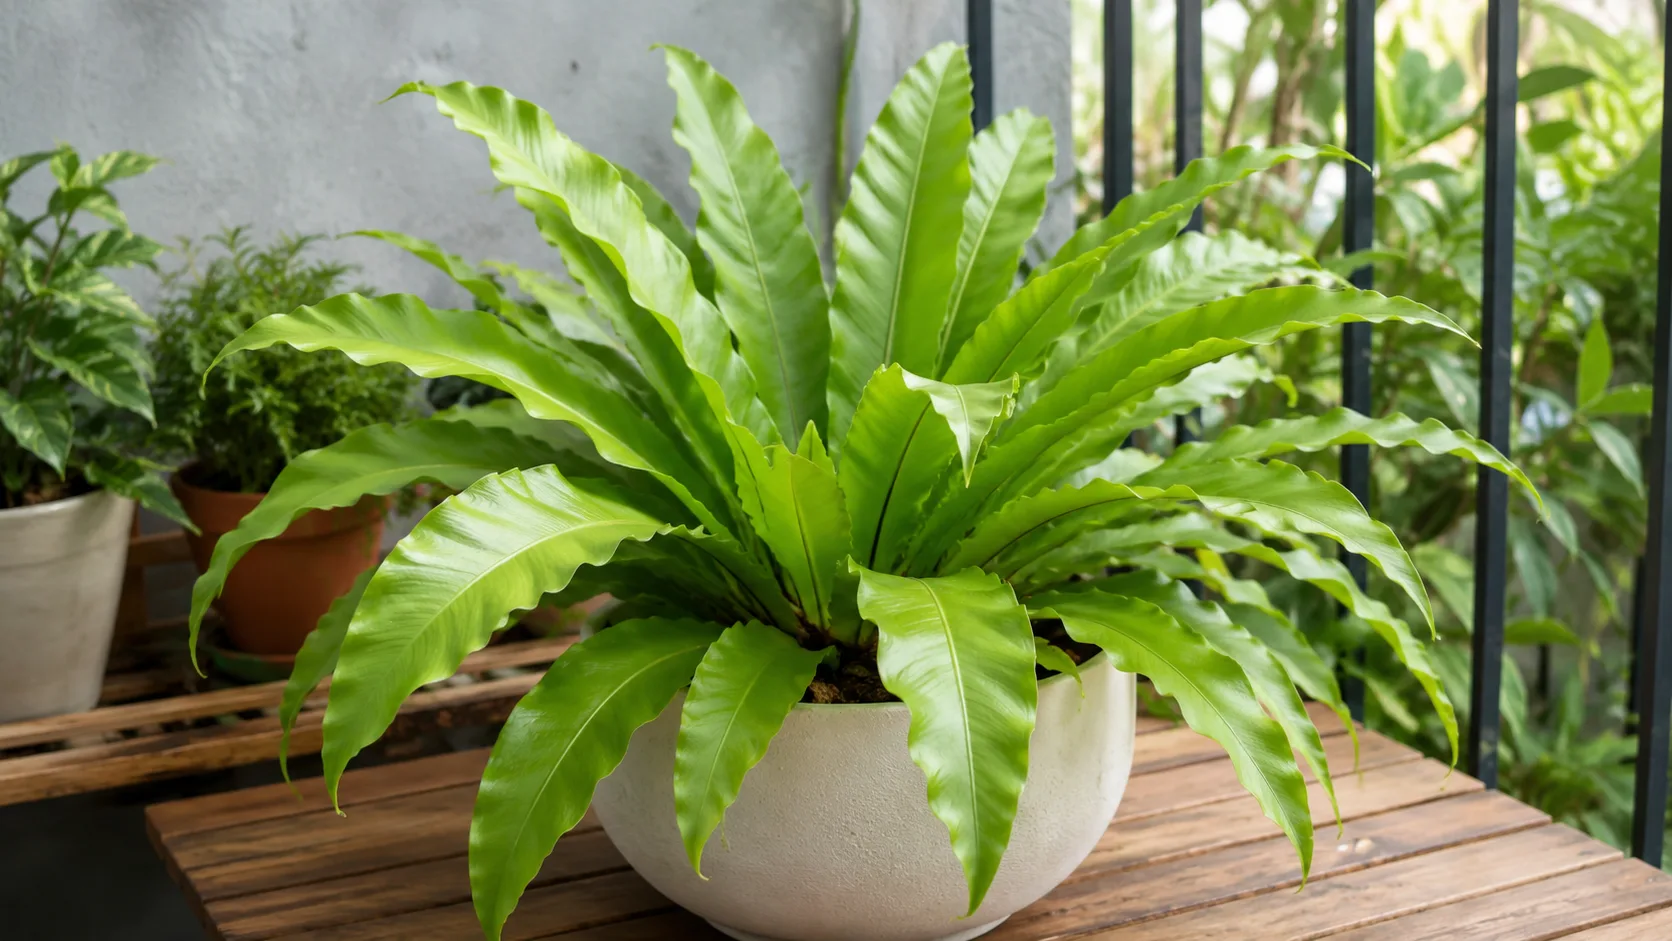
Bird’s Nest Fern (Asplenium nidus) belongs to the Aspleniaceae family and grows as a single rosette of undivided, sword-shaped fronds emerging from a central crown. Unlike flowering houseplants, it does not produce seeds. Ferns reproduce through spores - microscopic particles released from structures called sori on the undersides of mature fronds. UF/IFAS Gardening Solutions notes that bird’s nest fern reproduces by spores found on the undersides of fronds. Kew’s Plants of the World Online lists Asplenium nidus as a widely cultivated epiphytic and terrestrial fern native to tropical Asia, Australia, East Africa, and parts of Polynesia, including Hawaiʻi. (Plants of the World Online)
In the wild, ripe spores drift onto moist, shaded surfaces - tree bark, rock crevices, or rich forest litter - where they germinate into a tiny, heart-shaped prothallus (the gametophyte stage). That prothallus is not a miniature fern; it is a separate life stage that produces eggs and sperm under wet conditions. When fertilization succeeds, a new sporophyte - the familiar fronded plant you keep on a shelf - emerges from the prothallus and eventually grows into the rosette form you recognize. The entire cycle can take many months, which is why spore propagation at home is a long project, not a weekend task.
Division is a shortcut humans use when a mature plant has developed more than one crown or offset sharing a root mass. You are not creating new tissue from scratch; you are separating an existing piece that already has fronds and roots. For bird’s nest fern, division is faster and more reliable than spores when the plant structure allows it. The catch is that many indoor specimens, especially young nursery plants, grow as a single crown with no natural division points. Understanding that biological reality before you pick up a knife saves you from damaging a plant that cannot be split.
Division vs Spore Propagation: Which Method to Choose
The easiest way to propagate bird’s nest fern at home is division, but only when your plant has multiple crowns or clearly separable offsets, each with its own fronds and root tissue. In that scenario, division can produce a new plant in weeks rather than months, and the new section arrives with functional roots and established fronds. Success depends on plant structure, not enthusiasm.
Spore propagation is the fern’s natural method and the only option when you have a single-rosette plant and want more without buying another pot. It is slower, more technically demanding, and vulnerable to contamination, but it can eventually yield many seedlings from one frond. The University of Hawaiʻi College of Tropical Agriculture and Human Resources describes Asplenium nidus spore propagation as placing mature spores on moist sterile medium in a shady sheltered location with daily misting. (Asplenium nidus (Bird’s Nest Fern))
| Method | Typical success | Time to established plant | Best for |
|---|---|---|---|
| Division | High when multiple crowns exist | 4–8 weeks | Mature, multi-crown plants |
| Spores | Moderate with sterile technique | 3–12+ months | Patient growers, single-rosette plants |
| Leaf cuttings | Not viable | N/A | Not recommended |
| Water propagation | Not viable | N/A | Not recommended |
If your fern is a standard single-rosette houseplant from a garden center, assume spores are your realistic home propagation path - or simply buy a second plant if you want instant results. If you inherited a large, pot-bound specimen with visible separate crowns pushing from the same root ball, division deserves first consideration.
When to Propagate Bird’s Nest Fern
Spring and early summer - roughly March through June in the Northern Hemisphere - is the best window for both division and spore sowing. During active growth, Asplenium nidus repairs root disturbance faster, new fronds unfurl more readily, and ambient warmth supports the humidity both methods require. Missouri Botanical Garden notes that this fern is reliably winter-hardy only in USDA zones 11–12 outdoors but is widely grown as a houseplant elsewhere, where indoor conditions rather than outdoor frost dates dictate timing.
You can attempt propagation in fall if your home stays warm (above 18°C / 65°F) and bright, but expect slower rooting on divisions and slower prothallus development on spore trays when shorter days and cooler nights reduce growth. Avoid winter propagation unless you are rescuing a plant from an emergency - a broken pot, severe root rot on Bird’s Nest Fern requiring clean division of healthy tissue, or an imminent loss of the parent. Propagation stress on a dormant or struggling plant rarely ends well.
Plant readiness matters as much as the calendar. The parent should show firm, upright fronds with no active pest infestation, no mushy crown, and no recent Bird’s Nest Fern repotting guide trauma within the last four weeks. A fern that was shipped, moved, or heavily pruned needs time to stabilize before you divide it or strip fronds for spores. For spore collection specifically, choose fronds that are fully mature - not the pale newly unfurled leaves at the center of the rosette, which have not yet developed sori.
What You Need Before You Start
Good propagation starts with clean tools and realistic containers. For division, gather a sharp knife or hori-hori wiped with 70% isopropyl alcohol, a workspace covered with newspaper or a tray, fresh well-draining fern mix (orchid bark, coco coir, and peat-based potting mix in roughly equal parts works well), and pots one size smaller than you think you need. Bird’s nest fern roots are fine and prefer snug quarters; an oversized wet pot is a common post-division killer.
For spore propagation, you need a shallow sterile tray or small pots, peat moss and perlite (or fine sphagnum), a clean paper bag or sheet of white paper for spore collection, a clear plastic bag or propagation dome, a spray bottle dedicated to propagation (not one previously used for foliar pest sprays), and optionally a heat mat set near 21–24°C (70–75°F). Sterility matters more for spores than for almost any other houseplant propagation method because the same warm, moist conditions that germinate spores also grow mold, algae, and moss.
The environment is as important as the equipment. Both methods need bright, indirect light - an east-facing window, a few feet back from a sheer-curtained south window, or a shelf under gentle grow lights. Direct sun on a freshly divided fern or an uncovered spore tray dries tissue and overheats the medium within hours. Humidity should stay in the 50–70% range the species prefers; a dry, air-conditioned room will stress divisions and slow spore development unless you add a dome or humidity tent.
Label everything. Write the date on division pots and spore trays. Fern spore projects stretch long enough that you will forget when you sowed. A division that looks unchanged at week three may still be rooting; a spore tray that looks empty at week six may be days from showing a green film. Dates prevent you from throwing away viable material too early or watering a rotting setup too late.
Propagating by Division
Division is the method to try first when your plant’s structure allows it. You are transplanting a piece that already knows how to be a fern.
When Division Is Actually Possible
Open the question honestly: can you divide a bird’s nest fern? Yes, but only if the plant has two or more distinct crowns - separate clusters of fronds emerging from different points on the rhizome, each with its own root attachment. A single symmetrical rosette with all fronds arising from one central point is not a division candidate. Cutting through that crown to “make two plants” destroys the growing tip and usually kills both halves.
Signs that division may work include a plant that has clearly outgrown its pot with multiple frond clusters visible from above, offsets tucked beside the main rosette at the soil line, or a specimen that has been growing long enough to develop a branched rhizome beneath the surface. Large epiphytic mounts or basket-grown ferns sometimes develop pups at the rhizome edge. If you slide the plant from its pot and see only one central stem with radiating roots, put the knife away and consider spores or a nursery purchase instead.
Step-by-Step Division Method
- Dry the root ball slightly. Skip watering for 3 to 5 days before division so the root mass holds together and excess moisture does not pour from cut surfaces.
- Unpot carefully. Tip the container, support the fronds from below, and slide the plant out without pulling individual leaves. Fern fronds snap easily and do not regrow from broken tips the way some succulents resprout.
- Brush away loose mix. Gently expose the rhizome and root junctions until you can see where crowns connect. Look for natural seams between clusters rather than forcing a cut through the thickest part of the crown.
- Separate with a clean blade. Use one smooth cut to divide the rhizome, ensuring each section retains at least three to four fronds and a healthy root mass. Partial divisions with one leaf and a few roots rarely survive.
- Inspect each section. Discard any piece with brown mushy tissue at the crown or blackened, odoriferous roots. Rot spreads faster than new roots form.
- Repot immediately. Plant each division at the same depth it grew before, with the crown sitting at or just above the mix surface. Never bury the central growing point.
Water the new pots thoroughly until water runs from drainage holes, then empty the saucer. Place divisions in a humid, shaded location for the first 7 to 10 days - brighter than a closet, dimmer than their permanent spot. Gradually increase light over two weeks as new growth confirms the roots are functioning.
Post-Division Aftercare
The first month after division is about stability, not stimulation. Hold fertilizer entirely; fresh roots do not need feeding and salts can burn damaged tissue. Keep the mix evenly moist but never waterlogged - check the top 2–3 cm and water when it approaches dry, the same rhythm you would use for a mature bird’s nest fern. The critical rule that applies to all rosette ferns: water the soil around the plant, never the central cup or crown. Water pooling in the nest invites crown rot, the fastest way to lose a division that was otherwise rooting well.
Expect some older fronds to develop brown tips or slight wilting during the first two weeks. That is transplant stress, not necessarily failure. Watch the center of the rosette instead. A firm crown and a newly unfurling frond mean the division is establishing. If the crown goes soft, smells sour, or collapses inward, remove the plant from the pot, trim black tissue back to firm white or green rhizome, and repot in fresh mix - or discard if the crown is fully compromised.
Propagating from Spores
Spore propagation is the fern’s authentic reproductive path. It rewards patience and attention to cleanliness more than any special equipment.
Understanding Fern Spores and Sori
Do bird’s nest ferns produce seeds? No. They produce spores in elongated clusters called sori along the veins on the undersides of mature fronds. When sori are immature, they appear as neat rows of small dots, often brown or dark against the green leaf. When ripe, the sporangia within each sorus rupture and release fine dust-like spores that look like cinnamon or dark powder on the leaf surface and on anything beneath the frond.
Do not confuse sori with pests. Scale insects are raised, waxy bumps that scrape off; mealybugs look cottony and cluster at frond bases. Sori are flat, regularly arranged along veins, and symmetrical on the leaf underside. If you are unsure, compare both sides of the frond and consult a reference photo of Asplenium nidus sori before harvesting.
The spore itself is a single cell. It does not contain a tiny fern embryo waiting to pop open. It must land on suitable medium, germinate into a prothallus, undergo fertilization (which requires a film of water on the prothallus surface), and only then produce the sporophyte you pot up months later. That biological distance explains why spore projects fail when treated like seed-sowing with a quick cover of soil and a wait of ten days.
Collecting Ripe Spores
How do you know when fern spores are ripe? Wait until the sori turn dark brown to nearly black and release powder when you brush the frond over paper. The frond itself may begin to age and decline at the tip - mature fertile fronds are often older leaves, not the newest growth at the rosette center.
Two collection methods work well at home. Method A - frond on paper: Cut a fertile frond and lay it spore-side down on a clean white sheet of paper or paper towel in a dry, draft-free room. After 24 to 72 hours, spores fall as a fine brown dust, leaving a patterned deposit on the paper. Lift the frond and funnel the spores into a clean envelope or small jar. Method B - paper bag: Place the cut frond inside a paper bag, fold the top closed, and stand it upright so spores collect at the bottom over several days. The bag method reduces contamination from airborne dust.
Use spores soon after collection. Viability drops over time, especially in warm or humid storage. If you must store them, keep the envelope in a cool, dry place and sow within a few weeks. Label the collection date.
Preparing a Sterile Sowing Medium
Fern spores need a fine, moisture-retentive, sterile surface. A standard home mix is equal parts peat moss and perlite, or fine milled sphagnum moss alone. Commercial seed-starting mix can work if it is fine-textured and you trust its cleanliness; many growers sterilize homemade mix by moistening it and baking it in an oven-safe container at 82°C (180°F) for 30 minutes, then cooling before use.
Fill a shallow tray or small pot to a depth of 2–3 cm. Moisten the medium until it is evenly damp - like a wrung-out sponge - but not dripping. Press the surface lightly flat. Do not add fertilizer; spores and young prothalli are easily burned by nutrients at this stage.
Sterilize the container, too. Wash pots or trays with hot soapy water, rinse, and optionally wipe with isopropyl alcohol. Work on a clean counter. The goal is not laboratory perfection, but every reduction in fungal spores and algae cells improves your odds on a windowsill.
Sowing and Germinating Spores
Sprinkle spores thinly and evenly across the moist surface. A heavy dump produces overcrowded prothalli that compete and rot together. If you can barely see a light dusting on the medium, you are closer to the right density than if the surface looks coated in rust.
Do not cover spores with soil. They need light at the surface to germinate. Cover the container instead: slide it into a clear plastic bag or place a propagation dome on top to lock in humidity. Set the tray in bright, indirect light at 21–24°C (70–75°F). A heat mat underneath helps in cool homes but is not mandatory if the room stays warm.
Keep the medium consistently moist by misting the surface lightly when it lightens in color, or by bottom watering - setting the tray in a shallow dish of water for a few minutes until the surface glistens, then removing it. Never pour water directly onto the spore surface from above; that disturbs the sowing layer and can bury spores. Vent the cover briefly every few days to exchange stale air, then reseal.
Germination timing varies widely. A green film - the prothallus layer - may appear after several weeks to a few months under good conditions. Some trays show nothing for months and then suddenly green. The University of Hawaiʻi propagation guidance recommends daily misting and a shady sheltered location; consistency matters more than checking twice a day.
From Prothalli to Young Ferns
The prothallus stage looks like a mossy green carpet, not fern fronds. Leave it alone until tiny sporophytes - the first true fronds - emerge from fertilized prothalli. That second transition can take several more weeks to months after the green film appears. During this period, maintain humidity and light but reduce misting slightly once the prothalli are established to discourage algae, which competes on the same moist surface.
When sporophytes are 1–2 cm tall with several small fronds, they are large enough to prick out - gently lift clumps or individual seedlings with a fork or label and transplant into small pots of standard fern mix. Space them so air can move between crowns. A humidity dome over the seedlings for the first week after pricking out reduces shock. Gradually harden them off to open air over two to three weeks.
Grow young ferns in small pots, repotting only when roots circle the container. They will look disproportionately small for a long time. That is normal. A spore-grown bird’s nest fern may take a year or more to resemble a nursery specimen, but you will have started from the plant’s own genetics - useful if you have a particularly beautiful mature specimen and want a true copy without buying a look-alike cultivar.
First-Month Care for New Plants
Whether your new plant came from division or spore pricking-out, the first month follows the same principles. Bird’s Nest Fern light guide, steady moisture, high humidity, no fertilizer, and crown protection. New ferns lack the root mass to recover from drought or from sitting in stagnant water, so the margin for error is narrower than for an established rosette.
Water when the top 2–3 cm of mix feels dry, using room-temperature water. Avoid cold tap water shocks in winter. Maintain 50–70% humidity with a dome, pebble tray, or nearby humidifier if your home air is dry. Do not mist fronds directly as a humidity substitute on freshly propagated plants - surface moisture on young tissue invites fungal spotting.
Temperature should stay between 18–27°C (65–80°F). Cold drafts from windows or air-conditioning vents can stall root growth on divisions and stop prothallus development on spore trays entirely. If a division’s fronds wilt severely and the pot feels very light, water once and wait; if the pot feels heavy and the crown is soft, you likely have rot rather than dryness.
The best sign of success is new growth from the center - a frond beginning to unfurl on a division, or increasing frond count on spore-grown seedlings. Resist unpotting to check roots. Every disturbance resets the timeline by days or weeks.
What Does Not Work for Bird’s Nest Fern
Can you propagate bird’s nest fern from a leaf cutting? No. A detached frond has no dormant buds along its length and no ability to regenerate a crown from leaf tissue alone. The frond may stay green for weeks in water or soil, which creates the illusion of success, but it will not produce a new plant. This is fundamentally different from African violets or many succulents where leaf tissue carries regenerative capacity.
Can you propagate bird’s nest fern in water? Not as a reliable method. Divisions need substrate and airflow at the roots; sitting in water promotes anaerobic rot on fern roots adapted to airy epiphytic conditions. Spores require a moist solid surface for the prothallus stage, not standing water. Water propagation videos for other houseplants do not transfer to rosette ferns.
Buying a second plant is a legitimate strategy. If you have a single small rosette and no interest in a six-month spore project, propagation is not a moral obligation. The honest answer many guides skip is that commercial production of bird’s nest ferns happens at scale through spore sowing in controlled greenhouses, not through kitchen-counter division of every houseplant on Instagram.
Common Propagation Mistakes
The most damaging mistake on divisions is cutting a single-crown plant in half. Both sections lose the apical growing point and die. Always confirm multiple crowns before cutting.
Burying the crown after division or transplant is the second most common error. The nest-shaped center where fronds emerge must stay at or above the soil line. Buried crowns rot within days in a wet mix.
On spore trays, over-sowing produces a dense mat that rots before sporophytes develop. Less is more. Non-sterile medium invites mold that outcompetes prothalli; if your tray turns fuzzy within a week, discard and restart with sterilized mix rather than fighting contamination for months.
Impatiens watering kills both methods. Checking twice daily and adding water because you are anxious keeps the mix saturated and airless. Fern roots need oxygen as much as moisture; a rhythm of approaching dry, then thorough watering, beats constant dampness.
Wrong frond selection for spores - harvesting immature leaves without ripe sori - yields empty trays. Wait for the brown powder test.
Propagating during stress - right after repotting, during active mealybug infestation, or in a cold dim winter room - stacks the odds against you. Stabilize the parent first.
Troubleshooting Failed Propagations
Division with wilting fronds but firm crown: Usually transplant shock. Maintain humidity, reduce light slightly, and wait two weeks. Do not fertilize.
Division with soft, smelly crown: Crown rot. Remove from pot, cut away all brown tissue to firm rhizome, dust cuts with cinnamon if desired, repot in fresh airy mix, and water sparingly. Success depends on how much healthy tissue remains.
Spore tray with no green after 16 weeks: Possible causes include non-viable spores, medium too dry or too wet, temperature too cold, or insufficient light. One retry with fresh spores and verified ripe sori is reasonable before concluding the setup failed.
Spore tray with green moss but no fern fronds after months: Prothalli may be present but unfertilized, or algae may dominate. Improve air exchange, ensure brief periods of surface moisture for fertilization, and consider brighter indirect light.
Mold on spore medium: Discard the tray. Fighting mold on a months-long project rarely succeeds. Sterilize equipment and restart.
New plant stunted after pricking out: Often normal; seedlings are slow. If fronds blacken at the base, check for crown burial and reduce watering.
Conclusion
Bird’s nest fern propagation comes down to two honest paths. Division is faster and more dependable when your plant has multiple crowns with roots attached - a situation more common on large, older specimens than on young single-rosette nursery pots. Spore propagation is the natural method that works even on a plant you cannot split, but it demands sterile technique, steady warmth and humidity, and a timeline measured in months rather than weeks.
Choose your method based on what your plant actually offers, not on what is easiest on social media. Protect the crown from water and burial, propagate in spring when growth is active, and judge success by new central fronds rather than by how often you unpot to check roots. Whether you divide a mature clump or sow a dusting of spores on peat and perlite, the same principle holds: bird’s nest fern rewards patience, clean conditions, and respect for how ferns actually reproduce.
When to use this page vs other Bird’s Nest Fern guides
- Bird’s Nest Fern overview - Start here for whole-plant context before deep-diving this topic.
- Bird’s Nest Fern problems hub - Jump to symptom-specific fix guides when this care topic does not resolve the issue.