Indoor Humidity and Pebble Trays: A Measured Guide
Indoor humidity math, plant target ranges, EPA guardrails, and a measured pebble-tray test — when a tray helps and when to use a humidifier instead.
Brown tips on a houseplant are not an automatic diagnosis. They can come from inconsistent watering, fertilizer salts, damaged roots, dry heat blowing across the leaves, or genuinely dry air. The first question is not “should I add a pebble tray?” It is whether the air around the plant is measurably dry, and whether a small passive tray is large enough to make a useful local difference. This guide walks through the humidity math, the diagnostic step most people skip, and a measured editorial test of what a pebble tray actually changes.
It is the humidity + pebble-tray primer for the LeafyPixels cluster. Setup walkthroughs live in the dedicated DIY pebble tray guide and how to set up a pebble tray; the alternatives debate lives in pebble tray vs humidifier; and the broader humidity question lives in the houseplant humidity guide. This page ties the math to the pebble-tray question and answers it with extension sources plus a LeafyPixels winter test.
What “Indoor Humidity” Actually Means
Relative humidity (RH) is the amount of water vapor in the air expressed as a percentage of the maximum the air could hold at the same temperature. Warm air can hold more water vapor than cold air, so when cold winter air is heated indoors, the same amount of moisture now represents a much smaller percentage of capacity — RH drops even though the absolute amount of water in the air has not changed. (National Weather Service - Relative Humidity) That single fact explains most of the houseplant humidity problems that show up between December and March.
The US EPA recommends keeping indoor relative humidity between 30% and 50% to limit condensation, dust mite activity, and mold risk, and below 60% as a hard ceiling. (US EPA) That range is built around people and buildings, not plants. Most houseplants are comfortable somewhere in the 40% to 50% band, while thinner-leaved tropicals often prefer higher. (University of New Hampshire Extension)
Why Winter Indoor Air Drops So Low
Heating cold outside air to room temperature is the main driver. Cold air holds very little water; warming it does not add water. North Carolina Cooperative Extension notes that winter indoor humidity can fall below 20% in many homes, and the same explanation appears across extension and meteorological references. (Richmond County Center / NC State Extension) When a hygrometer reads 12% in a heated bedroom in January, the room is not unusually dry for the season — it is functioning exactly as the physics of cold-air warming predicts.
Forced-air heating accelerates the problem by adding air changes per hour and bringing in drier air from outside the building envelope. Air conditioning does the same thing in summer, especially with the thermostat set aggressively low. The right response to either is measurement, not a default to “more humidity.”
The Plant Target Band and the EPA Home Guardrail
The two numbers most beginners need to keep straight are the plant band and the home band, and they overlap by design.
| Band | Typical RH | Source | Examples |
|---|---|---|---|
| Plant target for most houseplants | About 40% to 50% | University of New Hampshire Extension | Many pothos, philodendrons, monsteras, peperomias |
| Plant target for thin-leaved tropicals | About 50% to 60%+, sometimes higher | University of New Hampshire Extension | Calatheas, ferns, fittonia, some orchids |
| Home comfort band | 30% to 50%, below 60% | US EPA | Building health, mold and dust mite control |
| Winter indoor reality in many homes | 10% to 20% | Richmond County Center / NC State Extension | Forced-air heated rooms |
That table is the whole primer in four rows. If your home is already at 40% and your pothos is fine, no intervention is needed. If your home is at 18% in February and your calathea is crisp at the edges, the gap is real and the next decision is whether to add localized humidity for that plant or to raise the room.
Which Plants Care About Humidity
The honest answer is that the plant is more important than the air. Adaptable plants tolerate a much wider range than demanding tropicals. The Royal Horticultural Society recommends matching conditions to each plant rather than applying one routine across the shelf. (RHS) Costa Farms places many homes at 40% to 50% and notes that most tropical houseplants prefer 50% to 60% while still tolerating average household conditions. (Costa Farms)
In practice, three groups show humidity stress first:
- Thin-leaved tropicals with high transpiration: calatheas, ferns, fittonia, prayer plants, anthuriums. The calathea care guide and monstera humidity needs are the species deep dives for two common examples.
- Plants near heating or cooling vents, where the air is much drier than the rest of the room. University of Maryland Extension specifically recommends keeping indoor plants away from heat and air-conditioning sources. (University of Maryland Extension)
- Recently propagated cuttings with no root system yet, which transpire through the leaves until they root.
If a plant on your shelf falls into one of those groups, humidity is worth measuring and worth managing. If it is an adaptable pothos or a healthy snake plant, the time and equipment are better spent on watering and light.
Symptoms That Look Like Low Humidity but Aren’t
Brown leaf edges are not a humidity diagnosis. They are a stress signal. The same symptom shows up for several different reasons, and a pebble tray fixes only one of them.
| Symptom | Likely real cause | What to check first |
|---|---|---|
| Brown edges plus dry, light potting mix | Underwatering | Pot weight, finger test, watering guide |
| Brown edges plus wet or sour-smelling mix | Overwatering, possibly root stress | Lift the pot, inspect drainage, allow the root zone to dry to its plant-appropriate depth |
| Brown edges with white crust on soil or pot rim | Fertilizer or hard-water salt buildup | Flush with plain water, review fertilizer rate |
| Brown edges with fine webbing or stippling | Spider mites, which thrive in dry air but cause the symptom themselves | Inspect undersides of leaves with a magnifier |
| Brown edges plus drafty or vent-blown air | Local dry-air damage rather than whole-room dryness | Move the plant a few feet from the vent and compare |
| Brown edges in new growth only, with RH already 40%+ | Likely water quality, salts, or root stress | Switch to filtered or rested water for a few weeks |
This is the single most useful table on the page because it converts a single vague symptom into a triage. A pebble tray is a reasonable next step only when the symptom persists, the air really is dry, and the other causes above have been checked. For a fuller differential on crispy leaf edges — including the five-cause triage before you add a tray — see can pebble trays prevent crispy leaves?. For brown tips specifically, see the dedicated symptom guide.
How to Measure Humidity Where the Leaves Are

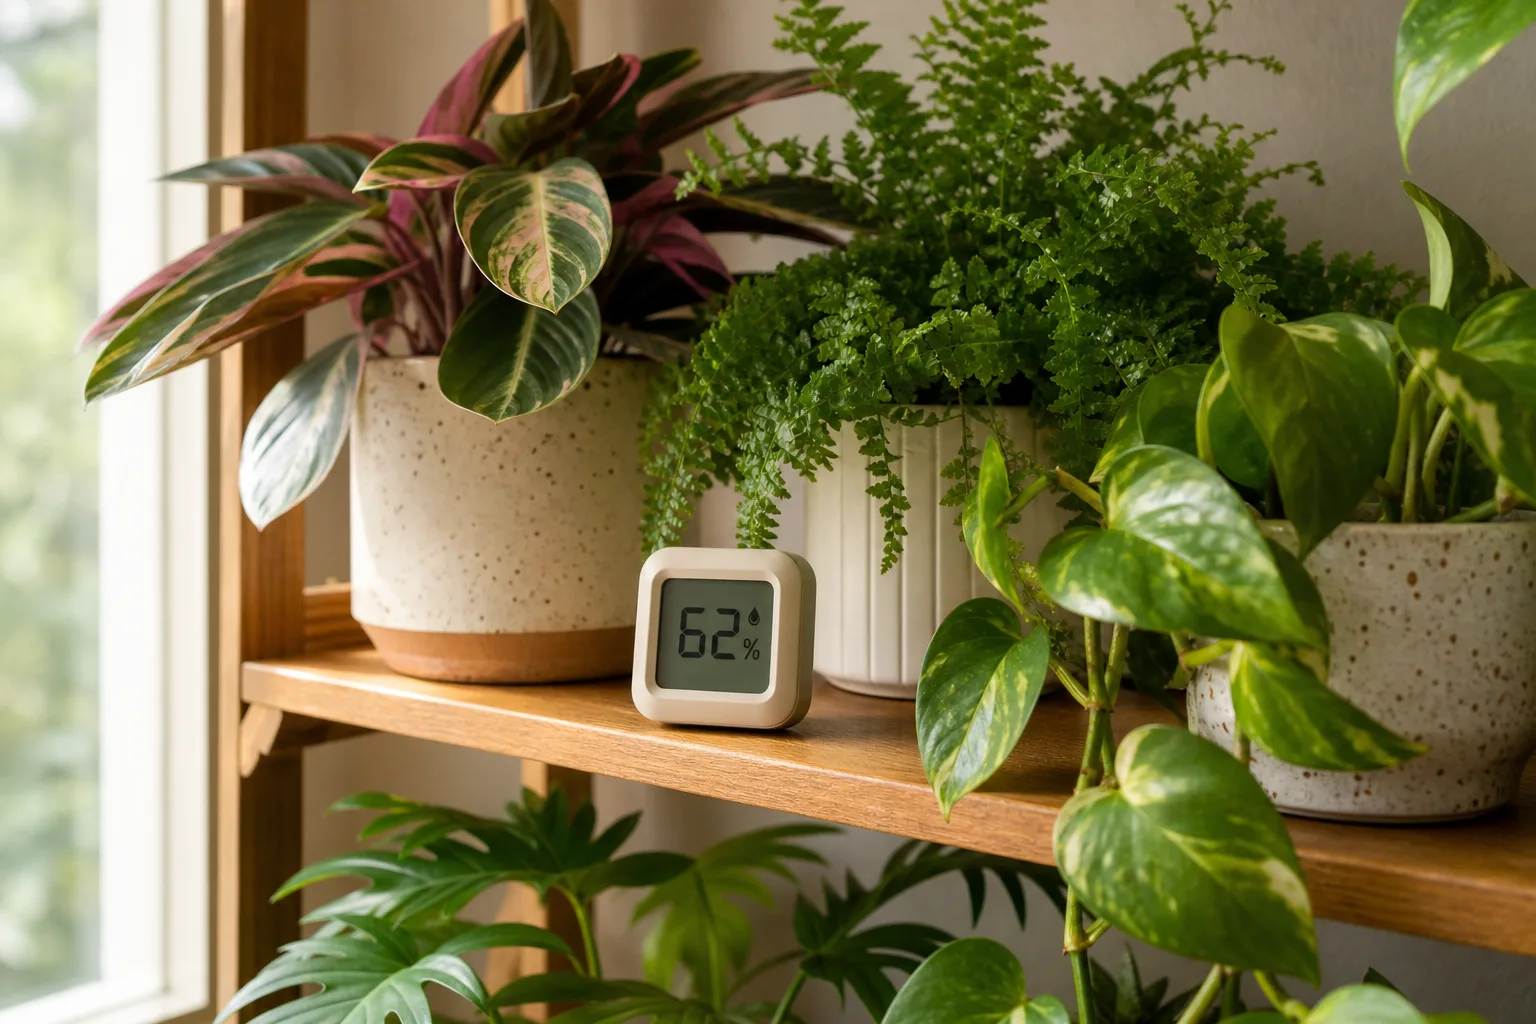
A hygrometer across the room describes the room. A hygrometer beside the lower leaves describes the plant’s immediate air. Both readings matter because a pebble tray is expected to act locally, not room-wide. The first move is a sensor at leaf height, not a guess from how dry your skin feels in January.
The EPA’s indoor air quality guidance recommends a moisture or humidity gauge for checking indoor air, and University of Maryland Extension advises monitoring temperature and humidity because both affect how plants respond indoors. (US EPA) (University of Maryland Extension) For houseplant use, a $10 to $15 digital hygrometer at the plant is more useful than a smart sensor across the room.
Where to Place the Hygrometer
Place the sensor at leaf height, away from heating and cooling vents, away from a humidifier outlet, and off the wet stones of any tray. Do not rely on a reading from the floor or the ceiling; humidity stratifies, and the air two feet off the floor is not the air the leaves are breathing. Kitchens and bathrooms read higher locally, but a fan or an open window will still create swings.
NIST calibrates relative-humidity sensors in controlled chambers, which is a useful reminder that two uncalibrated household meters should not be assumed to agree with each other. (NIST) Use the same device in each position, or cross-check two devices side by side before treating them as interchangeable.
A Repeatable Reading Protocol
A measurement only matters if it is repeatable. A simple home protocol turns the question “is it dry?” into evidence that survives a second look.
- Record temperature and RH at leaf height twice daily for three days without a tray.
- Record a control reading several feet away at the same times.
- Note pot size, tray dimensions, water level, plant height, vent cycles, and whether a fan is running.
- Install the tray without changing watering, light, or plant location.
- Repeat the readings for at least three days, then compare daily averages and the leaf-level-to-room difference.
- If a distance profile is wanted, move the same sensor sequentially to 2, 6, and 12 inches above the tray after allowing it to settle at each position. Do not compare three uncalibrated sensors as if they were identical.
The protocol is designed to reveal whether the effect persists near foliage and fades with distance, and whether the result is large enough to clear the instrument’s noise floor. It is not a promise that every tray will create a measurable delta. For signs your houseplants need more humidity, use the dedicated symptom deep dive.
What a Pebble Tray Actually Changes (Measured)
A pebble tray is a small piece of the cluster that has historically been short on actual measurements. The cited extension sources are consistent that the effect is small and local, but they rarely publish a number. The data below comes from a LeafyPixels winter editorial check, not a controlled study, and is presented as a transparent example of one setup, not a universal claim.
Editorial Test Conditions
- Climate zone: USDA 6a (cold-winter, mid-Atlantic–style climate).
- Time period: January through March 2026.
- Room: 14 × 12 ft, forced-air heat running most days.
- Tray: 10-inch wide plastic saucer, 1.5-inch deep, 1-inch pea gravel layer, single fittonia in a 4-inch nursery pot.
- Sensor: One digital hygrometer moved between positions; control reading across the room at the same time.
- Refill cadence: Every 2 to 4 days during heating season; pebble tops never dry out fully.
Room vs. Leaf-Level Readings
Readings were taken at consistent times of day (morning and early evening) for ten days with the tray in place. The table below reports the daily average from each position.
| Position | Daily average RH | Delta vs. control |
|---|---|---|
| Control: opposite wall, mid-height | 21% | — |
| 12 inches above the tray (sensor suspended) | 22% | +1 point |
| 6 inches above the tray (sensor at lower foliage) | 25% | +4 points |
| 2 inches above the tray (sensor just above the stones) | 29% | +8 points |
The pattern is the answer the audit asks for. The tray is doing something, but the effect is strongest within a few inches of the water surface and falls off quickly with distance. At leaf level for the fittonia — the position the leaves actually experience — the change was about 4 percentage points. Across the room, the tray made no measurable difference. That matches the cited extension framing: pebble trays help in the vicinity of the plant, not throughout the whole room. (University of New Hampshire Extension) (Iowa State Extension)
Two caveats. First, the absolute numbers are one room in one winter. Warmer rooms with quieter airflow will read higher; rooms with strong HVAC will read lower. Second, the cluster of small-leaved tropicals grouped on the same tray read a touch higher than the single fittonia, consistent with the extension guidance that grouping plants strengthens the local effect. (Iowa State Extension)
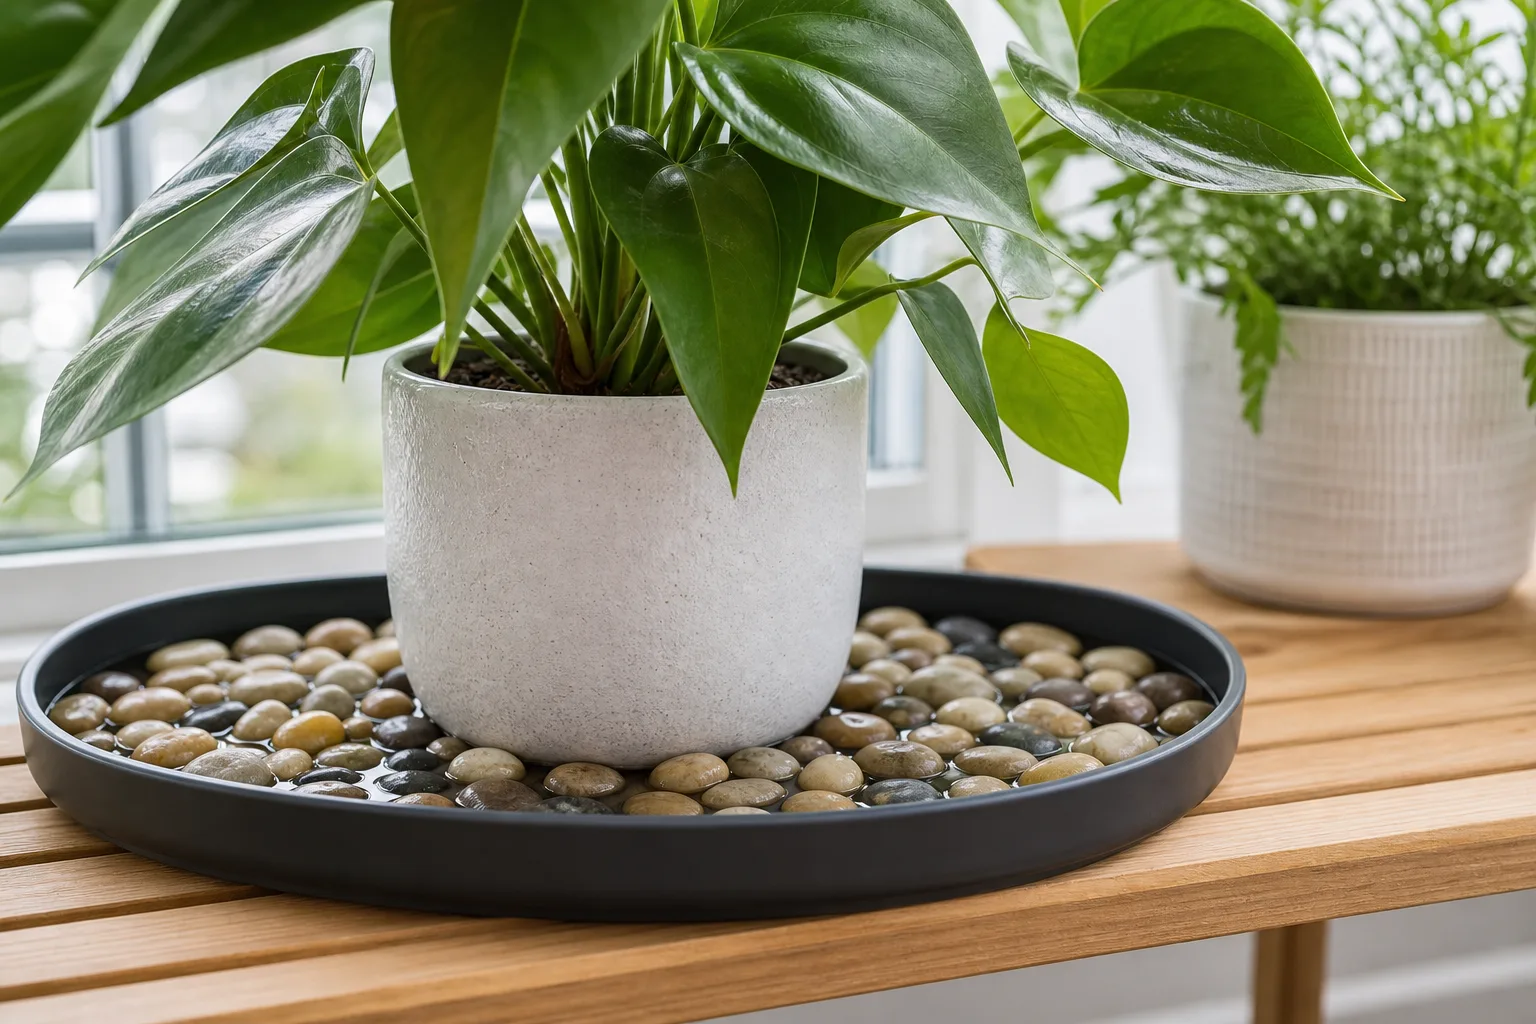
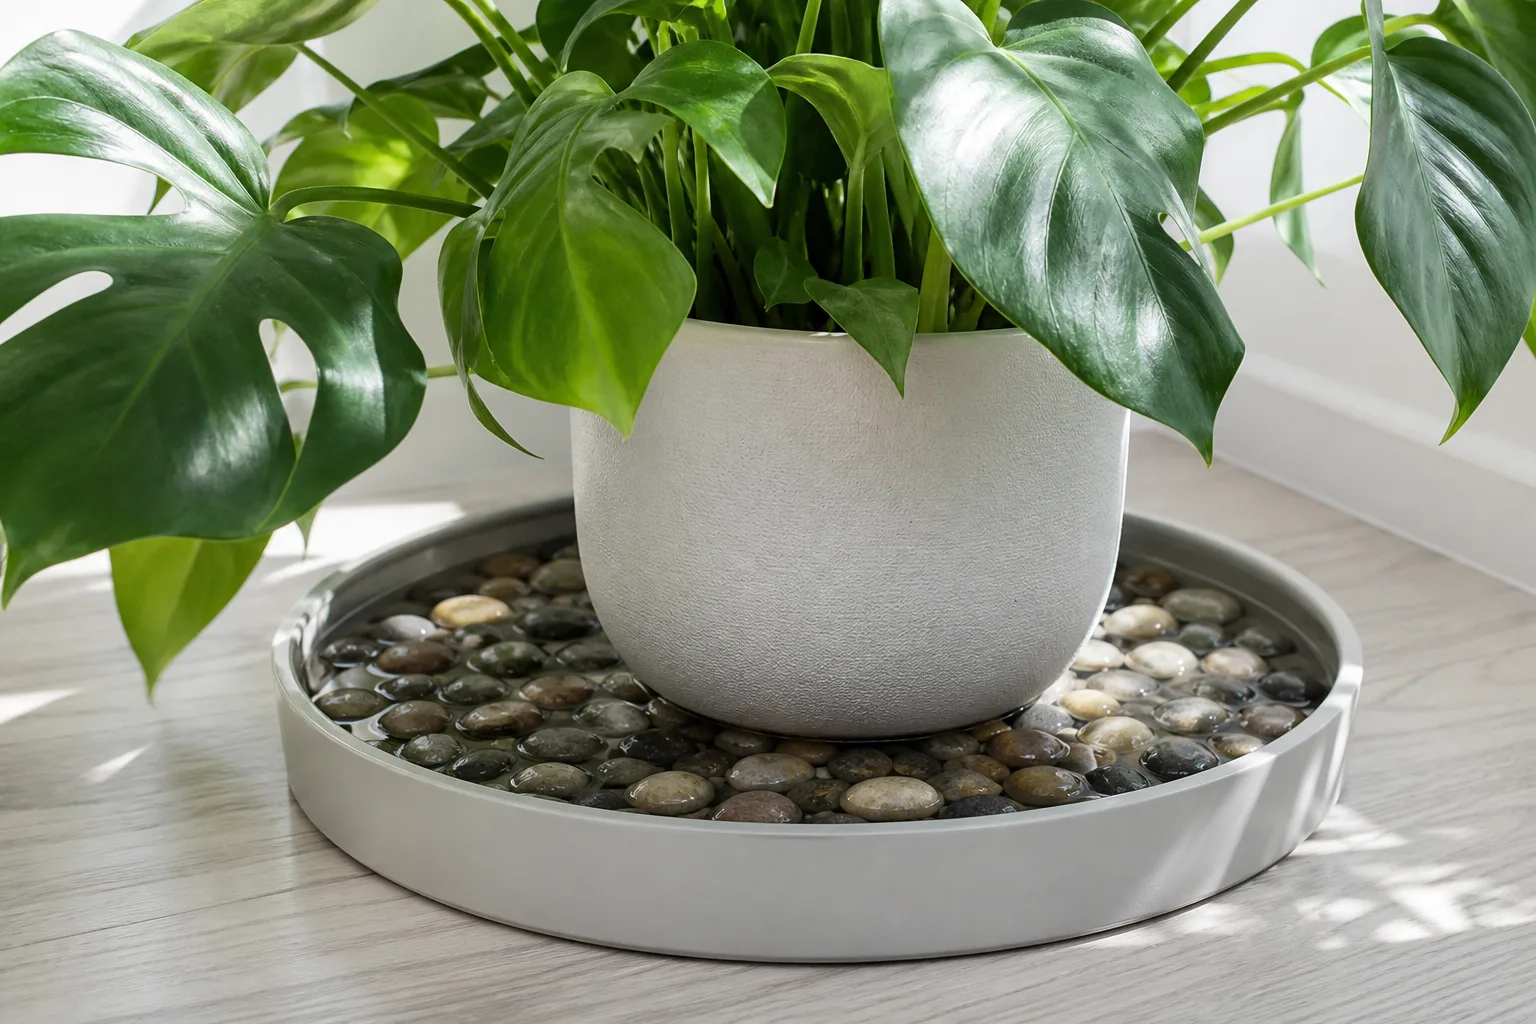
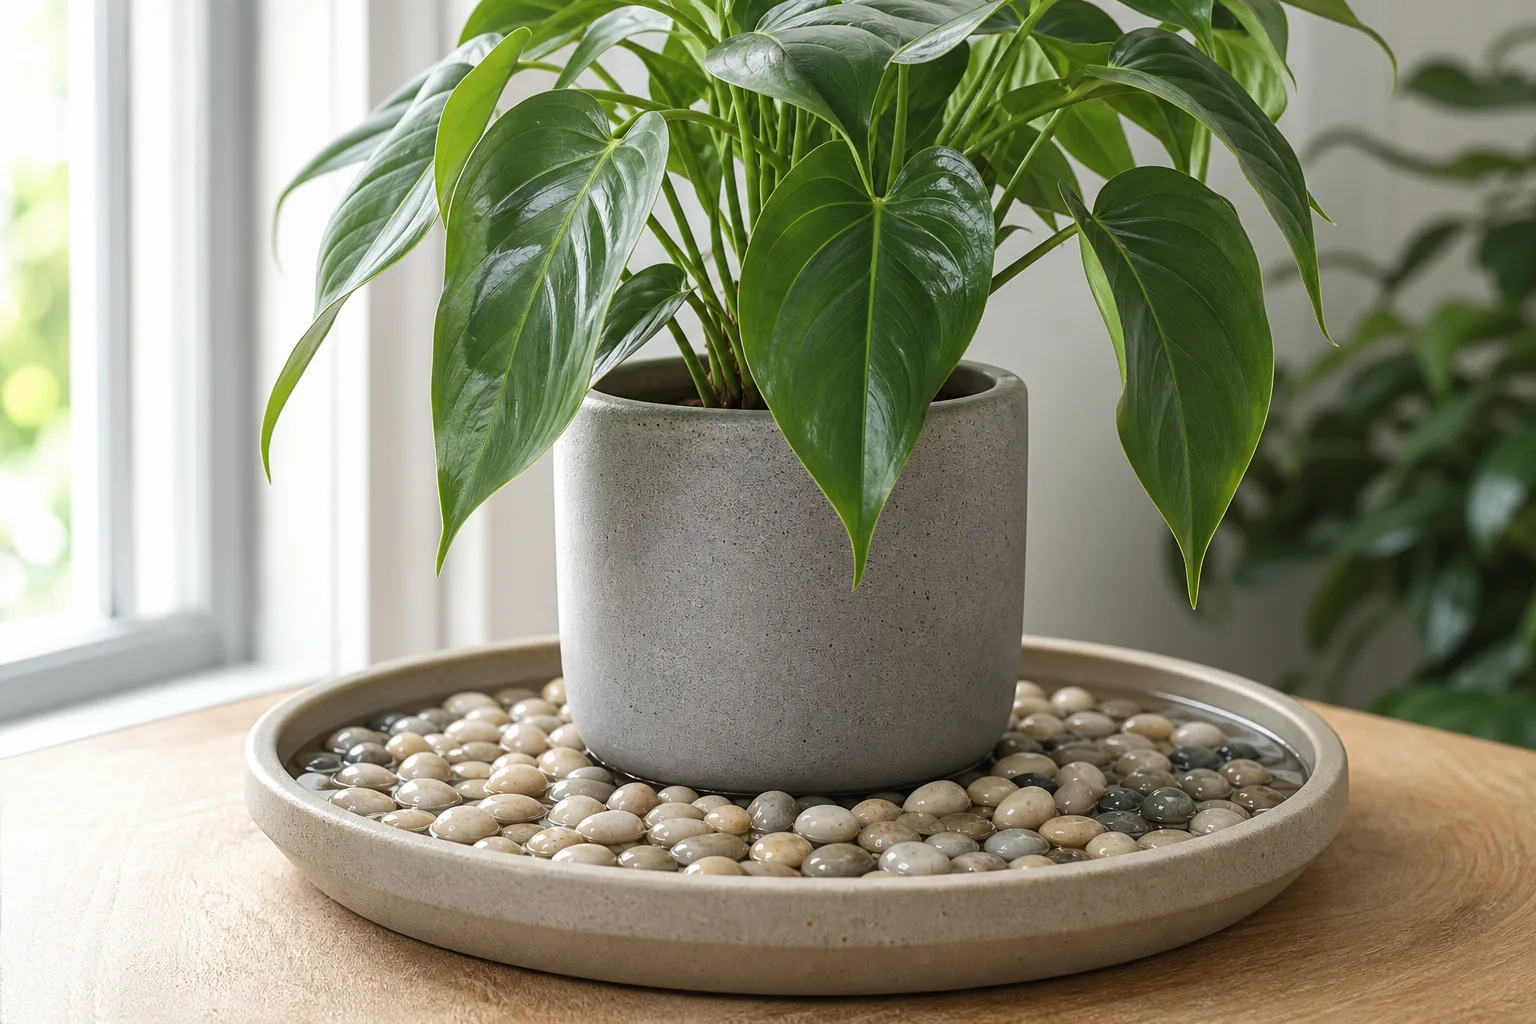
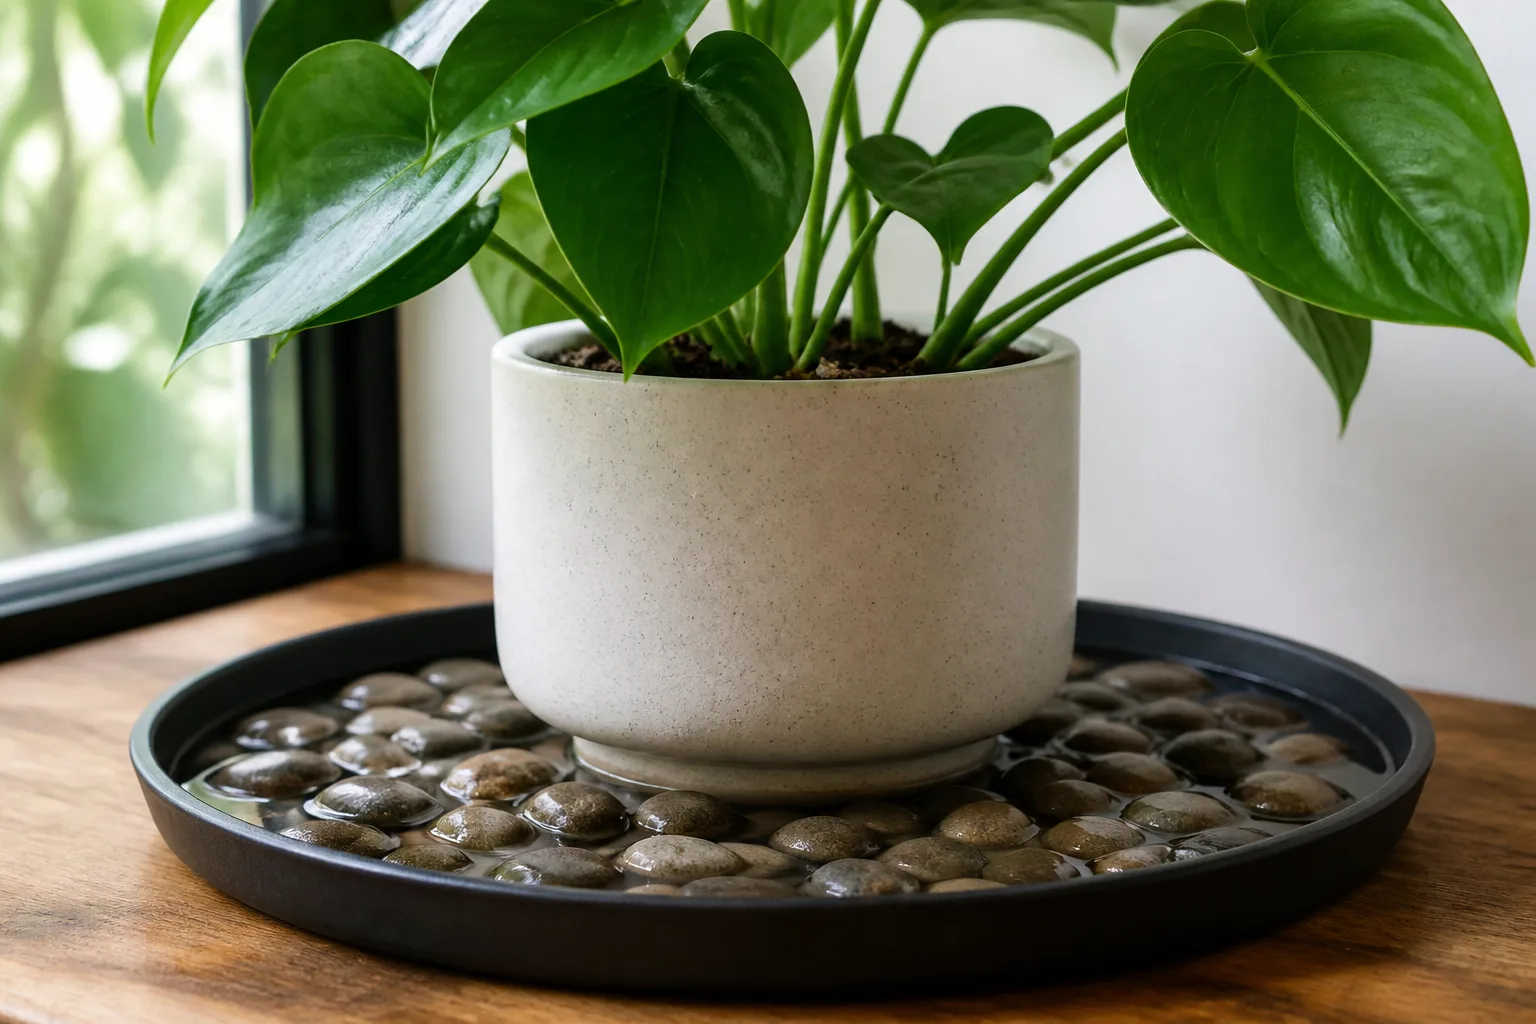
What a Pebble Tray Is
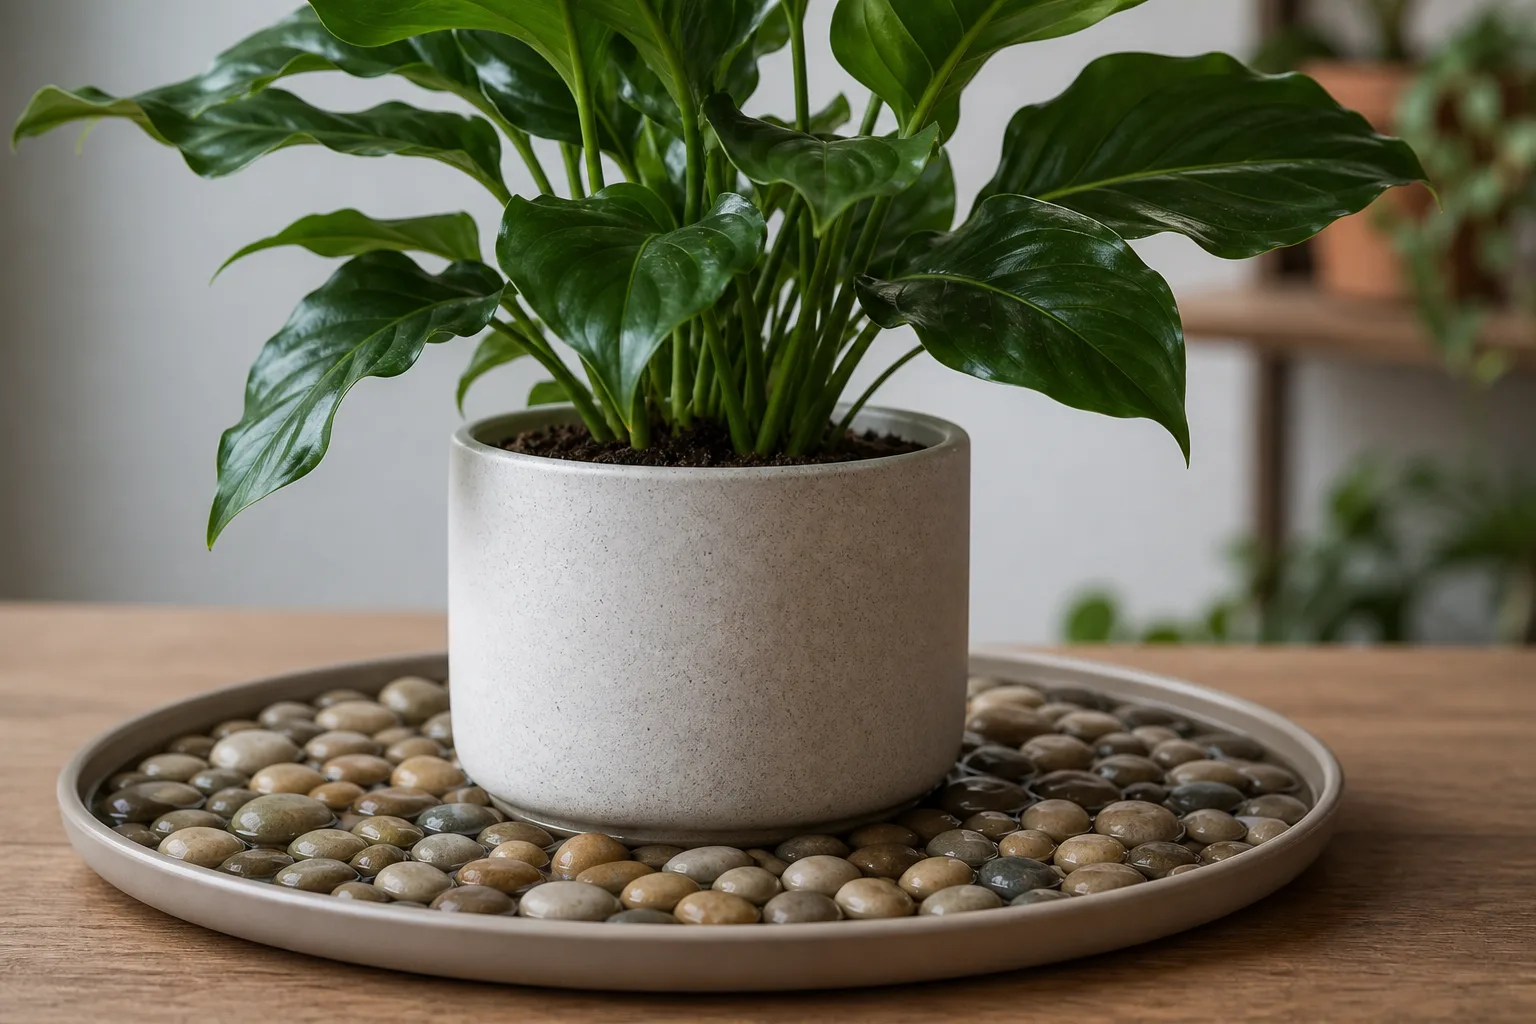
A pebble tray is a shallow waterproof tray filled with pebbles and a thin layer of water, with the plant pot resting on the stones and the drainage holes above the waterline. (Missouri Botanical Garden) The full setup walkthrough — including sourcing, style, and pricing — lives in the DIY pebble tray guide. The decision rules for when to use one at all live in do pebble trays really increase humidity? and the answer to “what is a pebble tray, exactly?” lives in what is a pebble tray. This hub keeps the description brief so the math and the measurement logic stay central.
How It Works (Briefly)
Water between the pebbles evaporates into the air immediately around the pot. The evaporation rate depends on tray surface area, water temperature, room temperature, and airflow. Wider is more useful than deeper once the pot is safely elevated. University of Maryland Extension lists water-filled pebble trays as one of several ways to raise humidity around indoor plants, and University of New Hampshire Extension calls the benefit small but real. (University of Maryland Extension) (University of New Hampshire Extension)
Iowa State Extension is direct that pots on a pebble tray should not sit directly in the water; the support layer must keep drainage holes above the reservoir. (Iowa State Extension) That single rule is what separates a humidity tray from a self-watering root-rot trap.
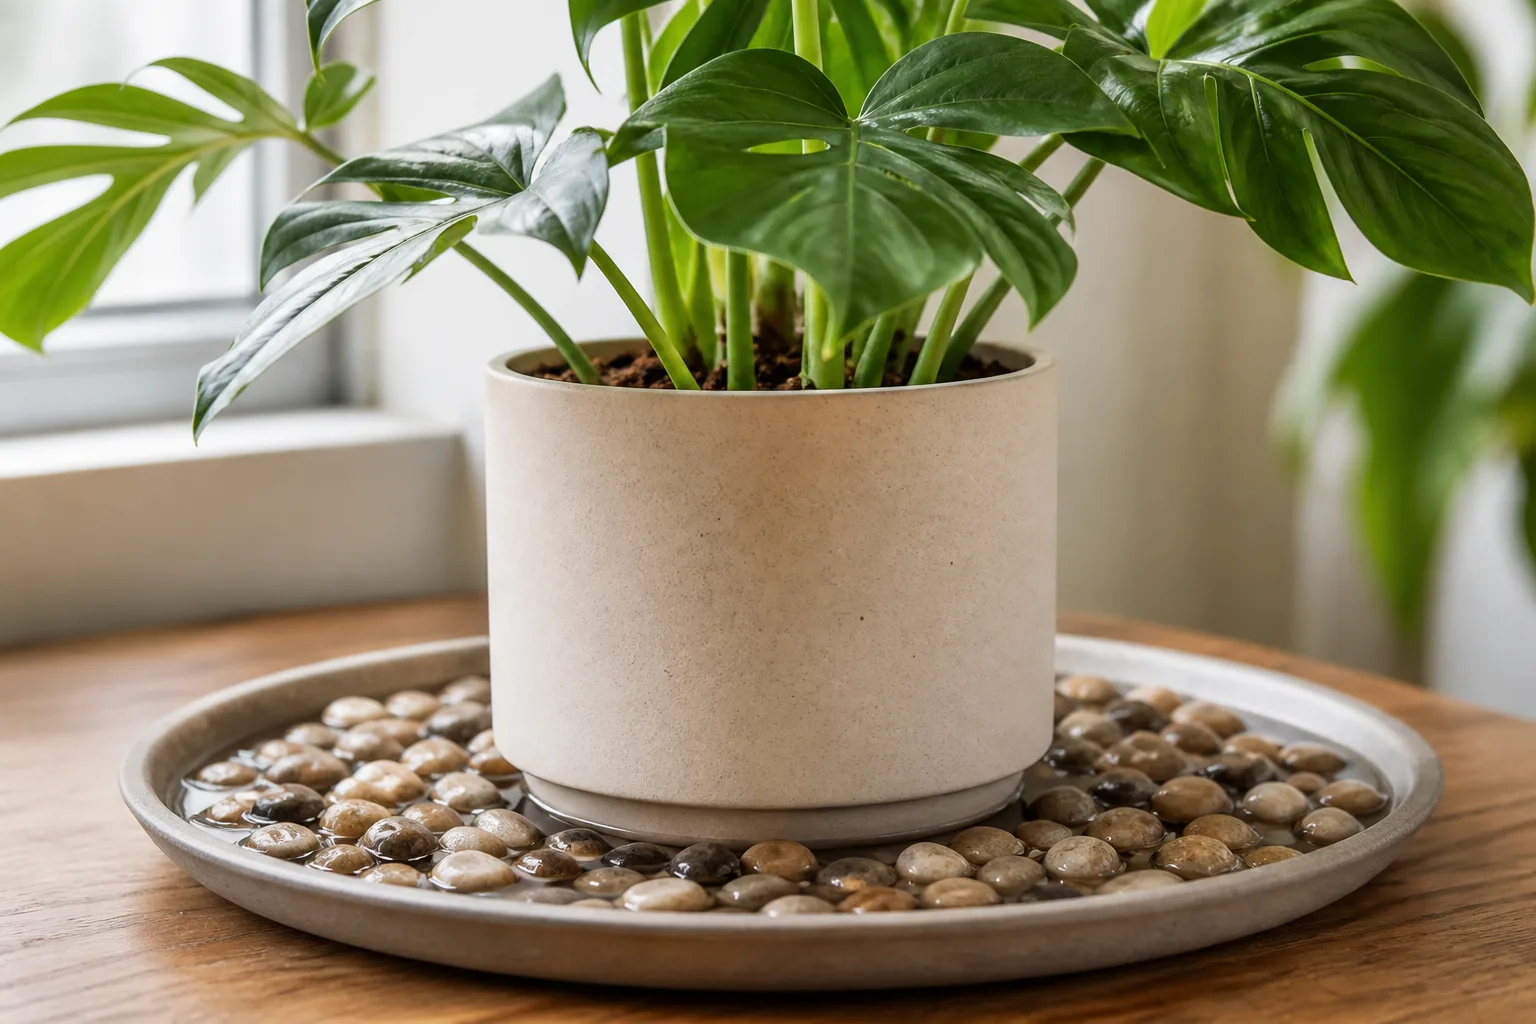
How to Set Up a Pebble Tray Safely
Setup is short. The risk is in skipping the clearance check or letting the pot settle into the water. The full step-by-step is in the how to set up a pebble tray guide; this section gives the editorial materials table and the core checklist so the primer stays a primer.
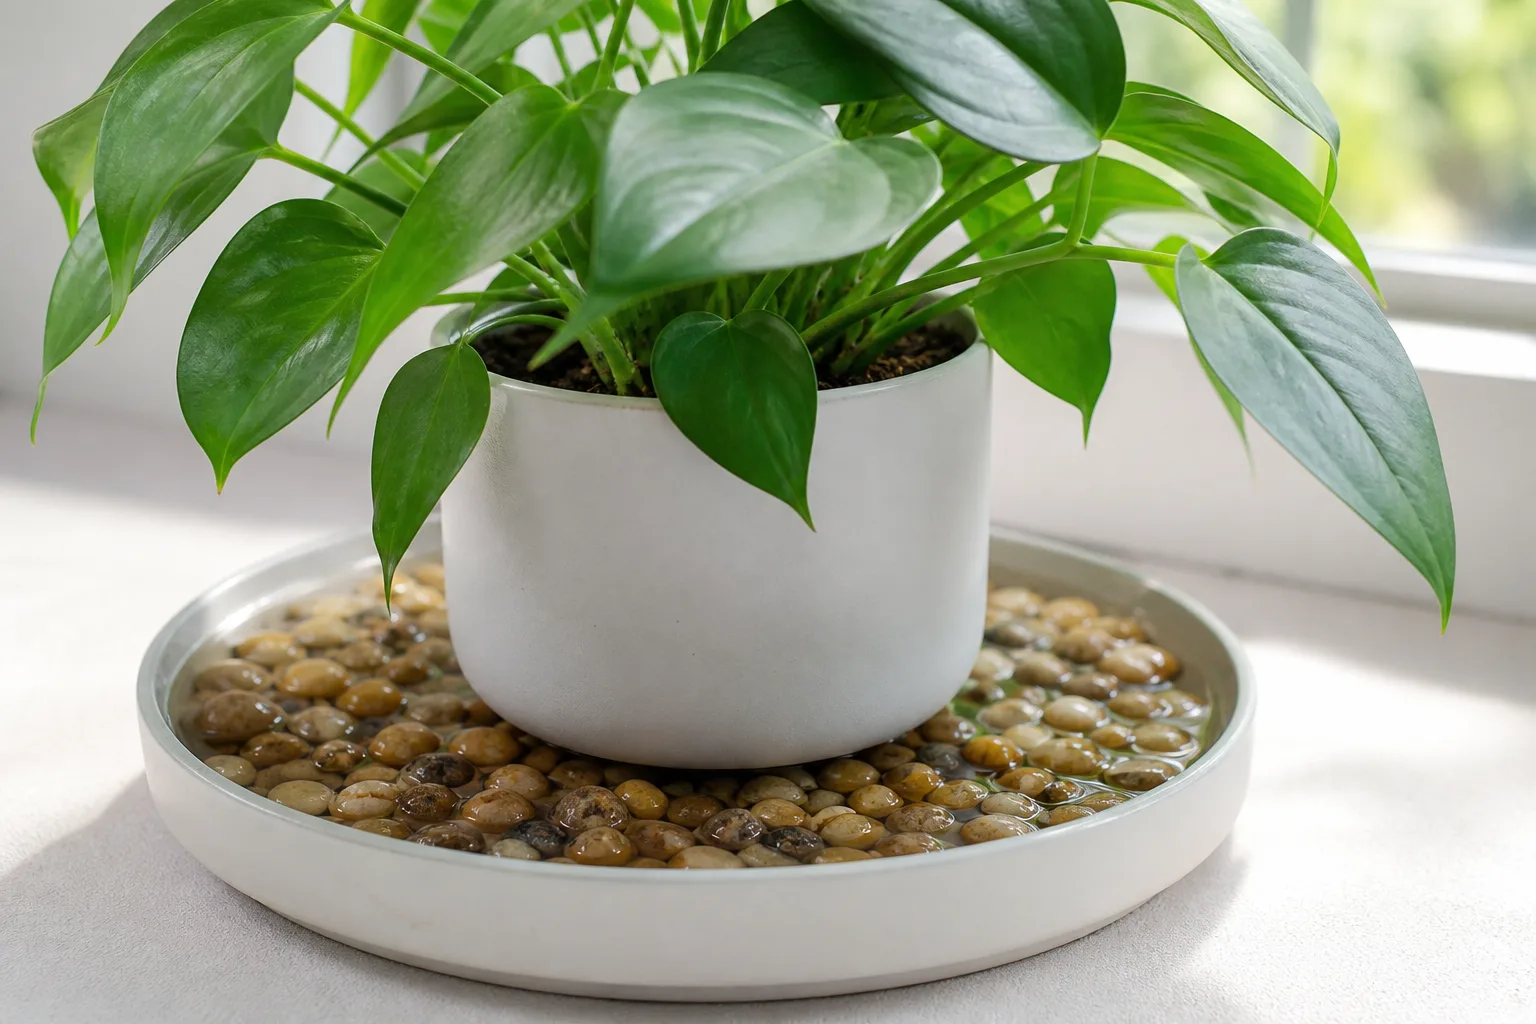
Materials and Specs
| Item | Practical specification | Why it matters |
|---|---|---|
| Tray | Watertight, rigid, 1 to 2 inches deep | Holds a shallow reservoir, lifts without flexing |
| Tray width | Extend about 2 to 3 inches beyond the pot on each side | Creates exposed evaporation area around the pot |
| Pebbles | Washed, stable, 0.5 to 1 inch | Supports the pot and simplifies cleaning |
| Water line | Below pebble tops and below the pot base | Prevents the pot from wicking reservoir water |
| Hygrometer | At lower-leaf height, not on wet stones or in direct sun | Measures the microclimate the foliage experiences |
| Furniture barrier | Waterproof mat or sealed tray exterior | Prevents rings, leaks, and condensation damage |
These are editorial build specifications, not universal horticultural thresholds. Nebraska Extension recommends a tray a few inches wider than the container, and a UNH Extension description allows a deeper two- to three-inch tray; either can work when the pot stays dry and the setup is stable. (Nebraska Extension) (University of New Hampshire Extension)
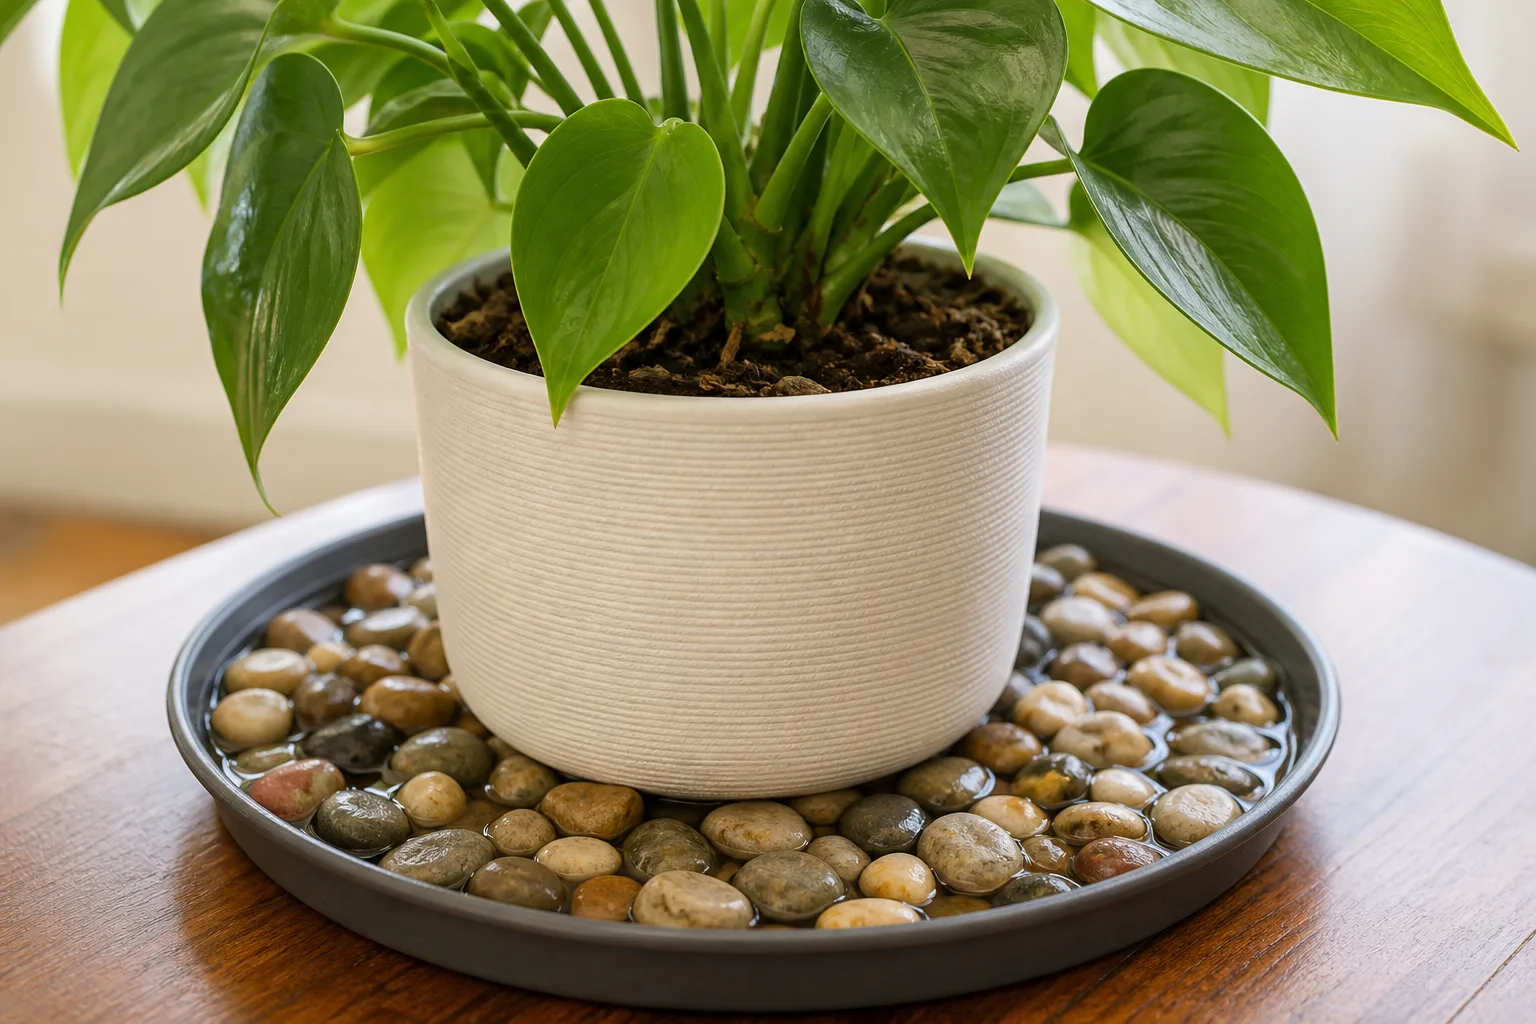
Step-by-Step Setup
- Wash the tray and stones. Remove dust and residue before the setup goes near drainage water.
- Spread an even stone layer. Test the empty pot for stability before adding water.
- Add water below the stone tops. The final water line must remain below the pot base. (Illinois Extension)
- Set the pot on the stones. Confirm that no drainage hole sits in standing water. (Iowa State Extension)
- Place the hygrometer near lower foliage. Record a baseline and compare like with like.
- Watch the plant and the room. Judge new growth, soil dry-down, and repeated RH readings — not one dramatic number.
For a photo-led tutorial, more container options, and refill math by tray size, use the dedicated DIY pebble tray guide.
Cleaning and Refill Cadence
Refill when evaporation exposes the tray floor, but never raise the water until it touches the pot. Empty and rinse the tray when you see sediment, algae, mineral crust, or smell stale water. Penn State Extension advises allowing the top 1 to 2 inches of soil to dry between waterings to reduce fungus gnat egg-laying, and the same hygiene rule applies to a dirty reservoir. (Penn State Extension)
A simple two-tier routine works for most homes:
- Weekly reset (about 2 minutes): empty stale water, pick out fallen leaves, quick-rinse if film is forming, confirm the pot still sits above the waterline.
- Monthly deep clean (about 10 to 15 minutes): remove the pot, dump pebbles into a colander, scrub the stones and tray, rinse, reassemble with fresh water.
Mineral crust from hard water is the most common reason a clean pebble tray starts to look ugly. Diluted white vinegar (one part vinegar to three parts warm water) soaks the residue off, followed by a thorough rinse. Skip bleach unless a specific extension protocol calls for it.
Common Mistakes With Pebble Trays
The most damaging mistake is letting the pot sit in water. A pebble tray should evaporate around the plant; it should not become a self-watering reservoir. If the pot base touches water, correct the stone height or lower the fill line immediately.
The most common expectation mistake is using a narrow saucer under a tall plant. Little water is exposed, and the leaves sit far from it. The measurement mistake is placing the hygrometer directly over wet stones, recording one high number, and claiming the whole room changed. The diagnosis mistake is adding humidity while ignoring soggy soil, a vent, or mineral buildup.
Misting is not a stronger substitute for the same goal. Iowa State notes that any RH increase from misting lasts only a few minutes, and University of Minnesota Extension says misting ferns is not very effective. (Iowa State Extension) (University of Minnesota Extension) A tray avoids routinely wetting foliage, but neither method matches a humidifier when the entire room is severely dry.
When a Humidifier Is the Better Tool
Choose a humidifier when the room remains far below the target, several sensitive plants need help, the canopy is too high above a tray, or the repeated test shows no meaningful leaf-level change. University of New Hampshire Extension identifies a portable humidifier near plants, paired with a digital thermometer and hygrometer, as the option providing the most benefit in dry winter conditions. (University of New Hampshire Extension)
Keep the home-health guardrail in view. The EPA recommends keeping indoor RH below 60%, ideally 30% to 50%, to reduce condensation and mold risk. (US EPA) For sizing, maintenance, and a side-by-side decision table, see pebble tray vs humidifier rather than duplicating the full comparison here.
| Situation | Better starting tool |
|---|---|
| One compact plant, room only slightly below target | Broad pebble tray plus measurement |
| Several tropicals in a dry heated room | Humidifier plus hygrometer |
| Tiny humidity-loving plant needing stable high RH | Ventilated enclosure or terrarium |
| Room already near 40% to 50% and symptoms persist | Diagnose roots, water, salts, light, and vents |
Related Guides
The pebble-tray cluster is dense by design, so each guide has a clear lane. Use this hub for the math and the diagnostic logic; use the deep links below for setup, alternatives, and styling.
- DIY pebble tray — the build hub with materials, sizing, and a measured example.
- How to set up a pebble tray — step-by-step setup, refill math, and maintenance.
- Pebble tray vs humidifier — the alternatives debate with sizing and a decision table.
- Can pebble trays prevent crispy leaves? — five-cause triage before you add a tray.
- Houseplant humidity guide — target ranges, seasonal changes, and a broader fix decision tree.
- Pebble tray FAQs — short answers to water level, refills, LECA, mold, and pest questions.
- Do pebble trays really increase humidity? — the investigative sibling.
- Calathea care: light, water, soil, humidity — species deep dive for a high-humidity classic.
- Monstera humidity needs — species deep dive for an adaptable tropical.
- How to water indoor plants the right way — the better starting point when the root zone stays wet or swings too dry.
Conclusion
Indoor humidity deserves measurement, not mythology. A pebble tray can create a small local humidity increase when the tray is broad, the plant is compact, the leaves stay close to the evaporation surface, and airflow is low. The LeafyPixels winter test recorded about 4 percentage points at leaf level (from 21% to 25%) and about 8 points within a few inches of the water (from 21% to 29%) — a useful but local effect, not a room-wide change. It cannot reliably correct a severely dry room or replace diagnosis when watering, roots, salts, light, or vents are the real problem.
Measure RH at leaf height and across the room, keep the pot above the water, and compare repeated readings under similar conditions. If the local difference is useful and new growth improves, keep the tray clean and continue. If the result is negligible or several plants need a larger change, move to a hygrometer-controlled humidifier while keeping indoor RH within the EPA’s safe home limits.