How to Set Up a Pebble Tray the Right Way
Set up a pebble tray correctly: wide shallow tray, 1–2 in. pebbles, water below the pot base, plus placement and maintenance tips.
Quick Answer: The Three Setup Rules
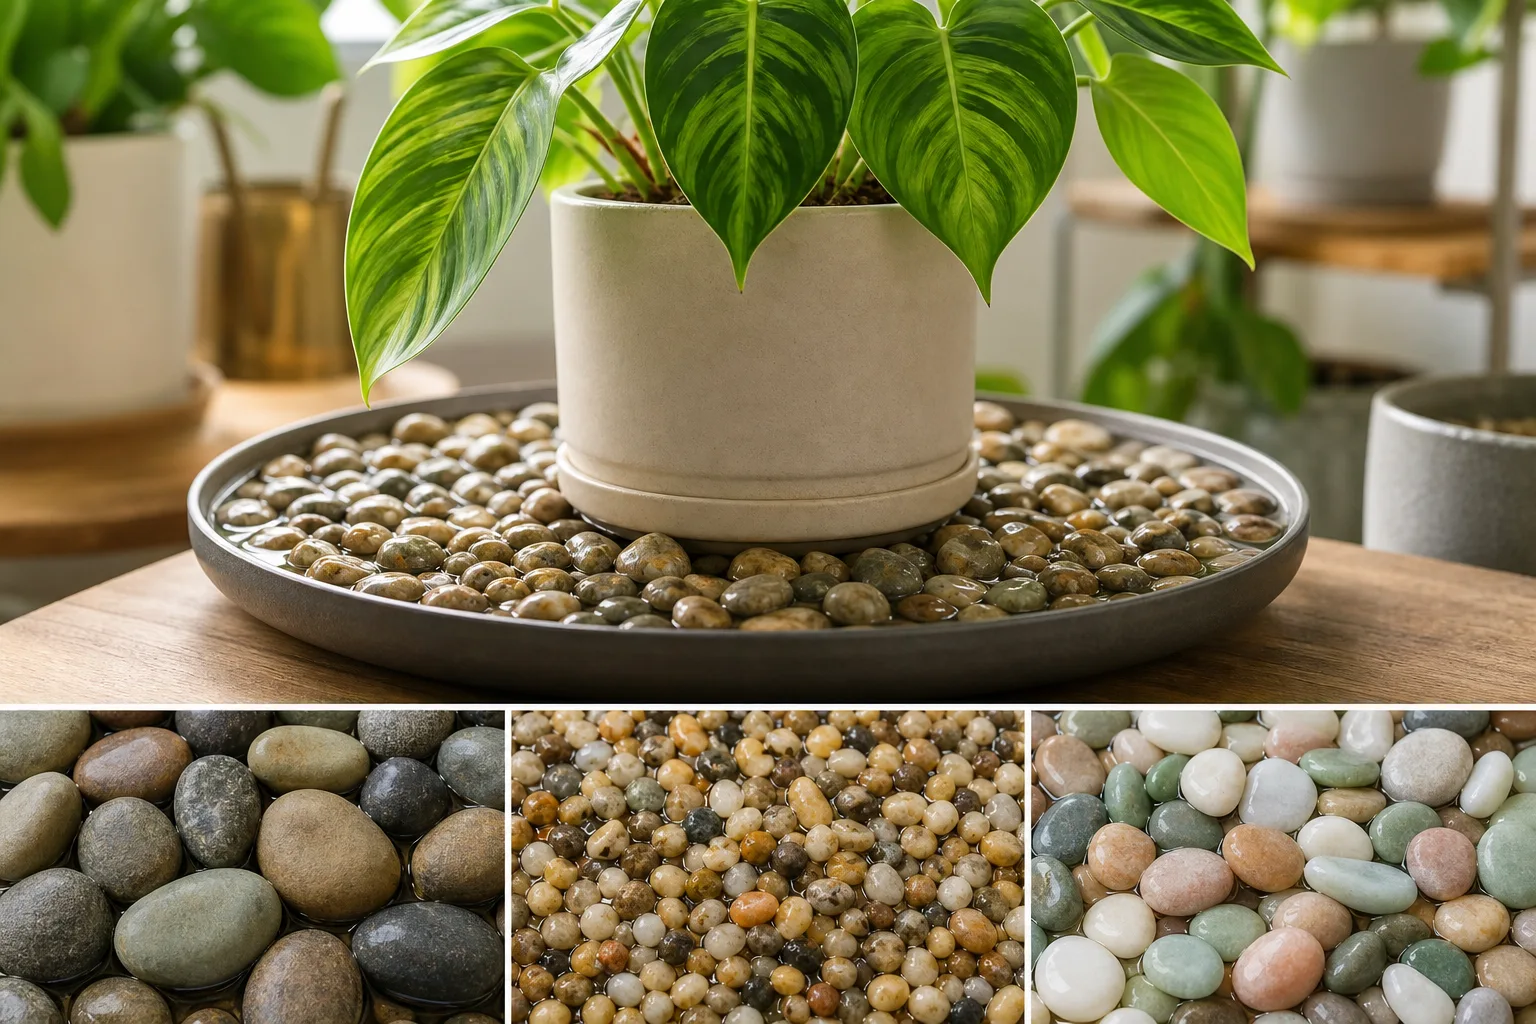
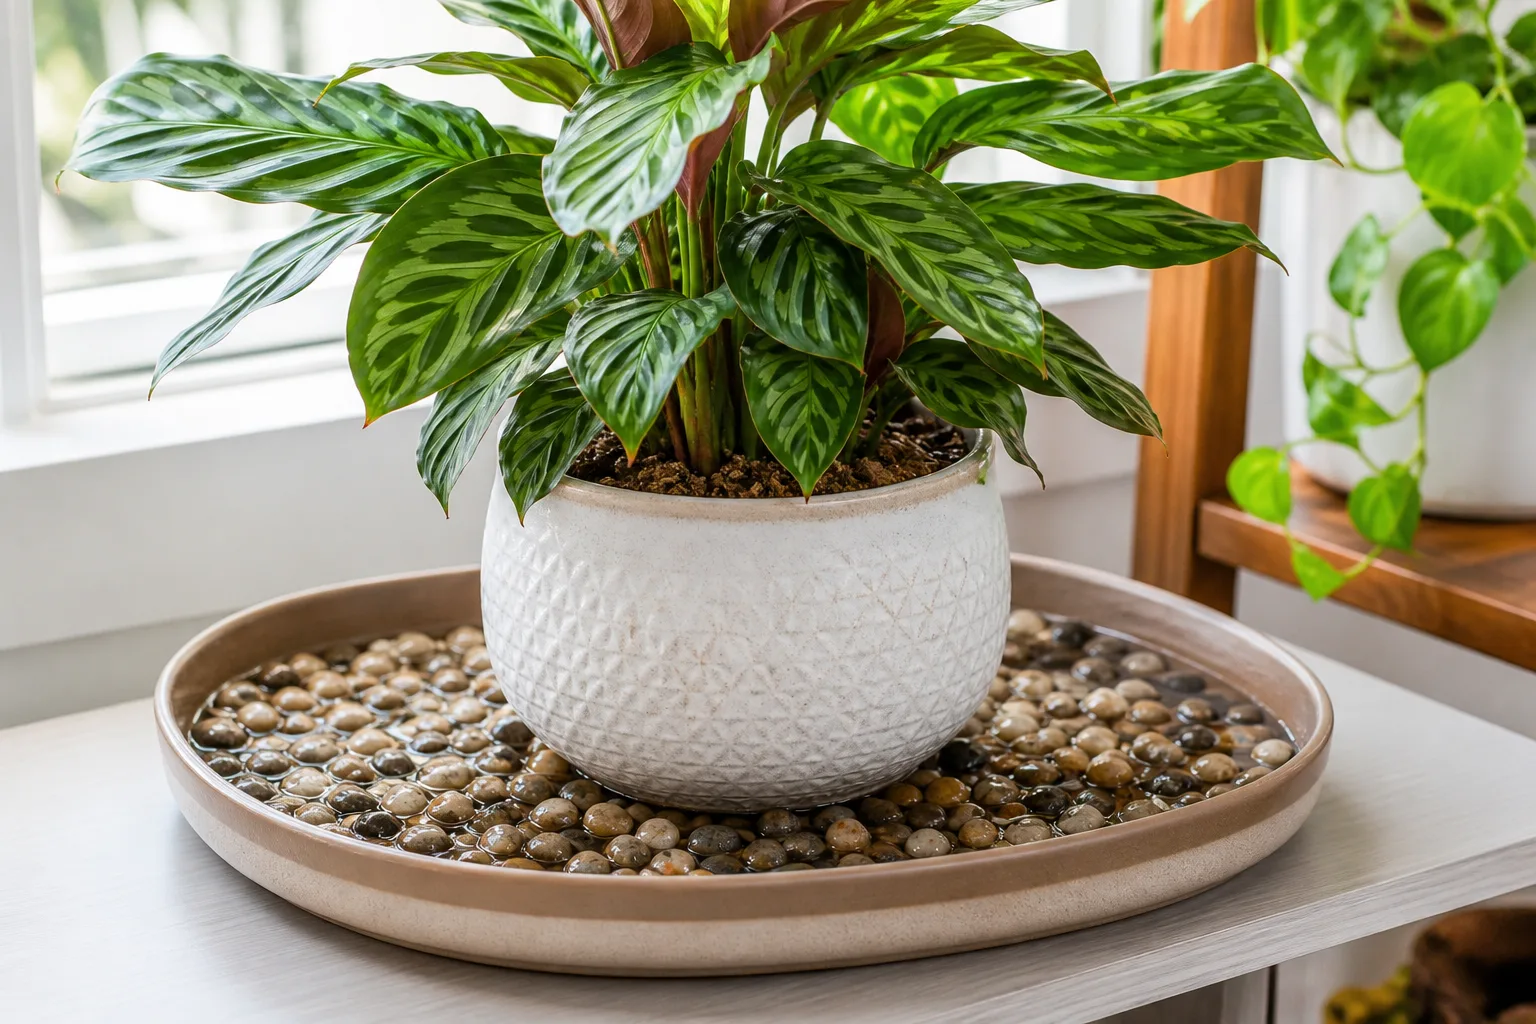
The correct pebble tray setup comes down to three rules: use a wide, shallow, waterproof tray; add 1 to 2 inches of clean pebbles so the pot sits above the water; and fill with water until the level stays below the top of the pebbles and below the base of the pot. Illinois Extension and Oklahoma State Extension both describe the same geometry-stones lift the container while water evaporates from the exposed surface, and the pot must never sit in standing water or wick moisture up through drainage holes. (Illinois Extension) (Oklahoma State Extension)
If you are new to the method, read what a pebble tray is for the basic definition and evaporation mechanics. This guide covers build steps only-tray size, pebble depth, water level, placement, and maintenance. For measured humidity gains, see do pebble trays really increase humidity; for room-level context, see indoor humidity and pebble trays.
What You Need Before You Build
You do not need specialty gear. You need the right tray geometry, inert stones, and clean water. Optional but useful: a digital hygrometer placed at leaf height so you can log whether the finished setup moves the needle in your room.
Materials Shopping List
| Item | What to buy | Notes |
|---|---|---|
| Tray or saucer | Shallow, watertight dish 2 to 3 inches deep | Plastic, glazed ceramic, or metal; must not leak |
| Pebbles or gravel | Washed river stones, pea gravel, or LECA | See best pebbles for a DIY pebble tray for material choice |
| Water | Tap or filtered, room temperature | Hard water leaves mineral crust faster-rinse tray more often if yours is crusty |
| Optional hygrometer | Digital RH + temperature meter | Place at pot rim / leaf height, not on the floor |
Pebble volume estimates (enough for a 1 to 2 inch layer after settling):
| Tray inside diameter | Approximate pebble volume |
|---|---|
| 8 to 10 inches | 1 to 2 cups |
| 10 to 12 inches | 2 to 4 cups |
| 14 inches or wider | 4 to 6 cups |
Nebraska Extension recommends a tray one to two inches deep and two to three inches wider than the pot on each side so more water surface can evaporate. (Nebraska Extension)
Tray Sizing by Pot Diameter
Width matters more than depth. A tiny saucer under a large pot exposes almost no water surface and wobbles under weight.
| Nursery pot diameter | Minimum tray inside width | Pebble layer target |
|---|---|---|
| 4 inches | 8 to 10 inches | 1 to 1.5 inches |
| 6 inches | 10 to 12 inches | 1.5 to 2 inches |
| 8 inches | 12 to 14 inches | 1.5 to 2 inches |
| 10 inches or larger | 14 to 16+ inches | 2 inches (check stability) |
Heavy ceramic cachepots: A shallow tray under a top-heavy pot can tip. Use a wider tray for stability, or place the cachepot inside a slightly larger outer tray so weight sits centered on the stones-not on a narrow rim.
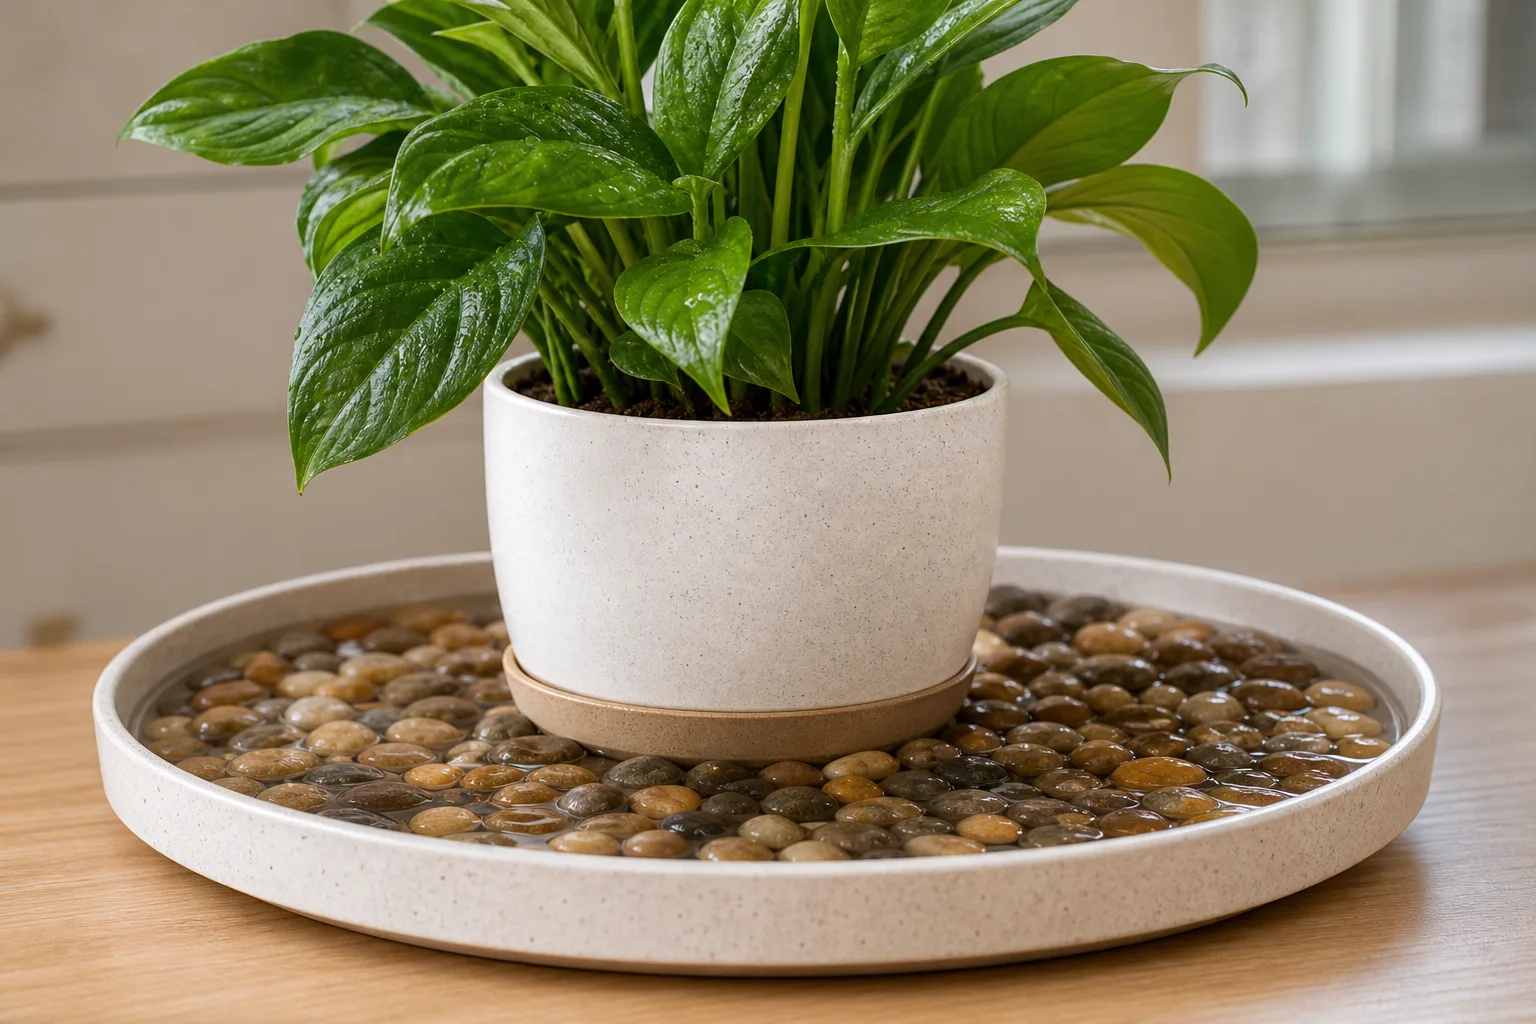
Step-by-Step: Build Your Pebble Tray
Work on a sink or towel. Total time: about 10 minutes for a first tray, less once you know your pot size.
Step 1 - Wash the Tray and Stones
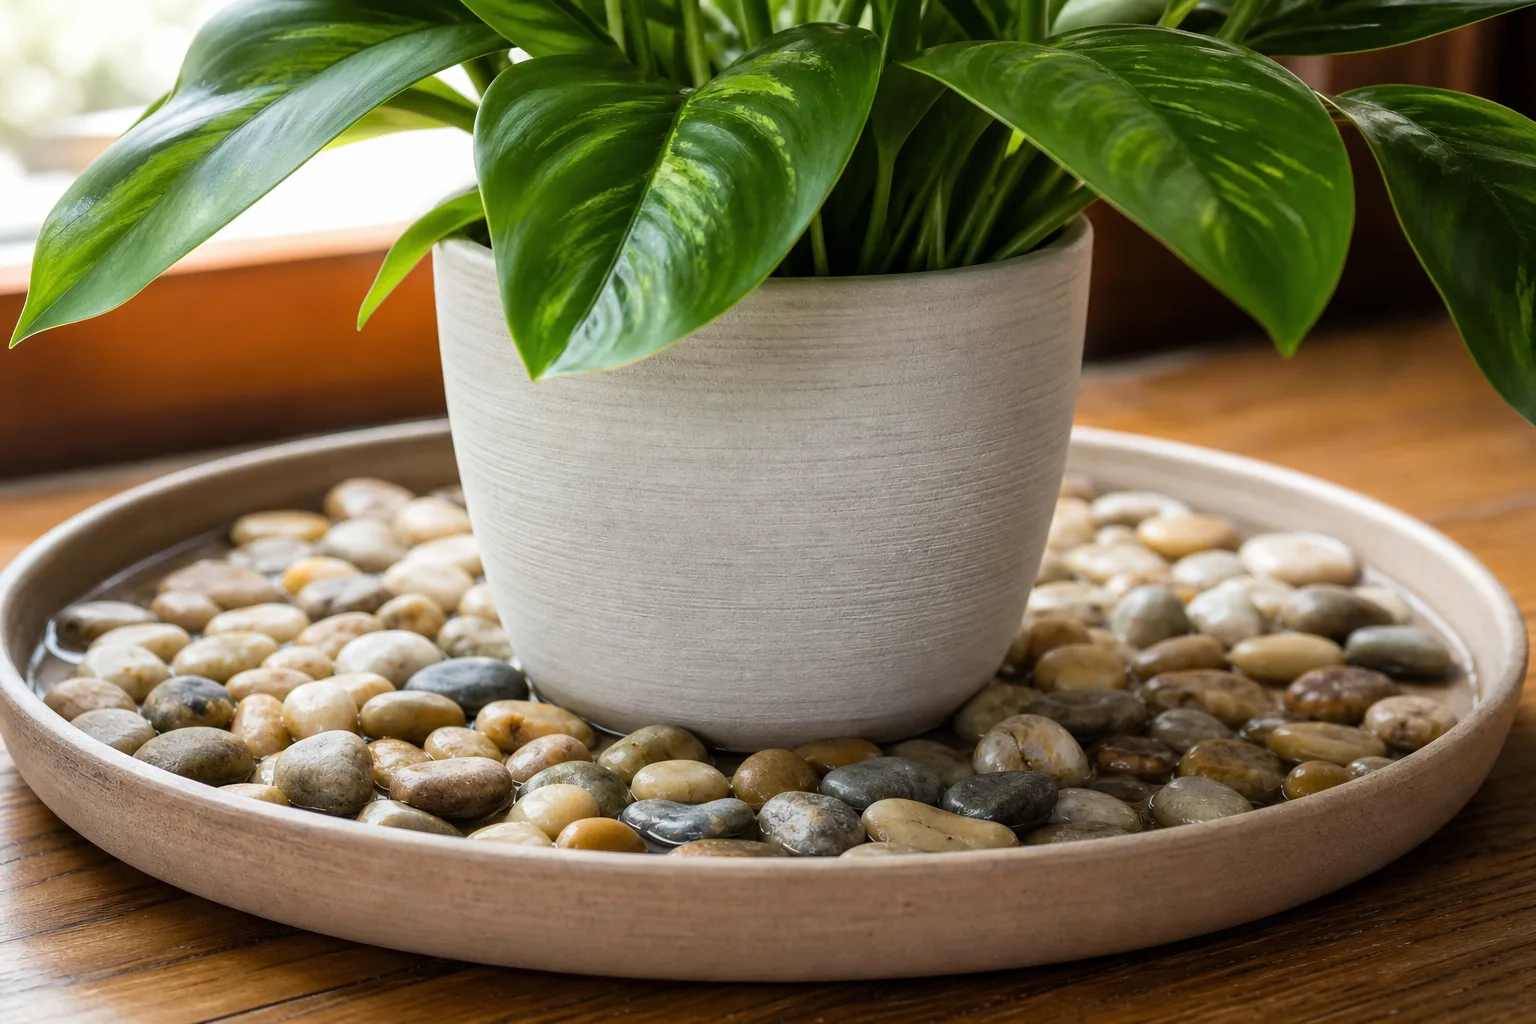
Rinse the tray and pebbles to remove dust, algae film, and bag residue. Dirty stones cloud the water within days and smell stale faster. You are building a small evaporator, not a decorative pond-clean materials evaporate cleanly.
Step 2 - Layer Pebbles to the Right Depth
Spread an even layer 1 to 2 inches deep, depending on tray depth and pot size. The layer must be deep enough that the empty pot sits fully stable with its base clearly above where the water line will sit. Shallow trays with tall nursery pots may need the full 2 inches; wide trays under small pots can use closer to 1 inch if the side-view check still clears the water.
Step 3 - Add Water Below the Pot Base
Pour water slowly until it reaches just below the top of the pebbles. Missouri Botanical Garden’s houseplant factsheet describes filling to just below the pebble surface-the same rule Illinois Extension states as “do not allow water to touch the bottom of the pot.” (Missouri Botanical Garden) (Illinois Extension)
You want enough exposed water to evaporate, not so much that the pot base or drainage holes will touch it once the plant is set on top.
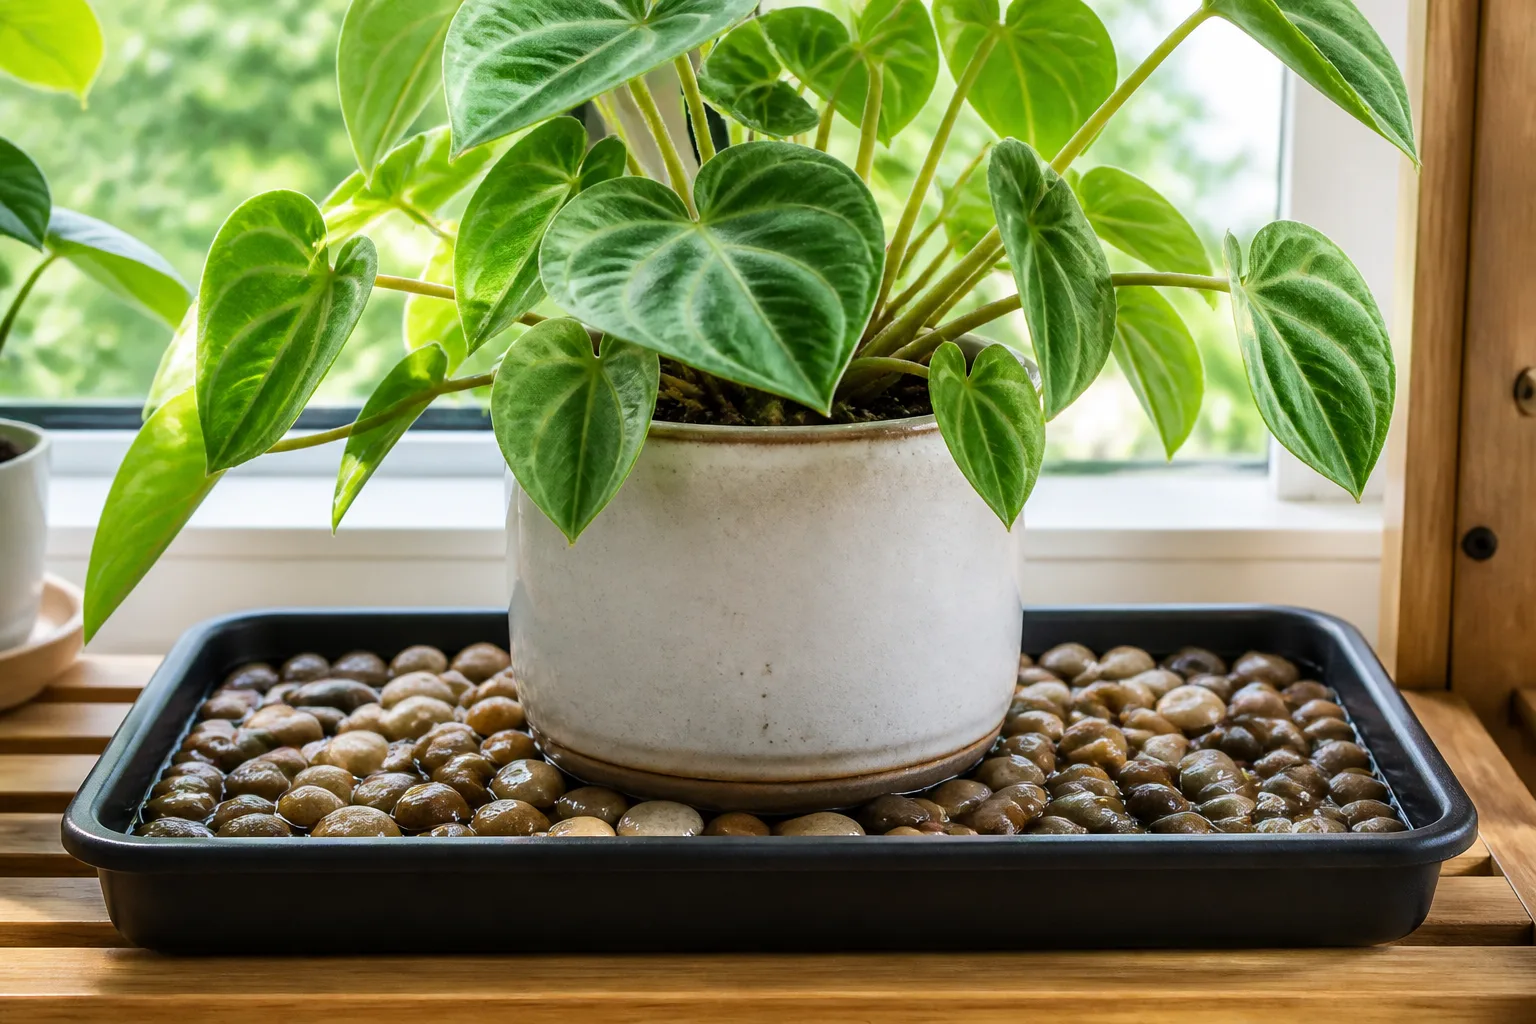
Step 4 - Set the Pot and Run the Side-View Check
Place the potted plant on the stones. Crouch to pot level and look from the side: drainage holes and pot base must sit above the waterline. If anything touches water, pour some out or add pebbles until the gap is clear. This 10-second check prevents the most common setup failure-accidental bottom watering that keeps roots too wet.
Numbered setup checklist:
- Choose a wide, shallow, waterproof tray sized from the table above.
- Wash tray and pebbles; spread a 1 to 2 inch even layer.
- Add water until it sits below the pebble tops.
- Set the pot on the stones and confirm the base is not in water (side-view check).
- Place the tray where the plant already gets correct light; refill and rinse on schedule.
Step 5 - Place the Tray in Your Plant Zone
Do not move a plant into poor light just to sit it on a tray. Put the finished setup where the plant already thrives, then optimize humidity placement (next section). If you also want a compact DIY variant for shelves, see DIY pebble tray-the water-level rules are identical; only the container shape changes.
How the Setup Should Look (Cross-Section)
Picture a side cut through the tray:
- Bottom: waterproof tray floor
- Lower third: water filling gaps between stones, surface below pebble tops
- Middle: pebble layer 1 to 2 inches deep, creating air gaps for evaporation
- Top: pot base and drainage holes fully above the water, resting on stone peaks-not submerged
Evaporation happens from the exposed water surface between pebbles, not from the pot. When the geometry is wrong-pot in water, tray too shallow, or water above stone tops-the setup stops being a humidity tool and becomes a root-health risk.
Optional hygrometer check: After setup, place a digital hygrometer at leaf height beside the pot (not inside the foliage). Log the room reading for two to three days with an empty tray, then with water filled to the correct level. University of New Hampshire Extension recommends measuring humidity when evaluating any humidity strategy; a small bump near the pot confirms the build works in your room, while no change tells you to escalate-see the humidifier note below. (University of New Hampshire Extension)
Where to Place the Tray
Light, Drafts, and Heat Vents
Keep the tray where the plant already belongs for light and temperature. Avoid direct blasts from heat vents, radiators, and strong fans-moving air strips away the small humid pocket the tray creates. Oklahoma State Extension notes that dry heated air and drafts stress houseplants in winter; a tray beside a vent evaporates fast without helping foliage. (Oklahoma State Extension)
Grouping Plants for a Local Humidity Pocket
A pebble tray works best as part of a plant zone, not an isolated saucer in a large open room. Iowa State Extension and Maryland Extension both suggest grouping houseplants so combined transpiration raises local humidity slightly. Three small tropicals on a shelf with trays within the cluster usually outperform one tray in the middle of an empty floor. (Iowa State Extension) (University of Maryland Extension)
Which species actually benefit from this setup is a separate question-see pebble trays for plants rather than repeating a full plant catalog here.
Maintenance and Refill Cadence
A pebble tray is low maintenance, not zero maintenance.
Refill: Top up when the water level drops noticeably-typically every 3 to 5 days in dry, heated indoor air, less often in moderate humidity. Do not endlessly top off stale water; dump, rinse, and refill every one to two weeks, or sooner if you see algae, cloudiness, or mineral crust. Better Homes & Gardens notes refill speed depends on tray size and how warm and dry the home is. (Better Homes & Gardens)
Clean: Rinse pebbles and wash the tray during each full water change. Maryland Extension links persistent moisture and poor airflow with algae and fungal growth on nearby soil surfaces-hygiene keeps the tray from becoming a slimy reservoir. (University of Maryland Extension)
Re-check geometry: After refills, repeat the side-view check monthly. Pebbles shift, pots get rotated, and water levels creep up until a drainage hole skims the surface.
Common Setup Mistakes
Pot sitting in water. The fastest way to turn a humidity tray into a root problem. If the base touches standing water, pour some out or raise the pebble layer.
Tray too small or too deep. Narrow saucers expose little water surface and tip under heavy pots. Deep buckets bury evaporation; you want shallow and wide.
Wrong plant for the method. Succulents and cacti usually prefer drier air-skip the tray unless you have a specific reason.
Expecting room-wide humidity. A correctly built tray nudges the immediate microclimate, not the whole house. That limitation is why measurement and realistic expectations matter; the evidence page covers scale in detail.
Ignoring pests and watering. Wisconsin Horticulture ties fungus gnats primarily to overwatered potting mix, not pebble trays alone-but stale standing water never helps. Fix watering first if gnats are active. (Wisconsin Horticulture)
When a Humidifier Is the Better Next Step
If a hygrometer at leaf height stays far below what your plant needs after a correctly built tray, a humidifier is the stronger tool for room-scale change-a pebble tray cannot match that output. Read pebble tray vs humidifier for the full comparison; keep the tray for local support or drip protection if you like, but do not expect it to replace mechanical humidification in a very dry room.
Conclusion
Build a pebble tray the same way every time: wide shallow tray, 1 to 2 inches of clean pebbles, water below the pot base, side-view confirmation, then placement in a stable plant zone with regular rinse-and-refill maintenance. Done correctly, the setup is a cheap, passive way to support humidity-loving plants without soaking roots. Done incorrectly-pot in water, tray too small, or stale reservoir-it creates more problems than it solves.
For everything beyond the build-how evaporation works, measured RH gains, or plant-by-plant fit-use the cluster hubs linked above rather than guessing. The setup itself is the easy part; the discipline is keeping the water where it belongs: under the stones, not under the roots.
FAQ
Can a pebble tray replace a humidifier? Usually, no. A correctly built tray adds a modest humidity bump right around the plant, while a humidifier changes room air more consistently. In bone-dry winter rooms or with large humidity-demanding collections, start with measurement and consider a humidifier-see pebble tray vs humidifier.
How much water should I put in a pebble tray? Enough to fill gaps between stones with the surface below pebble tops and below the pot base once the plant sits on top. The pot rests on stones, not in water. If drainage holes touch water, remove some water or add pebbles until the side-view check passes.
Which houseplants benefit most from a pebble tray? Small, humidity-loving tropicals-ferns, fittonia, maranta, calathea, peace lilies, some orchids, compact philodendrons-tend to benefit most. Cacti and succulents usually do not need extra humidity. Full plant-fit guidance lives on pebble trays for plants.
Can pebble trays attract fungus gnats? Overwatered potting mix is the main driver; trays are not usually the primary cause. Still, keep water fresh, rinse stones regularly, and let the growing medium dry appropriately between waterings. Penn State Extension links persistently wet conditions with fungus gnat pressure. (Penn State Extension)
Is a pebble tray better than misting? For sustained local humidity, generally yes-passive evaporation lasts hours, while misting wets leaves briefly without changing room RH much. Neither replaces a humidifier when large humidity shifts are needed. Maryland Extension questions misting as a reliable humidity strategy. (University of Maryland Extension)
Related pebble tray guides
- What is a pebble tray - definition and how evaporation works
- DIY pebble tray - compact build variants and materials
- Indoor humidity and pebble trays - humidity math and measurement hub
- Do pebble trays really increase humidity - measured effectiveness evidence
- Best pebbles for a DIY pebble tray - stone material choice
- Pebble tray vs humidifier - when to upgrade from a tray