Watering Blue Star Fern: Schedule, Soil Checks, and Common
Watering Blue Star Fern: Schedule, Soil Checks, and Common Mistakes
Watering Blue Star Fern: Schedule, Soil Checks, and Common Mistakes
What Blue Star Fern Actually Needs From Water
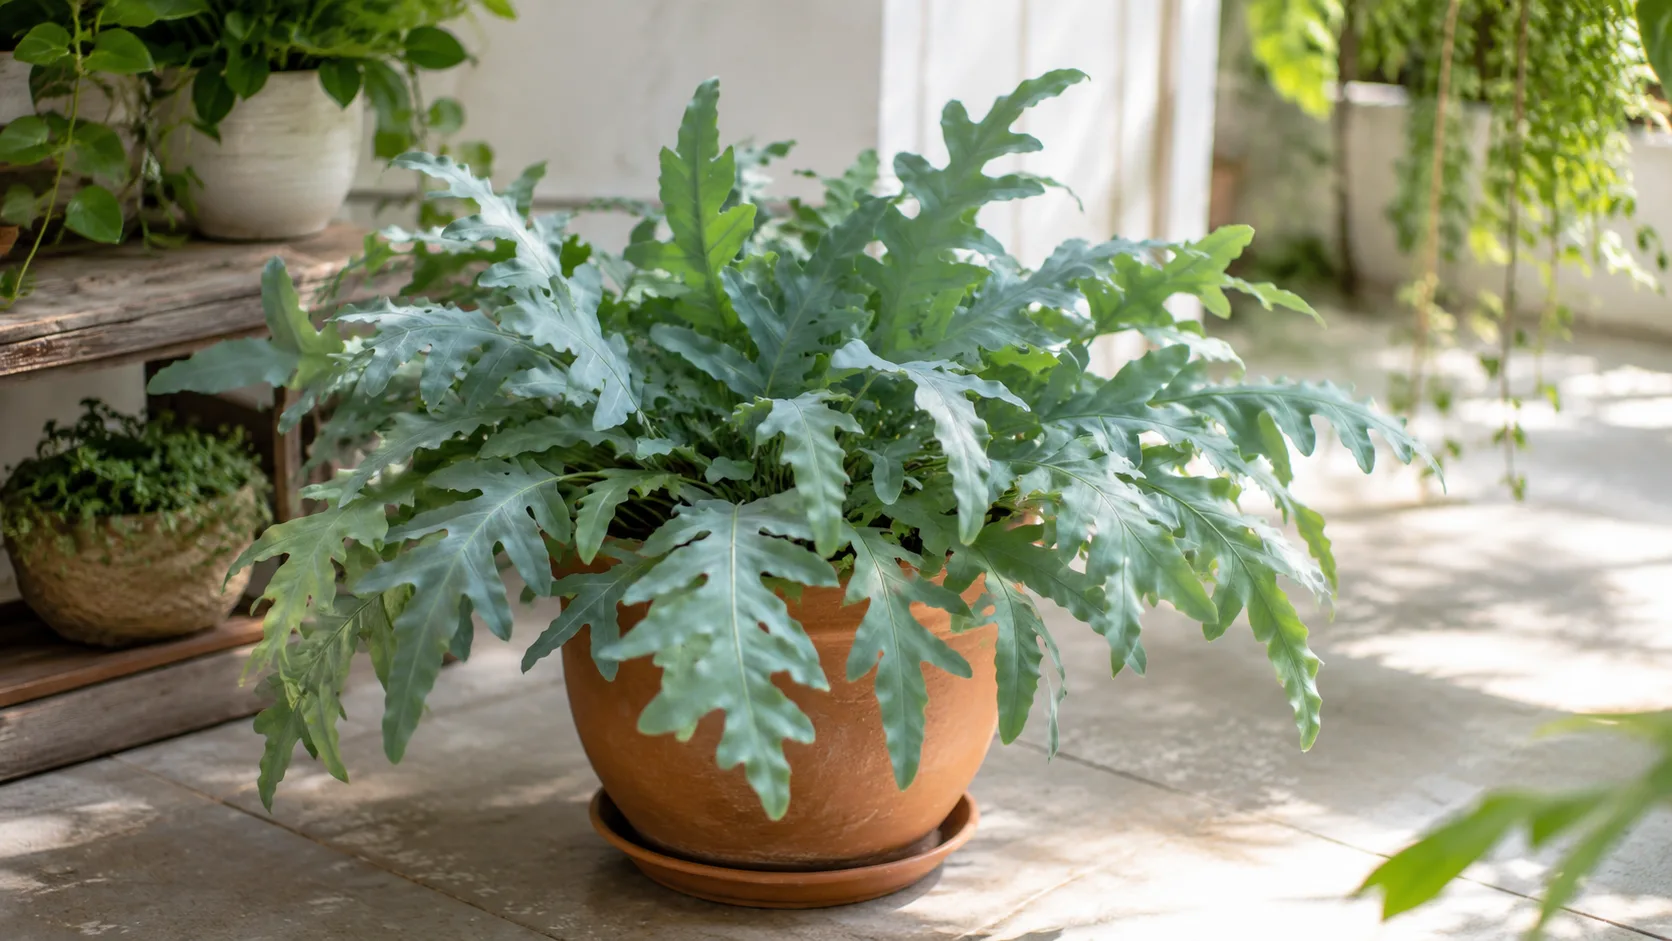
Blue star fern (Phlebodium aureum) sits in a sweet spot that confuses many indoor growers. It is a fern, so people assume it wants constant wetness. It is also an epiphyte that naturally grows on tree bark and rock in humid tropical forests from Florida through Central and South America, which means its rhizomes need air as much as moisture. Give it a swampy pot and the creeping rhizomes rot. Let the mix go bone dry for weeks and the bluish-green fronds lose their color, crisp at the edges, and wilt. The plant is not a succulent, but it tolerates brief drought better than maidenhair or Boston fern - which makes the wrong watering habit even harder to spot until damage stacks up.
The Spruce and Almanac.com both describe the same target: consistently moist but never waterlogged soil or bark mix. NC State Extension notes that Phlebodium aureum prefers evenly moist conditions in partial shade with high humidity. That combination matters because watering is only one variable. Light, pot shape, mix texture, and room humidity all change how fast the container dries. A plant in a bright bathroom may need water twice as often as the same plant in a cool north-facing room, even though both are technically “indoors.”
When you understand what the plant does with water, the routine becomes simpler. Blue star fern absorbs moisture through fine roots attached to creeping rhizomes - the fuzzy, golden-brown structures that spread across the soil surface and should not be buried deeply. Those rhizomes store some moisture and buffer short dry spells, which is why a missed watering is usually recoverable. They do not buffer chronic soggy soil. Rotten rhizomes mean the plant loses its anchor and water uptake system, and recovery gets hard fast. Your job is to water thoroughly when the root zone is ready, let excess drain away, and wait until the top layer of mix has dried slightly before the next drink.
Epiphytic Rhizomes and Even Moisture Explained
In the wild, blue star fern roots cling to bark and organic debris where water runs through quickly after rain. The rhizomes crawl along the surface rather than sitting deep in dense, anaerobic soil. Houseplant Central and multiple care references emphasize that moist does not mean wet - the mix should hold hydration without staying saturated for days. That is the core difference between thriving blue star ferns and the ones that yellow and collapse while the pot still feels heavy.
The fronds - deeply lobed, bluish-green to silvery - lose water through transpiration. In dry air below about 40% relative humidity, tips brown even when the soil is correct, which sends some growers toward more water when a humidifier is the real fix. Always check the soil before you react to crispy edges alone. Low humidity and underwatering on Blue Star Fern look similar on the foliage, but the pot tells you which problem you actually have.
The phrase growers use most often is consistently moist but never waterlogged. Translate that into a test: the top 1 inch (2.5 to 3 cm) of mix should dry slightly between waterings, the root zone should never stay saturated for days, and the pot should never sit in a saucer full of runoff. NC State Extension describes the same target for ferns in general - moist, well-drained substrate. “Evenly moist” does not mean “always wet.” It means no swing from desert to flood. Water deeply when the mix is ready, drain fully, then wait while the bark and roots breathe.
How Often to Water Blue Star Fern Indoors
There is no single correct number of days between waterings, because frequency depends on pot size, pot material, mix composition, light, temperature, humidity, and season. For most indoor Phlebodium aureum plants in a well-draining mix with roughly 20% orchid bark, a practical starting range is every 5 to 7 days in spring and summer and every 7 to 14 days in fall and winter. Some plants in wide, shallow terracotta pots in bright rooms dry in four or five days. The same plant in a deep plastic pot in a dim corner may need water only every two or three weeks in winter.
Treat those intervals as a reminder to check the plant, not as a command to pour. The soil or bark is the authority. Almanac.com recommends watering once or twice a week in summer for bark-based mixes and cutting back in winter - which aligns with slower growth and lower evaporation when days are short and rooms are cooler. If your home runs hot, dry heating all winter, the surface may dry faster even while the plant uses less water internally - another reason the calendar alone is unreliable.
This is the honest way to talk about blue star fern watering. Anyone who promises a fixed weekly schedule without mentioning pot type, mix, light, or season is oversimplifying. Use the range above, then let your finger, skewer, and pot weight make the final call. The plant is more forgiving of one dry spell than of one week sitting in stale wet mix, so when results are ambiguous, waiting an extra day and checking again is usually the safer choice.
A Realistic Summer and Winter Schedule
In spring and summer, when the plant is actively producing new fronds, most indoor blue star ferns in 6- to 8-inch wide pots need water roughly once a week, sometimes a little more often in very bright, warm conditions. Check the top inch of mix every few days. When it feels dry to the touch, water thoroughly until excess runs from the drainage holes, then empty the saucer within 30 minutes. If you grow in a chunky orchid bark mix, the soak-and-dry method - submerging the pot in a basin of room-temperature water for 15 to 20 minutes, then draining fully - may work better than a quick top pour because bark absorbs water slowly.
In fall and winter, growth slows, light drops, and the same pot stays wet longer. Most plants need water every 7 to 14 days, and some in cool rooms need even less. Reduce frequency, but do not stop checking. Let the top inch dry, but do not let the entire root ball turn into a hard, shrunken block. The rhizomes help buffer short drought, yet repeated full dry-down in winter still causes brown tips and stalled new growth that takes months to replace.
Wide, shallow pots dry differently from tall narrow ones because more surface area is exposed to air. A blue star fern in a warm, bright kitchen may need water twice as often as the same size plant in a north-facing bedroom. Write down your own pattern for two weeks and you will have a schedule that fits your home, not a generic blog number. The most common timing mistake is treating “about once a week” as automatic. Two plants in the same room can need water on different days because one sits in stronger light, one lives in a cachepot that traps moisture, or one was repotted recently into fresh mix that dries slowly. Put a recurring reminder on your phone to check the plant, then decide based on soil moisture and pot weight - not the day of the week alone.
How to Check Blue Star Fern Soil Moisture
The fastest way to know whether a blue star fern needs water is to check the root-zone moisture, not the appearance of the fronds alone. Yellow or brown frond edges can come from overwatering on Blue Star Fern, underwatering, low humidity, or salt buildup from tap water. Soil or bark tells you which problem you actually have. Three checks work well together: the finger or skewer test, the pot weight test, and a quick look at drainage and recent care history.
Build the habit of checking before every watering decision. It takes ten seconds once you know the plant’s pot. Over time you will feel the difference between a pot that is still heavy from the last drink and one that is ready for water. That skill matters more than any moisture meter for Blue Star Fern overview in chunky bark mix, where probes often read inconsistently because air gaps and large bark pieces confuse the sensor.
The Finger Test and Skewer Test
Push a clean finger into the potting mix or bark to the first knuckle, about 1 inch (2.5 cm) deep, near the pot edge rather than directly on top of the rhizome. If the material at that depth feels cool, damp, or clings to your skin, the plant is not ready. If it feels dry and crumbly, it is time to water. For deeper pots or if you prefer not to disturb surface rhizomes, use a wooden skewer or chopstick. Insert it near the edge of the pot, leave it for a minute, and pull it out. Damp mix darkens the wood and may leave particles stuck to it. Dry mix leaves the skewer clean.
The finger test works best when you learn the difference between surface dryness and root-zone dryness. Chunky bark can look dry on top while staying moist around the roots, especially in plastic or glazed pots. Conversely, a thin dry crust can form on top while the center is still wet after overwatering. When results seem ambiguous, combine the finger test with pot weight rather than guessing. The Spruce recommends watering when the top inch has dried - that is essentially a finger-test instruction translated into care language.
Moisture meters can help as a secondary tool, but they often read inaccurately in loose, bark-heavy epiphyte mix. Use them to support your judgment, not replace touch and weight. If your meter says “wet” but the pot feels light and the top inch is clearly dry, trust your hands.
The Pot Weight Test
Lift the pot right after a thorough watering and notice how heavy it feels. Lift it again every day or two as the mix dries. A freshly watered blue star fern pot has a full, dense weight. As moisture leaves the mix, the pot becomes noticeably lighter. When it feels light and the top inch is dry, water.
This test prevents a classic overwatering trap: watering because the surface looks dry while the lower root zone is still saturated. If the pot still feels heavy, wait another day and check again. Pot weight is especially useful after Blue Star Fern repotting guide, when new mix dries unevenly, and in winter, when evaporation slows and the gap between “still damp” and “ready to water” can stretch an extra week. For wide shallow pots, lift from the bottom with both hands briefly - you do not need a scale. After a few watering cycles you will know the “wet” and “dry” feel for that specific container without thinking about it.
How to Water Blue Star Fern the Right Way
A good blue star fern watering is a deep, even drink that wets the entire root ball and rhizome zone, followed by complete drainage. Half-hearted top-ups keep the surface damp while leaving dry pockets deeper in the pot, which encourages uneven root growth and makes the plant look stressed even when you water often. The mechanics depend partly on your mix. Bark-heavy epiphyte blends and peat-based houseplant mixes behave differently, and the best method follows the medium.
Place the pot in a sink, tub, or saucer. Use room-temperature water and apply it slowly so it soaks in rather than running straight through channels in the bark. Keep watering until excess runs freely from the drainage holes. Let the pot rest and drain for several minutes. Empty the saucer or cachepot so the plant is never sitting in runoff. Standing water around the rhizomes for hours is one of the fastest routes to rot indoors.
Top Watering vs Soak-and-Dry for Bark Mix
Top watering is the default for mixes that include a meaningful amount of peat or coco coir alongside bark and perlite. Pour slowly around the inner edge of the pot, moving the stream so water spreads through the mix. Water until runoff appears, then stop. Top watering flushes excess salts from fertilizer and hard tap water through the drainage holes, which matters because blue star fern fronds are sensitive to mineral buildup.
Soak-and-dry works better when the plant is potted in a very chunky orchid bark blend with little fine soil. The Spruce and Almanac.com both describe this method: fill a bowl or sink with room-temperature water, set the pot in so the mix submerges, and let it absorb for 15 to 20 minutes. Remove the pot, let it drain fully until no water drips from the holes, then return it to its saucer. Use this once or twice a week in summer and less in winter, always combined with a dryness check - not on autopilot.
For routine care in a standard well-draining houseplant mix with about 20% orchid bark, top watering when the top inch is dry is usually enough. Reserve full soaking for bark-dominant mixes or when rehydrating a plant that has gone too dry. After either method, expect the pot to feel heavy for one to three days depending on size and season. That is normal. The problem is not a heavy pot immediately after watering; it is a heavy pot five or seven days later when you have not added water again.
Drainage Rules and Why to Avoid the Crown
Always use a pot with drainage holes. A decorative outer pot without drainage overrides good technique. Water collects at the bottom, the mix stays saturated, and the plant declines while the top fronds still look blue-green for a while. If you use a cachepot, grow the plant in a plain inner pot with holes and lift it out to water, or water in the sink and return the plant only after draining.
Do not pour water directly into the center of the plant onto the rhizome crown. Houseplant Central and multiple fern growers note that blue star fern rhizomes rot easily when water pools in the heart of the plant. Water around the edges of the pot instead, letting moisture spread inward through the mix. Wet fronds are not usually fatal, but they invite fungal spotting in stagnant air and do nothing meaningful for humidity.
After watering, never leave the pot in a tray of standing water overnight. If you bottom-water for rehydration, use a shallow tray, leave the pot for 15 to 30 minutes, remove it as soon as the surface feels slightly moist, and let it drain fully. Bottom watering alone can leave fertilizer salts near the top of the mix because water moves up rather than washing down. If you rely on bottom watering regularly, flush from the top with plain water every month or two to leach salts.
Seasonal Watering Changes for Blue Star Fern
Blue star fern watering changes through the year even indoors because light, temperature, and growth rate change. In spring, as new fronds unfurl, gradually increase checking frequency. Soil dries faster, the plant uses more water, and the rhizomes are actively supporting new growth. Summer is usually the peak watering season: bright light, warm rooms, and optional time outdoors in shade all increase demand.
In fall, growth slows. Reduce how often you water, but do not stop checking. The same pot that needed water every five days in July may need it only every twelve days in November. In winter, apply the same “sparingly” logic fern references use: let the top inch dry, extend the interval, and avoid keeping the mix constantly damp in a dim, cool room. Central heating can dry the surface faster while the plant’s internal water use drops - another reason to check depth, not just the calendar or the look of the top crust.
| Season | Typical indoor frequency | What changes |
|---|---|---|
| Spring | Every 5 to 8 days | New frond growth, longer days, resume normal rhythm |
| Summer | Every 5 to 7 days | Heat, brighter light, bark mix may need soak method |
| Fall | Every 7 to 12 days | Growth slowing, soil stays damp longer |
| Winter | Every 7 to 14 days | Lower growth, check before watering, never flood |
Plants moved outdoors for summer in shade need more frequent checks than indoor plants because wind and warmth increase evaporation. Bring them back indoors before night temperatures drop consistently below about 50°F (10°C), and expect to adjust watering again as indoor conditions differ from outdoor humidity and airflow. Blue star fern is hardy in USDA zones 8 to 13 outdoors in frost-free climates, but as a houseplant it still follows indoor seasonal rhythms for watering purposes.
What Water to Use on Blue Star Fern
The best water for blue star fern is room-temperature and relatively low in problematic salts and chemicals. Many plants tolerate ordinary tap water, but fern fronds are sensitive enough that fluoride, chlorine, and hard-water minerals can accumulate in the pot over months and show up as brown, crispy tips. Those tips look like low-humidity damage, which sends some growers toward more misting and more water when the real issue is water chemistry.
A practical priority list: rainwater is ideal where collection is easy. Distilled or reverse-osmosis water helps plants with persistent tip burn despite good watering technique. Filtered tap water improves chlorine taste and removes some impurities but may not remove fluoride fully. Plain tap water at room temperature works for many homes, especially if you flush the pot regularly. Avoid softened water high in sodium, which damages roots over time.
Let cold tap water sit until it feels neutral to your hand before pouring. Cold water shocks roots and slows uptake in a plant that already prefers stable indoor conditions. Blue star fern grows best at roughly 16 to 24°C (60 to 75°F), and that stability applies to the water you use as well as the room. Garden Pals notes sensitivity to chemicals in tap water; if brown tips persist after you fix watering frequency and humidity, switch water sources for two months and flush the pot with plain water until it runs clear from the drainage holes. That leaches built-up salts. Skip fertilizer until new growth looks clean unless you know the plant was genuinely underfed.
Pot, Soil, and Humidity: What Affects Dry-Down Speed
Watering does not happen in isolation. Pot material, mix composition, and humidity determine how fast soil dries as much as how often you pour. Understanding those variables prevents the feeling that you are “doing everything right” while the plant still declines.
Terracotta breathes and speeds dry-down, which forgives slight overwatering tendencies in bark mix. Plastic and glazed ceramic hold moisture longer, which suits growers who tend to underwater but punishes heavy hands. Blue star fern often does well in a wide, shallow pot that matches its spreading rhizome habit - a shape that dries faster at the edges than a deep tower pot. Pot size matters after repotting: fresh mix in a larger pot stays wet longer until roots and rhizomes fill the space. Water less often after repotting even if the plant looks full on top.
Soil mix should be loose and well-draining with orchid bark and perlite. A workable recipe is quality all-purpose potting mix amended with roughly 20% orchid bark and additional perlite for epiphyte roots. Heavy garden soil or pure compost compacts, suffocates fine roots, and stays wet too long. If water sits on the surface or drainage slows, the mix - not your schedule - needs attention. Target pH around 6.0 to 7.0; overly alkaline water and mix can contribute to mineral stress over time.
Humidity affects how fast fronds lose water but does not replace soil moisture. Target 40 to 60% relative humidity when you can; bathrooms and kitchens often hit that range naturally. Below 30%, tips brown and the plant looks thirsty even when the pot is damp. A pebble tray or humidifier helps the foliage; it does not mean you can skip checking the soil. Misting fronds briefly raises humidity for minutes and can spread fungal leaf spot - it is a poor substitute for correct watering and stable room humidity. Blue star fern is non-toxic to cats and dogs according to ASPCA guidance on related ferns, but that does not change the need for proper drainage - pets knocking over saucers of stale water still creates rot risk at the root zone.
Signs of an Overwatered Blue Star Fern
Overwatering is the most common way indoor blue star ferns fail, and the symptoms stack together once root and rhizome damage begins. The plant is not yellow because it needs more water. It is yellow because roots and rhizomes are failing in saturated mix, and the fronds cannot get oxygen or nutrients even while the pot feels wet.
Watch for these signs together:
- Yellowing fronds that look dull or limp, sometimes starting lower on the plant while the mix stays dark and wet.
- Soft, mushy rhizomes at or just below the soil surface. Healthy rhizomes are firm and fuzzy with golden-brown scales. Rotten ones feel squishy and may smell earthy or sour.
- A pot that stays heavy for many days after the last watering, with mix that looks waterlogged and may grow algae or white mold on the surface.
- Wilting or limp appearance despite wet soil. on Blue Star Fern Damaged roots cannot move water properly, so the plant looks thirsty in a wet pot - the classic confusion point.
- Fungus gnats hovering near the surface, attracted to constantly damp organic mix.
- root rot on Blue Star Fern on inspection: brown, black, or slimy roots when you unpot.
If several signs appear together, stop watering, empty any saucer water, move the plant to medium indirect light with good airflow, and inspect the root zone before feeding or repotting into an even larger pot. Overwatering in low light is especially dangerous because evaporation is slow and the mix stays anaerobic longer.
Signs of an Underwatered Blue Star Fern
Underwatering is less immediately fatal than rot on blue star fern, which tolerates brief drought better than many true ferns - but repeated full dry-downs still stress rhizomes and cause frond damage that takes months to replace. One dry episode is often recoverable. Chronic neglect makes the plant sparse and slow to refill.
The clearest signs are:
- Fronds losing their blue-green tinge, turning dull gray-green or flat green, then developing brown, crispy tips and edges.
- Wilting or drooping fronds that feel papery when the mix is dry an inch down.
- Soil or bark pulled away from the pot edge, shrunken and hard, with water running down the sides without soaking in when you try to water.
- A very light pot combined with dry mix at the top inch.
- Slow or stalled new frond growth despite good light, because the plant is conserving moisture.
When symptoms overlap, compare clues side by side before you pour. Overwatered plants have wet, heavy pots, soft yellow fronds, and mushy rhizomes. Underwatered plants have light pots, dry shrunken mix, and papery frond edges. Confirm with the finger test and pot weight before acting. Brown tips on old fronds will not fully revert to blue-green even after recovery - judge success by healthy new growth from the rhizome.
How to Save an Overwatered Blue Star Fern
Root and rhizome rot on blue star fern is serious but not always a death sentence if you act before the tissue is fully gone. The goal is to remove saturated, anaerobic mix, trim dead roots and rhizomes, and give the plant a smaller, well-draining home while it regrows from healthy tissue.
Start by stopping all watering and tipping the plant out of its pot. Shake or rinse away wet mix so you can see roots and rhizomes clearly. Healthy tissue is firm and pale to golden-brown. Rotted tissue is dark, soft, and may fall apart when touched. Trim all mushy roots and rhizome sections with clean, sharp scissors or pruners. If more than half the root mass is gone, reduce the foliage burden by removing the most damaged fronds at the base so the remaining roots can support the plant.
Repot into fresh, well-draining mix with orchid bark and perlite - not the old soggy soil - in a wide, shallow pot only large enough for the trimmed root mass. One size smaller than the previous pot is often correct after a severe rot cleanup. Water lightly once to settle the mix, then let the top inch dry before the next drink. Keep the plant in medium to Blue Star Fern light guide with stable humidity and no fertilizer until new fronds appear. Recovery can take several weeks. If the rhizomes are fully mushy with no firm tissue left, the plant may not come back.
How to Revive an Underwatered Blue Star Fern
An underwatered blue star fern usually needs one thorough rehydration, not a week of daily sips. Small amounts of water on crusty, shrunken bark often run down the sides and out the bottom without rewetting the root ball, which leaves the plant thirsty in a pot you think you watered.
Place the pot in a sink and water slowly from the top until the mix absorbs and runoff appears. If water channels away, use the soak-and-dry method for 15 to 20 minutes, then let the pot drain fully. Alternatively, bottom-water for 20 to 30 minutes, then top-water to flush. Remove fronds that are completely brown and crispy - they will not recover - but leave green fronds even if the tips are damaged.
After rehydration, return to a check-based schedule. Do not compensate for drought by keeping the soil constantly wet; that swings the plant from one extreme to the other and invites rot. Expect new fronds from the rhizome over the following weeks rather than instant fullness on old damaged leaves. Increase humidity slightly during recovery if your room is very dry, but still let the top inch dry between waterings once the plant is stable.
Common Blue Star Fern Watering Mistakes to Avoid
Most blue star fern losses trace back to a short list of repeatable errors. Avoiding them is simpler than rescuing a plant after rhizomes rot.
Watering on a calendar without checking soil is the top mistake. Use the calendar as a reminder, not a rule. Keeping the plant in a pot without drainage or leaving it in a full saucer defeats every other good habit. Pouring water into the rhizome crown pools moisture where rot starts fastest. Daily small sips keep the surface damp and the center sour; water deeply instead. Misting instead of watering does not hydrate roots and can encourage leaf spot. Using cold or softened water stresses roots and builds sodium in the mix over time.
Overpotting after purchase or repotting leaves a large volume of wet mix the roots cannot use, mimicking overwatering. Watering while the plant is in full decline from rot without inspecting roots adds moisture to a problem that needs less water and better drainage. Ignoring humidity makes tip burn look like a watering error and leads to extra water when a humidifier or pebble tray is the fix. Using dense, compacted potting soil without bark stays wet too long for an epiphyte and suffocates fine roots.
Changing light, pot, and watering all at once makes it impossible to know what helped or hurt. Fix watering first - check depth, drain fully, adjust seasonally - before repotting, moving windows, or feeding. Blue star fern responds well to boring, consistent care once the soil rhythm matches the plant. Treat “every 5 to 7 days in summer, top 3 cm dry” as a checkpoint from your care data, not a rule that overrides what the pot actually feels like today.
Conclusion
Watering blue star fern well comes down to a few clear habits: check the top inch of mix before every drink, give a full watering with complete drainage, and adjust frequency by season, pot, mix, and room conditions rather than a fixed weekly rule. The plant’s epiphytic rhizomes forgive a missed watering more easily than they forgive a soggy pot, so when in doubt, wait and check again tomorrow.
Use the finger test, skewer test, and pot weight together until you know how your specific container dries. In summer, expect roughly every 5 to 7 days for many indoor plants in standard mix; in winter, stretch toward 7 to 14 days while still preventing a fully desiccated root ball. Match your water quality and humidity to the plant’s needs so brown tips and yellow fronds are not misread as thirst.
If you see yellow fronds with wet, heavy soil, stop watering and inspect the rhizomes and roots. If you see papery wilt with hard, dry mix, rehydrate thoroughly with top watering or a 15-to-20-minute soak, then resume a check-based rhythm. Blue star fern is not a succulent and not a maidenhair fern - it wants steady moisture with oxygen in the root zone. Get that balance right and the plant rewards you with silvery-blue, deeply lobed fronds for years.
When to use this page vs other Blue Star Fern guides
- Blue Star Fern overview - Start here for whole-plant context before deep-diving this topic.
- Blue Star Fern problems hub - Jump to symptom-specific fix guides when this care topic does not resolve the issue.
- Overwatering on Blue Star Fern - Escalate here when watering adjustments are not enough.
- Underwatering on Blue Star Fern - Escalate here when watering adjustments are not enough.
- Root Rot on Blue Star Fern - Escalate here when watering adjustments are not enough.
Related Blue Star Fern guides
- Blue Star Fern overview
- Blue Star Fern light
- Blue Star Fern soil
- Blue Star Fern propagation
- Blue Star Fern fertilizer
- Blue Star Fern repotting
- Overwatering on Blue Star Fern
- Underwatering on Blue Star Fern
- Root Rot on Blue Star Fern
- Wilting on Blue Star Fern
- Drooping Leaves on Blue Star Fern
- Mold on Soil on Blue Star Fern