Blue Star Fern Repotting: When, How, and Mistakes to Avoid
Blue Star Fern Repotting: When, How, and Mistakes to Avoid
Blue Star Fern Repotting: When, How, and Mistakes to Avoid
Why Repotting Matters for Blue Star Fern (Epiphytic Fern With Surface Rhizomes)
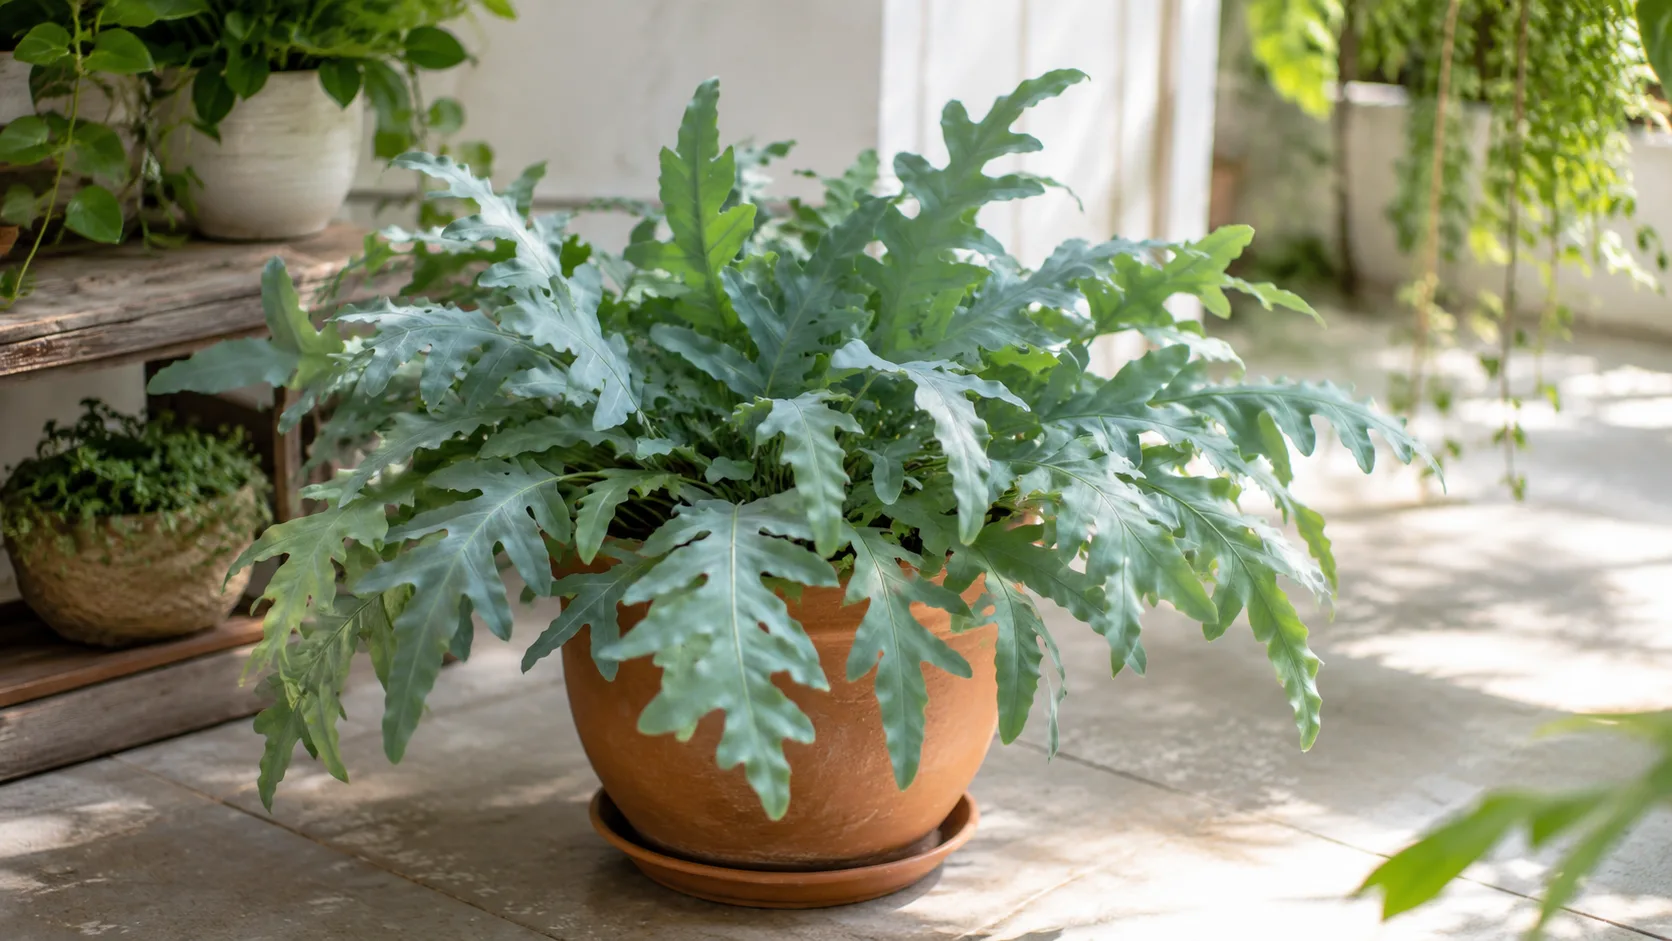
Blue star fern repotting is root-zone maintenance for a plant that does not grow like a typical potted houseplant. Phlebodium aureum - the blue star fern, also called golden polypody or cabbage palm fern - is an epiphytic fern native to tropical and subtropical regions of the Americas, from Florida through Central and South America. In the wild it attaches to tree trunks and branches, drawing moisture and nutrients from rain, air, and accumulated organic debris rather than from a deep soil column. That natural history shapes every repotting decision you make indoors.
The most visible sign of this growth habit is the fuzzy, golden-orange rhizome creeping across the soil surface. These structures, covered in small scales called ramenta, are not decorative roots you should tuck underground. They are the plant’s primary growing stem, and they are adapted to stay exposed to air. Burying them during repotting is the fastest route to rhizome rot - a problem that generic fern guides often create by treating blue star fern like a terrestrial plant with a buried crown.
The NC State Extension notes that blue star ferns do best in a loose, airy potting mix because of their epiphytic nature, and recommends repotting every two to three years in spring or summer when the plant is actively growing. Almanac.com similarly advises repotting every two to three years during active growth, using an orchid bark blend or houseplant soil amended with bark and perlite (Almanac.com). When the root zone gets overcrowded or the mix breaks down, several problems follow: water races through the pot without wetting the center of the root ball, fertilizer salts accumulate in exhausted soil, new frond growth stalls, and older blue-green leaves yellow or crisp at the edges. Repotting resets that system. Done well, it gives rhizomes room to spread, replaces degraded mix with something airy, and is often the easiest moment to divide an overgrown plant.
Blue star fern is also slower-growing than many popular houseplants, which means it does not demand annual pot upgrades. That slower pace is an advantage for indoor growers - but it also means problems in the root zone can develop quietly for months before fronds show obvious stress. Repotting is how you catch those issues before they become rot or chronic wilting. The ASPCA lists blue star fern as non-toxic to cats and dogs, which is worth noting if you repot on a kitchen counter or floor where curious pets investigate loose soil (ASPCA). The plant is pet-safe, but the mess and disturbed roots still benefit from a contained workspace.
When to Repot Blue Star Fern
The right time to repot blue star fern is when the root system and rhizome mass - not the calendar alone - need more space or fresher soil. Most healthy plants need attention every one to three years, though slow growers in moderate light may comfortably go three years between full repots. Two categories help: routine maintenance repotting and emergency repotting when the root zone is clearly failing.
Routine Repotting Every 1 to 3 Years
Routine repotting is for a plant that looks generally healthy but has been in the same container long enough that soil structure has declined or rhizomes have filled most of the pot surface. Even when the plant is not dramatically root-bound, old peat- or coir-based mix compacts, loses air spaces, and holds water unevenly. A routine repot refreshes that environment before yellow fronds and watering headaches appear. NC State Extension recommends division as a propagation strategy for Blue Star Fern overview. The Spruce and Almanac.com lean toward two to three years for slow, steady growers (The Spruce).
You do not always need a larger pot during routine repotting. If the plant still fits its container by frond spread but the mix is tired, you can return it to the same pot after gently loosening the outer root layer, trimming only dead tissue, and replacing most of the soil. That is closer to a full refresh than a true upsize. Routine repotting should feel uneventful: same plant, clean pot, fresh airy mix, stable placement afterward. The goal is prevention, not rescue.
Emergency Signs That Cannot Wait
Emergency repotting means the root zone is actively limiting the plant’s health. Repot soon - ideally in the next viable growth window - if you see multiple signs below:
- Rhizomes crowding the pot rim or bending a plastic nursery pot out of shape
- Roots emerging from drainage holes or circling tightly at the soil surface
- Water racing through the pot in seconds while the center of the root ball stays dry
- Soil that smells sour or stays wet for days despite careful watering
- Stunted new frond growth despite adequate light and light feeding during the growing season
- Soft, mushy rhizomes or a dark, collapsed base where fronds attach
- Chronic wilting that does not respond to adjusted watering
One sign alone may not require immediate action. A single rhizome peeking over the rim on an otherwise healthy plant can wait until spring. Water channeling plus stalled growth plus a sour smell is a different story. That combination often means the mix has broken down and oxygen around the roots is poor. Emergency repotting should include careful rhizome and root inspection. Trim mushy, dark sections with sterilized scissors and repot into fresh, well-draining mix with rhizomes positioned correctly on the surface - not simply moved into a bigger pot with rotting tissue intact.
Best Season and Timing for Repotting
Spring is the best season to repot blue star fern in most homes. As daylight lengthens and room temperatures stabilize, the plant enters active growth and can rebuild fine feeder roots quickly in fresh mix. Early spring through early summer is the main window. NC State Extension lists spring and summer as the recommended repotting window when the fern is actively growing. Almanac.com also recommends spring or summer repotting (Almanac.com).
Fall can work in warm indoor environments where growth continues, but it is a second-choice season. As growth slows, the plant has less capacity to repair root disturbance before winter conditions arrive. Low winter light and dry heated air already stress many ferns, so adding repot shock on top is rarely ideal. Winter repotting should be reserved for emergencies such as severe root or rhizome rot, a severely deformed pot, or a plant so root-bound that normal watering is impossible. If you must repot in winter, keep expectations modest: stable Blue Star Fern light guide, consistent humidity, slightly warmer room temperatures, and no fertilizer until you see new growth in spring.
Timing within the day matters less than plant hydration and room stability. Repot when the plant is neither bone dry nor soaking wet. A lightly moist root ball holds together and reduces tearing of fine roots. Avoid repotting on the same day you moved the plant to a new window, turned on aggressive heating, or treated it for pests. Stack one stress at a time. Blue star fern recovers faster when the environment stays consistent for two to three weeks after the move.
Choosing the Right Pot Size, Shape, and Material
Pot choice is where many repotting jobs succeed or fail. Blue star fern tolerates being somewhat snug, but it does not tolerate swimming in a large volume of wet soil. The container must match the current root and rhizome mass and leave only modest room for new spread.
The One-Pot-Size-Up Rule
Move up only one pot size - roughly 2 to 4 inches (5 to 10 cm) wider in diameter than the current pot. That guideline appears consistently in houseplant repotting guidance because oversized pots hold excess mix that stays damp around a small root system, increasing root rot on Blue Star Fern risk. For blue star fern, the risk is amplified by epiphytic roots that may not quickly colonize a large new soil volume. The plant sits in wet mix, growth stalls, and growers often respond by watering more because the top looks dry while the center remains soggy.
The Spruce specifically recommends choosing a new pot only 2 to 4 inches larger than the last container (The Spruce). Patch Plants similarly advises using a slightly larger pot with fresh mix when roots outgrow the container (Patch Plants). If your plant is in a decorative cachepot, keep the actual growing pot appropriately sized with a drainage hole and lift it out to empty excess water after each watering.
Wide Shallow Pots and Drainage Holes
Shape matters as much as diameter for this fern. Blue star fern rhizomes spread horizontally across the soil surface, not deep into a tall column of mix. A wide, shallow pot suits that habit better than a narrow, deep container that keeps the lower layer anaerobic and buries surface rhizomes under falling mix during watering. Think bowl-shaped or azalea-style pots rather than standard deep nursery containers.
Drainage holes are non-negotiable for long-term indoor culture. A hole-free decorative pot turns every watering into a gamble the plant cannot consistently survive. If you love a cachepot, use it as an outer sleeve only. Pot material involves a trade-off: terracotta dries faster and can help prevent soggy mix in humid rooms or for growers who tend to water heavily, but several experienced growers find that blue star fern prefers the steadier moisture retention of plastic or glazed ceramic because the porous walls of terracotta wick water away too quickly from the fine root system. Either material works if drainage is real, pot size is restrained, and your watering habits match the container.
Best Soil Mix for Blue Star Fern Repotting
The best soil for blue star fern repotting is loose, airy, and well-draining - closer to an orchid or epiphyte blend than to heavy garden soil or straight peat. The Spruce recommends a soilless orchid bark mix, or indoor potting soil heavily amended with perlite and orchid bark to create a chunky, open structure (The Spruce). Almanac.com advises repotting in orchid bark mix or houseplant soil blended with bark and perlite for drainage (Almanac.com).
A reliable DIY blend for repotting:
- 2 parts quality indoor potting mix
- 1 part orchid bark or coarse pine bark
- 1 part perlite
Some growers use a 50/50 blend of indoor potting mix and orchid bark for especially humid homes where the mix needs maximum air space. The mix should hold moisture evenly without staying waterlogged. When you squeeze a handful, it should feel spongy and crumble apart - not form a tight, wet ball. Blue star fern prefers consistently moist soil during active growth, but fine roots and surface rhizomes still need oxygen. Dense, degraded mix is a common hidden reason growers think they are “overwatering on Blue Star Fern” when the real problem is poor soil structure.
Target a slightly acidic pH between 5.6 and 7.0, which matches the plant’s natural preferences. Do not reuse old mix from a plant with root rot, rhizome rot, or sour smell. Discard it, wash the pot, and start fresh. If the previous mix was acceptable but exhausted, you may compost it if no disease was present. For repotting after division, use the same blend in each new pot so all sections face identical conditions.
Tools and Supplies Before You Start
Gather everything before you disturb the root ball. Blue star fern recovers better when repotting is quick and the plant is not left bare on the counter while you hunt for soil.
You will need:
- A new pot one size larger, or the same size if refreshing soil only - wide and shallow preferred
- Fresh potting mix prepared and slightly dampened
- Clean scissors or pruners for dead or mushy roots and rhizomes
- A chopstick or pencil for settling mix around roots without burying rhizomes
- A small stone, bent wire pin, or plant stake for stabilizing surface rhizomes if needed
- Newspaper or a tarp for mess control
- Optional: a clean knife for dividing large rhizome masses
Sterilize cutting tools with rubbing alcohol if you are trimming rot or dividing multiple sections. Have a watering can ready for the first light watering after repotting, but do not pre-load fertilizer. The first four to six weeks after repotting are for root establishment, not feeding. If you bottom-water this fern routinely, plan to continue that method after repotting rather than pouring water directly over exposed rhizomes.
Step-by-Step: How to Repot Blue Star Fern
Repotting blue star fern is methodical rather than forceful. The plant is more adaptable than many delicate true ferns, but surface rhizomes and fine feeder roots still suffer if you yank, bare-root aggressively, or bury the growing stem too deep.
Pre-Watering, Removal, and Rhizome Inspection
Water the plant lightly one day before repotting so the root ball holds together. Do not soak it to mud; the goal is workable moisture, not saturation. To remove the plant, tip the pot on its side and slide the root ball out with gentle pressure on the base. If it resists - common when rhizomes have adhered to plastic pot walls - run a knife around the inside rim to loosen without tearing. Never pull the plant by its fronds; the leaf tissue bruises easily and damaged fronds do not recover.
Once out, inspect the rhizomes and roots in good light. Healthy rhizomes are firm, fuzzy, and golden-orange to brown. They should feel solid, not hollow or squishy. Mushy, dark, or collapsed sections indicate rot and should be trimmed back to solid tissue with sterilized scissors. Fine feeder roots should be pale and flexible. Tease circling outer roots lightly with your fingers so they point outward into the new mix. You do not need to destroy the entire root ball or remove every old soil particle. Aggressive bare-rooting strips fine feeder roots and extends recovery time by weeks.
If the plant is only slightly root-bound, loosen the bottom and sides and proceed. If roots form a dense mat, make a few shallow vertical cuts on the bottom quarter-inch to interrupt circling. For severely bound plants with rhizomes wrapping the entire soil surface, division may be easier than forcing one oversized mass into a marginally larger pot.
Positioning Rhizomes at the Correct Depth
This step separates a successful blue star fern repot from a failed one. Do not bury the rhizomes. Position them horizontally on the surface of the fresh mix so only the underside and attached roots make contact with the medium. The fuzzy golden stem should remain visible above the soil line, just as it would on a tree branch in the wild. If the rhizome seems unstable, secure it with a small stone, a bent wire pin, or a gentle stake rather than pushing it below the surface.
Add a shallow layer of fresh mix to the pot bottom - enough to support the root mass at the same depth the plant occupied before. Center the plant, then fill around the sides with fresh mix, working it in gently with a chopstick to remove large air voids without compacting the soil into a dense block. As you backfill, repeatedly check that creeping rhizomes stay on top. It is easy to accidentally cover them with falling mix; brush them clear before the first watering.
Leave about half an inch to an inch of headspace below the rim for watering. Firm the mix lightly with your fingers, not heavy palm pressure. When finished, the plant should feel stable and upright without wobbling. If it leans, adjust support with a pin or stone rather than burying the rhizome deeper. Water lightly after repotting until a small amount drains from the bottom, watering around the pot edges rather than directly onto exposed rhizomes. Empty the saucer or cachepot so the plant is not sitting in runoff.
Dividing Blue Star Fern at Repot Time
Division is one of the best reasons to repot blue star fern in spring. Because the plant spreads through creeping rhizomes, you can cut sections that include a rhizome segment, attached roots, and at least one growing point with healthy fronds. NC State Extension lists division as the recommended propagation strategy for Phlebodium aureum.
Choose division when the plant is too large for your space, when the rhizome mass is too dense to fit a reasonably larger pot, or when you want backup plants without buying new stock. Each division should include a section of firm rhizome with visible growing points and several fronds - not a single leaf with a tiny rhizome fragment unless you are experimenting. Two to four frond clusters per division is a practical minimum for reasonable recovery speed.
Separate natural weak points in the rhizome with clean scissors or a knife sterilized with rubbing alcohol. Pot each division into its own container sized to that section’s root mass, not the size of the original whole plant. Position every rhizome on the surface of fresh bark-based mix and stabilize if needed. Water lightly and keep divisions in bright indirect light with stable humidity above 50 percent when possible. Expect some older fronds to yellow; new growth emerging from the rhizome tip is the success signal. Divisions that show no growth after eight weeks often indicate buried rhizomes or rot - the two problems to check first.
Aftercare: Watering, Light, Humidity, and Fertilizer
The first month after repotting is a recovery window, not a growth-maximization window. Your job is to keep conditions stable while fine roots explore the new mix and rhizomes re-anchor on the surface.
Watering: Keep the mix consistently moist but not soggy. Check the top inch (2–3 cm) and water when it begins to dry. The Spruce recommends watering once or twice weekly during spring and summer, cutting back in fall and winter (The Spruce). After repotting, lean slightly conservative - the root system is smaller relative to fresh mix until it expands. Water around the pot edges or use bottom watering to avoid soaking exposed rhizomes. Never let the plant sit in a full saucer of runoff.
Light: Return the plant to the same bright indirect light it had before repotting. Do not move it into direct sun to “help it recover.” Blue star fern fronds scorch in harsh sun, and a recently repotted plant has less capacity to replace damaged tissue. Medium to bright indirect light near an east- or north-facing window, or set back from a south- or west-facing window, is the safe range.
Humidity: Blue star fern prefers 50 to 75 percent humidity. After repotting, stable humidity reduces frond crisping while roots re-establish. A pebble tray, grouped plants, or a humidifier in dry heated rooms all help. Misting fronds can supplement humidity briefly but does not replace good ambient moisture or proper soil hydration.
Fertilizer: Hold all fertilizer for at least four weeks after repotting - six weeks if the plant showed stress during the move. Fresh mix contains some available nutrients, and feeding too soon can burn tender new roots. Resume light feeding only when you see new frond growth. A diluted balanced liquid fertilizer every two to three months during spring and summer is sufficient for this slow grower.
Recovery Timeline and What Normal Stress Looks Like
Mild transplant shock on blue star fern is normal. A few fronds may wilt, droop, or develop slight yellowing during the first one to two weeks after repotting. That response usually clears if light, humidity, and moisture stay stable. Full root re-establishment typically takes four to six weeks. New frond growth is the clearest signal of recovery - damaged old fronds will not heal, but new blue-green leaves emerging at the correct size and color mean the plant is back on track.
If wilting persists beyond two to three weeks, or if rhizomes soften and darken, the problem is likely buried rhizomes, oversize pot with soggy mix, or rot that was not fully trimmed. Those situations need inspection, not more water. A plant that looks unchanged but quiet for two weeks, then pushes a new frond, is behaving exactly as expected for a slow epiphytic fern.
Common Blue Star Fern Repotting Mistakes
Most repotting failures on blue star fern trace back to a short list of errors that are easy to avoid once you understand the plant’s epiphytic habit.
Burying the rhizomes. This is the most destructive mistake. Rhizomes belong on the mix surface. Buried rhizomes in consistently moist soil rot within weeks. If your plant declined after a repot where soil covered the golden stems, gently brush mix away, reposition the rhizome on top, and stabilize with a pin or stone.
Choosing an oversized pot. A pot that is too large holds wet mix around a small root system. Growth stalls, roots stay cold and oxygen-poor, and the grower waters more because the surface dries slowly while the center stays soggy. One pot size up is the safe rule.
Repotting in deep winter without cause. Cold-season repotting adds stress when the plant is not actively growing and room humidity is often at its lowest. Wait for spring unless rot or severe root-binding forces your hand.
Fertilizing too soon. Fresh roots are sensitive. Feeding within the first month after repotting can cause tip burn and slow establishment. Patience here pays off in faster new frond production later.
Watering directly onto rhizomes. Pouring water over the fuzzy golden stems keeps them wet longer than they tolerate. Water the mix at the pot edges or bottom-water instead.
Aggressive bare-rooting. Stripping all old soil and exposing every fine root hair sets recovery back by weeks. Loosen the outer layer and refresh most of the mix; keep the root ball largely intact.
Troubleshooting Problems After Repotting
Wilting fronds that do not recover within two weeks. Check whether rhizomes were buried, whether the pot is too large, and whether the mix is staying soggy. Gently excavate surface rhizomes if needed and reduce watering frequency until the top inch dries slightly between drinks.
Yellowing lower fronds. A few old fronds yellowing after repot is normal as the plant reallocates energy to roots. Widespread yellowing plus mushy base tissue suggests rot or chronic overwatering in dense mix. Inspect rhizomes immediately and trim soft tissue.
No new growth after six to eight weeks. Verify that rhizomes sit on the surface with firm texture, that the plant receives adequate bright indirect light, and that humidity is not chronically low. Divisions with too little rhizome tissue may simply need more time, but buried rhizomes are the first suspect.
Crispy frond edges. Usually a humidity or watering-balance issue rather than a repotting technique failure. Increase ambient humidity and confirm the mix is moist but not waterlogged. Avoid direct sun during recovery.
Fungus gnats after repotting. Fresh moist mix can attract gnats in warm rooms. Let the top layer dry slightly between waterings, use sticky traps, and avoid overwatering the new pot while roots are still sparse.
Conclusion
Blue star fern repotting comes down to respecting how Phlebodium aureum actually grows: as an epiphyte with creeping rhizomes on the surface, fine roots in airy mix, and a slow but steady spread that does not need annual pot upgrades. Repot every one to three years in spring when rhizomes crowd the container, the mix has broken down, or growth stalls despite good light and careful watering. Move up only one pot size into a wide, shallow container with drainage holes. Use a chunky bark-and-perlite blend. Position rhizomes on the mix surface, never buried. Water lightly around the edges, hold fertilizer for a month, and keep humidity and light stable while the plant settles.
Most post-repot problems - wilting, yellowing, mushy rhizomes, stalled growth - trace back to buried rhizomes, oversized pots, or watering habits that fight the plant’s epiphytic nature. Get those three elements right and blue star fern recovers with less drama than many ferns its size. When in doubt, less disturbance beats aggressive intervention. This fern tolerates staying slightly root-bound far better than it tolerates sitting in a swampy oversized pot with rotting rhizomes hidden under soil.
When to use this page vs other Blue Star Fern guides
- Blue Star Fern overview - Start here for whole-plant context before deep-diving this topic.
- Blue Star Fern problems hub - Jump to symptom-specific fix guides when this care topic does not resolve the issue.
- Root Rot on Blue Star Fern - Escalate here when repotting adjustments are not enough.