Save Your Dying Houseplant: A Practical Revival Guide
Learn how to save your dying houseplant by diagnosing the real problem first, then fixing roots, water, light, pests, and recovery care.
A dying houseplant is not asking for more care. It is asking for the right care. Most plant rescues fail when the owner reacts to the symptom instead of the cause. A drooping plant may need water, but it may also be drowning in wet soil with damaged roots. Yellow leaves may mean overwatering, low light, root disease, pests, fertilizer salt buildup, cold stress, or normal old-leaf shedding. The fastest way to help a struggling plant is to slow down for a few minutes, inspect it properly, and treat the actual stress.
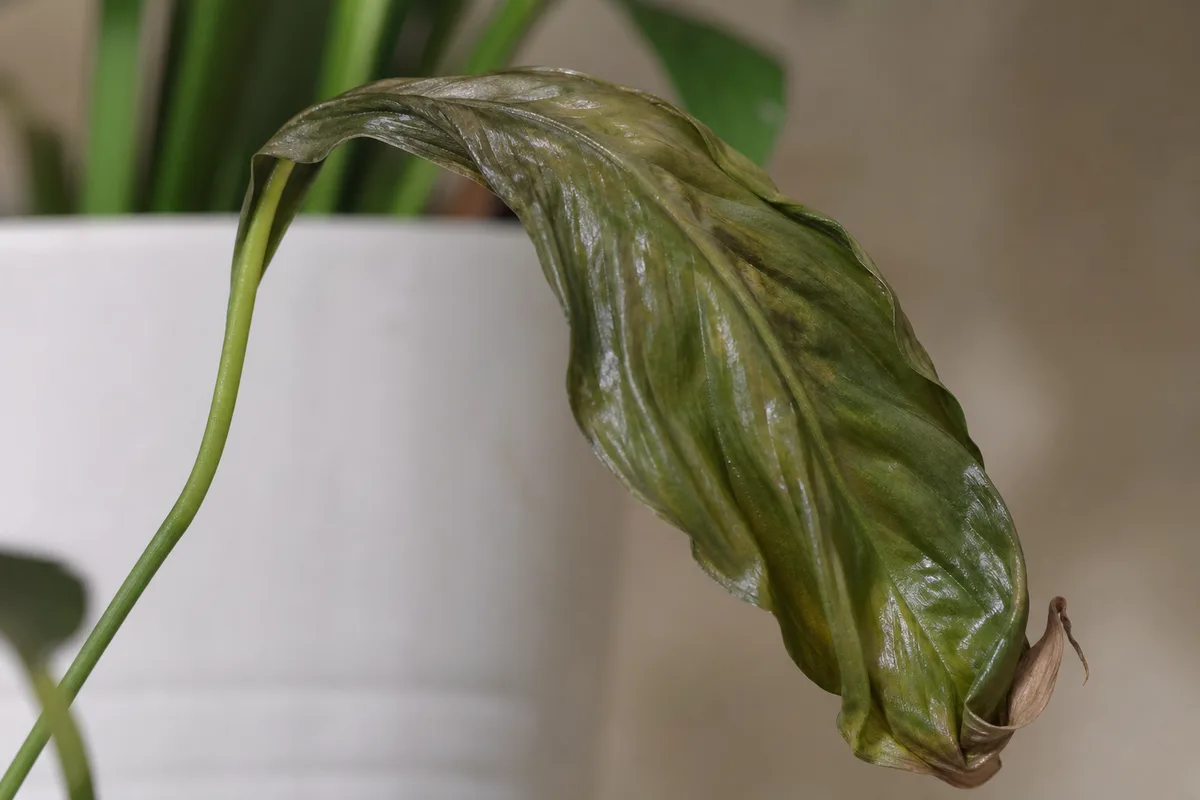
Many indoor plants recover if they still have living roots, a firm crown, or healthy nodes that can push new growth. Houseplants do not recover instantly, and some visible damage is permanent. A yellow leaf usually will not turn green again. A crispy brown edge will not heal. Revival means stopping the decline, protecting the healthy tissue that remains, and creating conditions where new growth can replace the damaged growth.
Your 10-minute triage checklist:
- Quarantine the plant if you see speckling, webbing, sticky residue, gnats, or bumps on stems.
- Lift the pot — heavy usually means wet; feather-light often means dry.
- Probe the soil with a finger or chopstick below the surface, not just at the top.
- Inspect stems and crown for firmness versus mush.
- Check light and recent moves — new window, heater, or AC draft?
- Decide the primary stress before watering, fertilizing, or repotting.
The First 10-Minute Triage
Start by moving the plant away from your other houseplants, especially if you see speckling, sticky residue, webbing, white cottony clumps, flying gnats, or small bumps on stems. Quarantine is basic plant hygiene. Many common indoor plant pests spread quietly before the owner realizes the problem is not bad watering but an infestation. Colorado State University Extension notes that washing plants with a vigorous jet of water can help control some household plant pests, especially spider mites and aphids, which are easily dislodged. (CSU Engagement and Extension)
Then check the pot before touching the leaves. Lift it. A pot that feels unusually heavy usually contains more water than the plant can use. A pot that feels feather-light may be severely dry. Push a finger or wooden chopstick into the potting mix. Dryness at the surface means very little if the lower root zone is still wet. Many houseplants decline because the top inch dries while the lower mix stays soggy, especially in low light, oversized pots, dense soil, or decorative cachepots with no drainage.
Next, inspect the leaves and stems in context. Lower yellow leaves plus wet soil often point toward excess moisture. Limp leaves plus dry soil usually point toward dehydration. Mushy stems, sour-smelling soil, blackened roots, or a collapsing crown suggest a more serious rot issue. Fine webbing, pale stippling, sticky residue, or cottony white patches suggest pests. Scorched patches on the side facing a window suggest light or heat damage. The same plant can have more than one problem, but you still need a primary diagnosis before making changes.
Signs Your Plant Is Stressed, Not Dead
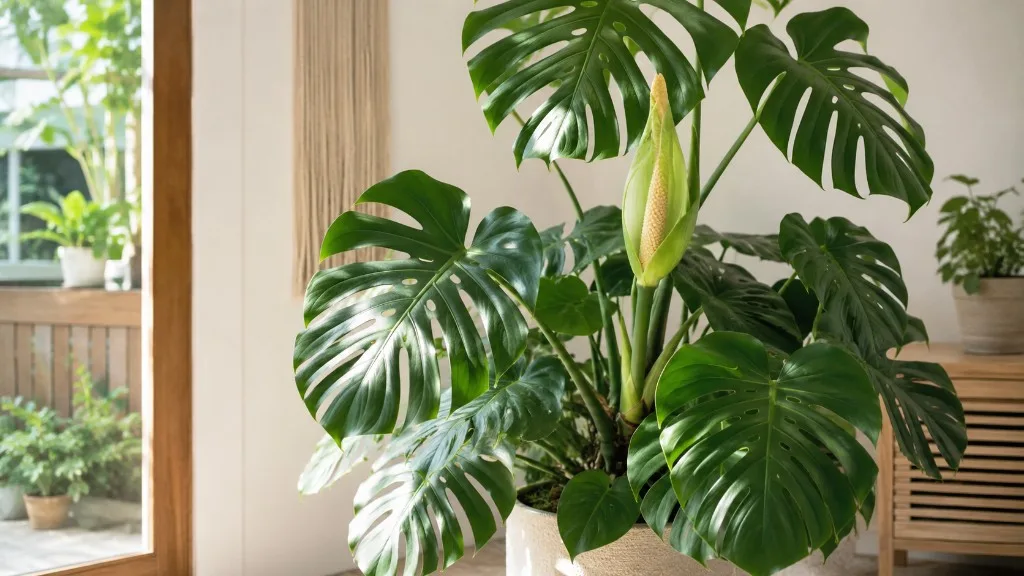
A plant is still worth rescuing if it has firm stems, at least a few healthy leaves, pale or tan firm roots, or living nodes along the stem. A node is the point where a leaf, aerial root, or new shoot can emerge. Vining plants such as pothos, philodendron, monstera, and many hoyas can look terrible above the soil while still having viable nodes for regrowth or propagation. Cane plants, succulents, and rosette plants are harder to rescue if the central growing point has rotted, but even they may recover if part of the stem or root system remains firm.
Do not judge the plant only by leaf count. Leaves are the first thing owners notice, but roots decide whether the plant has a future. Wisconsin Horticulture describes root rot as a disease condition where pathogens cause deterioration of the root system, and it can be acute enough to kill the plant. (Wisconsin Horticulture) If the plant is wilting while the soil is wet, the roots may no longer be able to take up water, even though water is physically present. That is why watering a wilted plant without checking soil moisture can make the damage worse.
Healthy roots are usually firm, flexible, and pale, cream, tan, or light brown depending on the plant species and potting medium. Rotten roots tend to be brown or black, fragile, mushy, hollow, slimy, or foul-smelling. South Dakota State University Extension describes root rot symptoms as wilting despite moist soil, yellowing leaves, and roots that may look mushy, brown, fragile, and smell bad. If enough healthy roots remain, the plant can often be rinsed, trimmed, and repotted in a clean container with fresh sterile soil. (SDSU Extension)
What Not to Do in Panic Mode
Do not fertilize a dying plant as your first move. Fertilizer is not medicine. It supports growth when the plant is already able to use nutrients, but it does not fix rotten roots, poor light, pests, compacted soil, or cold damage. Iowa State University Extension warns that excess fertilizer salts can contribute to brown leaf edges and recommends reducing fertilizer rates, flushing soil, or repotting when salt buildup is part of the problem. (Yard and Garden) A sick plant with damaged roots is less able to process fertilizer, so feeding it can add stress instead of solving the issue.
Do not immediately repot every sad plant either. Repotting is useful when the soil, roots, pot size, or drainage are part of the problem. It can be harmful when the plant is only thirsty, light-starved, newly relocated, or recovering from shock. Repotting breaks fine roots, changes moisture dynamics, and adds stress at exactly the time the plant has little energy to spare. If the soil is dry and the roots are not rotten, rehydration and stable light may be safer than a full root disturbance. See the repotting houseplants guide for when a pot change actually helps.
Do not cut off every imperfect leaf. Remove leaves that are fully dead, diseased, mushy, or pest-infested beyond cleaning. Keep partially green leaves if they are not rotting or spreading disease because they still photosynthesize. A plant with too few leaves and a damaged root system has less energy to recover. The goal is not to make the plant look perfect today; it is to keep enough healthy tissue alive for the plant to rebuild.
Skip the panic remedies. Hydrogen peroxide root dips, cinnamon dusting, and dish-soap sprays are popular online but poorly matched to most root-rot rescues. Wisconsin Horticulture recommends trimming rotten roots, repotting in fresh pasteurized mix, and correcting moisture — not chemical fungicides for home gardeners. (Wisconsin Horticulture) Research on orchid root dips found hydrogen peroxide can be phytotoxic to roots and may worsen decay rather than cure it. Stick to drainage correction, root trimming, and stable aftercare instead.
Diagnose the Real Problem Before You Treat It
A dying houseplant usually falls into one of five stress categories: water, roots, light, pests, or environment. The trick is that these categories overlap. Poor light slows water use, which keeps soil wet longer, which encourages root rot. Root rot causes wilting, which looks like drought. Pests cause yellowing, which looks like nutrient deficiency. Dry indoor air causes brown tips, which people sometimes mistake for underwatering. A good diagnosis looks at the plant, pot, soil, roots, room conditions, and recent care history together.
University of Maryland Extension notes that leaf yellowing is often one of the first signs of plant stress, and identifies overwatering as the number one reason indoor plants fail. (University of Maryland Extension) That does not mean every yellow leaf equals overwatering. It means water management should be one of the first things you check because it is common, easy to misread, and often fatal when ignored. A plant can recover from a dry spell faster than it can recover from weeks of oxygen-starved, decaying roots.
Overwatered vs. Underwatered Houseplants
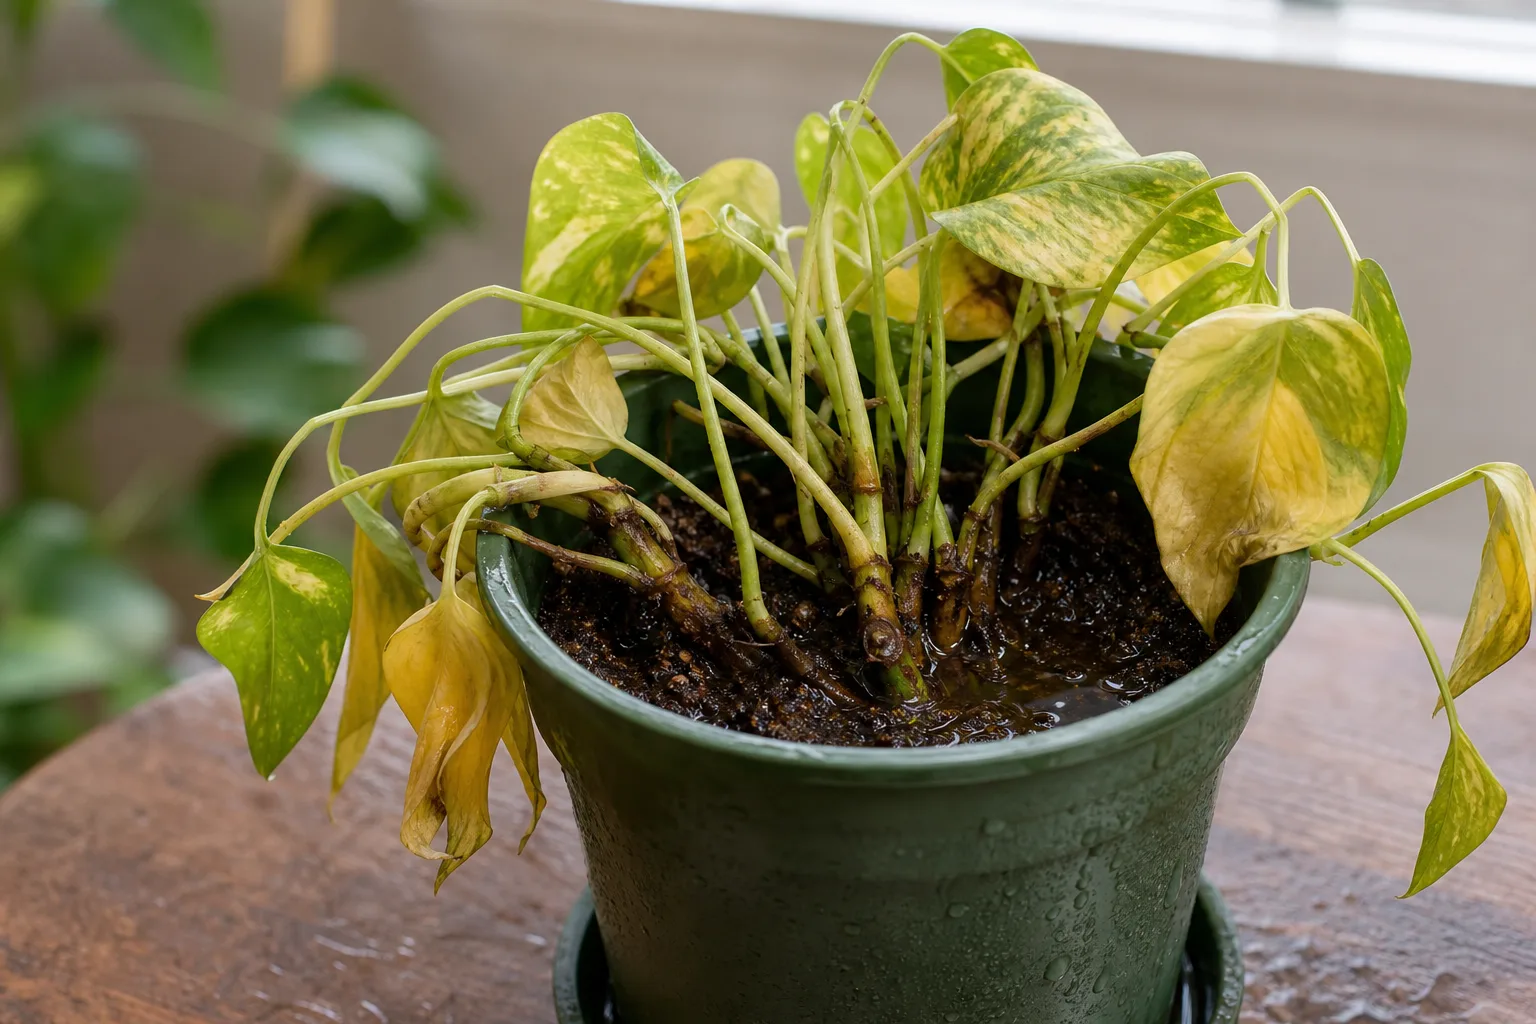
Overwatered and underwatered plants can both droop, yellow, and shed leaves. The difference is in the soil, pot weight, root texture, and leaf feel. An underwatered plant usually has dry, pulling-away soil, a light pot, limp or crisp leaves, and roots that may be dry but not mushy. An overwatered plant usually has damp or sour-smelling soil, a heavy pot, yellowing lower leaves, soft stems, leaf drop, and roots that may be dark or collapsing. University of Maryland Extension explains that excess moisture can cause wilting or yellowing of lower and inner leaves, and that overwatered plants can show symptoms similar to drought stress because root function is impaired. (University of Maryland Extension)
| Symptom | More Likely Overwatered | More Likely Underwatered |
|---|---|---|
| Soil feel | Wet below the surface for days | Dry deep into the pot |
| Pot weight | Heavy | Very light |
| Leaf texture | Limp, soft, yellowing | Limp, thin, curled, crispy |
| Roots | Brown, black, mushy, smelly | Dry, brittle, pale to tan |
| Smell | Sour, swampy, musty | Usually neutral or dusty |
| Best first action | Stop watering and inspect roots | Rehydrate gradually and drain well |
The table is a guide, not a law. Succulents may become mushy from overwatering before they yellow. Ferns may crisp quickly when too dry. Peace lilies can collapse dramatically from thirst and perk up after watering, while snake plants may rot silently below the soil before the leaves show major symptoms. Always confirm with the soil and roots before choosing a rescue path. For routine watering mechanics, see indoor plant watering basics and how to water indoor plants the right way.
Light Stress and Leaf Damage
Light problems often hide behind watering problems. A plant in too little light uses water slowly, so the same watering routine that worked in summer can become dangerous in winter or in a darker room. University of Missouri Extension states that insufficient light cannot be cured by extra fertilizer, water, or repotting. It also notes that artificial lights can improve growth when placed close enough and used for long enough each day. (MU Extension) This matters because many owners keep adding inputs when the actual missing ingredient is light.
Low-light stress usually shows as slow growth, smaller new leaves, weak stretched stems, leaning toward a window, pale foliage, and soil that stays wet too long. Direct-sun damage looks different. Leaves may show bleached, tan, or crispy patches, often on the side facing the glass. A plant moved suddenly from low light to intense sun can burn even if the species normally tolerates brighter conditions. Revival usually means moving the plant into brighter indirect light, not blasting it with harsh afternoon sun. The grow lights complete guide covers distance and duration when natural light is insufficient.
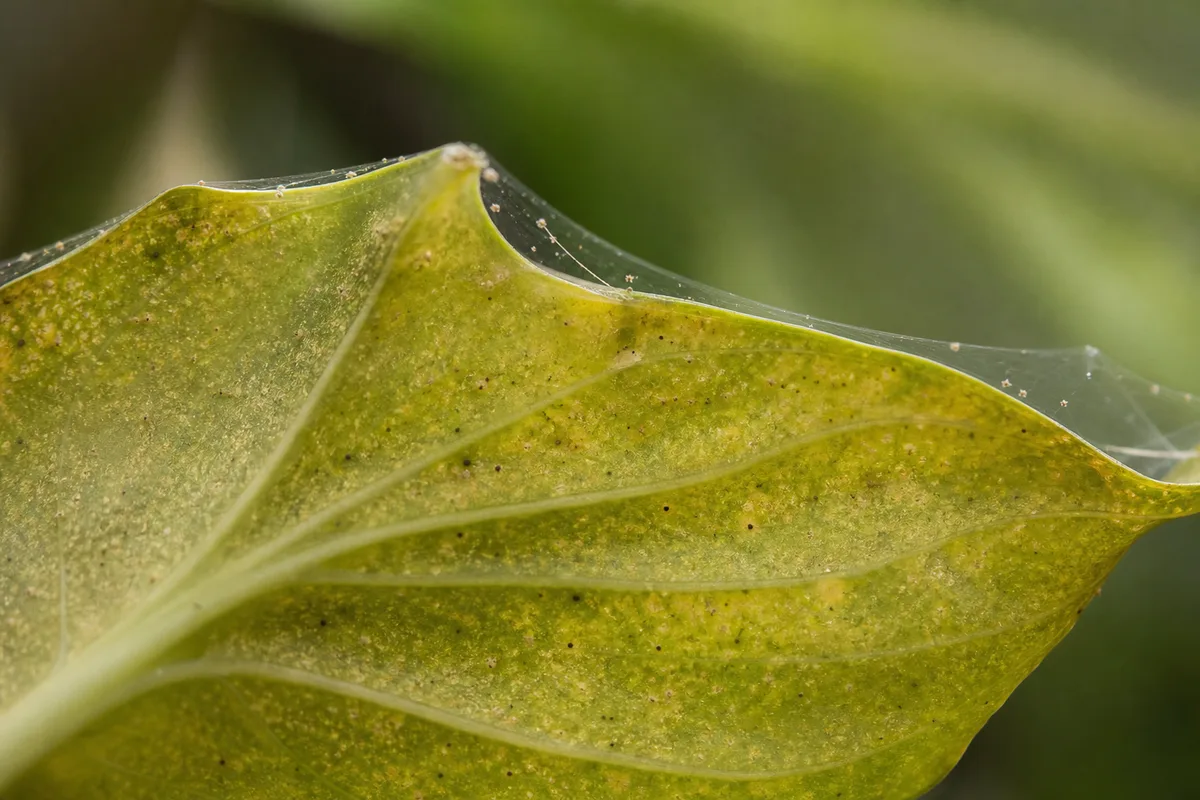
Pest Damage That Looks Like Plant Decline
Pests often make a plant look generally unhappy before the infestation is obvious. Spider mites can cause pale speckling and fine webbing. Mealybugs look like small white cottony clusters in leaf joints and along stems. Scale insects can look like brown bumps stuck to stems or leaf veins. Aphids cluster on soft new growth. Thrips can leave silvery scarring, black specks, and distorted new leaves. Fungus gnats usually do not kill healthy mature plants on their own, but their presence often signals overly wet organic soil that may be stressing the roots.
Clemson Cooperative Extension explains that insecticidal soaps work only by direct contact and are most effective on soft-bodied pests such as aphids, mealybugs, immature scale crawlers, thrips, whiteflies, and spider mites. Once the soap dries, it has no residual effect. (Home & Garden Information Center) Colorado State University Extension adds that home remedies made from household liquid soaps should not be substituted for labeled insecticidal soap products. (CSU Engagement and Extension) This is why one casual spray rarely fixes an infestation. Treatment works when you identify the pest, isolate the plant, clean the foliage, repeat treatment at the correct interval, and monitor new growth. Go deeper with the indoor plant pest guide and integrated pest management indoors guides.
Before treating, wipe leaves with a damp cloth or rinse the plant if the species tolerates it. Physical removal reduces pest pressure immediately. Then apply the safest effective control for the pest and plant type. Test any spray on a small area first, keep treated plants out of direct sun, and follow label directions. More product is not better. Over-spraying a stressed plant can burn leaves and create a new problem.
Temperature, Humidity, and Shock
Indoor plants often decline after a move, a season change, a cold draft, heating-system use, or a sudden shift in watering. Most common tropical houseplants prefer stable, warm indoor conditions. Cornell Cooperative Extension notes that many houseplants grow well between 65 and 75°F and should be kept away from cold drafts, radiators, and hot air vents. (Cornell Cooperative Extension) A plant sitting near an air conditioner, heater, drafty window, or hot balcony door can look like it has a watering problem when the real issue is environmental stress.
Humidity matters most for thin-leaved tropical plants such as calatheas, ferns, marantas, and some anthuriums. Low humidity often causes brown tips, curling, and crispy edges, especially when paired with inconsistent watering. Mississippi State University Extension notes that grouping plants can help increase humidity, while misting may aggravate some foliar diseases and should be avoided when abnormal foliage is present. (MSU Extension) A humidifier is often more useful than misting because it changes the air for longer than a few minutes. For winter decline patterns, see why houseplants struggle in winter.
Shock is also real. A plant newly brought home from a nursery may drop leaves because its light, humidity, temperature, watering, and airflow all changed at once. The solution is usually stability, not constant intervention. Keep it in suitable light, check soil moisture before watering, avoid fertilizer for a few weeks, and resist moving it every day. A plant cannot adapt to a place if the place keeps changing.
Rescue Steps for the Most Common Houseplant Emergencies
Once you identify the likely cause, choose the least disruptive treatment that solves the real problem. A severely dry plant needs water. A rotting plant needs oxygen, trimming, and fresh medium. A pest-infested plant needs isolation and repeated control. A low-light plant needs better light. A plant with damaged but functional roots needs patience. The most effective rescue is not always the most dramatic rescue.
Build a simple recovery kit before you start: clean scissors or pruning shears, rubbing alcohol for sterilizing blades, fresh well-draining potting mix, a pot with drainage holes, disposable gloves, a chopstick or moisture probe, a soft cloth, labeled insecticidal soap if pests are present, and a tray where the plant can drain fully after watering. For root rot cases, use a clean container and fresh medium rather than reusing the same soggy, contaminated mix.
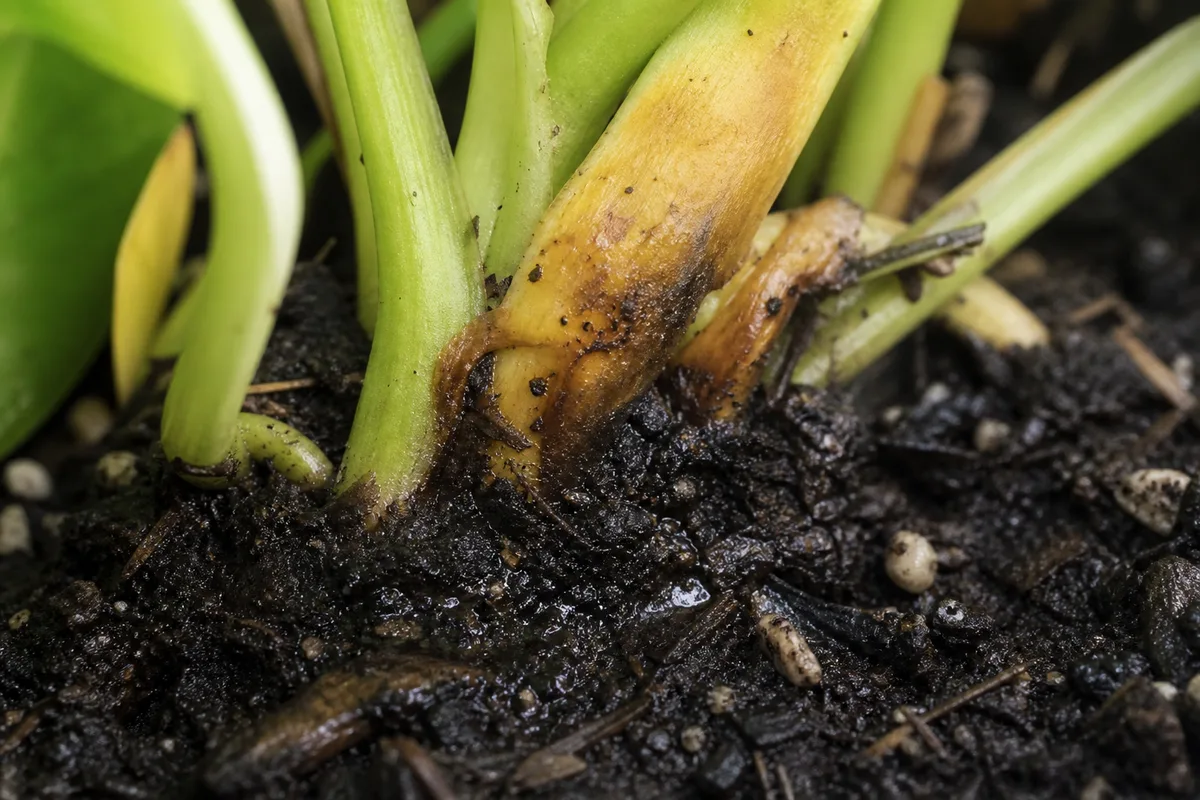
How to Save a Houseplant With Root Rot
Root rot rescue starts with stopping water and removing the plant from the pot. Do not wait for the top of the soil to dry if the plant is collapsing, the pot smells sour, or stems are turning mushy. Slide the root ball out gently and inspect the roots. If the outer soil is wet and compacted, loosen it carefully. Rinse only if needed to see the roots clearly, and avoid rough handling because stressed roots break easily.
Trim away roots that are black, mushy, hollow, slimy, or foul-smelling. Keep roots that are firm, even if they are tan or light brown. Sterilize your scissors between cuts if rot is severe. If the plant has lost a major portion of roots, also reduce some damaged foliage so the smaller root system does not have to support too much top growth. Do not strip the plant bare; keep enough green tissue for energy.
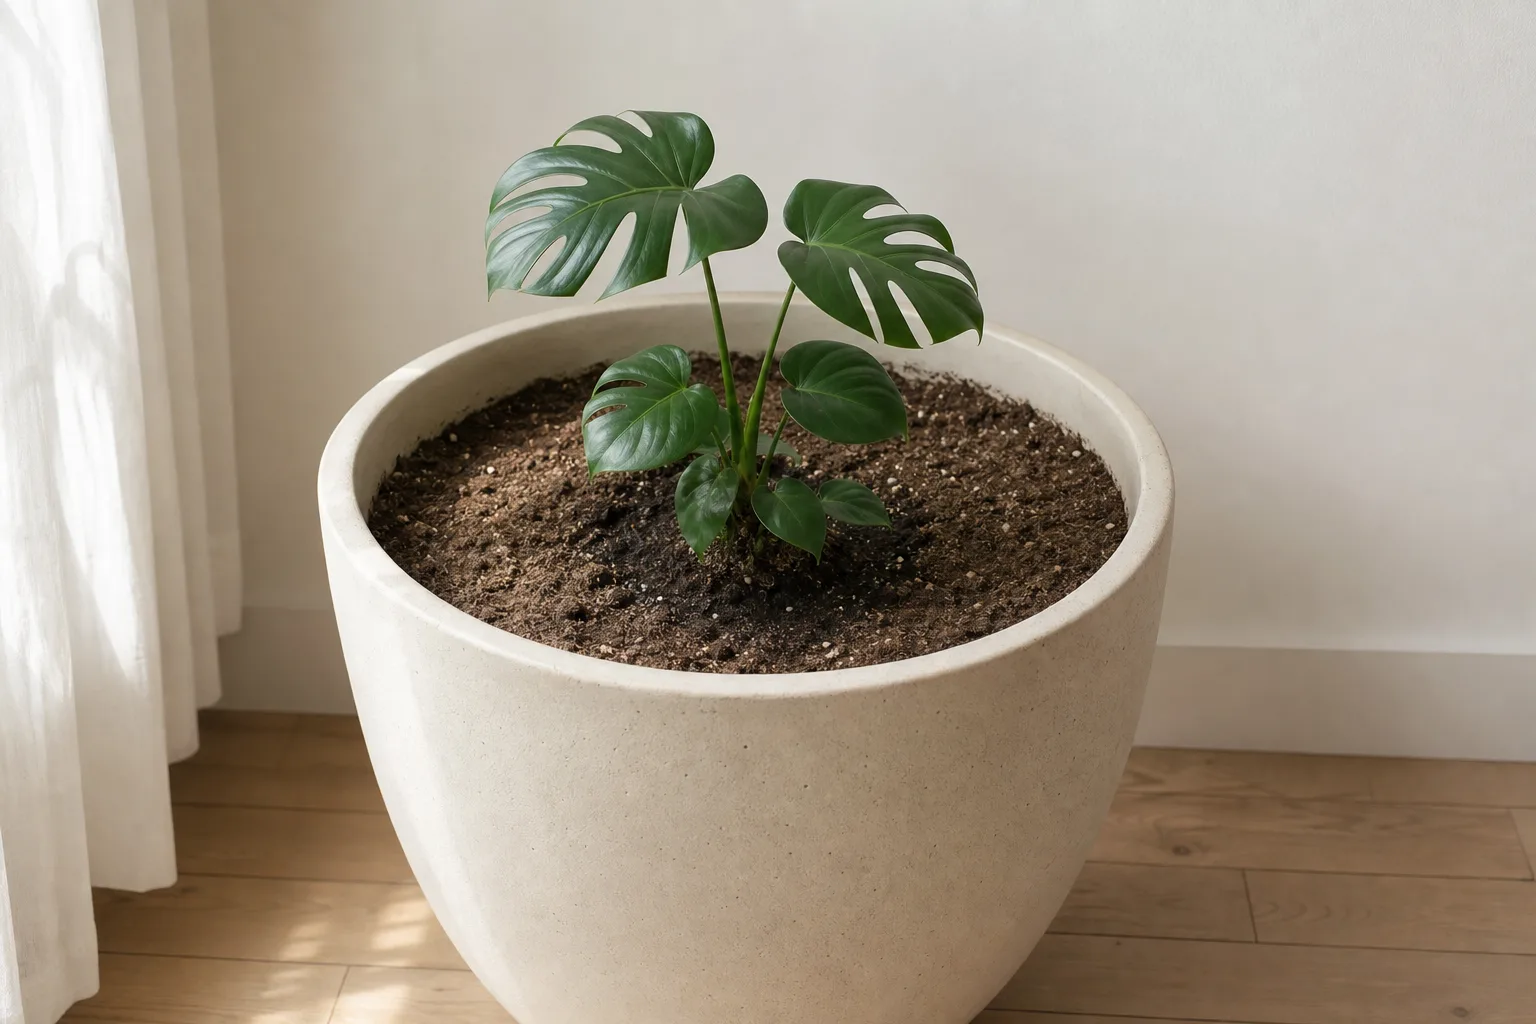
Repot into a clean pot with drainage holes and a fresh, airy mix. Choose a pot only slightly larger than the remaining root mass. Oversized pots hold excess moisture, which recreates the same problem. Water lightly after repotting only if the new mix is dry and the plant type needs it. If the roots are very wet and freshly trimmed, it is often safer to let the plant settle briefly before watering again. Keep the plant in bright indirect light, warm stable conditions, and away from direct harsh sun while it recovers.
UC Integrated Pest Management notes that root rot is often associated with poor drainage and overwatering, and that drainage can worsen as potting media ages, settles, loses aeration, and becomes compacted. It recommends good soil aeration, drainage, and appropriate watering frequency to prevent root rot. (UC IPM) Decorative pots without drainage can be used as outer cachepots, but the plant itself should sit in a nursery pot or inner pot that drains freely.
Editorial rescue vignette: An overwatered golden pothos in a 6-inch cachepot showed limp leaves and sour soil despite a dry surface. After unpotting, roughly 40% of roots were mushy and brown. Firm roots were rinsed, rotten tissue trimmed with alcohol-wiped shears, and the plant repotted one size down in chunky aroid mix. Lower yellow leaves were removed; two partly green leaves stayed. Watered lightly once, then left in bright indirect light. New growth appeared at a node in week three. The old damaged leaves never recovered — recovery showed up as firm stems and fresh leaves, not cosmetic repair of yellow tissue.
Recovery from root rot is slow. You may see more leaf drop after repotting because the plant is adjusting to root loss. The real sign of success is not old leaves becoming beautiful again; it is the decline stopping and new growth appearing. If the crown is rotten, the main stem is mushy, or no firm roots remain, full-plant recovery is unlikely. In that case, look for healthy stem cuttings or nodes that can be propagated. For infectious disease overlap, see houseplant diseases identification and treatment.
How to Rehydrate a Severely Dry Plant
A severely dry plant needs even rehydration, not a quick splash. When potting mix becomes extremely dry, it can repel water. You may pour water on top and watch it run straight down the sides without moistening the root ball. That is why a plant can be watered and still remain dry. The fix is to soak the root ball until the mix actually absorbs moisture, then let it drain completely.
Place the pot in a basin or sink with a few inches of room-temperature water and let the plant absorb water from below for 20 to 45 minutes, depending on pot size and plant type. When the top of the soil feels lightly moist and the pot feels heavier, remove it and let excess water drain fully. Do not leave the plant sitting in water for hours unless you are using a specific pest-control dunking method for a suitable plant. Long soaking can deprive roots of oxygen.
After rehydration, put the plant in bright indirect light and wait. Some plants perk up within hours, especially peace lilies and fittonias. Others need days. Crispy leaves will not become soft again, so judge recovery by stem firmness, leaf posture, and new growth. If the plant collapses again within a day or two, the roots may be too damaged to hold water, or the plant may be root-bound, hydrophobic, or in a poor mix.
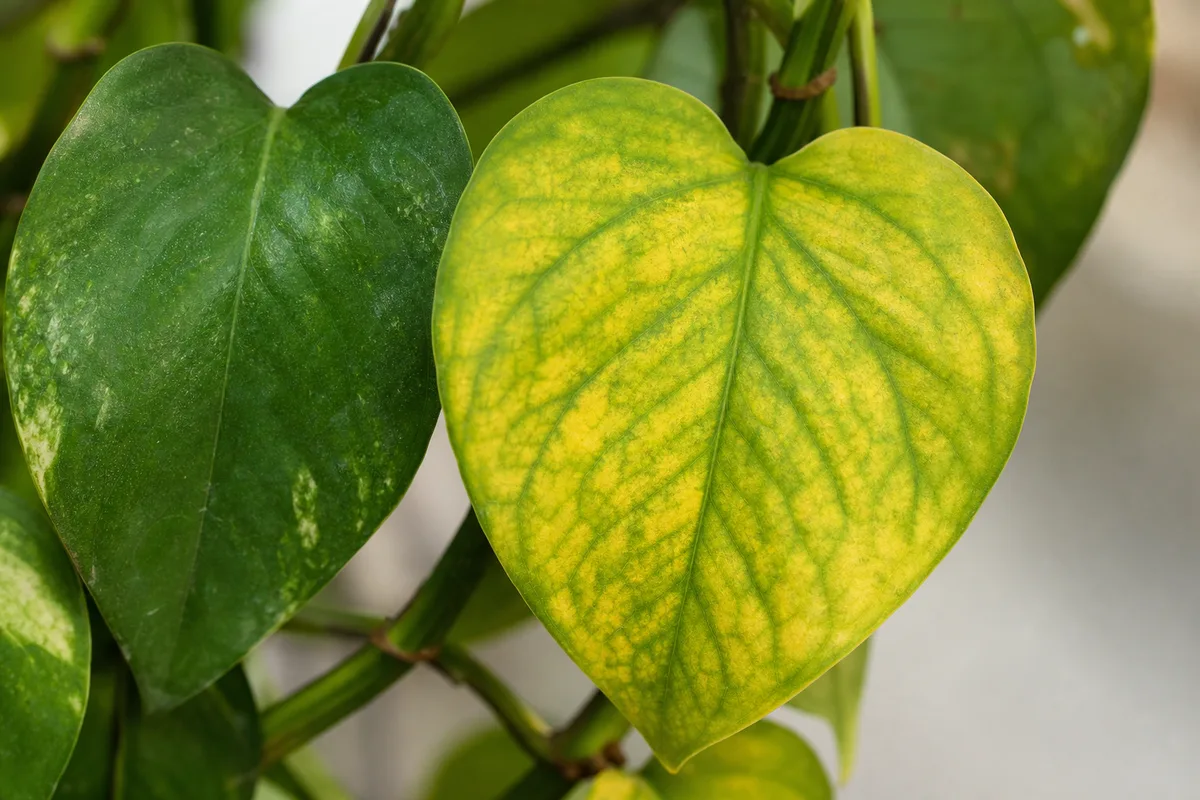
How to Handle Yellow, Brown, or Dropping Leaves
Yellow leaves are information, not a command to water. A single older lower leaf turning yellow can be normal aging. Many yellow leaves at once mean stress. Yellowing lower and inner leaves with wet soil suggests overwatering. Yellowing new growth may point toward root damage, pests, nutrient issues, or pH-related nutrient availability. Yellow leaves plus stippling or webbing suggest pest feeding. Brown tips often point toward inconsistent watering, low humidity, fertilizer salt buildup, or water-quality stress.
Once a leaf is fully yellow or brown, it will not recover. Remove it cleanly if it detaches easily or if it is diseased, mushy, or attracting pests. If the leaf is partly green and the plant has few leaves left, you can leave it temporarily unless it is infected. The plant benefits more from remaining green tissue than from cosmetic pruning. Use clean scissors and avoid tearing stems.
Leaf drop after a rescue does not automatically mean failure. A plant that has been overwatered, repotted, moved, pruned, or treated for pests may shed damaged leaves while stabilizing. Watch the direction of the trend. If old damaged leaves drop but stems remain firm and new growth looks healthy, the plant is improving. If new leaves are smaller, distorted, yellowing, or collapsing, the core issue is still active.
How to Contain and Treat Pest Problems
If pests are present, isolate the plant immediately and inspect nearby plants. Pests often spread before you see them. Check leaf undersides, petioles, stem joints, soil surface, and new growth. Use a bright light and magnification if needed. The first treatment should usually be physical: rinse, wipe, prune heavily infested sections, and remove visible insects. This lowers the population before any spray is used.
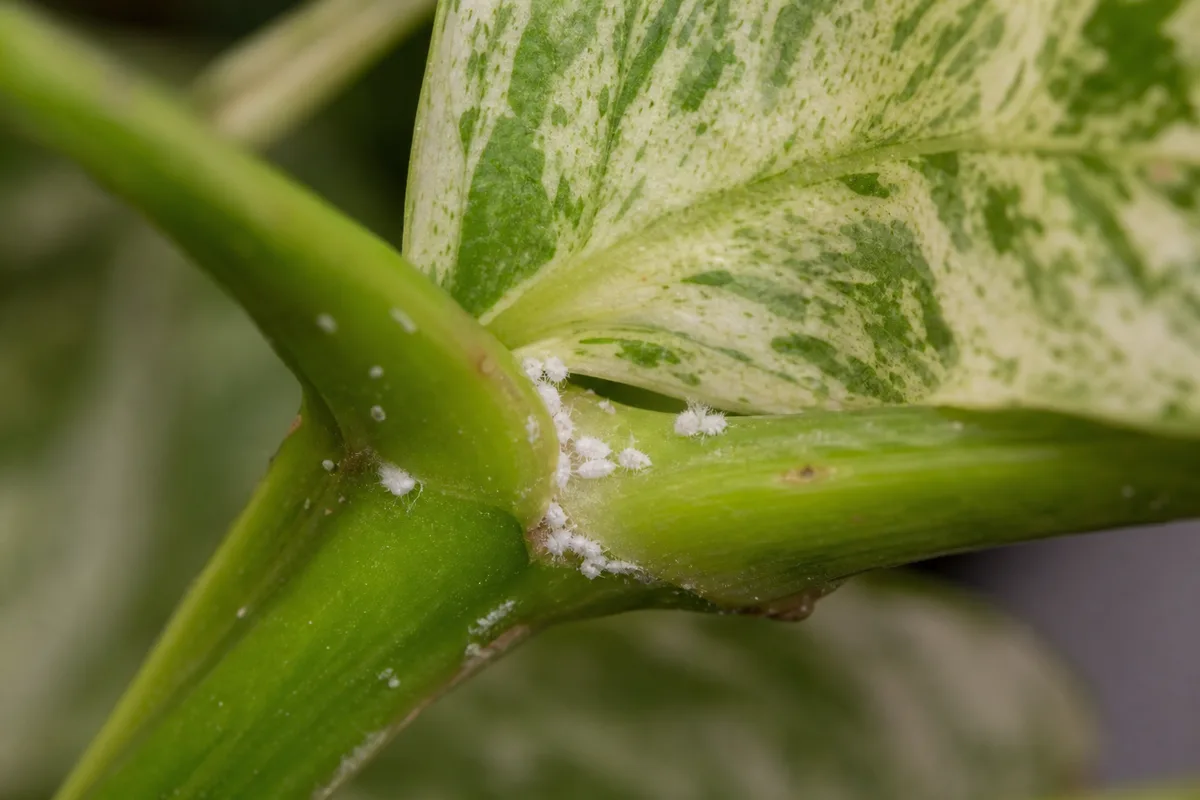
For spider mites and aphids, rinsing can be highly effective because they dislodge easily. For mealybugs, use a cotton swab dipped in rubbing alcohol on visible clusters, then follow with repeated monitoring. For scale, gently scrape off adults and treat crawlers with appropriate contact controls. University of Minnesota Extension notes that small numbers of scale insects can be removed manually, while mealybugs can be removed with tweezers or a cotton swab dipped in alcohol. (University of Minnesota Extension)
Repeat treatment matters because eggs, hidden insects, and new hatchlings may survive the first round. Insecticidal soap must contact the pest directly, and it stops working after it dries. Treat according to label directions, avoid spraying in strong sun, and test sensitive plants first. If a plant is heavily infested, badly weakened, and easy to replace, discarding it may be the most responsible choice, especially if it threatens a larger collection.
Aftercare That Helps the Plant Recover
Revival is not finished when the plant stops collapsing. The aftercare phase is where many rescues fail. People see one new leaf, get excited, and start watering more, fertilizing heavily, repotting again, or moving the plant to a better place every few days. A recovering plant needs boring consistency. It needs the right light, predictable moisture, airflow, warmth, and time.
Water by Soil Condition, Not by Calendar
A fixed watering schedule is one of the easiest ways to kill indoor plants. A plant may need water every few days in warm bright conditions and only every two or three weeks in low light or cool weather. Pot size, pot material, soil mix, humidity, airflow, season, and root health all change water use. The plant does not know it is Sunday. It only responds to moisture, oxygen, temperature, and light.
Check the soil before watering. For many tropical foliage plants, water when the top portion of the mix has dried but before the entire root ball becomes bone dry. For succulents and many drought-tolerant plants, wait until the mix dries much more thoroughly. For ferns and moisture-loving plants, avoid full drought but still do not keep the soil swampy. When you water, water thoroughly enough that excess drains out, then empty the saucer or cachepot.
Use pot weight as a second signal. Lift the plant after watering and again when it is ready for water. Over time, your hands learn the difference better than a calendar can. Moisture meters can help, but they are not perfect in chunky mixes or salty soil. A chopstick, finger test, and pot weight together are often more reliable.
Adjust Light, Repotting, and Fertilizer Timing
Give the recovering plant bright, suitable light without sudden extremes. Many common houseplants prefer bright indirect light, especially while recovering from root stress. Too little light slows repair and keeps soil wet too long. Too much direct sun can scorch weakened leaves. If the plant was in a dark corner, move it closer to a window gradually or use a grow light at a sensible distance.
Do not repot again unless there is a clear reason. Repotting is helpful for root rot, compacted soil, no drainage, severe root binding, or contaminated pest-heavy media. It is not helpful as a repeated comfort ritual. After a rescue repot, let the plant rebuild roots before disturbing it again. For most recovering plants, several weeks of stability are more valuable than another upgrade.
Hold fertilizer until the plant is actively growing. UC Marin Master Gardeners advises against fertilizing during winter because reduced light and temperature reduce indoor plant growth. (UC Agriculture and Natural Resources) The same logic applies to a stressed plant: if it is not growing, it cannot use much fertilizer. Once you see healthy new growth, restart at a diluted dose during the active growing season. Avoid strong feeding on plants with recently pruned or damaged roots.
When to Propagate or Give Up
Sometimes the smartest way to save a dying houseplant is to stop trying to save the whole plant. Propagation is the backup plan when the root system is failing but stems or nodes are still alive. Vining plants are especially good candidates. Cut below a healthy node, remove rotting or damaged tissue, and root the cutting in water, perlite, sphagnum, or a suitable propagation medium. Keep the cutting warm, bright, and humid enough for the species, but not sealed in stagnant wet conditions if rot is already a risk.
Give up on the original plant when the crown is mushy, the main stem is hollow, all roots are rotten, no viable nodes remain, or pest pressure is too severe for safe containment. This is not failure. It is good plant care. Keeping a rotten or infested plant can spread disease and pests to healthy plants. If the plant has sentimental value, take any viable cutting before discarding the rest.
Recovery timelines vary. A mildly underwatered plant may improve in a day. A plant recovering from root rot may take several weeks before new growth appears. A pest-damaged plant may need multiple treatment cycles before it looks stable. A low-light plant may need a full growing season to regain shape. Judge progress by new growth quality, stem firmness, root recovery, and whether damage has stopped spreading.
If diagnosis remains uncertain on a valuable plant, contact your local cooperative extension office or a university plant diagnostic clinic with clear photos and a description of how symptoms spread.
Species-Specific Next Steps
After triage, route to the right species problem page for deeper recovery steps:
| If your plant is… | Likely next read |
|---|---|
| Pothos or golden pothos | Pothos root rot, yellow leaves, wilting |
| Monstera | Monstera root rot, yellow leaves |
| Peace lily | Peace lily wilting, root rot |
| Snake plant | Snake plant root rot, drooping leaves |
| Spider plant | Spider plant root rot, yellow leaves |
Related Guides
This page is the site-wide revival hub. Use sibling guides when you need deeper coverage of one stress type:
- Houseplant diseases identification and treatment — when rot or spots may be infectious, not just cultural stress.
- How to tackle indoor plant pests at home — pest ID and repeat-treatment workflow.
- Integrated pest management indoors — inspect-before-treat system for recurring infestations.
- Indoor plant watering basics — moisture checks that prevent most rescues from starting.
- How to water indoor plants the right way — drainage, pot weight, and seasonal adjustment.
- Repotting houseplants — when a pot change helps versus adds stress.
Conclusion
Diagnose before you act. Check soil moisture, pot weight, roots, light, pests, and recent environmental changes. Most successful rescues come down to isolating the plant, identifying the real stress, removing dead or rotten tissue, correcting watering and drainage, improving light gradually, treating pests thoroughly, and giving the plant stable aftercare. If firm roots, living stems, or healthy nodes remain, the plant may still have a real chance. If not, propagation or replacement is the responsible choice.