Polka Dot Plant Care Guide: Light, Humidity & Pinching
Hypoestes phyllostachya
Polka Dot Plant needs medium to bright indirect light, consistent moisture every 2–4 days, weekly pinching to prevent flowering and legginess, and 50–70 % humidity. Non-toxic to pets.
Polka Dot Plant Care Guide: Light, Humidity & Pinching
Start with wateringThe most common care mistake for Polka Dot PlantWatering guide →Polka Dot Plant care essentials
Light
medium to bright indirect light, low indirect light
Water
Every 2–4 days - check top 1–2 cm. Water when surface begins to dry. Do not let the plant wilt repeatedly - shallow roots stress quickly.
Soil
Standard potting compost + 15 % perlite + 10 % worm castings. Slightly moisture-retaining but well-draining. pH 5.5–7.0.
Humidity
50–70%
Temperature
18–27°C (65–80°F)
Fertilizer
Feed lightly during active growth. Balanced liquid fertilizer at half strength and stop if the plant is stressed, newly repotted, or not actively growing.
About Polka Dot Plant
Polka Dot Plant has a upright growth habit.
| Detail | Information |
|---|---|
| Growth habit | Upright |
| Scientific name | Hypoestes phyllostachya |
Polka Dot Plant Care Guide: Light, Humidity & Pinching
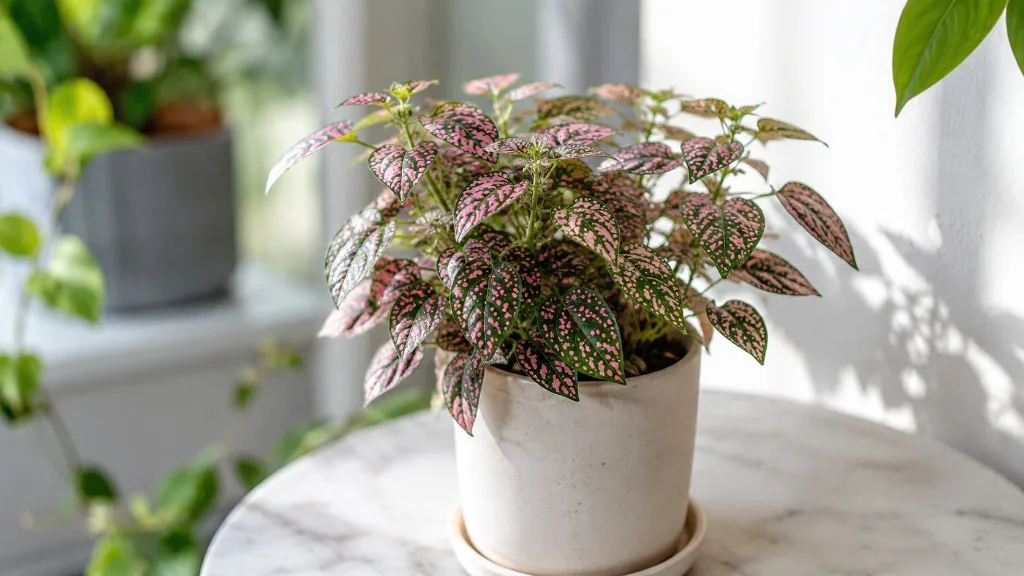
Walk into a garden center in spring and you will see flats of polka dot plant (Hypoestes phyllostachya) in electric pink, clean white, and deep red - compact mounds that look almost painted. Bring one home, set it on a bookshelf in medium light, water when you remember, and within a month the pink speckles fade, the stems stretch, and the whole plant starts looking like a tired weed with good intentions. That gap between the nursery bench and the windowsill is exactly what this guide closes.
Polka dot plant is not difficult because it needs exotic conditions. It is difficult because it needs consistent moisture, Polka Dot Plant light guide to hold its color, humidity above what most living rooms provide, and regular pinching to stay bushy instead of leggy. Miss any one of those and the plant still lives - it just stops looking like the plant you bought. The sections below walk through each requirement with specific numbers, a clear fix for leggy growth, and the ASPCA non-toxic status that makes this one of the few vividly patterned houseplants you can keep in a pet-friendly home without panic.
What Is Polka Dot Plant (Hypoestes phyllostachya)?
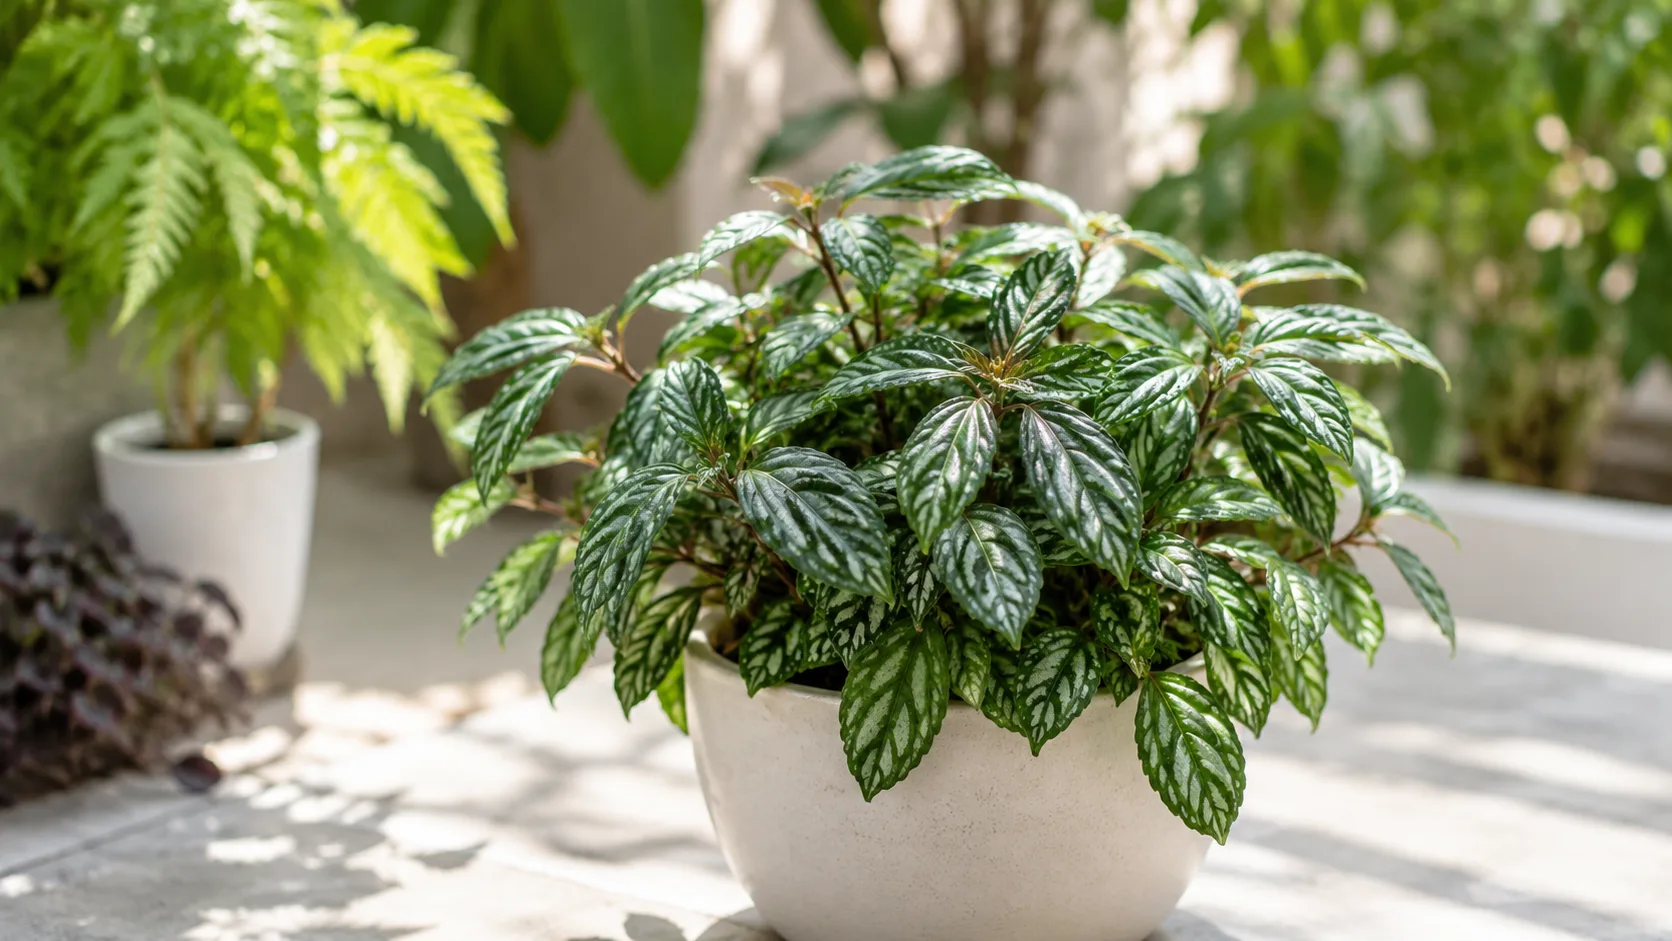
Polka dot plant is an herbaceous perennial in the Acanthaceae family, native to Madagascar and widely grown as a houseplant, terrarium filler, and seasonal bedding annual in warm climates. The Missouri Botanical Garden Plant Finder describes it as a plant noted for ovate green leaves up to 2 inches long that are spotted with rose, pink, or lavender. Indoors it typically grows 12–20 inches tall with a loose, spreading habit unless you train it otherwise.
The North Carolina Extension Gardener Plant Toolbox adds useful commercial context: what was once treated mainly as a houseplant now appears routinely in containers, dish gardens, and window boxes, with hybrids available in reds, greens, whites, and pinks. The first true leaves after the green cotyledon already show the variegation pattern, which is how growers can sort colors early. Tiny lilac or purple tubular flowers appear on spikes up to 6 inches long in late spring and summer outdoors, and sporadically year-round indoors - but nobody grows Polka Dot Plant overview for the blooms. The foliage is the entire point.
Outdoors, polka dot plant is winter-hardy only in USDA zones 10–11. Everywhere else it is a tender tropical treated as an annual or brought indoors before temperatures drop below about 50°F (10°C). That tropical origin explains the humidity appetite, the intolerance of cold window ledges, and the fast growth when conditions are right. It also explains why the plant can look fabulous for one season and then decline if you let it flower and go to seed without intervention - a lifecycle quirk covered later in this guide.
Common names pile up on the same species: freckle face, measles plant, flamingo plant, pink splash, and baby’s tears - though that last name also applies to unrelated plants, so check the botanical tag. If your pot says Hypoestes phyllostachya, you are in the right place regardless of which nickname the label uses.
Pink Speckles, Cultivars, and Why Color Fades
The entire appeal of polka dot plant is variegated foliage: green leaves irregularly splashed, spotted, or almost fully flooded with pink, red, or white. The RHS genus guide for Hypoestes describes leaves as irregularly spotted and splashed in various shades, forming low spreading clumps up to about 30 cm high. In commerce, the pink-green combination remains the default image most people picture, but the same species carries a wide color range.
Pink, Red, White, and Modern Series
Classic pink polka dot plant pairs deep green with bubblegum-pink speckles that intensify under stronger appropriate light. Red and rose forms push the splashes toward crimson. White cultivars invert the look with dark green and clean white markings. Proven Winners’ Hippo series - Rose, White, and Red - was bred for larger leaves and more vigorous growth than older seed strains, which matters if you want a faster fill in a mixed container but also means more frequent pinching indoors.
Color intensity is not fixed at purchase. It is a live report on light exposure. The RHS growing guide is explicit: deep shade reduces leaf colouring and turns foliage more green. The reverse failure mode is harsh direct summer sun, which scorches the thin leaves and bleaches the bright pigments. A plant on a dim north-facing desk will slowly revert toward solid green as it sacrifices variegation to photosynthesize more efficiently. A plant in blazing western afternoon sun will crisp at the margins and look washed out. The sweet spot is bright, indirect light - enough photons to keep the pink speckles vivid, not so much that the leaf tissue burns.
If your polka dot plant is turning green, resist the instinct to fertilize. Check light first, then watering stress, then whether the plant has gone leggy and is spending energy on stem elongation instead of new patterned leaves. Move it closer to a bright window behind a sheer curtain, or supplement with a grow light 8–12 inches above the canopy for 12–14 hours daily, and new growth should carry the color back within a few weeks. Old leaves will not repaint themselves; judge success by the newest pair at each stem tip.
Light: Bright Indirect for Color, Not Leggy Stretching
Light is the control knob for both color and shape on polka dot plant. The University of Florida IFAS fact sheet on Hypoestes phyllostachya notes that variegated foliage coloration is often more pronounced in shaded locations outdoors - a statement that confuses indoor growers until you remember that “shade” in Florida summer is still brighter than many indoor shelves. Indoors, the practical translation is medium to bright indirect light for most of the day, not dim corners and not unfiltered south glass.
The best placements in a typical home: an east-facing window where the plant gets soft morning sun and bright indirect light the rest of the day; a few feet back from a south- or west-facing window with a sheer curtain; or under a dedicated LED grow light if your only window is obstructed. The Missouri Botanical Garden recommends overwintering houseplants in bright indoor light with some direct sun - a hint that this species tolerates a short sun dose better than many tropical foliage plants, as long as you introduce it gradually and avoid peak midday beams.
Leggy growth - tall, thin stems with long gaps between leaves - is etiolation. The plant is reaching for more light. It is so common on polka dot plant that some growers assume legginess is inevitable. It is not. It is a signal. When you see internodes stretching, move the pot to a brighter station before you do anything else. Pinching alone on a dark shelf only produces a bushier plant that is still pale and weak. Brighter light plus pinching is the combination that keeps the nursery look.
Too much light shows up as bleached patches, brown scorched edges, or curling leaves at midday. Pull the plant back from the glass or add filtering. Acclimate over a week when upgrading light intensity so you do not shock a plant that came from a shaded greenhouse bench. Rotate the pot a quarter turn weekly so growth stays even and one side does not dominate.
Watering: Even Moisture Without Soggy Roots
Polka dot plant wants evenly moist soil, not a swamp and not a drought cycle. LeafyPixels plant-care data for this species targets checking the top 1–2 cm of mix and watering when the surface begins to dry, roughly every 2–4 days in active growth - but the interval is a starting point, not a rule. Pot size, material, light, humidity, and season all change how fast the root zone dries.
The RHS growing guide says to let the top of the compost dry out before watering again. Both point the same direction: do not keep the mix saturated at all times, but do not let the plant sit dry for long either. This is a finer line than with a snake plant or ZZ plant.
Reading Soil Moisture and the Wilting Response
Polka dot plant has a dramatic drought tell: if the top layer dries too far, the whole plant collapses and looks dead. Stems flop, leaves lose turgor, and you will swear you killed it. In most cases you have not. Soak the pot thoroughly until water runs from the drainage holes, empty the saucer, and the plant often stands back up within hours. That recovery trick makes beginners think the plant loves drought. It does not. It loves steady moisture and punishes long dry gaps with a stress response that weakens the root system over time.
The finger test remains the best tool. Push your index finger into the mix to the first knuckle. If it feels cool and slightly damp, wait. If it feels dry at the surface and the pot is noticeably lighter, water deeply. Lift the pot before and after watering a few times until you can judge weight by hand. Shallow roots stress quickly on this species - another reason not to let wilting become a weekly habit even if the plant bounces back.
overwatering on Polka Dot Plant is the quieter killer. Chronic wet mix with weak light produces yellowing lower leaves, soft stems, and eventually root rot on Polka Dot Plant. If the pot stays heavy for days after watering, the soil smells sour, or fungus gnats appear, cut back on frequency, improve light, and check that drainage holes are open. Never let the pot sit in a full saucer. In winter, stretch the interval as growth slows and the mix holds moisture longer, but do not abandon watering entirely - resume the normal rhythm when new spring growth appears.
Humidity: Why This Plant Loves Steamy Rooms
Polka dot plant is a tropical understory species that expects humid air. The RHS states plainly that Hypoestes need high humidity to keep foliage looking good; in dry air, leaf edges brown. LeafyPixels targets 50–70% relative humidity, which matches what most successful indoor growers report. Below about 40%, brown crispy margins and increased spider mite risk follow. Above 70% without airflow can invite foliar fungal issues, so balance matters.
The easiest high-humidity placements are steam-forward rooms with windows - bathrooms and kitchens where showers and cooking raise ambient moisture. A closed terrarium or bottle garden is even better because it traps humidity around the canopy; the RHS specifically recommends terrarium culture for this genus. If the plant lives in an ordinary living room, use a pebble tray (pot elevated above water-filled stones), group it with other plants, or run a small cool-mist humidifier nearby. Misting alone gives only a brief humidity bump and can leave wet foliage that encourages mildew; treat misting as cosmetic, not structural.
Humidity and watering interact. In very dry air, the plant loses water through leaves faster and the pot dries sooner - so you may water slightly more often while also raising humidity. In a steamy bathroom with lower light, the pot may dry slowly and you must water less to avoid rot. Read the pot, not the calendar, and use humidity as the context that changes the interval.
Winter heating strips humidity from indoor air just when the plant is already stressed by shorter days. That is when a humidifier earns its keep. If brown tips appear despite correct watering, suspect dry air before you suspect fertilizer deficiency.
Temperature and Indoor Placement
Polka dot plant prefers warm, stable indoor temperatures in the 65–80°F (18–27°C) range, which is ordinary room comfort for most homes. The RHS genus guide lists 18–27°C as the preference. The RHS growing guide sets a minimum around 12°C (54°F); below that, growth stalls and leaves discolor.
Watch the microclimates that violate “room temperature” on paper: cold winter window ledges where glass chills the pot overnight; air-conditioning vents blowing dry cold air directly on leaves; and radiators that bake one side of the pot while desiccating the air. Move the plant a few feet back from the glass in deep winter, redirect vents, and never leave it in a car or unheated porch during a cold snap.
Placement is where light, humidity, and temperature intersect. A bright bathroom with a frosted window can be ideal. A dark bathroom without supplemental light will fade color and stretch stems even if humidity is perfect. A bright kitchen away from the stove is often the compromise that works year-round. Avoid clustering polka dot plant tightly with plants that need polar opposite care - a succulent on the same tray that wants bone-dry soil will not simplify your routine.
Soil, Pot Choice, and Drainage
Use a rich, well-draining potting mix that holds moisture without staying waterlogged. LeafyPixels recommends standard potting compost with 15% perlite and 10% worm castings, slightly moisture-retaining but well-draining, at pH 5.5–7.0. The Missouri Botanical Garden calls for organically rich, medium-moisture, well-drained soils in part shade - language that translates indoors to quality houseplant mix amended for porosity, not heavy garden soil.
A simple recipe if you are mixing at home: start with a reputable all-purpose indoor potting mix, add perlite or pumice until water drains quickly when you test a handful, and incorporate a modest amount of worm castings for gentle organic matter. The perlite keeps oxygen at the shallow root zone; the worm castings improve moisture retention without the compaction of straight peat. Avoid packing the mix tight when Polka Dot Plant repotting guide - polka dot plant roots are fine and close to the surface.
Pot selection should always include drainage holes. Terracotta dries faster and forgives slight overwatering in humid homes; plastic retains moisture longer and suits growers who tend to underwater. Go up only one pot size at repotting. An oversized pot holds water the root mass cannot use and is the fastest route to root rot after a well-intentioned upgrade.
Fertilizer and Feeding Schedule
Polka dot plant is a moderate feeder during active growth, not a hungry monster. The RHS growing guide recommends every two or three weeks from April to September with a liquid general-purpose fertiliser. LeafyPixels data points to every 2–4 weeks in spring and summer at half strength with a balanced liquid formula - a slightly more frequent, diluted approach that suits fast juvenile growth in small pots. Both are reasonable; the principle is light, regular feeding while the plant is visibly growing, not heavy doses on a stressed or dormant plant.
Always apply fertilizer to already-moist soil so salts do not burn shallow roots. Pause feeding in winter when growth slows, immediately after repotting while roots heal, and during recovery from wilt stress, pests, or root rot. Excess fertilizer does not restore pink color - light does - and salt buildup mimics drought damage with brown leaf tips. If you see white crust on the pot rim, flush the mix with plain water until runoff runs clear and skip the next feeding.
Pinching, Pruning, and Stopping Leggy Growth
Here is the care task most polka dot plant owners skip - and the one that separates a bushy color spot from a leggy stick with leaves at the top. Polka dot plant is not naturally compact. Left alone, it grows upright, stretches toward light, and develops long bare stems with foliage clustered at the tips. Nurseries sell tight mounds because they pinch relentlessly in production. You need to continue that at home.
The RHS growing guide recommends pinching shoot tips along with any flowers to encourage bushiness. NC State Extension notes that pinching back leggy plants maintains a more compact form - pinch the apical bud back to just above the second or third leaf node; from each pinched point, two new stems typically branch, making the plant sturdier and fuller with every session.
Weekly Pinching and Hard Resets
For maintenance, pinch the top two leaves on each stem every week or two during active growth. Use clean fingers or sterilized snips. Do not be timid - this species grows back fast when light and moisture are right. Regular pinching is what prevents legginess before it starts, not just what fixes it after the fact.
If the plant is already seriously straggly, combine brighter light with a hard prune in early spring: cut each stem back to a few inches above soil level, leaving several healthy nodes. The plant will look stubby for a week, then push bushy new growth if the root zone is healthy. Never remove more than about one-third of total foliage in a single session unless you are executing a deliberate hard reset. Sterilize cutting tools between plants if you have had pest issues.
Leggy growth has two root causes: insufficient light and insufficient pinching. Address both. Moving a spindly plant to a brighter window without pinching produces a taller spindly plant. Pinching on a dark shelf produces a shorter pale plant. Brighter light plus weekly pinching is the fix that actually works.
Flowers, Life Cycle, and When to Snip Blooms
Polka dot plant produces small lilac or purple flowers on upright spikes in summer, and sporadically indoors. They are cute, inconspicuous, and you should usually remove them. The Missouri Botanical Garden notes that some gardeners remove flower spikes because they detract from the attractive foliage. There is a stronger reason indoors: once the plant commits heavily to flowering and seed set, it often declines vegetatively afterward. Indoors, polka dot plant is often treated as a short-term display plant rather than a long-lived permanent specimen.
Snipping flower spikes as soon as they appear redirects energy back into spotted foliage and can extend the plant’s useful life indoors by months. Use clean shears, cut at the base of the spike, and keep pinching stem tips on the same schedule. If you want to experiment, let one spike mature on a backup propagation cutting while you remove blooms on your display plant - that way you see the flowers without sacrificing your main pot’s longevity.
Treat polka dot plant as a short- to medium-term houseplant unless you propagate regularly. That is not failure; it is biology. The goal is to keep it looking nursery-fresh for as long as possible through light, moisture, humidity, pinching, and flower removal - then root fresh cuttings before the parent fades.
Repotting and Root Health
Repot polka dot plant roughly every one to two years, or when roots circle the drainage holes, water runs straight through without soaking in, or the plant becomes top-heavy for its container. The best timing is early spring as active growth resumes, giving the plant a full bright season to fill the new root zone. Do not repot on day one after purchase unless the mix is clearly failing or pests are present - let it acclimate a few weeks first.
Choose the next pot size up by 1–2 inches in diameter, refresh with the same well-draining mix described earlier, and water lightly for the first week while torn roots heal. Because roots are shallow, avoid burying the crown deeper than it sat before. If you repot at the same time you hard-prune for legginess, expect a few weeks of slow top growth while the root system re-establishes - that is normal.
Root rot from chronic overwatering shows as wilting on wet soil, yellow leaves, and a sour smell. Unpot, trim black mushy roots with sterile scissors, repot into fresh mix in a smaller pot if you removed significant root mass, and withhold fertilizer until new growth appears. Prevention beats surgery: drainage holes, appropriate pot size, and a drying rhythm matched to actual light and humidity.
Propagation from Stem Cuttings and Seed
Polka dot plant is easy to propagate, which is the practical way to keep color in your home after the parent plant ages out. The simplest method is stem cuttings in water: take a 3–4 inch tip cutting with at least two nodes, remove the lower leaves, place in a clear jar of room-temperature water in bright indirect light, and refresh the water every few days. Roots typically appear in 7–14 days. Plant into moist mix once roots are an inch or longer.
You can also root cuttings directly in a moist, well-draining propagation mix covered loosely with a humidity dome or clear bag - especially helpful if your home air is dry. The North Carolina Extension Plant Toolbox lists seed and stem cuttings as recommended propagation strategies. Seed is viable if you let flower spikes mature, but it is slower and variable for color; cuttings give a true copy of the parent’s variegation pattern.
Propagate from healthy, well-hydrated plants before they become leggy and exhausted. Take several cuttings at once so you can rotate new plants into display pots as older ones finish their lifecycle. Do not propagate from plants with active pest infestations or root rot - cuttings inherit those problems and fail at higher rates.
Pet Safety: ASPCA Non-Toxic Status
If you share your home with cats or dogs, polka dot plant is one of the safer colorful foliage options. The ASPCA toxic and non-toxic plants listing for polka dot plant classifies Hypoestes phyllostachya as non-toxic to dogs, non-toxic to cats, and non-toxic to horses. Additional common names on the ASPCA entry include pink polka dot plant, measles plant, baby’s tears, and freckle face - useful if your plant tag uses a nickname.
That non-toxic classification is genuinely reassuring for pet owners who want pink speckles without the calcium oxalate anxiety that comes with many patterned tropicals. It does not mean you should encourage pets to eat houseplants. The ASPCA still lists mild vomiting and diarrhea as possible clinical signs - likely associated with ingesting plant material in quantity rather than with a specific toxin, since toxic principles are listed as unknown. Large ingestions can upset stomachs in cats and dogs the same way any unfamiliar fiber bulk can. Keep the plant out of reach if your pet is a chronic chewer, both for the pet’s comfort and the plant’s appearance.
For households prioritizing pet-safe displays, polka dot plant pairs well with other ASPCA-listed non-toxic species such as spider plant, parlor palm, and Boston fern - though always verify current listings before placing plants within reach. If symptoms persist after ingestion, contact your veterinarian. The ASPCA Animal Poison Control line is 888-426-4435 (fee may apply).
Common Problems and Practical Fixes
Most polka dot plant problems map to a short diagnostic list: soil moisture, light level, humidity, pinching schedule, then pests. Run that sequence before you change three variables at once.
Leggy growth is covered above - brighter indirect light plus weekly pinching. If stems are already bare, hard-prune in spring and restart the pinching rhythm on new shoots.
Pink color fading to green is almost always insufficient light. Increase brightness gradually; judge new growth, not old leaves.
Wilting on dry soil means underwatering on Polka Dot Plant. Soak thoroughly and adjust your check frequency. Wilting on wet soil means root trouble - inspect roots immediately.
Brown leaf edges usually mean low humidity, salt buildup from fertilizer or hard tap water, or both. Raise humidity, flush the pot, and switch to filtered water if tips keep appearing on new growth.
Yellow lower leaves can be normal aging, but a sudden flush often signals overwatering, especially in winter. Let the surface dry slightly more between waterings and confirm drainage.
Pests are uncommon on healthy plants but not impossible. Spider mites appear in dry air - increase humidity, shower the foliage, and treat with insecticidal soap. Mealybugs hide in leaf axils; dab with 70% isopropyl alcohol on a swab and follow with soap sprays. Fungus gnats mean the mix surface stays too wet - dry the top layer longer between waterings and use sticky traps for adults.
Powdery mildew and root rot are cultural diseases tied to stagnant humidity without airflow and chronic wet soil, respectively. Improve air movement, reduce leaf wetness at night, and fix the Polka Dot Plant watering guide before reaching for fungicides.
Fix the environment first, then trim damaged leaves for cosmetics after new growth is clean.
Terrariums, Bathrooms, and Display Ideas
Polka dot plant shines where humidity is naturally high and light is filtered - which is why it became a terrarium classic. A closed or mostly closed glass container traps moisture around the fine leaves, reduces the wilting drama, and keeps pink variegation crisp without running a humidifier across the room. Use a drainage layer of gravel or leca, add activated charcoal if you are building a long-term closed system, and plant polka dot toward the middle or front where it receives bright indirect light through the glass without touching hot glass panels that can scorch leaves.
Open terrariums and bathroom windowsills work equally well if humidity stays elevated and you still pinch weekly - terrariums are not a substitute for pinching, only for moisture. In mixed containers outdoors in shade, polka dot pairs with coleus, caladium, and impatiens for a foliage color block; Proven Winners positions the Hippo series specifically for those combinations. Indoors on a desk, a single well-pinched pink plant in a 4-inch pot is often more striking than an overcrowded arrangement.
Because the ASPCA lists the species as non-toxic to cats and dogs, you have more flexibility than with many colorful tropicals - but elevated shelves still protect both the plant from chewing and the cat from an upset stomach. Hanging baskets in bright kitchens are another pet-safer display option if floor-level pots invite investigation.
Conclusion
Polka dot plant rewards growers who treat it like a short-cycle, high-maintenance color plant, not a set-and-forget succulent. Give it bright indirect light to keep pink speckles vivid, even moisture checked at the top 1–2 cm of soil, 50–70% humidity from a bathroom, terrarium, or humidifier, and weekly pinching to prevent the leggy stretch that ruins its shape. Remove flower spikes to keep energy in the foliage and extend the plant’s useful indoor display life. Refresh through stem cuttings before the parent declines.
The ASPCA lists Hypoestes phyllostachya as non-toxic to cats and dogs, making it a rare patterned plant that fits pet-conscious homes - with the usual caveat that non-toxic is not a license for pets to snack freely. When color fades, stems stretch, or leaves crisp, check light and moisture before you fertilize or repot. Fix the growing condition, then prune for shape. Do that consistently and polka dot plant stays the vivid, speckled showpiece you bought - not the green, leggy afterthought it becomes in so many living rooms.
When to use this page vs other Polka Dot Plant guides
- Polka Dot Plant overview - Canonical hub for this species - care topics and problems branch from here.
- Polka Dot Plant problems - Symptom-first path when you already know something is wrong.
Related Polka Dot Plant guides
- Polka Dot Plant watering
- Polka Dot Plant light
- Polka Dot Plant soil
- Polka Dot Plant propagation
- Polka Dot Plant fertilizer
- Polka Dot Plant repotting
- Polka Dot Plant pruning
- Leggy Growth on Polka Dot Plant
- Drooping Leaves on Polka Dot Plant
- Root Rot on Polka Dot Plant
- Pale Leaves on Polka Dot Plant
- Yellow Leaves on Polka Dot Plant
How to care for Polka Dot Plant?
How much light does Polka Dot Plant need?
medium to bright indirect light, low indirect light
- medium to bright indirect light, low indirect light - medium to bright indirect light, low indirect light.
When should you water Polka Dot Plant?
Every 2–4 days - check top 1–2 cm. Water when surface begins to dry. Do not let the plant wilt repeatedly - shallow roots stress quickly.
- Check top 2 inches - Every 2–4 days - check top 1–2 cm.
- Drain excess water - Water when surface begins to dry.
What soil works best for Polka Dot Plant?
Standard potting compost + 15 % perlite + 10 % worm castings. Slightly moisture-retaining but well-draining. pH 5.5–7.0.
- Well-draining mix - Slightly moisture-retaining but well-draining.
Grower notes for Polka Dot Plant
What matters most with Polka Dot Plant
Polka Dot Plant is easiest to grow when you judge the whole plant: new growth, root-zone moisture, light exposure, and how quickly the pot dries after watering. In practice, the care checkpoint is simple: medium to bright indirect light, low indirect light. Pair that with standard potting compost + 15 % perlite + 10 % worm castings. Slightly moisture-retaining but well-draining; pH 5.5–7.0, and avoid changing water, pot size, and placement all at once.
Best placement in a real home
Polka Dot Plant belongs where medium to bright indirect light, low indirect light is realistic for most of the day, not only where the pot looks good. Every 2–4 days - check top 1–2 cm. Water when surface begins to dry. Do not let the plant wilt repeatedly - shallow roots stress quickly. If the pot stays wet longer than expected, move the plant into better light or reassess the mix before watering again. Humidity target: 50–70%. Temperature comfort zone: 18–27°C (65–80°F).
Before you buy this plant
Choose Polka Dot Plant with firm new growth, clean leaf undersides, and soil that does not smell sour or feel compacted. Be cautious if you see leggy-growth, sticky residue, collapsed crowns, or a pot that is wet in poor light. Cosmetic old-leaf damage is less worrying than weak roots or active pests.
First month after bringing it home
Do not repot Polka Dot Plant on day one unless the mix is failing or pests are obvious. Quarantine it, learn how fast the pot dries, and keep care boring while it adjusts. Watch especially for leggy-growth, drooping-leaves, and root-rot. If problems appear, correct the condition first rather than stacking fertilizer, repotting, and pruning together.
Safety note for Polka Dot Plant
Polka Dot Plant is not a plant to keep within reach of pets or children. Treat it as an inaccessible display plant. Use gloves if sap or plant tissue is irritating, and pick a pet-safe alternative for floor pots or low shelves.
How to tell Polka Dot Plant is settling in
If you plan to multiply it later, common methods include Stem cuttings in water and Seeds. If drooping-leaves shows up early, inspect light, watering, and roots before assuming the plant is permanently weak.
Is it pet safe?
Polka Dot Plant is generally considered pet safe.
Watering Polka Dot Plant
Every 2–4 days - check top 1–2 cm. Water when surface begins to dry. Do not let the plant wilt repeatedly - shallow roots stress quickly.
Soil & potting for Polka Dot Plant
Standard potting compost + 15 % perlite + 10 % worm castings. Slightly moisture-retaining but well-draining. pH 5.5–7.0.
Humidity & temperature for Polka Dot Plant
Polka Dot Plant prefers 50–70%, though normal home humidity is usually fine. Keep temperatures around 18–27°C (65–80°F).
| Detail | Information |
|---|---|
| Humidity | 50–70% - normal home humidity is fine. |
| Ideal temperature | 18–27°C (65–80°F) |
Fertilizer & pruning for Polka Dot Plant
Use feed lightly during active growth. Balanced liquid fertilizer at half strength and stop if the plant is stressed, newly repotted, or not actively growing. for Polka Dot Plant.
| Detail | Information |
|---|---|
| Fertilizer type | Feed lightly during active growth. Balanced liquid fertilizer at half strength and stop if the plant is stressed, newly repotted, or not actively growing. |
Common problems on Polka Dot Plant
Leggy Growth
HighLikely cause: Not pinching regularly or insufficient light - most common issue
Quick fix: Pinch every 1–2 weeks; move to better light; remove flowers immediately
Full fix guide →Drooping Leaves
MediumLikely cause: Underwatering - shallow roots dry quickly
Quick fix: Water immediately; establish more frequent check schedule
Full fix guide →Root Rot
HighLikely cause: Overwatering in warm humid conditions
Quick fix: Repot in fresh mix; allow surface to dry slightly between waterings
Full fix guide →Pale Leaves
MediumLikely cause: Too little or too much light fading spot pattern
Quick fix: Adjust to medium-bright indirect light
Full fix guide →Yellow Leaves
MediumLikely cause: Common on this plant type; confirm with recent watering, light, and root checks.
Quick fix: Inspect the plant and correct the most likely care stressor before stacking treatments.
Full fix guide →Brown Tips
MediumLikely cause: Common on this plant type; confirm with recent watering, light, and root checks.
Quick fix: Inspect the plant and correct the most likely care stressor before stacking treatments.
Full fix guide →Overwatering
MediumLikely cause: Common on this plant type; confirm with recent watering, light, and root checks.
Quick fix: Inspect the plant and correct the most likely care stressor before stacking treatments.
Full fix guide →Underwatering
MediumLikely cause: Common on this plant type; confirm with recent watering, light, and root checks.
Quick fix: Inspect the plant and correct the most likely care stressor before stacking treatments.
Full fix guide →Spider Mites
MediumLikely cause: Common on this plant type; confirm with recent watering, light, and root checks.
Quick fix: Inspect the plant and correct the most likely care stressor before stacking treatments.
Full fix guide →Mealybugs
MediumLikely cause: Common on this plant type; confirm with recent watering, light, and root checks.
Quick fix: Inspect the plant and correct the most likely care stressor before stacking treatments.
Full fix guide →Aphids
MediumLikely cause: Common on this plant type; confirm with recent watering, light, and root checks.
Quick fix: Inspect the plant and correct the most likely care stressor before stacking treatments.
Full fix guide →Slow Growth
MediumLikely cause: Common on this plant type; confirm with recent watering, light, and root checks.
Quick fix: Inspect the plant and correct the most likely care stressor before stacking treatments.
Full fix guide →Wilting
MediumLikely cause: Common on this plant type; confirm with recent watering, light, and root checks.
Quick fix: Inspect the plant and correct the most likely care stressor before stacking treatments.
Full fix guide →Low Humidity
MediumLikely cause: Common on this plant type; confirm with recent watering, light, and root checks.
Quick fix: Inspect the plant and correct the most likely care stressor before stacking treatments.
Full fix guide →Not Enough Light
MediumLikely cause: Common on this plant type; confirm with recent watering, light, and root checks.
Quick fix: Inspect the plant and correct the most likely care stressor before stacking treatments.
Full fix guide →Fungus Gnats
MediumLikely cause: Common on this plant type; confirm with recent watering, light, and root checks.
Quick fix: Inspect the plant and correct the most likely care stressor before stacking treatments.
Full fix guide →Mold on Soil
MediumLikely cause: Common on this plant type; confirm with recent watering, light, and root checks.
Quick fix: Inspect the plant and correct the most likely care stressor before stacking treatments.
Full fix guide →