How to Prune Polka Dot Plant: When, Where & What to Cut
How to Prune Polka Dot Plant: When, Where & What to Cut
How to Prune Polka Dot Plant: When, Where & What to Cut
Polka Dot Plant Pruning: Pinch Tips, Remove Blooms, Keep the Spots
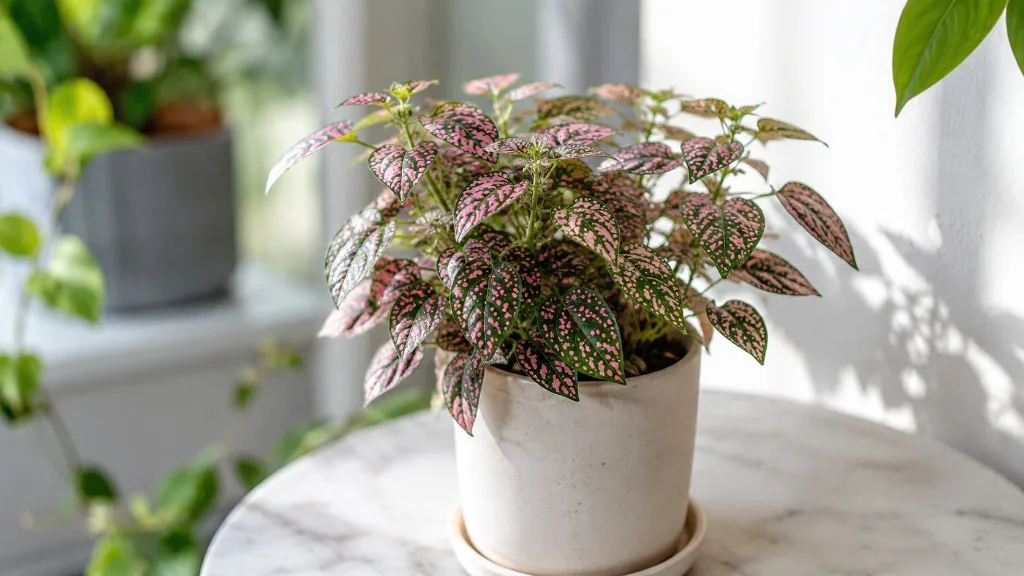
Start by snipping off any flower spike the moment you see bud clusters forming - before you pinch healthy stem tips or shorten leggy growth. Polka dot plant (Hypoestes phyllostachya) is an herbaceous foliage plant from Madagascar grown for spotted ovate leaves, not its small lilac tubular flowers on upright spikes. NC State Extension notes the plant is not grown for flowers and that removing blooms directs more energy to the foliage. Many indoor growers also find that once a mature plant finishes a heavy bloom cycle, it becomes leggier and less worth saving - so spike removal is the highest-priority pruning cut, not an optional cosmetic step.
After flower spikes are gone, inspect for yellow or damaged leaves and remove those with clean scissors. Then pinch extending stem tips just above a leaf pair to keep the plant bushy. Missouri Botanical Garden recommends pinching tips to promote bushiness on this fast-growing annual or houseplant. That weekly rhythm - not a single hard cutback once a year - is what separates a compact spotted mound from a tall stick with color only at the top.
Why Polka Dot Plant Needs Pinching, Not a Once-a-Year Haircut
Left alone, polka dot plant stretches upward with long internodes, especially in dim rooms where stems reach for brighter light. NC State Extension describes plants becoming leggy as they reach for brighter lighting when light is too low. Pinching the apical bud at each stem tip breaks apical dominance and forces side branches from the node just below your cut, which is how you rebuild width and keep new leaves densely spotted.
Flowering is the second reason pinching matters. University of Wisconsin–Madison Extension explains that long day lengths keep plants in vegetative growth, while flowering on houseplants often appears in late summer or fall. Once bloom spikes form and set seed outdoors, plants can reseed; indoors, heavy flowering often coincides with a tired, open silhouette. Removing spikes early keeps the plant in foliage mode longer.
This species also has a practical lifespan. Wisconsin Horticulture states that regular pinching keeps houseplants compact, but eventually they will need to be replaced - propagation from tip cuttings is part of normal care, not a sign you failed. Plan on renewing plants every season or two rather than expecting one pot to stay perfect indefinitely.
Stems, Nodes, and What You Are Actually Removing
Polka dot plant stems are soft, green, and slightly succulent when young. Leaf nodes sit at each point where an opposite pair of ovate leaves attaches; each node holds buds that can branch once the tip bud is removed. The apical bud at the stem tip suppresses many of those side shoots - remove it, and two (sometimes more) new stems typically emerge within one to two weeks during active growth.
Internode length tells you about conditions. Long gaps between leaf pairs mean the plant is stretching - usually from insufficient bright filtered light, though neglected pinching also allows one dominant shoot to run. Short internodes and vivid pink, red, or white spotting on dark green blades mean conditions are closer to ideal. Pruning can temporarily tighten the silhouette, but without brighter indirect light the next flush will stretch again.
Opposite Leaves and Where New Branches Emerge
Because leaves are opposite, a clean pinch above the top leaf pair leaves a symmetrical node ready to branch both ways. Never cut halfway down a bare internode expecting new leaves to sprout from empty stem - polka dot plant branches from nodes, not from random mid-stem tissue. When a stem has become woody or leafless over several inches, shorten it back to the lowest node that still carries healthy spotted foliage, or remove the whole stem at soil level if it has no useful side shoots.
What to Check Before You Pinch
Walk through a quick inspection before you start cutting:
- Flower spikes - lilac bud clusters at stem tips or on short side racemes; remove these first.
- Soil moisture - shallow roots wilt quickly; pinching on a severely dehydrated plant adds stress. Water if the top 1–2 cm of mix is dry and the plant is drooping.
- Light level - if stems are pale and internodes are long, note whether you need to move the pot to brighter filtered light after pruning.
- Pests - check leaf undersides for aphids, mealybugs, and whiteflies, which NC State Extension lists as occasional problems. Sterilize blades between cuts if you remove infested tissue.
- Overall balance - decide whether you need light tip pinches on many stems or a few deeper cuts on the longest runners.
If the plant is wilting from overwatering on Polka Dot Plant, mushy at the base, or shedding leaves in clusters, pause on aggressive pinching and fix the root-zone problem first. Pruning cannot restore rotting roots.
Your First Cut: Flower Spikes and Dead Tissue
The first cut on a healthy polka dot plant is almost always a flower spike, not a random tip. As soon as you see a tubular lilac bud cluster forming at a stem apex, snip or pinch the spike off just above the top leaf node below it. Do not wait for full bloom - early removal keeps energy in the leaves and delays the decline many growers see after heavy flowering.
For dead or fully yellow leaves, remove them at the petiole base with sharp scissors. One yellow lower leaf on an otherwise vigorous plant is often normal senescence. Widespread yellowing means investigate watering, drainage, and light before stripping foliage.
Brown crisp tips on otherwise green blades may reflect low humidity, salt buildup, or too much direct sun - NC State Extension notes direct sun can crinkle and curl leaves. Trim the damaged portion or remove the whole leaf only when most of the blade is gone or pests cover it.
When to Pinch Polka Dot Plant
Timing splits into urgent cleanup and planned pinching. Flower spikes and individual dead leaves can come off whenever you notice them. Structural tip pinching belongs in active growth - spring through fall for most indoor plants when daylight is longer and room temperatures sit in the comfortable 18–27°C (65–80°F) range Polka Dot Plant overview prefers.
Avoid removing a large share of foliage in late fall and winter, when lower light slows replacement growth. Light cleanup still works - one spike, one yellow leaf - but a hard cutback on a plant in a dim cool room often stalls until spring.
Active Season Rhythm vs Year-Round Cleanup
Year-round cleanup covers flower spikes, single yellow leaves, and one pest-damaged blade the day you see them. These low-risk cuts barely change the plant’s energy budget.
Active season pinching means removing the top one to two leaf pairs from every extending shoot every one to two weeks. That frequency matches how fast polka dot plant pushes new growth in bright filtered light. Miss several weeks and you will chase leggy stems instead of doing quick maintenance pinches.
Begin pinching young plants once stems have at least four to six leaf pairs so enough foliage remains to fuel recovery after each tip removal.
Tools and Sanitation
Soft young stems can be pinched with clean fingernails during weekly maintenance - grasp the tip above the top leaf pair and snap off the apical bud and upper leaves. For tougher stems, flower spikes, or diseased tissue, use sharp scissors or bypass snips.
Keep 70% isopropyl alcohol nearby and wipe blades before you start, between plants if you grow several pots, and after cuts on pest-infested or rotting tissue. Iowa State University Extension recommends cleaning visible sap from blades so disinfectant contacts the metal. Work in good light and rotate the pot so you see every extending tip.
Polka dot plant is listed as non-toxic to cats and dogs by the ASPCA, so sap exposure is low risk for most households - still discard trimmings if pets chew plants.
How to Pinch Polka Dot Plant Step by Step
- Remove flower spikes from every stem showing bud clusters.
- Snip dead, yellow, or pest-damaged leaves at the petiole base.
- Identify extending tips - stems whose top leaf pair sits noticeably above the rest of the mound.
- Pinch or cut just above the top leaf pair on each extending shoot, leaving the node below intact.
- Step back and check symmetry - pinch middle and lower extending side shoots too, not only the tallest center stem.
- Set aside healthy tip cuttings 10 cm (4 in) long if you want backup plants; strip lower leaves.
- Water lightly if the surface mix is dry, then return the pot to bright filtered light without direct hot sun.
Pinching Soft Tips Above a Node
Grasp the stem tip between thumb and forefinger. Remove the top one to two pairs of leaves including the apical bud, stopping just above the next leaf pair down. That node should push two side shoots within about one to two weeks when the plant is actively growing, well lit, and evenly moist. Repeat on every stem that is outpacing its neighbors.
Shortening a Leggy Stem You Missed
If a stem has already grown several inches of bare internode with leaves only at the tip, cut back to a lower node where healthy spotted leaves remain - roughly 5–10 mm above the node. Do not shear the entire plant into a tight ball in one session; polka dot plant looks ragged when too many colorful tops come off at once, even though it often refills within weeks. Shorten the longest stems first, wait two weeks, then pinch new tips as they extend.
How Much You Can Safely Remove
Weekly pinching removes only a few leaves per stem but adds up to a compact plant over a month - that is the normal maintenance dose.
For a single rejuvenation session on an overgrown plant, limit removal to no more than one-third of living foliage. If the plant is severely leggy after flowering, take several tip cuttings and plan to replace the parent rather than stripping it bare in one day.
Polka dot plant recovers faster from many small pinches than from one dramatic cutback, especially indoors where shallow roots wilt quickly under heavy top loss.
What Not to Cut
- Do not cut below a node or into bare internodes expecting new branches - buds live at nodes, not on empty stem.
- Do not remove all foliage from a stem unless you are discarding that stem entirely at the base.
- Do not shear the whole plant into a geometric shape without continuing weekly pinches afterward; new growth will look uneven within days.
- Do not prune heavily into wet, rotting soil - fix overwatering and repot if needed before cosmetic work.
- Do not ignore flower spikes while focusing only on tip shape - blooms are the cut that most affects long-term plant quality.
Using Pruning Cuttings to Start Fresh Plants
Tip trimmings are worth saving. Wisconsin Horticulture notes that stem cuttings about 10 cm (4 in) long root quickly in water or moist potting mix, sand, or vermiculite - especially in spring and summer. Remove lower leaves, place stems in Polka Dot Plant light guide, and refresh water every few days if rooting in a glass.
Start fresh pots when the parent becomes irreversibly leggy after bloom or when pinching no longer produces tight spotted growth. That replacement cycle is normal for this species.
Aftercare and Recovery Timeline
After pinching, keep the soil evenly moist but not soggy - shallow roots stress quickly if the mix swings from dry to saturated. Bright filtered light supports compact new growth; avoid moving the plant and changing Polka Dot Plant watering guide on the same day as a heavy cut session.
Pinch response - slight swelling or tiny new leaves at nodes below the cut - often appears within three to seven days in warm active growth. Side shoots that fill out the silhouette typically take two to three weeks during spring or summer. Recovery slows in winter even though light cleanup remains fine.
Do not fertilize immediately after a hard cutback on a stressed plant. Wait until new growth is visible and the plant is stable.
Signs Pinching Worked - and When to Replace the Plant
Pinching succeeded when you see two new stems emerging from nodes below recent cuts, shorter internodes on new growth, and vivid spotting on fresh leaves in adequate light.
Replace the plant when repeated pinching no longer tightens the shape, flowering keeps returning despite spike removal, stems stay bare for most of their length, or the plant wilts constantly despite corrected watering - signs the root system or lifecycle has aged out. Rooting a few tip cuttings before discarding the parent gives you a seamless swap.
Mistakes to Avoid
- Skipping pinches until the plant blooms - by then you are managing decline, not prevention.
- Pinching only the tallest stem while lower side shoots run - creates a lollipop silhouette.
- Hard cutback without propagation backup on a post-bloom plant - you may have no replacement ready.
- Relying on pinching alone in very low light - stems will stretch again; improve light alongside pruning.
- Letting soil dry to wilt repeatedly between pinches - shallow roots cannot support constant top renewal.
- Leaving flower spikes “because they look cute” - they redirect energy from the foliage you bought the plant for.
When Not to Prune
Delay heavy pinching when the plant is severely dehydrated, wilting from root rot on Polka Dot Plant, or recently moved and still adjusting - stabilize care first. Skip major cutbacks in late winter when replacement growth will stall for weeks. Do not prune as a first response to pale leaves without checking whether light is too low or too intense - color fades in both extremes per NC State Extension guidance.
If pests cover most of the foliage, treat or isolate the plant before aggressive trimming spreads infested debris through the pot.
When to use this page vs other Polka Dot Plant guides
- Polka Dot Plant overview - Start here for whole-plant context before deep-diving this topic.
- Polka Dot Plant problems hub - Jump to symptom-specific fix guides when this care topic does not resolve the issue.
- Leggy Growth on Polka Dot Plant - Escalate here when pruning adjustments are not enough.
- Slow Growth on Polka Dot Plant - Escalate here when pruning adjustments are not enough.
- Brown Tips on Polka Dot Plant - Escalate here when pruning adjustments are not enough.