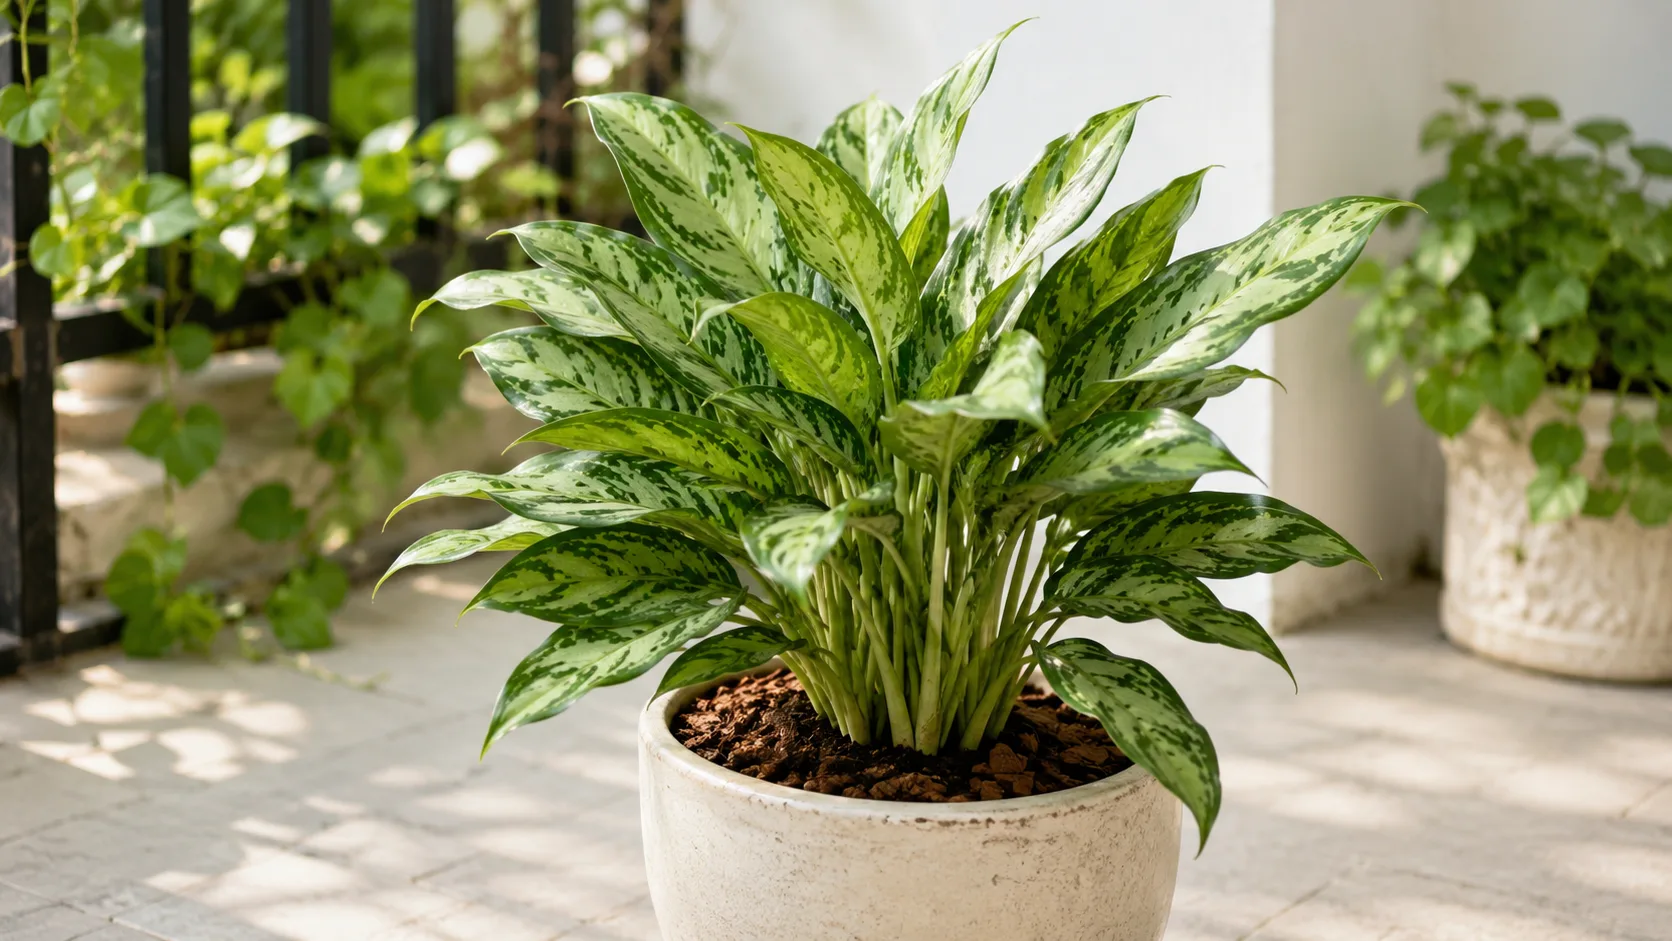
Alocasia Amazonica Care: Light, Humidity, Water
Alocasia × amazonica
Alocasia Amazonica needs bright indirect light, 60–80% humidity, and fast-draining aroid mix. Reduce watering in winter as it may go dormant.
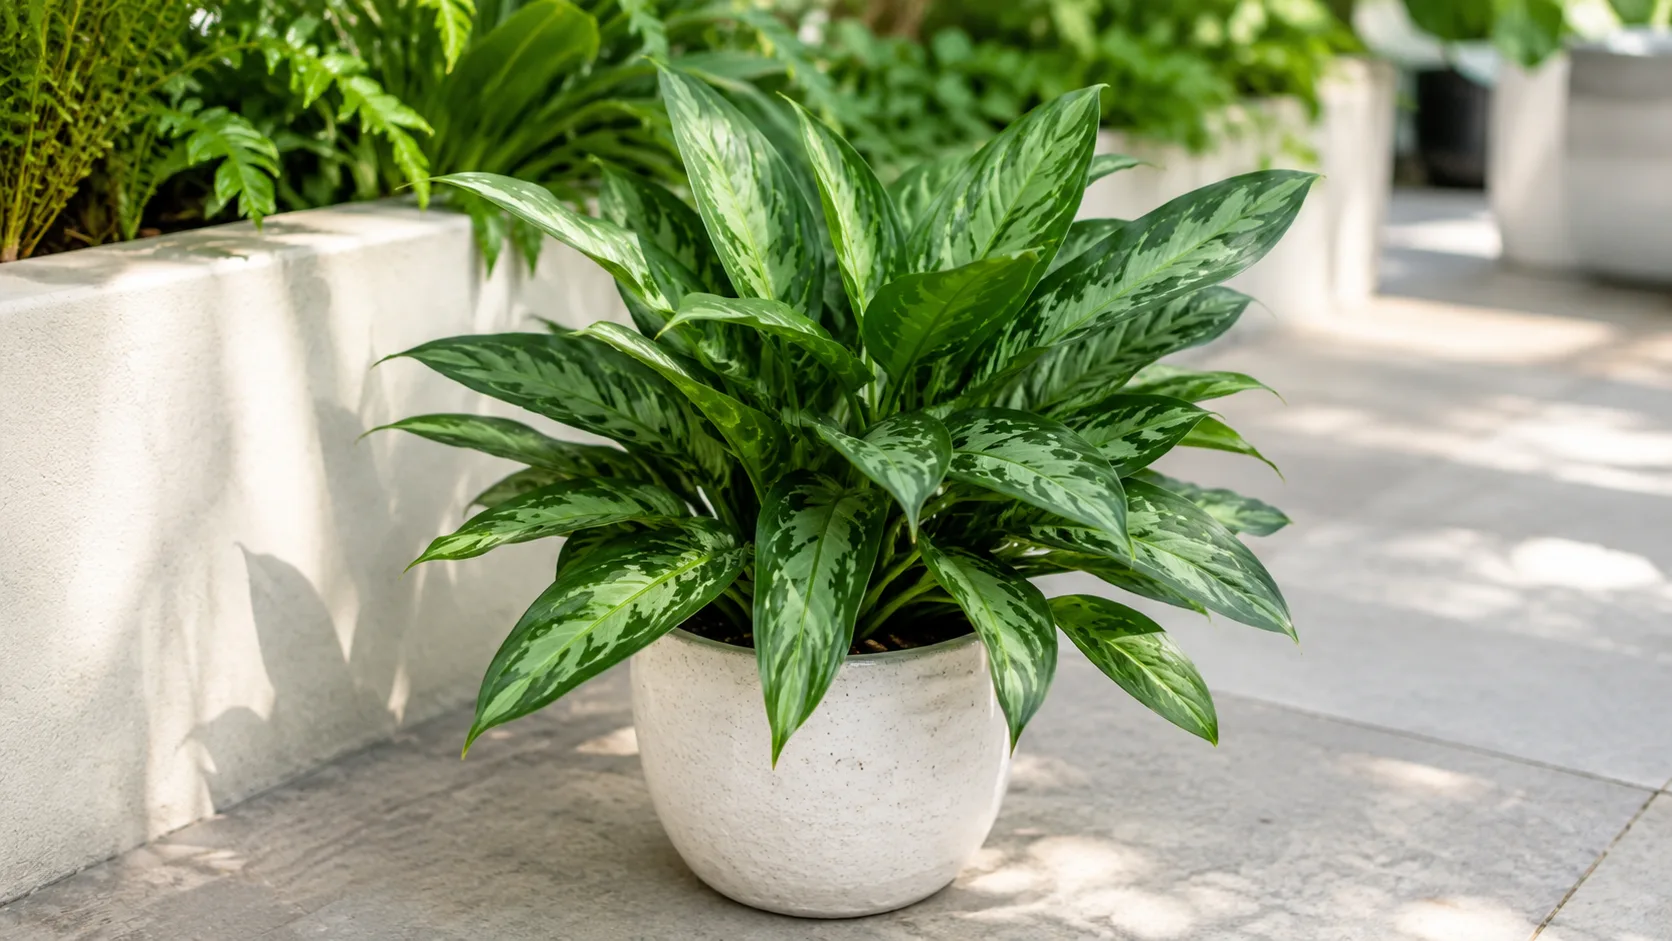
Alocasia Amazonica Care: Light, Humidity, Water, and Problems
Start with wateringThe most common care mistake for Alocasia AmazonicaWatering guide →Alocasia Amazonica care essentials
Light
bright indirect light
Water
Water when the top 2–3 cm of soil is dry; never let roots sit in water.
Soil
Light, well-aerated aroid mix that drains freely.
Humidity
60–80%
Temperature
18–27°C (65–80°F)
Fertilizer
Use balanced liquid fertilizer at half strength and stop if the plant is stressed, newly repotted, or not actively growing. Fertilizing during dormancy.
About Alocasia Amazonica
Alocasia Amazonica is native to Hybrid (Southeast Asian parentage), typically reaches 60–90 cm tall indoors, with moderate growth. Alocasia Amazonica has a upright growth habit and part of the Araceae family. It is also known as Amazonian Elephant Ear and African Mask Plant.
| Detail | Information |
|---|---|
| Also known as | Amazonian Elephant Ear, African Mask Plant |
| Native region | Hybrid (Southeast Asian parentage) |
| Mature size | 60–90 cm tall |
| Growth rate | Moderate |
| Growth habit | Upright |
| Scientific name | Alocasia × amazonica |
| Family | Araceae |
Alocasia Amazonica Care: Light, Humidity, Water, and Problems
The Alocasia Amazonica sitting in your living room has never seen the Amazon. It has never seen a rainforest, a river, or a single day in South America. The “Amazonica” in its name is a piece of horticultural fiction from a Miami nursery in the 1950s, and most of the care advice floating around the internet treats the plant as if it were a wild species rather than the man-made hybrid it actually is. That gap between myth and reality is why so many people lose Alocasia Amazonica overview. This guide closes it.
You will get the real Alocasia Amazonica care numbers, the parentage, the dormancy cycle, the propagation method that actually works, and the fixes for the three problems that show up most often: yellow leaves, spider mites, and root rot on Alocasia Amazonica. You will also get a clear answer on toxicity to cats, dogs, and humans, with the hotline to call if a pet chews a leaf.
What “Alocasia Amazonica” Actually Means (and Why the Amazon Has Nothing to Do With It)
Alocasia × amazonica is a hybrid, not a species, and never grew in the wild. The Missouri Botanical Garden Plant Finder puts it plainly: “Although amazonica seems to suggest that this plant is native to the Amazon River in Brazil, none of the species of Alocasia are native to South America.” The name comes from a Florida nurseryman named Salvadore Mauro, who in the 1950s crossed two Asian Alocasia species at his Miami operation, Amazon Nursery, and named the resulting hybrid after the business. He never formally registered the name.
The widely accepted parentage is Alocasia sanderiana × Alocasia longiloba ‘Watsoniana’, both Southeast Asian species. Aroidpedia notes that Australian aroid botanist Alistair Hay has even argued the cross may trace back to 19th-century European horticulture before Mauro re-created it in Florida. The takeaway: this is a manufactured plant bred for dramatic leaves, and it behaves more like its tender parents than like a tough jungle species.
A second piece of confusion comes from Alocasia ‘Polly’, the compact plant sold almost everywhere as “African mask plant.” ‘Polly’ is not a different species or cross. It is a tissue-culture sport of Alocasia × amazonica discovered in the 1980s by Bill and Denis Rotolante at Silver Krome Gardens in Homestead, Florida. The original name was ‘Poly’, chosen because they first thought the smaller plant was a polyploid form of Amazonica. DNA tests disproved that, but the name stuck in its misspelled form, “Polly.” If you own a ‘Polly’, every care instruction in this article applies to it identically.
African Mask Plant at a Glance
Foliage, Size, and Growth Habit
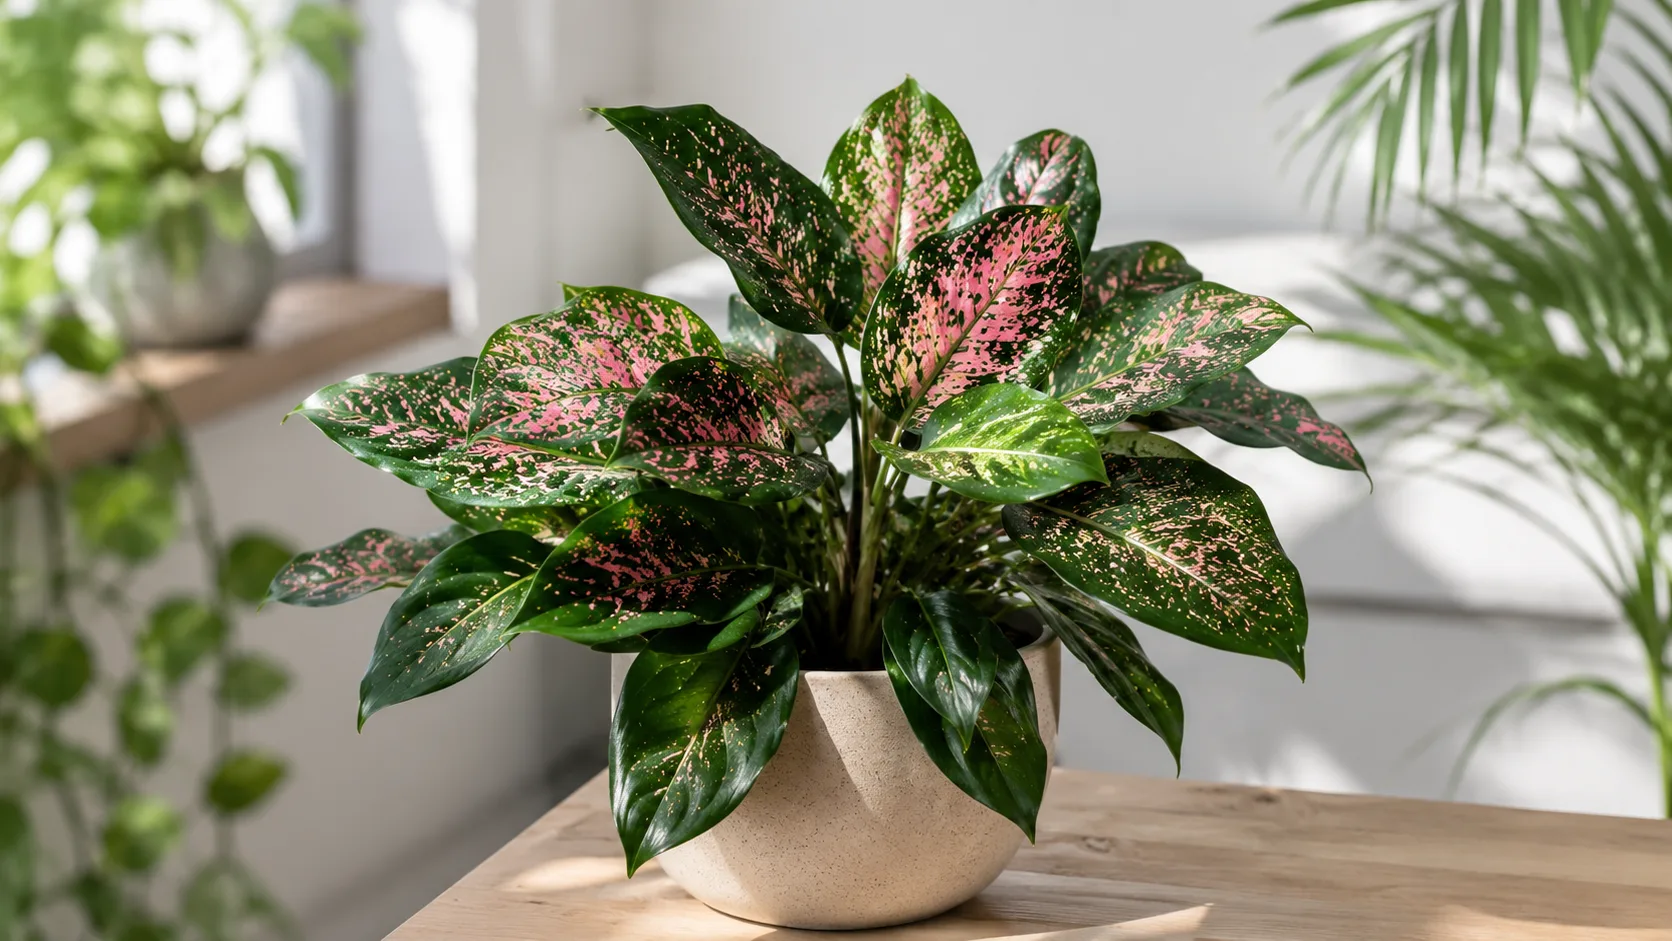
The plant is grown for one thing: leaves. Each leaf is a dark, almost black-green, arrowhead or shield shape with a glossy surface and stark, silvery-white to cream veins that look painted on. A mature, well-grown leaf on the original Alocasia × amazonica can reach 16 inches (40 cm) long, held on a long, fleshy petiole that emerges from a central crown, per the Missouri Botanical Garden Plant Finder. ‘Polly’ is a tighter version with shorter petioles, usually topping out around 2 feet (60 cm) tall and wide.
The plant grows from a rhizome with a central corm (a thickened, bulb-like storage organ). New leaves unfurl from the top of the corm in spring and summer, often in flushes. Old leaves yellow and die back as part of normal cycling, and during winter the plant may retreat entirely into the corm and re-sprout in spring. The plant rarely flowers indoors; when it does, the bloom is a typical aroid structure - a white spadix inside a greenish-white spathe - and is not the point of the plant.
Toxicity in Plain English
Every part of Alocasia × amazonica is toxic to cats, dogs, horses, and humans if chewed or swallowed. The toxic principle is insoluble calcium oxalate crystals called raphides, bundled in specialized cells and released mechanically when plant tissue is crushed. The ASPCA lists Alocasia under its toxic-plant gallery with clinical signs of oral irritation, pain and swelling of the mouth, tongue and lips, excessive drooling, vomiting, and difficulty swallowing. The NC State Extension plant entry rates the toxicity as “medium severity” with documented symptoms including contact dermatitis and eye injury. The symptoms are dramatic but usually self-limiting in small exposures.
The pet and human safety section later in this article gives the specific signs to watch for, the ASPCA Animal Poison Control hotline (888-426-4435), and practical steps for keeping the plant out of reach. If you share your home with a curious cat, a chewing puppy, a toddler, or a horse that ever gets access to houseplants, treat the African mask plant as you would any other toxic houseplant: elevated, inaccessible, and labeled.
Light: Bright but Filtered
Alocasia Amazonica evolved under a rainforest canopy, which is the mental model that solves most of the light questions. The parents grow in bright, dappled shade with strong ambient light and no direct sun burning through for hours. The closest you can get indoors is bright, indirect light for most of the day.
A few placements work well:
- An east-facing window with a few hours of gentle morning sun, especially if the sun is filtered by a sheer curtain.
- A spot 2 to 4 feet back from a south- or west-facing window behind a transparent curtain.
- A north-facing window in summer, though in winter the plant will likely slow down because the light is too weak to sustain active growth.
Direct, hot sun burns the leaves - bleached patches, papery brown spots, or curled edges. Deep shade produces stretched, weak petioles, pale veining, leaf drop, and slow decline into dormancy. Proven Winners recommends an eastern or western exposure with bright, indirect light, and notes that grow lights are a useful supplement during the darker months. If you do not have a bright enough window, a full-spectrum grow light on a 12- to 14-hour timer is a clean fix. Rotate the pot a quarter-turn every week or two so the plant does not lean toward the light source. If new leaves are coming in smaller than older ones, with longer petioles, you almost always need more light, not more water.
Watering the African Mask Plant Without Drowning It
Watering is where most people lose this plant. Alocasia Amazonica has thick, fleshy roots and an underground corm that both need constant access to moisture to keep the leaves turgid and push new growth, but those same structures rot extremely fast in soil that stays wet. The goal is the middle: moist, never bone-dry, never soggy.
A workable rule for most indoor conditions is to water thoroughly when the top 1 to 2 inches (2.5-5 cm) of soil feel dry. Push a finger into the mix or use a wooden chopstick; if the surface is dry and the deeper mix is approaching dry, water. Pour slowly and evenly over the whole surface until water runs freely from the drainage hole, then let the pot drain completely and empty the saucer. The RHS Alocasia growing guide gives the same “top 5 cm (2 in) of compost has become dry” threshold. Standing water in the saucer is a root-rot invitation.
A few habits keep the plant out of trouble:
- Use room-temperature water to avoid shocking the roots.
- Use filtered, distilled, or 24-hour-aged tap water if your municipal supply is heavily chlorinated or very hard. Alocasias are sensitive to fluoride and chlorine buildup.
- Cut watering way back in winter. A dormant plant uses almost no water, and watering on the summer schedule in December is the most common cause of corm rot.
- Watch the leaves, not the calendar. A thirsty Alocasia droops visibly; a waterlogged one droops the same way. Always check the soil before watering.
The RHS flags “watering too much in winter - or overwatering on Alocasia Amazonica in general - can lead to root rot” as a top Alocasia problem. The advice is consistent: top 2 inches dry → water thoroughly → drain.
Humidity: Where the African Mask Plant Really Comes Alive
The African mask plant is a tropical aroid, and humidity is the single environmental factor most likely to make the difference between a struggling plant and a stunning one. The minimum viable humidity is around 50%, with a sweet spot of 60-80% for fast growth, clean leaf edges, and proper leaf unfurling. The RHS notes that low humidity “can cause browning on the leaf edges and may attract red spider mites, which thrive in a dry atmosphere.”
Indoor reality is usually much drier. In a centrally heated home in winter, ambient humidity can drop below 20%, which is why the same plant that thrived in October starts developing crispy brown leaf edges in January and attracts spider mites by February.
To raise humidity around the plant:
- Run a room humidifier nearby. This is the most reliable method, and the one the RHS recommends.
- Group the plant with other tropical houseplants so their combined transpiration creates a more humid microclimate.
- Place the pot on a pebble tray filled with water just below the bottom of the pot, so the pot sits on the stones, not in the water. Evaporation raises humidity right where it matters.
- Use a bright bathroom or kitchen with good light, since those rooms are usually more humid.
- Misting is the least effective option. It raises humidity for a few minutes and is no substitute for a humidifier, but it helps with leaf hygiene.
The signs of insufficient humidity are predictable: crispy brown leaf edges and tips, leaves that struggle to unfurl, and a sudden spider mite problem.
Temperature, Drafts, and Airflow
Alocasia Amazonica wants to live in the same temperature range you do, with a couple of firm limits. The consensus range across Missouri Botanical Garden, the RHS, Smart Garden Guide, and major aroid guides is 65-85°F (18-29°C) during the growing season, with 65-80°F (18-27°C) the practical indoor sweet spot. Below 60°F (15°C) sustained, the plant begins to think winter is here and may trigger dormancy. The RHS Alocasia growing guide sets a hard floor of 10°C (50°F) as the lowest temperature the plant should ever experience, and recommends keeping it above 16°C (60°F) during active growth.
Two environmental hazards are easy to miss:
- Cold drafts. A spot near a drafty window, an exterior door, or an uninsulated wall in winter can drop the leaf temperature below ambient room temperature and trigger leaf drop.
- Hot, dry air from heating vents or air conditioning. Direct airflow from a furnace or AC unit stresses the plant, drops local humidity, and brings along the spider mites that thrive in dry heat.
Place the plant in a stable, warm room, away from heating and cooling vents, away from cold windows, and ideally somewhere with gentle air circulation but no strong drafts. A gentle fan in the room is fine and helps discourage fungal issues on damp leaves, but do not point it directly at the plant.
Soil Mix and Pot Choice
Standard indoor potting mix is too dense for this plant. Alocasia Amazonica needs a chunky, airy, fast-draining “aroid mix” that holds some moisture but lets excess water run out of the root zone quickly. The fleshy roots and the corm both suffocate and rot in a dense, waterlogged mix, and the difference between a thriving plant and a dead one is often literally the soil.
A standard DIY aroid mix is equal parts high-quality indoor potting soil, medium-grade orchid bark, and coarse perlite. A more refined version uses 2 parts coco coir, 2 parts orchid bark, 2 parts perlite (or pumice), and 1 part worm castings, with an optional 5-10% horticultural charcoal. The logic is the same: bark for structure and long-lasting air pockets, perlite for drainage, coco coir for moisture retention, worm castings for slow-release nutrition.
Practical notes:
- Always use a pot with drainage holes. Water needs to exit the pot freely.
- Choose a pot only 1-2 inches larger than the root ball when Alocasia Amazonica repotting guide. Oversized pots hold excess moisture and invite rot.
- Terra cotta breathes and helps moderate overwatering, making it a forgiving choice. Glazed ceramic and plastic work fine but demand more watering discipline.
- Aim for a slightly acidic pH around 5.5-6.5, which both coco coir and peat-based mixes deliver naturally.
The dry-down test after potting: water thoroughly and note the date. In normal indoor conditions, the top inch should dry within 2-3 days and the full mix should be substantially drier within 7-10 days. If the pot is still heavy and wet on day 5, the mix is too dense and you should add more bark and perlite.
Fertilizing: Light, Steady, and Only When Growing
The African mask plant is not a heavy feeder. A balanced, water-soluble houseplant fertilizer at half-strength, applied every 3 to 6 weeks during the active growing season (spring through early fall), is plenty. Some growers feed at every watering with a heavily diluted solution; both approaches work as long as you stay on the low side.
A few rules keep fertilizer from becoming a problem:
- Do not fertilize a dry plant. Water first, then feed, to avoid burning the roots.
- Stop fertilizing entirely in fall and winter. The plant is either slowing down or fully dormant, and unused fertilizer salts build up in the soil and damage the roots.
- Flush the pot every few months by watering thoroughly until water runs freely from the drainage hole for a full minute, which leaches built-up salts out of the mix.
- Skip a feed if the plant has just been repotted in fresh mix; the coco coir and worm castings already supply a baseline of nutrients.
Over-fertilized Alocasias show crispy brown leaf edges and tip burn that looks like low humidity or under-watering but is actually salt burn. When in doubt, dilute more, feed less often, and remember that under-feeding a slow-growing tropical is much safer than over-feeding it.
Winter Dormancy: Don’t Throw the Pot Away
The single most common way people “kill” an Alocasia Amazonica is by throwing a dormant, leafless plant into the trash in January. The plant looks dead. The pot is full of bare soil. The instinct is to compost it. Resist the instinct.
Alocasia Amazonica enters a natural winter dormancy triggered by shorter days, lower light, cooler temperatures, and reduced humidity. Below 60°F (15°C) sustained, the plant begins shutting down its above-ground growth, pulling nutrients from each leaf back into the corm, and dropping leaves one at a time. The Blooming Expert dormancy guide puts it directly: “Do the corm squeeze test - firm and neutral-smelling means alive.”
How to handle dormancy:
- Stop fertilizing the moment growth slows in fall.
- Reduce watering to once every 3-5 weeks, giving the corm just enough moisture to prevent desiccation. A light drink, not a soak.
- Do not cut yellowing leaves early. Wait for them to detach on their own so the plant finishes pulling nutrients back into the corm.
- Check the corm with a gentle squeeze through the soil. Firm and unscented is alive. Mushy, soft, or foul-smelling is rot and must be dealt with immediately.
- Resume normal watering in spring when temperatures climb back above 65°F and you see a growth tip emerging from the corm. Most healthy Alocasias come back larger and bushier than they went in.
NC State Extension puts the active-growth range at 68-77°F; sustained temperatures below that band are what trigger the plant’s natural conservation mode.
Repotting Without Ripping the Corm
Alocasia Amazonica does not need frequent repotting. Every 1-2 years in spring is plenty, ideally right as new growth is just starting. The plant will tell you it is ready when roots circle the pot, water runs straight through without absorbing, or the corm is pushing the plant upward out of the container.
A clean repotting process:
- Water the plant a day or two before so the root ball is hydrated but not waterlogged.
- Gently remove the plant from its pot and shake off the loose mix.
- Inspect the roots and corm. Trim any soft, brown, smelly roots with sterilized shears. Healthy roots are firm and pale.
- Choose a new pot only 1-2 inches larger in diameter, with drainage holes.
- Refresh with new chunky aroid mix at the bottom and around the sides, and do not bury the corm deeper than it was before. The top of the corm should sit at or just below the soil surface.
- Water lightly to settle the mix, keep the plant out of direct sun for a week, and hold off on fertilizer for 4-6 weeks to let the roots recover.
If you find small, rock-like cormels (baby corms) attached to the main corm during repotting, you have free propagation material. Set them aside in damp sphagnum moss or perlite while you finish repotting the mother plant.
Propagation by Division and Corms
The most reliable way to make new Alocasia Amazonica plants is division of offsets during repotting, or by sprouting the small corms that hide in the root ball. Leaf cuttings do not work. Stem cuttings do not work, because the plant does not have a stem in the conventional sense. If a guide tells you to root this plant in water from a cutting, ignore that guide.
Division of offsets (the easy method):
- Unpot the mother plant in spring or early summer.
- Shake off the soil and identify offsets with their own roots and a visible growth point.
- Gently separate them by hand, or use a clean, sharp knife for stubborn connections.
- Dust the cut surfaces with cinnamon (a natural fungicide) or let them callus in a shaded, dry place for an hour.
- Pot each division into a small container with the same chunky aroid mix used for the mother plant.
- Keep humidity high (a clear plastic bag tent works), the light bright but indirect, and the soil evenly moist. New growth typically appears within several weeks.
Corms (the patient method):
- Find the small, dark, nut-like corms around the root ball.
- Snip them off cleanly with sterilized scissors, leaving the main root intact.
- Peel off the dark outer tunic of each corm to speed up sprouting.
- Place the corms on pre-moistened sphagnum moss, perlite, or LECA with the bottom in contact with the medium and the top above the surface.
- Cover with a clear dome or bag, place in Alocasia Amazonica light guide at 75-80°F, and wait. Roots and a tiny shoot usually appear within a few weeks.
Propagation by seed is technically possible but impractical for indoor growers.
Pet and Human Safety
Toxicity is the part of Alocasia Amazonica care that is easiest to forget until there is an emergency.
Mechanism. Every part of the plant contains bundles of needle-like insoluble calcium oxalate crystals called raphides. When plant tissue is chewed or crushed, those cells rupture and shoot the raphides into the mouth, throat, and digestive tract, causing immediate mechanical irritation. The result is intense, almost instant pain.
Clinical signs in pets. The ASPCA and the Merck Veterinary Manual list oral pain, pawing at the mouth, drooling, vomiting, and difficulty swallowing. With larger exposures, swelling of the tongue and throat can compromise breathing, a genuine emergency. Horses are also at risk.
Clinical signs in humans. Poison Control describes similar effects: intense mouth and throat pain, nausea, vomiting, and diarrhea, usually within minutes. Adults rarely ingest enough to be seriously ill, but small children and toddlers are at higher risk simply because everything goes in the mouth.
What to do:
- For pets: call the ASPCA Animal Poison Control Center at (888) 426-4435 or your local veterinarian immediately (a consultation fee may apply). The ASPCA’s guidance for calcium oxalate exposures is to offer a small amount of milk, yogurt, or vanilla ice cream (no xylitol) to help flush crystals from the mouth, but call first, not after.
- For humans: call Poison Control at 1-800-222-1222 in the US, or your local equivalent, and follow their instructions. Rinse the mouth with water; do not induce vomiting unless directed.
- Difficulty breathing or significant swelling is a 911 / emergency-vet situation. Do not wait.
Prevention is much easier than treatment. Place the plant on a high shelf, in a hanging basket, in a closed terrarium, or in a room pets and small children cannot access. Wash your hands after pruning or repotting, and wear gloves if you are sensitive.
Common Problems and How to Read Them
Most Alocasia Amazonica problems fall into three buckets: yellow leaves, spider mites, and root rot. Reading the plant correctly is half the cure.
Yellow Leaves
A single yellowing leaf on an otherwise healthy plant is normal. The plant is reabsorbing nutrients from an old leaf as it pushes a new one. Let the leaf go fully yellow and limp before trimming it at the base; pulling it early interrupts the nutrient retrieval.
Multiple yellowing leaves at once, especially with wet soil, almost always means overwatering. The roots are suffocating, rot is setting in, and the plant can no longer support its foliage. Unpot immediately, trim mushy brown roots, dust the cuts with cinnamon, and repot in fresh, dry, chunky aroid mix. Hold off on watering until the top inch dries.
Other possible causes of yellow leaves include low light (the plant is starving), low humidity (crispy edges plus yellowing), nutrient deficiency (rare if you feed at all), and pest infestation (look closely at the undersides). Houseplant Alley’s troubleshooting guide catalogs thirteen distinct causes; rule out the top three - overwatering, light, and humidity - before chasing the long tail.
Spider Mites
Alocasia Amazonica is, frankly, a spider mite magnet. The mites love warm, dry indoor air, and the plant’s broad, smooth leaves are easy feeding territory. The early signs are subtle: a faint yellow stippling on the leaf surface, especially near the main veins, and a fine, dusty look on the undersides. The tell-tale sign is fine webbing between the leaf and the petiole, and along the leaf edges. By the time you see the webs, the colony is established.
Treatment:
- Rinse the foliage thoroughly under a lukewarm shower or with a strong spray from a hose, paying special attention to the undersides. This physically dislodges a large fraction of the mites.
- Wipe each leaf with a damp cloth soaked in a dilute neem oil solution or insecticidal soap. Cover top and bottom surfaces.
- Repeat every 4-5 days for at least two weeks to break the mite life cycle, which runs roughly that long from egg to reproductive adult.
- Isolate the plant from your other houseplants until the infestation is gone. Mites drift easily on air currents and on your hands.
- Raise the humidity around the plant to 60% or higher. Spider mites thrive in dry air and struggle in humid air.
Do not reach for a broad-spectrum miticide first. Most spider mite problems on indoor Alocasias can be cleared with diligence, neem, and humidity.
Root Rot
Root rot is the most serious of the three, and the most preventable. It is always caused by a combination of overwatering and a mix or pot that does not drain. The first visible symptom is usually yellowing and drooping leaves on a plant sitting in wet soil - the same symptom that makes people water more, which makes the rot worse. The progression is fast: yellowing → drooping → mushy stem base → plant collapse.
The only reliable rescue is surgery:
- Unpot the plant and shake off the soil.
- Wash the roots under lukewarm water so you can see them clearly.
- Healthy roots are firm and white or pale tan. Rotten roots are brown or black, soft, and foul-smelling.
- With sterilized shears, cut away every soft, dark root. Cut back to firm, healthy tissue. Be ruthless; rot spreads from what you leave behind.
- Dust the cut surfaces with cinnamon or a commercial fungicide, and let the plant air-dry in a shaded, well-ventilated spot for an hour or two.
- Repot in fresh, dry, chunky aroid mix in a clean pot with drainage holes. Do not reuse the old soil.
- Withhold water for a few days, then resume the normal “top inch dry” schedule. Expect the plant to look rough for several weeks as it pushes new roots.
The single best prevention is the right soil mix in the first place. A chunky aroid mix is essentially rot insurance, because the excess water simply runs through.
Conclusion
The Alocasia Amazonica is a high-drama, high-reward houseplant that rewards attention and punishes inconsistency. It is not from the Amazon, it is a 1950s Florida hybrid with no formal botanical registration, and almost every “expert tip” you read online is treating a manufactured plant as if it were a wild species. The good news is that the actual care is straightforward once you reset your mental model.
Give it bright, indirect light, 65-80°F temperatures, and a spot away from cold drafts and heating vents. Water when the top 1-2 inches of mix dry out, then drain thoroughly. Keep humidity around 60-80% with a humidifier. Pot it in a chunky aroid mix of orchid bark, perlite, and coco coir in a container with drainage holes. Feed lightly during spring and summer, and stop during the cool months. Expect a winter dormancy in which the plant drops its leaves and lives off the corm; do not throw the pot away. Propagate by division of offsets or by sprouting corms, never by leaf cutting. Treat every yellow leaf as data, not disaster, and reach for the humidifier at the first sign of crispy edges or spider mites.
Keep it out of reach of curious cats, dogs, horses, and small children, because every part of it contains insoluble calcium oxalate crystals that cause real pain. If a pet ever chews the plant, call the ASPCA Animal Poison Control Center at (888) 426-4435 immediately.
Treat the African mask plant as the manufactured, slightly finicky, absolutely gorgeous hybrid it is, and it will give you years of the most dramatic foliage in your collection.
When to use this page vs other Alocasia Amazonica guides
- Alocasia Amazonica overview - Canonical hub for this species - care topics and problems branch from here.
- Alocasia Amazonica problems - Symptom-first path when you already know something is wrong.
Related Alocasia Amazonica guides
- Alocasia Amazonica watering
- Alocasia Amazonica light
- Alocasia Amazonica soil
- Alocasia Amazonica propagation
- Alocasia Amazonica fertilizer
- Alocasia Amazonica repotting
- Alocasia Amazonica pruning
- Yellow Leaves on Alocasia Amazonica
- Spider Mites on Alocasia Amazonica
- Brown Tips on Alocasia Amazonica
- Root Rot on Alocasia Amazonica
- Overwatering on Alocasia Amazonica
How to care for Alocasia Amazonica?
How much light does Alocasia Amazonica need?
bright indirect light
- bright indirect light - bright indirect light.
When should you water Alocasia Amazonica?
Water when the top 2–3 cm of soil is dry; never let roots sit in water.
- Finger test to 2–3 cm depth - Water when the top 2–3 cm of soil is dry; never let roots sit in water.
- Drain excess water - Water when the top 2–3 cm of soil is dry; never let roots sit in water.
What soil works best for Alocasia Amazonica?
Light, well-aerated aroid mix that drains freely.
- orchid bark - Chunky bark pieces that create air pockets and mimic epiphytic growing conditions.
- perlite - Light white granules that keep soil airy and help prevent compaction.
- potting mix - Light, well-aerated aroid mix that drains freely.
Grower notes for Alocasia Amazonica
What matters most with Alocasia Amazonica
Alocasia Amazonica is easiest to grow when you judge the whole plant: new growth, root-zone moisture, light exposure, and how quickly the pot dries after watering. In practice, the care checkpoint is simple: bright indirect light. Pair that with light, well-aerated aroid mix that drains freely, and avoid changing water, pot size, and placement all at once.
Best placement in a real home
Alocasia Amazonica belongs where bright indirect light is realistic for most of the day, not only where the pot looks good. Water when the top 2–3 cm of soil is dry; never let roots sit in water. If the pot stays wet longer than expected, move the plant into better light or reassess the mix before watering again. Humidity target: 60–80%. Temperature comfort zone: 18–27°C (65–80°F).
Before you buy this plant
Choose Alocasia Amazonica with firm new growth, clean leaf undersides, and soil that does not smell sour or feel compacted. Be cautious if you see yellow-leaves, sticky residue, collapsed crowns, or a pot that is wet in poor light. Cosmetic old-leaf damage is less worrying than weak roots or active pests.
First month after bringing it home
Do not repot Alocasia Amazonica on day one unless the mix is failing or pests are obvious. Quarantine it, learn how fast the pot dries, and keep care boring while it adjusts. Watch especially for yellow-leaves, spider-mites, and brown-tips. If problems appear, correct the condition first rather than stacking fertilizer, repotting, and pruning together.
Safety note for Alocasia Amazonica
Alocasia Amazonica is not a plant to keep within reach of pets or children. The database flags it for cats, dogs, and humans. Use gloves if sap or plant tissue is irritating, and pick a pet-safe alternative for floor pots or low shelves.
How to tell Alocasia Amazonica is settling in
Also sold as Amazonian Elephant Ear and African Mask Plant, this plant should be judged by stable new growth rather than label names alone. If you plan to multiply it later, common methods include Corm division and Offset separation. Repot only when you see pot-bound roots and stunted growth. If spider-mites shows up early, inspect light, watering, and roots before assuming the plant is permanently weak.
Is it pet safe?
Alocasia Amazonica is toxic to cats and dogs and humans.
Contains calcium oxalate crystals; ingestion causes intense oral burning, drooling, and vomiting.
Watering Alocasia Amazonica
For Alocasia Amazonica, finger test to 2–3 cm depth and water every 7–14 days depending on humidity and light. Cut back to minimal watering in winter; dormancy common.
| Detail | Information |
|---|---|
| How often | Every 7–14 days depending on humidity and light |
| How to check | Finger test to 2–3 cm depth |
| Seasonal changes | Cut back to minimal watering in winter; dormancy common |
Signs of overwatering
- yellowing lower leaves
- soft stems
- fungus gnats
Signs of underwatering
- crispy leaf margins
- drooping
- slow growth
Soil & potting for Alocasia Amazonica
Use a mix of orchid bark, perlite, potting mix, activated charcoal for Alocasia Amazonica. Excellent; terracotta pots help regulate moisture. Target soil pH around 5.5–6.5. Repot every 1–2 years, ideally in early spring.
| Detail | Information |
|---|---|
| Recommended mix | orchid bark, perlite, potting mix, activated charcoal |
| Drainage | Excellent; terracotta pots help regulate moisture |
| Soil pH | 5.5–6.5 |
| Repotting frequency | Every 1–2 years |
| Best season to repot | Early spring |
Signs it needs repotting
- pot-bound roots
- stunted growth
Humidity & temperature for Alocasia Amazonica
Alocasia Amazonica prefers 60–80%, though normal home humidity is usually fine. Keep temperatures around 18–27°C (65–80°F).
| Detail | Information |
|---|---|
| Humidity | 60–80% - normal home humidity is fine. |
| Ideal temperature | 18–27°C (65–80°F) |
Fertilizer & pruning for Alocasia Amazonica
Use use balanced liquid fertilizer at half strength and stop if the plant is stressed, newly repotted, or not actively growing. Fertilizing during dormancy. for Alocasia Amazonica.
| Detail | Information |
|---|---|
| Fertilizer type | Use balanced liquid fertilizer at half strength and stop if the plant is stressed, newly repotted, or not actively growing. Fertilizing during dormancy. |
Common problems on Alocasia Amazonica
Yellow Leaves
MediumLikely cause: Overwatering or natural dormancy
Quick fix: Check roots for rot; reduce watering in winter
Full fix guide →Spider Mites
HighLikely cause: Low humidity in dry indoor environments
Quick fix: Increase humidity; treat with insecticidal soap
Full fix guide →Brown Tips
LowLikely cause: Dry air or fluoride sensitivity
Quick fix: Use filtered water; run a humidifier
Full fix guide →Root Rot
HighLikely cause: Overwatering in heavy soil
Quick fix: Repot into airy mix; trim rotten roots
Full fix guide →Overwatering
MediumLikely cause: Common on this plant type; confirm with recent watering, light, and root checks.
Quick fix: Inspect the plant and correct the most likely care stressor before stacking treatments.
Full fix guide →Underwatering
MediumLikely cause: Common on this plant type; confirm with recent watering, light, and root checks.
Quick fix: Inspect the plant and correct the most likely care stressor before stacking treatments.
Full fix guide →Mealybugs
MediumLikely cause: Common on this plant type; confirm with recent watering, light, and root checks.
Quick fix: Inspect the plant and correct the most likely care stressor before stacking treatments.
Full fix guide →Aphids
MediumLikely cause: Common on this plant type; confirm with recent watering, light, and root checks.
Quick fix: Inspect the plant and correct the most likely care stressor before stacking treatments.
Full fix guide →Leggy Growth
MediumLikely cause: Common on this plant type; confirm with recent watering, light, and root checks.
Quick fix: Inspect the plant and correct the most likely care stressor before stacking treatments.
Full fix guide →Slow Growth
MediumLikely cause: Common on this plant type; confirm with recent watering, light, and root checks.
Quick fix: Inspect the plant and correct the most likely care stressor before stacking treatments.
Full fix guide →Wilting
MediumLikely cause: Common on this plant type; confirm with recent watering, light, and root checks.
Quick fix: Inspect the plant and correct the most likely care stressor before stacking treatments.
Full fix guide →Drooping Leaves
MediumLikely cause: Common on this plant type; confirm with recent watering, light, and root checks.
Quick fix: Inspect the plant and correct the most likely care stressor before stacking treatments.
Full fix guide →Low Humidity
MediumLikely cause: Common on this plant type; confirm with recent watering, light, and root checks.
Quick fix: Inspect the plant and correct the most likely care stressor before stacking treatments.
Full fix guide →Not Enough Light
MediumLikely cause: Common on this plant type; confirm with recent watering, light, and root checks.
Quick fix: Inspect the plant and correct the most likely care stressor before stacking treatments.
Full fix guide →Fungus Gnats
MediumLikely cause: Common on this plant type; confirm with recent watering, light, and root checks.
Quick fix: Inspect the plant and correct the most likely care stressor before stacking treatments.
Full fix guide →Mold on Soil
MediumLikely cause: Common on this plant type; confirm with recent watering, light, and root checks.
Quick fix: Inspect the plant and correct the most likely care stressor before stacking treatments.
Full fix guide →