Alocasia Amazonica Watering: How Often, How Much, and How
Alocasia Amazonica Watering: How Often, How Much, and How to Fix Mistakes
Alocasia Amazonica Watering: How Often, How Much, and How to Fix Mistakes
Alocasia Amazonica Watering: How Often, How Much, and How to Fix Mistakes
Why Alocasia Amazonica Watering Is Different From Your Other Houseplants
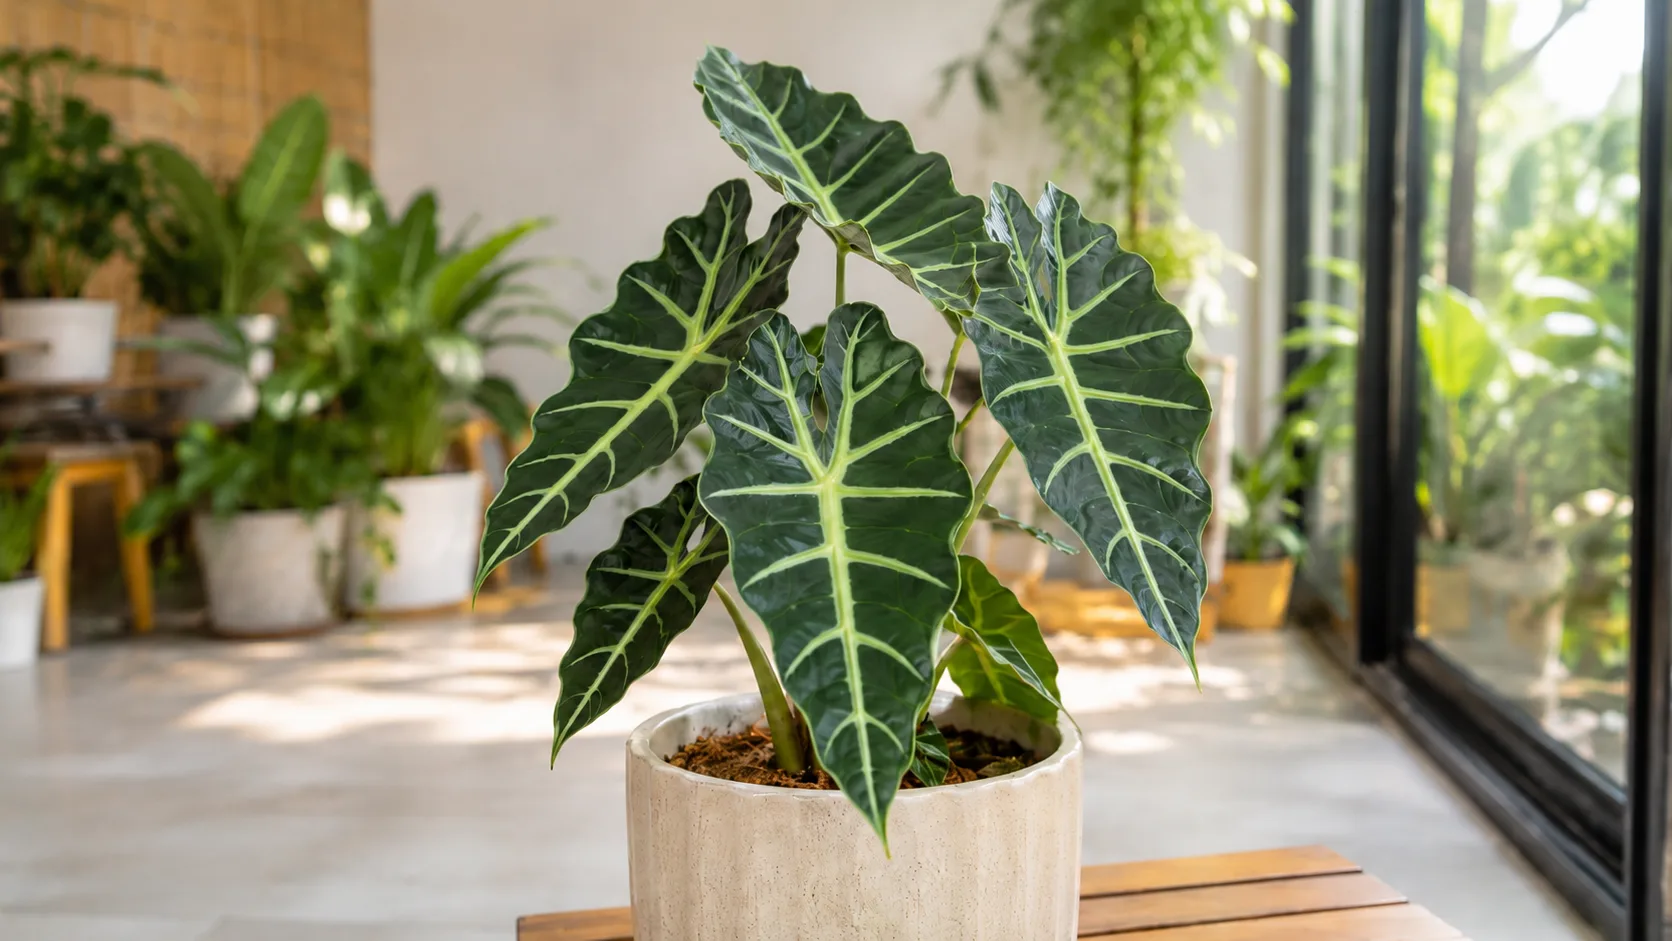
Most generic houseplant advice treats watering as a single variable. With Alocasia Amazonica - the compact, dark-veined cultivar sold as “Polly” or “African Mask Plant” - watering is the make-or-break decision, because the plant grows from a corm, a swollen underground storage organ that holds the entire future of the plant. The RHS Alocasia growing guide is unusually blunt about this: water when the top 5 cm (about 2 inches) of compost has dried out, and reduce watering to a minimum in winter because “overwatering on Alocasia Amazonica, especially while dormant, can cause the roots to rot.” That single sentence explains why so many Alocasias die in good homes.
The corm stores water and energy, so the plant can survive short droughts. It cannot, however, survive long periods of soggy, oxygen-poor soil. When the substrate stays wet, air is pushed out of the pore spaces between soil particles, roots suffocate, and opportunistic pathogens - most often Pythium and Phytophthora, the fungi behind most aroid root rot on Alocasia Amazonica - move from the feeder roots into the corm itself. By the time leaves are obviously yellow, the damage is usually extensive.
A second reason Alocasia Amazonica watering feels different is that the plant signals in ways that look identical from a distance. A thirsty Alocasia droops. A drowned Alocasia also droops. A dormant Alocasia drops leaves. A dying-from-rot Alocasia also drops leaves. The whole article exists to help you tell those four states apart using the pot, the soil, the stem, the roots, and the season - not the day of the week.
The corm at the center of every decision you make
Before you water, picture what is happening under the soil. The corm sits at or just below the surface, with feeder roots radiating outward and downward and a few anchoring roots gripping the substrate. New leaves emerge from a single growth tip on top of the corm. When you water, you are not just moistening soil - you are deciding whether the corm spends the next week in an aerobic environment (oxygen present, roots healthy) or an anaerobic one (oxygen absent, pathogens winning). Every check below - finger, weight, probe, leaf texture, season - is a way of answering the same question: is the corm in conditions that keep it firm, or conditions that are starting to soften it?
The Core Rule: Check the Pot, Not the Calendar
A weekly schedule is the single most common reason healthy-looking Alocasias die. Light intensity, humidity, pot size, soil mix, and season all change how fast the substrate dries, so a plant that needs water every 5 days in July may need it only every 18 days in January. The Royal Horticultural Society, the International Aroid Society, and most experienced aroid growers all converge on the same rule: water when the top 1–2 inches of substrate are dry, and confirm with a second check.
The finger test: how deep, what to feel for
Insert a clean finger to the second knuckle - roughly 2.5 cm (1 inch) deep. You are feeling for three states:
- Cool and barely damp at the tip, dry below the surface: water now.
- Cool and damp all the way down: wait 24 hours and recheck.
- Wet or cold at depth, with the surface still dark: do not water. The substrate is staying wet too long, which usually means a drainage or soil-mix problem rather than a watering-frequency problem.
The Missouri Botanical Garden recommends the same approach for tropical aroids in general: feel the top inch, water only when it is no longer moist. If the surface still looks dark and feels cool, the soil is retaining more water than the plant is using, and the next step is to check the pot, not to add more water.
The weight test: reading the pot like a fuel gauge
Lift the pot right after a thorough watering and remember the weight. Lift it again two days later, three days later, and so on. A dry pot feels dramatically lighter - typically 20–30% lighter for a 6-inch nursery pot - and that change is one of the most reliable signals in indoor gardening because it is impossible to fake. The weight test is also the only check that works for plants in tall decorative cache pots where you cannot easily see or feel the surface.
If you do this once, you will build a feel for the rhythm. In active summer growth, a chunky aroid mix in a terracotta pot can drop from “soaked” to “ready” in 5–7 days. In winter, the same plant in the same pot can take 14–21 days to reach that lighter weight. That gap is the entire seasonal schedule in one observation.
The chopstick or probe test: a second opinion
Push a plain wooden chopstick or a bamboo skewer to the bottom of the pot and leave it for 10 minutes. Pull it out and look at it:
- Dark and damp at the tip: the lower root zone is still wet. Wait.
- Evenly tan and dry, with no visible moisture line: the substrate is ready for water.
- Dark at the top, dry at the bottom: unusual but possible in hydrophobic mixes; this is the one case where bottom watering or a deep top soak helps rewet the medium.
This test is especially useful in chunky aroid mixes that contain orchid bark, perlite, and coco chips, because the finger test can be misleading when the surface dries around larger particles while the lower half stays wet. Moisture meters are unreliable in those mixes; a chopstick is not.
How Often to Water Alocasia Amazonica by Season
The most useful answer is a range, not a number. Most healthy Alocasia Amazonica in a chunky, well-draining aroid mix and a 6-inch pot will fall into these windows:
- Spring and summer (active growth): every 7–14 days, with brighter light and warmer temperatures pulling the interval toward the shorter end.
- Fall and winter (slow growth or dormancy): every 14–21 days, sometimes longer if the plant has dropped all leaves and the corm is resting.
- After a recent repot: wait 5–7 days before the first real soak so disturbed roots can callus, then resume normal checks.
- In a hot, dry room with a humidifier off: the interval can shrink to every 5–6 days; in a cool basement with low light, it can stretch to every 3 weeks.
The RHS puts the active season squarely between April and October for watering purposes. The NC State Extension places the plant’s comfort range between 68°F and 77°F (20–25°C), which lines up with the same active season in most homes. The University of Wisconsin Extension adds that Alocasias begin to falter below 50°F (10°C), and at low temperatures the soil also dries more slowly, so the two effects compound.
Spring and summer: active growth, faster drinking
During active growth the plant pushes out new leaves, often one every 4–6 weeks in good conditions, and transpires heavily. The substrate dries faster, the plant drinks faster, and a missed watering shows up within days as soft, drooping petioles. In a south- or east-facing room with Alocasia Amazonica light guide, a 6-inch Alocasia in a chunky mix typically wants water every 7–10 days. In a darker interior, every 10–14 days is more realistic. The growth tip is also the most sensitive part of the plant; keeping the substrate evenly - not constantly - moist is what produces the dramatic, unblemished leaves Alocasia Amazonica is famous for.
Fall and winter: slowing down, cutting back
As day length drops below about 10 hours and indoor temperatures fall, most Alocasias slow their growth noticeably. Many stop altogether and either hold a small number of leaves or drop them entirely. The corm is still alive underground, but it is pulling very little water from the substrate. Watering the same summer volume on the same summer schedule is the fastest way to rot a dormant corm.
A safer winter rhythm is to let the top 50–70% of the substrate dry between waterings, then water just enough to barely rehydrate the mix - roughly half to two-thirds of your summer volume. The corm should never sit in cold, wet soil, and it should never desiccate completely. If the plant drops all of its leaves, keep the corm barely moist and check it every 2–3 weeks; new growth will resume in spring when temperatures climb back above 65°F (18°C).
How Much Water to Use and How to Apply It
When you do water, water deeply. The goal is to rehydrate the entire root ball, not just the top centimeter. Pour slowly and evenly over the substrate surface until water runs freely from the drainage holes, then stop. Let the pot drain for 10–15 minutes and empty the saucer. Standing water in a saucer is one of the most common rot triggers in indoor aroids because it wicks back into the substrate and keeps the bottom of the root ball saturated for days.
The amount is determined by the pot, not the plant. A 4-inch pot may need 150–250 ml to wet the entire substrate and produce drainage. A 10-inch pot may need 700 ml or more. Watch the drainage holes, not the measuring cup. As soon as water runs steadily from the bottom, the substrate is fully wetted; anything beyond that point is just flushing salts.
Top watering vs. bottom watering for Alocasia Amazonica
Top watering is the default for Alocasia Amazonica. It wets the entire substrate column evenly, pushes stale air out of the root zone, and carries excess salts, fertilizer residue, and fluoride down through the pot and out the drainage holes. Most aroid growers recommend top watering as the primary method and reserve bottom watering for special situations.
Bottom watering has two legitimate uses. The first is rescuing a hydrophobic mix - a peat- or coco-heavy substrate that has dried so thoroughly that water runs down the sides of the root ball without wetting the center. Sitting the pot in 2–3 cm of room-temperature water for 20–30 minutes lets the substrate rehydrate from below. The second is the controlled-rehydration step in an emergency recovery, when you want to rewet a stressed root ball without splashing the leaves or compacting the substrate.
Bottom watering is not a good permanent system for Alocasia Amazonica. It encourages shallow rooting, allows salts to accumulate in the upper substrate, and - most importantly - masks overwatering. A plant that always sits in a wet saucer will develop the same anaerobic conditions as a plant that is overwatered from the top. If you do bottom-water, flush from the top once a month to reset the salt balance.
Water type matters: fluoride, chlorine, and temperature
Alocasia Amazonica is unusually sensitive to fluoride, chlorine, and other dissolved minerals commonly found in municipal tap water. The International Aroid Society and multiple aroid-specific growers flag this because the damage is distinctive: brown, crispy leaf tips and margins, often with a thin yellow halo. The condition does not kill the plant, but it is permanent on the affected leaves and will recur on new growth if the water source is not changed.
In rough order of preference:
- Rainwater: free, soft, and what the plant receives in nature. Collect in clean containers and use within a few days.
- Distilled or reverse-osmosis water: reliably clean but strips minerals; pair with a light, balanced fertilizer to compensate.
- Filtered tap water (activated carbon or pitcher filter): removes chlorine and a meaningful share of fluoride; a good middle ground.
- Tap water left out for 24 hours: removes chlorine, but does not remove fluoride or hard-water minerals, so it is the weakest option for sensitive cultivars.
Water temperature matters more than people expect. Cold water straight from the tap can shock the roots and slow uptake, and over time it can contribute to leaf curl and stalled growth. Let the water come to room temperature before pouring. The Foliage Factory and several university extension services also recommend flushing the substrate with plain water every 4–6 weeks to dissolve and wash out accumulated salts, especially if you are fertilizing regularly.
Humidity, Light, and Temperature: The Triad That Controls Thirst
Watering is a downstream variable. The plant’s actual thirst is set by how fast it transpires, and transpiration is set by humidity, light, and temperature. The Royal Horticultural Society and NC State Extension agree on the comfort zone: 60–80% relative humidity, temperatures between 65°F and 85°F (18–29°C), and bright but indirect light. A plant in that range uses water predictably; a plant outside it drinks in bursts, which is when over- and underwatering on Alocasia Amazonica mistakes happen.
Humidity is the easiest of the three to underestimate. Alocasia Amazonica evolved under a tropical canopy where ambient moisture often sits above 70%. Most homes run at 30–45% in winter, which is why leaf edges crisp, new leaves struggle to unfurl, and the plant drinks faster than the substrate can deliver water. A humidifier set to 60–65% near the plant is the most effective fix. Pebble trays and grouping with other tropicals help at the margins; misting raises humidity for roughly 15 minutes and can leave the leaves vulnerable to fungal spotting, so it is a temporary boost, not a strategy.
Light drives evaporation through the leaves. Bright indirect light in the 15,000–20,000 lux range produces steady transpiration and a predictable dry-down. Too little light, and the substrate stays wet for a week longer than expected, which is one reason overwatering is so common in darker rooms. Too much direct sun, and the leaves scorch and the substrate bakes unevenly. A north- or east-facing window, or a south-facing window with a sheer curtain, is the usual sweet spot.
Temperature is the silent control. University of Wisconsin Extension notes that sustained temperatures below 50°F (10°C) push Alocasia into stress, and at those temperatures the soil also stays cold and wet, doubling the rot risk. Keep the plant away from drafts, AC vents, and single-pane windows in winter, and let the pot sit on a warm surface rather than a cold stone floor.
Reading the Plant: Overwatering vs. Underwatering
The plant is always telling you something. The challenge is that the two most common watering failures - too much and too little - produce overlapping symptoms. A quick triage comes down to soil, leaves, stem, and roots in that order.
| Symptom | Overwatered | Underwatered |
|---|---|---|
| Soil 1–2 days after watering | Still wet, heavy, sometimes sour-smelling | Already dry, light, pulling from the pot edges |
| Fungus gnats | Often present, hovering near the soil | Usually absent |
| Leaf texture | Limp, soft, sometimes translucent at the base | Papery, thin, crispy at the edges |
| Leaf color | Yellow, starting with the lower, older leaves | Brown tips and margins, sometimes dull overall |
| Stem base | Mushy, dark, sometimes leaking fluid | Firm, dry, may look slightly shriveled |
| Roots | Brown, soft, foul-smelling, break when pinched | Tan or white, dry, brittle |
| Petiole posture | Drooping even when soil is wet | Drooping that recovers within hours of watering |
If the soil is wet and the plant is drooping, do not water. The most common emergency-room mistake in Alocasia care is seeing a wilted plant and reaching for the watering can, when in reality the wilt is rot-induced and additional water accelerates the collapse. The University of Maryland Extension is explicit on this point: a plant in root rot wilts and yellows in exactly the same way a thirsty plant does, so always check the soil before adding water.
Overwatering signs: yellow leaves, mushy stems, fungus gnats
Yellowing lower leaves are the most common early signal. The color is usually a uniform, soft yellow rather than the patchy discoloration of a pest problem, and the affected leaves feel soft or limp rather than dry. As the condition progresses, the stem base turns dark and spongy, the soil may develop a sour or swampy smell, and small black flies - fungus gnats - start hovering near the surface. Fungus gnats are not just a nuisance; they are a moisture warning. They thrive in constantly damp substrate, and their larvae feed on the same roots that are already under stress.
A single yellow leaf every few weeks is often just natural senescence. Multiple yellow leaves at once, especially with mushy stems, is a watering problem. Stop watering, unpot the plant within 24–48 hours, and check the corm and roots. The recovery path is in the next section.
Underwatering signs: drooping, crispy edges, slow growth
An underwatered Alocasia is harder to confuse with rot because the soil is the giveaway. It is dry, light, sometimes pulling away from the pot edges. The leaves lose their characteristic rigidity; the petioles soften and the leaf blades droop. Over a longer period, the leaf margins turn brown and crispy, new growth stalls, and the plant stops producing the dramatically veined leaves that make the species worth growing. In severe cases the corm itself begins to desiccate and the growth tip dies back.
The good news is that an underwatered Alocasia almost always recovers quickly once watered correctly. A thorough soak - pot in 2–3 cm of room-temperature water for 20–30 minutes, or a slow top water until it drains freely - usually produces visible improvement within 24 hours, with new leaf posture restoring over 3–5 days. Crispy edges will not reverse, but new growth will come in clean if the watering rhythm is corrected.
Corm Rot: The Silent Killer Behind Most Losses
Root rot and corm rot are the same disease process in different tissues. Pythium and Phytophthora - both oomycete pathogens - are responsible for most aroid losses, per the Clemson HGIC guide on root and crown rot pathogens. They live in soil, activate when substrate stays wet and oxygen-starved, and move from the feeder roots into the main roots, then into the corm itself. The progression typically runs through three stages:
- Early rot. Slight wilting despite wet substrate. Lower leaves yellow slightly. Growth slows or stops. The plant looks “off” but not obviously sick.
- Advanced rot. Obvious wilting even in wet substrate. Multiple yellowing leaves. Leaves dropping rapidly. Stems soft at the base.
- Terminal rot. Complete wilting. All leaves yellowing or browning. Stems mushy and collapsing. Foul smell when handling the plant. The corm is soft throughout, smells foul, and shows black discoloration deep in the tissue. Recovery is not possible.
The single most important warning sign is wilting despite wet substrate. If the plant is drooping and the soil is damp, the roots are failing to move water upward - almost always because they are rotting. Treat the wilt as a rot signal, not a thirst signal, and unpot the plant immediately.
Emergency Recovery: Saving a Watering-Damaged Plant
The recovery protocol depends on how far the damage has progressed. In every case, stop watering the moment you suspect a problem and move the plant to a warm, brightly lit spot with good airflow so the existing substrate can dry.
Step 1 - Unpot and inspect. Slide the plant out of its pot and shake off as much substrate as you can. Healthy roots are white or cream, firm, and slightly springy. Rotted roots are brown or black, mushy, stringy, collapse when pinched, and smell sour or rotten.
Step 2 - Assess the corm. This is the deciding moment. Squeeze the corm gently. A viable corm is firm, dense, and smells earthy. A failing corm has soft spots, dark discoloration, or a foul smell. If the corm is firm, recovery is highly likely. If the corm is soft throughout and smells bad, recovery is not possible and the plant should be composted.
Step 3 - Trim and treat. With sterilized scissors or shears, cut away every mushy, black, or smelly root back to clean white tissue. If the corm has soft spots, slice them off with a sterilized blade until you reach firm, pale tissue. Dust the cut surfaces with ground cinnamon, a natural antifungal, and let the corm air-dry on a paper towel for 30–60 minutes.
Step 4 - Repot into a fast-draining mix. Use a chunky aroid blend - roughly 40% peat-free compost or coco coir, 30% orchid bark, 20% perlite, and 10% horticultural grit or pumice. The RHS recommends three parts peat-free compost to one part horticultural grit for general Alocasia culture; a chunkier version of that ratio suits a plant coming out of rot. Use a clean pot with drainage holes, sized to the root mass.
Step 5 - Hold off on water. Do not water the freshly repotted corm for 5–7 days. This window lets the cut surfaces callus and discourages re-entry by the same pathogens. Keep the plant in bright indirect light, temperatures between 70°F and 78°F (21–25°C), and humidity above 60%.
Step 6 - Resume gradually. After 5–7 days, water lightly - about half your normal volume - and let the top inch dry before the next session. Do not return to a full watering schedule until you see a new growth tip emerging. New growth is the single best confirmation that the corm has recovered; most rescued Alocasias push a new leaf within 4–6 weeks if the conditions are right.
Step 7 - Hold fertilizer. Do not feed a recovering Alocasia. Fertilizer on stressed roots burns tissue and gives pathogens an easy nutrient source. Resume a dilute, balanced fertilizer only after the first new leaf has fully unfurled.
Seasonal Adjustments and Dormancy: A Month-by-Month Plan
Treating Alocasia watering as a static habit is the most reliable way to lose the plant. The right rhythm shifts with the seasons, and the most dangerous months are the ones where the light changes faster than the watering routine does.
March through May. Active growth resumes. Begin watering when the top 1–2 inches of substrate are dry, typically every 7–10 days. Begin a half-strength balanced fertilizer at this point if the plant is producing new leaves.
June through August. Peak growth and peak thirst. Water every 7–14 days depending on light, pot size, and humidity. Watch the pot weight rather than the date. This is also the season to be most careful with humidity - air conditioning drops ambient moisture fast, and the plant will drink more than the schedule suggests.
September and October. Growth slows. Extend the interval - let the top 2 inches dry, then wait another day or two. The first cool nights often arrive before the plant visibly slows, so the soil can stay wet longer than expected. Stop fertilizing by mid-fall.
November through February. Slow growth or full dormancy. Allow the top 50–70% of the substrate to dry between waterings, then water just enough to rehydrate - not drench. If the plant drops all of its leaves, keep the corm barely moist and check it every 2–3 weeks. Move the plant to the brightest indirect light you can provide; a grow light running 12–14 hours a day can prevent dormancy altogether in northern climates.
Emergency signs to watch year-round. A sudden, unexplained droop, a sour smell from the pot, multiple yellowing leaves in a week, or fungus gnats appearing in numbers all point to a watering rhythm that has slipped out of balance. In every case, the response is the same: unpot, inspect, correct.
Conclusion
Alocasia Amazonica watering is not a calendar problem; it is a corm problem. The plant’s entire survival comes down to whether the storage organ at the base of the petioles spends its time in a substrate that breathes or a substrate that suffocates. A weekly schedule ignores the variables that actually control thirst - light, humidity, temperature, pot size, soil mix, and season - and that is why generic advice so often fails this particular plant.
The framework that works is simple enough to run on autopilot. Check the top 1–2 inches of substrate before you water. Confirm with a second test - weight, chopstick, or leaf texture. Water deeply until the pot drains, then let it dry to the right point before the next session. Use room-temperature, low-fluoride water, ideally rainwater, distilled, or filtered. Keep humidity at 60–80% and temperatures between 65°F and 85°F (18–29°C). Cut the volume by half in fall and winter. Stop the moment you see signs of overwatering, because the corm does not get a second chance once it goes soft.
Get those four checks right and the rest of Alocasia care becomes much easier. Get any one of them wrong for long enough, and the corm pays the price. Treat the watering can as a precision tool, not a routine, and Alocasia Amazonica will repay you with the kind of dramatic, deeply veined foliage that made you bring it home in the first place.
When to use this page vs other Alocasia Amazonica guides
- Alocasia Amazonica overview - Start here for whole-plant context before deep-diving this topic.
- Alocasia Amazonica problems hub - Jump to symptom-specific fix guides when this care topic does not resolve the issue.
- Overwatering on Alocasia Amazonica - Escalate here when watering adjustments are not enough.
- Underwatering on Alocasia Amazonica - Escalate here when watering adjustments are not enough.
- Root Rot on Alocasia Amazonica - Escalate here when watering adjustments are not enough.
Related Alocasia Amazonica guides
- Alocasia Amazonica overview
- Alocasia Amazonica light
- Alocasia Amazonica soil
- Alocasia Amazonica propagation
- Alocasia Amazonica fertilizer
- Alocasia Amazonica repotting
- Overwatering on Alocasia Amazonica
- Underwatering on Alocasia Amazonica
- Root Rot on Alocasia Amazonica
- Wilting on Alocasia Amazonica
- Drooping Leaves on Alocasia Amazonica
- Mold on Soil on Alocasia Amazonica