Alocasia Amazonica Propagation: Division, Offsets, and Corm
Alocasia Amazonica Propagation: Division, Offsets, and Corm Method
Alocasia Amazonica Propagation: Division, Offsets, and Corm Method
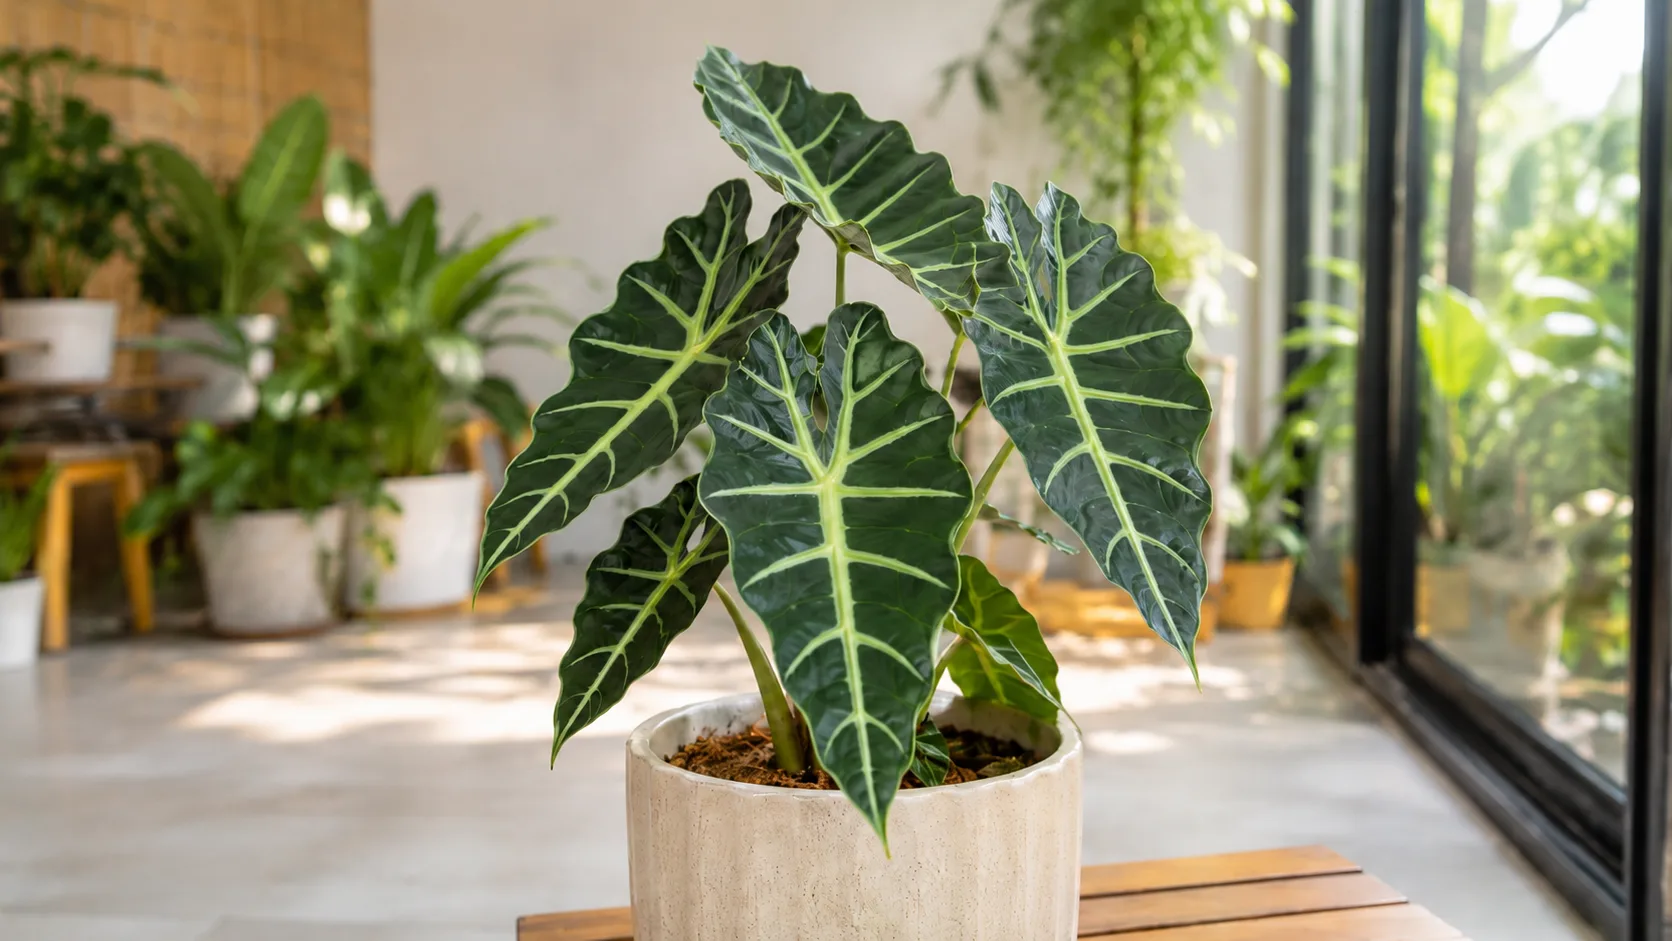
Alocasia Amazonica, sold interchangeably as Alocasia ‘Polly’ and the African mask plant, looks difficult to multiply. It is not. The plant grows from a shallow rhizome, sends out underground stolons, and drops small storage organs called corms into the surrounding soil. Every one of those is a future plant. The trick is knowing which structure you are looking at, when to disturb it, and how to keep the new pieces alive while they rebuild a root system. That is what this guide is built to give you.
If symptoms persist, see the Yellow Leaves on Alocasia Amazonica guide.
Why Alocasia Amazonica Cannot Be Propagated From a Leaf Cutting
If you have searched for this topic before, you have probably read at least one forum thread suggesting a leaf-cutting method. Ignore it. Alocasia is a member of the aroid family, and like its relatives the philodendrons and monsteras, it has the capacity to root from a cutting only when that cutting includes a node - a chunk of stem containing the meristematic tissue where new growth originates. An Alocasia leaf attached to a petiole has no node. The petiole is a leaf stalk, not a stem. There is no bud, no dormant eye, and no cambium layer from which a new plant can form. A leaf placed in water or moss may stay green for weeks, but it will not produce a single new root. It is the horticultural equivalent of a dead end.
The Missouri Botanical Garden entry for Alocasia × amazonica ‘Polly’ describes the plant as grown from “rhizomes or tuberous roots” started indoors in pots, and that is the only propagation pathway that botanically exists for this hybrid. So the three real options are: divide the rhizome, separate offsets, or sprout the corms. Each has its own timing, its own success rate, and its own pitfalls.
The Three Reliable Propagation Methods at a Glance
| Method | What you are separating | Best for | Time to a new leaf | Difficulty |
|---|---|---|---|---|
| Rhizome division | A section of the mother rhizome with at least one growth point and roots | Mature, crowded plants | 2–3 weeks | Easy |
| Offset / pup separation | A small daughter plant already attached to the mother with its own roots | Plants that have produced visible pups | 2–4 weeks | Easy |
| Corm propagation | A small, dormant storage organ harvested from the soil | Maximizing the number of new plants from one unpotting | 4–12 weeks | Moderate |
The first two are essentially the same operation done at different scales; both are forms of division. The third is slower and more variable, but it is the only way to multiply a plant that has not yet produced visible pups.
When to Propagate Alocasia Amazonica
The short answer is spring through early summer, when the plant is in active growth. The NC State Extension plant entry for Alocasia x mortfontanensis recommends spring division because energy reserves are highest and recovery is fastest during this window. Indoors, where temperatures are stable, you can extend that window into mid-summer, but you should avoid disturbing the plant in late autumn or winter. Cooler indoor temperatures, shorter days, and the natural tendency of Alocasia Amazonica to slip into dormancy all conspire to make winter divisions slow, rot-prone, and likely to fail.
You will know your plant is ready if it is pushing out new leaves, the soil is drying out faster than usual (a sign of a denser root system), or roots are circling the surface or growing out of the drainage holes. A plant that has just finished a hard repot, just recovered from a pest infestation, or just emerged from dormancy is not a good candidate. Wait until it has put out at least one new leaf under your care and is clearly growing on its own.
Tools, Sterilization, and Potting Mix
You do not need a lot, but you do need a few specific things. The first is a clean cutting surface. Wipe a sharp knife, scalpel, or pair of pruning shears with 70% isopropyl alcohol before you start, and again between cuts. The University of Minnesota Extension recommends 70% isopropyl alcohol as the preferred daily-driver disinfectant for precision cutting tools like pruners, since bleach is corrosive and not recommended for tools requiring a sharp edge. Bacteria and fungal spores travel easily on plant tools, and Alocasia wounds are slow to callus over, which gives pathogens a long window to take hold.
You will also want:
- A new pot for each division, with drainage holes, sized to the root mass rather than the plant’s top growth.
- A well-draining, airy aroid mix. A workable blend is two parts potting soil or coco coir, one part perlite, and one part orchid bark. Anything that drains fast and holds air around the roots is fine.
- Optional but useful: a small bottle of ground cinnamon (a mild natural fungicide), a soft brush, a clean tray to work on, and a pair of gloves. The sap of Alocasia Amazonica contains calcium oxalate crystals that irritate skin and mucous membranes, with documented contact dermatitis and eye injury symptoms per NC State Extension. Most people will not have a severe reaction, but gloves save you from itching fingers.
If you are planning to sprout corms, also gather a small clear container with a lid (a deli cup or a takeout box works), your chosen medium, and a heat source such as a seedling heat mat.
Method 1 - Division of the Rhizome During Alocasia Amazonica repotting guide
Rhizome division is the fastest path to a new plant that is already established, and the easiest place to fold propagation into routine care is at repotting time. Most Alocasia Amazonica benefit from a fresh pot every two to three years, so plan the work together.
How to Unpot and Inspect the Root Ball
Water the plant the day before you divide it. Moist roots flex rather than snap, and the soil comes away more cleanly. To unpot, tip the container on its side, squeeze the walls gently if it is plastic, and slide the root ball out. Do not yank the plant by its stems. If it is stuck, run a butter knife around the inside edge of the pot to loosen the grip.
Once the plant is out, lay it on a clean surface and shake or tease away as much of the old soil as you can. The rhizome will be a pale, fleshy structure somewhere near the top of the root mass - the place where the petioles all meet. Offsets, when present, will branch off from it like fingers off a hand. Healthy rhizome tissue is firm and cream-colored. Anything that is dark, papery, or smells sour is rotted and should be cut away.
How to Separate the Rhizome Without Tearing Roots
Look for natural divisions first. The rhizome will often have visible “joints” where one growth point can be cleanly separated from another. If the joint is loose, you can tease it apart with your fingers. If it is fused, take your sterilized knife and make a single, clean cut straight through the rhizome, making sure each piece retains at least one growth point (an “eye”) and a generous share of roots. A division with no eye will not produce new growth, no matter how healthy the roots look. A division with an eye but few roots will survive, but it will establish more slowly.
After cutting, let the wounds air-dry in a shaded, well-ventilated spot for 30 to 60 minutes. A thin callus will form over the cut, which lowers the risk of rot once the piece is back in soil. If you want a little extra insurance, dust the cut surface with ground cinnamon.
Potting Up and Aftercare for Divisions
Pot each division into a small container - one whose diameter is just an inch or two wider than the root mass. Over-potting is one of the most common propagation mistakes. A small plant in a large pot sits in too much damp soil, and damp soil is what kills freshly cut rhizomes. Use your aroid mix, water once to settle the medium, and let the top inch dry before watering again. The plant does not yet have the root density to use the moisture you are giving it.
Place the freshly potted divisions in bright, indirect light with temperatures between 65 and 80°F. Humidity above 60% is strongly preferred. A clear plastic bag tented over the pot, a propagation box, or a humidifier placed nearby all work. New leaves should appear within 2 to 3 weeks. Hold off on fertilizer for at least 3 weeks after division - the new roots are sensitive, and salts burn them. The University of Maryland Extension confirms that fertilizer at this stage should be limited because reduced growth reduces nutrient demand.
Method 2 - Separating Offsets and Pups
Offsets are essentially miniature daughter plants. They look like small clusters of leaves clustered at the base of the mother plant, attached to the rhizome by a short stolon. If you can see roots around the base of a pup, you are looking at an offset. If you cannot, you are looking at something closer to a corm with a leaf on it, and it should be treated like one (covered in the next section).
How to Tell If an Offset Is Ready to Separate
A pup with at least two to three leaves and roots that are visible when you gently brush away the surface soil is ready. Smaller offsets can be separated, but treat them like corms: expect them to need a warm, humid environment to establish, and accept that some will not make it. A mother plant that is still pushing out a fresh leaf is a poor donor. Wait until the new leaf has fully unfurled, then divide - splitting during leaf emergence diverts energy at the worst possible moment.
Step-by-Step Offset Separation
The process is similar to rhizome division, but simpler because the natural separation point is more obvious. Unpot the mother as described above, then identify each pup. If the pup’s roots are well developed, you can often tease the offset free with your fingers, working from the base of the rhizome outward. If the connection is stubborn, use the sterilized knife to cut the stolon cleanly, leaving a centimeter or two of stolon attached to the offset.
Pot each offset in the same aroid mix and at the same small-pot size you would use for a division. The aftercare is identical: Alocasia Amazonica light guide, 60%+ humidity, temperatures in the 65 to 80°F range, water when the top inch dries, and no fertilizer for the first 3 weeks. Expect new growth within 2 to 4 weeks. The advantage of this method is that an offset with its own roots is essentially already a plant - it is adjusting to a new container rather than building a root system from scratch.
Method 3 - Corm Propagation From Harvested Bulbils
Corm propagation is the most involved method, but it is also the most generous. A single unpotting can yield a dozen corms, and most of them will sprout if you give them the right conditions. The work is mostly in the setup and the patience.
Where to Find Corms and How to Harvest Them
Corms are small, teardrop-shaped storage organs that you will find loose in the soil, attached to stolons, or clinging to the mother rhizome. They range from the size of a peanut to the size of a small grape, and they have a thin, papery brown skin called a tunic. Some will already have a tiny pink or white nub poking out - that is the apical bud, the point from which a new leaf will emerge. Others will look completely dormant.
To harvest, simply unpot the mother plant and sift through the soil by hand. You will be surprised how many you find. Set them aside on a clean tray as you work. Discard anything that is mushy, hollow, or smells off. Corms that are firm to the touch - even if they are slightly wrinkled from drying - are worth trying.
How to Peel, Soak, and Viability-Test a Corm
A quick viability test: squeeze the corm gently between your thumb and forefinger. Firm = viable. Slightly soft but not collapsing = borderline, worth trying. Mushy all the way through = discard. Ignore the float test - a corm that floats is just slightly desiccated, not dead. A 24- to 48-hour soak in room-temperature water will rehydrate borderline corms nicely.
Peeling the tunic is the single most useful trick in corm propagation. The brown outer skin is hydrophobic - it actively repels water, which is the plant’s natural way of keeping the corm dormant through dry seasons. Use a fingernail, the edge of a credit card, or a plastic plant label to gently scrape the brown layer away until you reach the cream or pale-green flesh beneath. Avoid gouging the apical bud at the top or the flat basal plate at the bottom. Peeled corms typically sprout in 1 to 2 weeks. Unpeeled corms can sit dormant for 3 to 6 months. The tunic is armor the corm no longer needs once you are giving it consistent moisture and warmth.
Choosing a Sprouting Medium: Moss, Perlite, Fluval, or Water
The medium is less important than the conditions, but each option has tradeoffs.
| Medium | Pros | Cons |
|---|---|---|
| New Zealand sphagnum moss | Holds moisture while staying airy; contains natural antifungal compounds | Easy to over-soak, which causes rot; roots can grow into the fibers and tear on transplant |
| Perlite | Maximum aeration; almost impossible to overwater | Inert - no nutrients; dries out fast; offers no buffer |
| Fluval Stratum (volcanic aquarium soil) | Buffers pH around 6.0–6.5, retains moisture without waterlogging, dark color absorbs warmth | A specialty item; some growers find it messy |
| Water (the “puddle method”) | Lets you watch roots develop | Stagnant water depletes oxygen and accelerates bacterial rot; high-maintenance |
A safe default is 50/50 sphagnum and perlite, or just sphagnum moss wrung out until it is the dampness of a sponge you have squeezed firmly. If you go with Fluval Stratum, the pH-buffered volcanic soil is widely used in serious aroid circles and tends to give reliable results.
Setting Up the Humidity Dome and Bottom Heat
Place the peeled, soaked corms about two-thirds of the way into the medium, pointed end up if you can tell which end is which. If you cannot, lay the corm on its side - the apical bud will find its way to the surface. Mist the medium so it is evenly moist, not dripping, and cover the container with a clear lid. A takeout container, a deli cup, or any clear plastic box with a loose lid will create the near-100% humidity a sprouting corm needs.
The single most common cause of corm failure in heated homes is inadequate bottom heat. Even if your room reads 72°F, the substrate is usually 5 to 10°F cooler because of evaporative cooling. Place the container on a seedling heat mat set to keep the substrate at 75 to 80°F (24 to 27°C). A cheap aquarium thermometer stuck into the medium will tell you whether you are actually hitting that range. If you do not have a heat mat, place the container on top of a refrigerator or any other consistently warm surface - but the heat mat is a better, more controllable solution.
Every 2 to 3 days, “burp” the container by opening the lid for about 30 seconds. This lets fresh oxygen in, vents the ethylene gas that builds up, and disrupts the fungal growth cycle. Condensation on the walls is a good sign - it means humidity is high enough. Standing pools of water at the bottom of the container are not. Pour them off.
Timeline: What to Expect Week by Week
A reasonable mental model for a healthy corm under good conditions:
- Days 1 to 7: No visible change. The corm is hydrating and beginning to break dormancy. Resist the urge to dig it up to check.
- Days 7 to 14: Tiny white roots emerge from the basal plate.
- Weeks 2 to 4: A pale pink or green shoot pushes up from the apical bud.
- Weeks 4 to 8: The first leaf unfurls. Once it is open and roots are a few centimeters long, the cormling is ready to be potted into its own small container.
- Weeks 6 to 12: The plant establishes a full root system. You can begin light feeding at quarter strength and gradually acclimate it to normal household humidity by lifting the lid a little more each day for a week or two.
For a division or offset, the equivalent timeline is shorter because the new plant already has roots. Expect 2 to 3 weeks before a new leaf, and 6 to 8 weeks before the plant is growing on its own steam.
Common Mistakes and How to Avoid Them
Even experienced growers lose corms. The pattern of mistakes is consistent and worth naming.
Dividing during dormancy. A dormant plant has no energy reserves to recover from the cut. Wait until active growth.
Letting the corm dry out, even once. The corm is mostly starch. A single hard dry-out can kill it. Check the medium every few days and never let it go bone dry.
Waterlogging the medium. This is the flip side. Soggy moss or perlite that is sitting in a pool of water at the bottom of the container is a rot factory. Drain standing water and wring out your moss.
Planting the corm upside down. The pointed end is the top. If you cannot tell, lay the corm on its side. The shoot will curve upward.
Skipping tool sterilization. A non-sterile knife is one of the fastest ways to introduce bacterial rot to a fresh cut. Wipe with 70% isopropyl alcohol before and after every cut.
Fertilizing too soon. Freshly cut rhizomes, newly separated offsets, and sprouting corms all have sensitive new roots. Wait at least 3 weeks after division, and at least 6 weeks after a corm’s first leaf emerges, before you begin feeding.
Trying to propagate from a leaf cutting. A leaf in a glass of water will look fine for weeks. It will never produce roots. It is not a viable method for Alocasia Amazonica overview.
Repotting into an oversized pot. More soil means more moisture, and more moisture sitting around un-rooted rhizome tissue means rot. Always pot into a container just slightly larger than the root mass.
Conclusion
Alocasia Amazonica is one of the most generous aroids to multiply, because every part of its underground structure - the main rhizome, the offsets, and the small corms tucked into the soil - is a potential new plant. The art is matching the method to the plant’s growth phase. In spring and early summer, an unpotting will reveal a cluster of offsets and a handful of corms; divisions go back into fresh aroid mix and establish in 2 to 3 weeks, while corms go into a covered container with bottom heat and sprout over the following month or two. The hardest part is not the technique. It is keeping your hands off the corms while they do their quiet work beneath the medium. Give them warmth, give them humidity, give them time, and most of them will reward you with a leaf.
When to use this page vs other Alocasia Amazonica guides
- Alocasia Amazonica overview - Start here for whole-plant context before deep-diving this topic.
- Alocasia Amazonica problems hub - Jump to symptom-specific fix guides when this care topic does not resolve the issue.