Aloe Vera Care Mistakes: What Actually Kills It?
Most aloe vera deaths come from kindness, not neglect. See six beginner mistakes, diagnostic photos, and links to the LeafyPixels aloe hub.
Aloe Vera Care Mistakes: What Actually Kills the Plant
Aloe vera survives neglect better than enthusiasm. The plant stores water in thick leaves, evolved for rocky, fast-draining soil, and wants long dry spells between drinks. Most indoor aloe deaths are not mysterious. They come from six repeatable mistakes: calendar watering, air-purifier expectations, bad pots, dim or humid placement, leaf-cut propagation, and harvesting gel from a plant that is already failing. This guide names those errors, shows what they look like in real setups, tells you what to do instead, and sends you to the Aloe Vera care hub when you need seasonal calendars, pest ID, grow-light specs, or symptom-specific fixes.
When to Use This Guide vs. the Aloe Vera Hub
Use this guide if you already own an aloe, suspect you are killing it with kindness, or searched for what people get wrong with aloe vera care. It is a mistake checklist with diagnostic photos - not a full species encyclopedia.
Use the Aloe Vera care hub when you want the complete picture: at-a-glance reference card, seasonal watering table, gel-vs-latex biology, numbered pup-propagation workflow, pest treatment, and links to every topic and problem page in the cluster. For watering rhythm alone, open the Aloe Vera watering guide. For mushy leaves, start at overwatering. For dry brown tips vs. soft rot, see brown tips. For offsets, see propagation.
If your plant already shows a specific symptom, skip straight to the hub’s problem index rather than rereading general advice here.
What We Saw Growing Aloe in Two Different Pots
To test how much pot type changes aloe vera care in practice, we ran two matched plants side by side on the same south-facing windowsill in a room that held roughly 72°F (22°C) through spring. Both were in 6-inch (15 cm) pots with the same gritty cactus mix. One sat in unglazed terracotta with a drainage hole and an emptied saucer after each soak. The other lived in a glazed nursery pot dropped inside a decorative cachepot - the setup many beginners buy at the store.
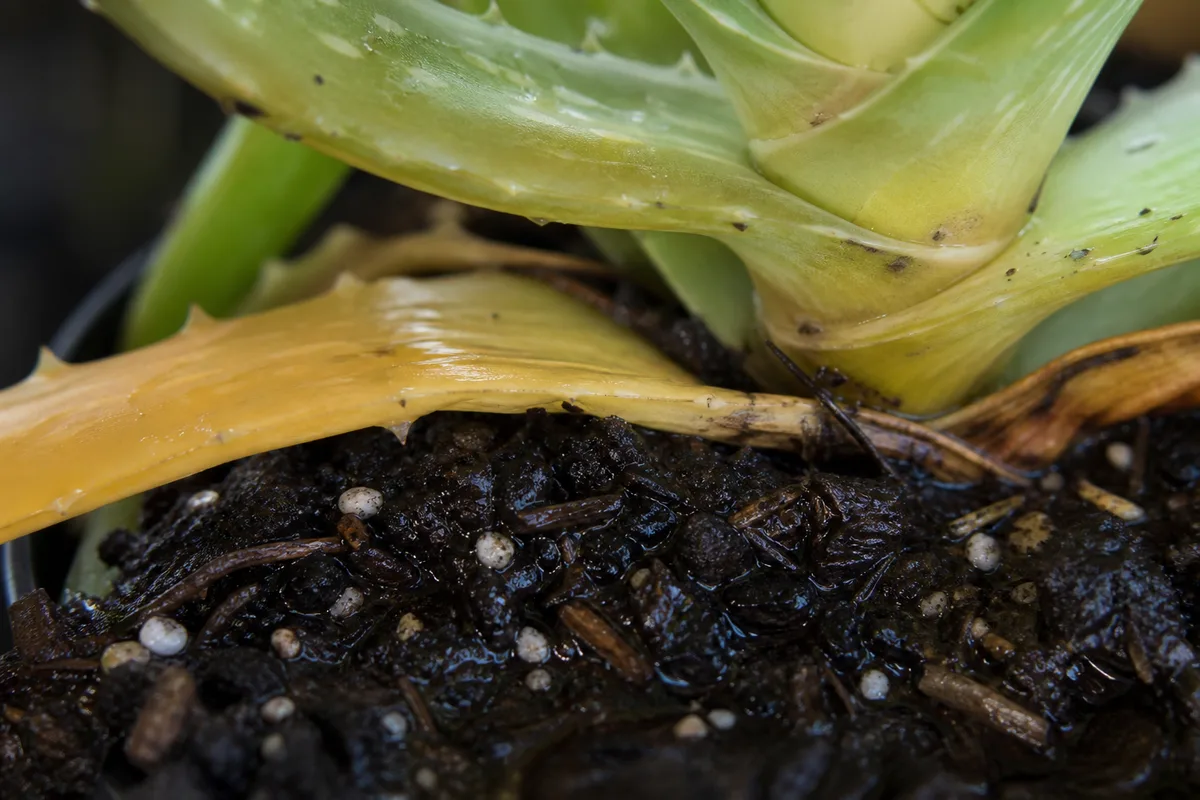
The terracotta plant needed a thorough soak about every 18 days in March and only every 28 days in January once we checked the mix 2 inches (5 cm) deep and lifted the pot for weight. The cachepot plant looked fine on the surface, but the inner pot still felt heavy 10 days after watering because runoff had pooled in the outer shell twice. By week three, the lower leaves went soft at the base - classic overwatering on Aloe Vera - while the terracotta neighbor stayed firm.
That is not a universal calendar for your home. Light, AC, and mix all shift timing. The takeaway is narrower and more useful: two aloes with the same species name can need completely different check-in rhythms based on pot breathability alone. Your job is to read the soil and leaf texture in your setup, not copy a weekly reminder from a blog.
The One Rule: Treat Aloe Like a Succulent, Not a Tropical
Before the numbered mistakes, hold one mental model: aloe is a water-storing succulent, not a leafy tropical that wants constant moisture and soft indirect light. NC State Extension describes aloe vera as a succulent perennial that needs very well-drained soil and soil that dries completely between waterings. Penn State Extension puts the indoor rule even more bluntly for succulents generally: err on the side of underwatering, never let the plant sit in water, and use pots with large drainage holes. (NC State Extension) (Penn State Extension)
When you catch yourself watering because the calendar says so, misting because you think it needs humidity, or repotting into a huge decorative planter, you are probably treating aloe like a fern or a peace lily. That mismatch is the root of most failures below.
Six-Mistake Summary at a Glance
Scan this table first, then read the section that matches what you are seeing on your plant.
| Mistake | Telltale sign | Do this instead | Deep dive |
|---|---|---|---|
| 1. Calendar watering | Soft, yellow, or translucent leaves; sour soil smell | Check mix 2 in (5 cm) deep; soak only when dry; drain fully | Watering · Overwatering |
| 2. Air-purifier myth | Aloe stuck in a dim bedroom “for clean air” | Move to the brightest window; grow for looks and drought tolerance | Light · Not enough light |
| 3. Wrong pot | Water sits in saucer or cachepot; soil stays dark and cool | Drainage hole, empty saucer, pot sized to roots, gritty mix | Repotting · Soil |
| 4. Bathroom or dim corner | Stretching, pale leaves, slow recovery after watering | Bright direct or strong indirect light; acclimate before harsh sun | Light · Leggy growth |
| 5. Leaf-cut propagation | Single leaf rots at the base in soil | Separate rooted pups from the parent rosette | Propagation |
| 6. Stressed gel harvest | Gel from mushy or sun-scorched leaves | Cut only firm outer leaves on an otherwise healthy plant | Aloe Vera hub (gel safety section) |
Mistake 1 - Watering on a Calendar Instead of Checking the Soil
The most common aloe vera care mistake is overwatering, and overwatering usually starts with a schedule. “Every Sunday” feels responsible. For aloe, it is often lethal. SDSU Extension recommends regular, thorough watering with the soil drying completely between sessions. UF/IFAS Gardening Solutions advises watering only when the top inch of soil is dry, then watering well - and never letting the plant sit in water. (SDSU Extension) (UF/IFAS Gardening Solutions)
Aloe stores water in its leaves. In a bright, warm room with gritty mix and a terracotta pot, the root zone may dry in two weeks. In a cool, dim room with dense peat mix and a glazed cachepot, the same calendar interval keeps roots wet for days after the surface looks fine. The fix is not a better schedule. It is a better question: Is the mix dry deep enough, and does the pot feel lighter than it did after the last soak?
Wrong fix we see constantly: brown tips appear, so the owner adds water - but the leaf base is already soft and the soil smells sour. That is rot, not thirst. Adding water accelerates collapse. For the full soak-and-dry rhythm, seasonal shifts, and finger-test details, use the Aloe Vera watering guide and the general framework in how to water indoor plants the right way.

How to Tell Overwatering From Thirst
Texture beats color. Soft, yellow, translucent, or mushy leaves point to too much water and possible root rot - see overwatering on Aloe Vera for recovery steps. Firm leaves with dry, crispy brown tips often mean the plant went too long without a drink or got sun-stressed. Slightly thinner but still firm leaves can be normal thirst; aloe forgives brief dryness far better than soggy roots.
If you are unsure, check the soil and roots before adding water. Wet soil plus collapsing leaves is almost never a thirst problem.
Mistake 2 - Believing the Air-Purifier Marketing
Aloe vera is often sold beside claims that houseplants dramatically clean indoor air. That expectation leads people to keep aloe in stuffy, dim rooms “for air quality” when the plant actually needs bright light and dry air. The American Lung Association states that current evidence does not support houseplants as an effective indoor air-cleaning strategy in homes and offices. (American Lung Association)
That does not make aloe worthless. It makes the honest case simpler: aloe is drought-tolerant, easy to propagate from pups, attractive on a sunny sill, and useful if you harvest gel carefully. Grow it for those reasons. Do not choose a bathroom or bedroom corner over a bright window because you expect it to scrub VOCs from the air.
Wrong fix: moving a declining aloe deeper into a dim room because “plants need less light when they are stressed.” Low light slows drying, keeps soil wet longer, and invites leggy growth - the opposite of recovery.
Mistake 3 - Using the Wrong Pot (No Drain Hole, Cachepots, Oversized Containers)
Drainage is not a preference for aloe. It is the infrastructure everything else depends on. NC State Extension recommends pots with several drainage holes, noting clay is especially helpful. Penn State Extension warns that succulents are susceptible to root rot and should never sit in water. (NC State Extension) (Penn State Extension)
Three pot mistakes show up constantly:
No drainage hole. Water has nowhere reliable to go. Even a careful hand eventually leaves the lower root zone saturated.
Decorative cachepots that trap runoff. Watering the nursery pot inside a pretty outer pot, then putting it back without draining, creates a hidden swamp. Remove the inner pot, soak, drain fully, then replace. Many “mystery” declines are invisible standing water - exactly what our side-by-side pot test showed above.
Oversized pots. A small root system in a huge volume of wet mix cannot dry the soil fast enough. UF/IFAS notes that jumping more than two pot sizes can hold excess moisture and trigger rot. Repot only slightly larger when needed - details in the Aloe Vera repotting guide.
Use fast-draining cactus or succulent mix amended with extra perlite or grit. University of Arizona Cooperative Extension recommends commercial mix improved with perlite, granite grit, or coarse sand. (University of Arizona Cooperative Extension)
Wrong fix: drilling no hole but adding a gravel layer “for drainage.” The perched water table still sits at the bottom where succulent roots live. You need an exit hole and an emptied saucer, not decorative rocks.
Mistake 4 - Putting Aloe in the Bathroom or a Dim Corner
Bathrooms are marketed as plant-friendly, but they are usually wrong for aloe unless the room is unusually bright and well ventilated. Aloe wants strong light. SDSU Extension lists bright, indirect sunlight as the baseline, with too little light causing leggy, weak, drooping leaves. RHS guidance for indoor succulents places the comfortable temperature range around 13°C to 27°C and warns against cold drafts - high humidity without airflow contributes to rust and fungal issues on aloe. (SDSU Extension) (RHS)
Indoors, a south- or west-facing window with direct sun often works well; the risk is sudden exposure, not light itself. Outdoors or after a move from a dim shelf, strong midday sun can scorch leaves unless you acclimate gradually over a week or two - think of it like skin after winter. For placement troubleshooting and grow-light options, use the Aloe Vera light guide and not enough light problem page.
Wrong fix: misting bathroom aloe because leaves look dull. Misting does not replace root watering, raises leaf moisture without helping a succulent’s core need - brighter light and dry soil cycles.
Mistake 5 - Trying to Propagate From a Leaf Cutting
Many houseplant guides blur propagation methods. Aloe does not propagate reliably from leaf cuttings the way a pothos or snake plant might. The practical route is separating pups - offsets with their own developing roots - from the base of a mature plant. Penn State Extension notes that some aloe species produce pups that may be removed and transplanted. BBC Gardeners’ World and extension sources consistently describe pup division as the workable method. (Penn State Extension) (BBC Gardeners’ World)
Wait until a pup is large enough to handle and ideally has visible roots of its own. Unpot the cluster, separate gently with clean tools, pot into small containers with gritty mix, and go easy on water until roots settle. A leaf stuck in soil without a meristem typically rots. For the numbered seven-step workflow with callusing times, open the Aloe Vera propagation guide.
Wrong fix: planting a snapped leaf in damp peat and waiting for roots that never come. After three weeks the cut end turns black and mushy while the parent plant you could have divided still sits untouched.
Mistake 6 - Harvesting Gel From a Stressed or Rotting Plant
Harvesting gel feels like the payoff of growing aloe. Doing it from a waterlogged, sun-scorched, or pest-stressed plant adds risk without reward. Stressed tissue is weaker, sap flow is abnormal, and you may be cutting into rot without realizing it. Harvest from firm, healthy outer leaves on a plant that is otherwise growing well.
Wrong fix: cutting the largest mushy leaf hoping to “save the gel” from a dying plant. If the base is soft, fix culture first - or discard rotted tissue - before any kitchen use.
Gel, Latex, and Oral-Aloe Safety
Two substances matter. Clear inner gel is what most people want for topical use. Yellow latex just beneath the leaf skin contains anthraquinone compounds such as aloin and is not the same product.
NCCIH notes topical aloe gel is generally well tolerated, while oral aloe latex can cause cramps and diarrhea. The Mayo Clinic goes further on oral use: taking 1 gram a day of aloe latex for a few days can cause kidney damage and might be fatal. Mayo also warns that aloe latex may contain cancer-causing chemicals and is likely unsafe taken by mouth in high doses. (NCCIH) (Mayo Clinic)
For skin use, take a mature outer leaf, let the cut end drain, separate clear gel from the yellow latex layer, and patch-test first. Do not drink latex or whole-leaf extract from a kitchen-harvested plant. Do not treat serious burns, infections, or internal symptoms with home-harvested aloe instead of medical care.
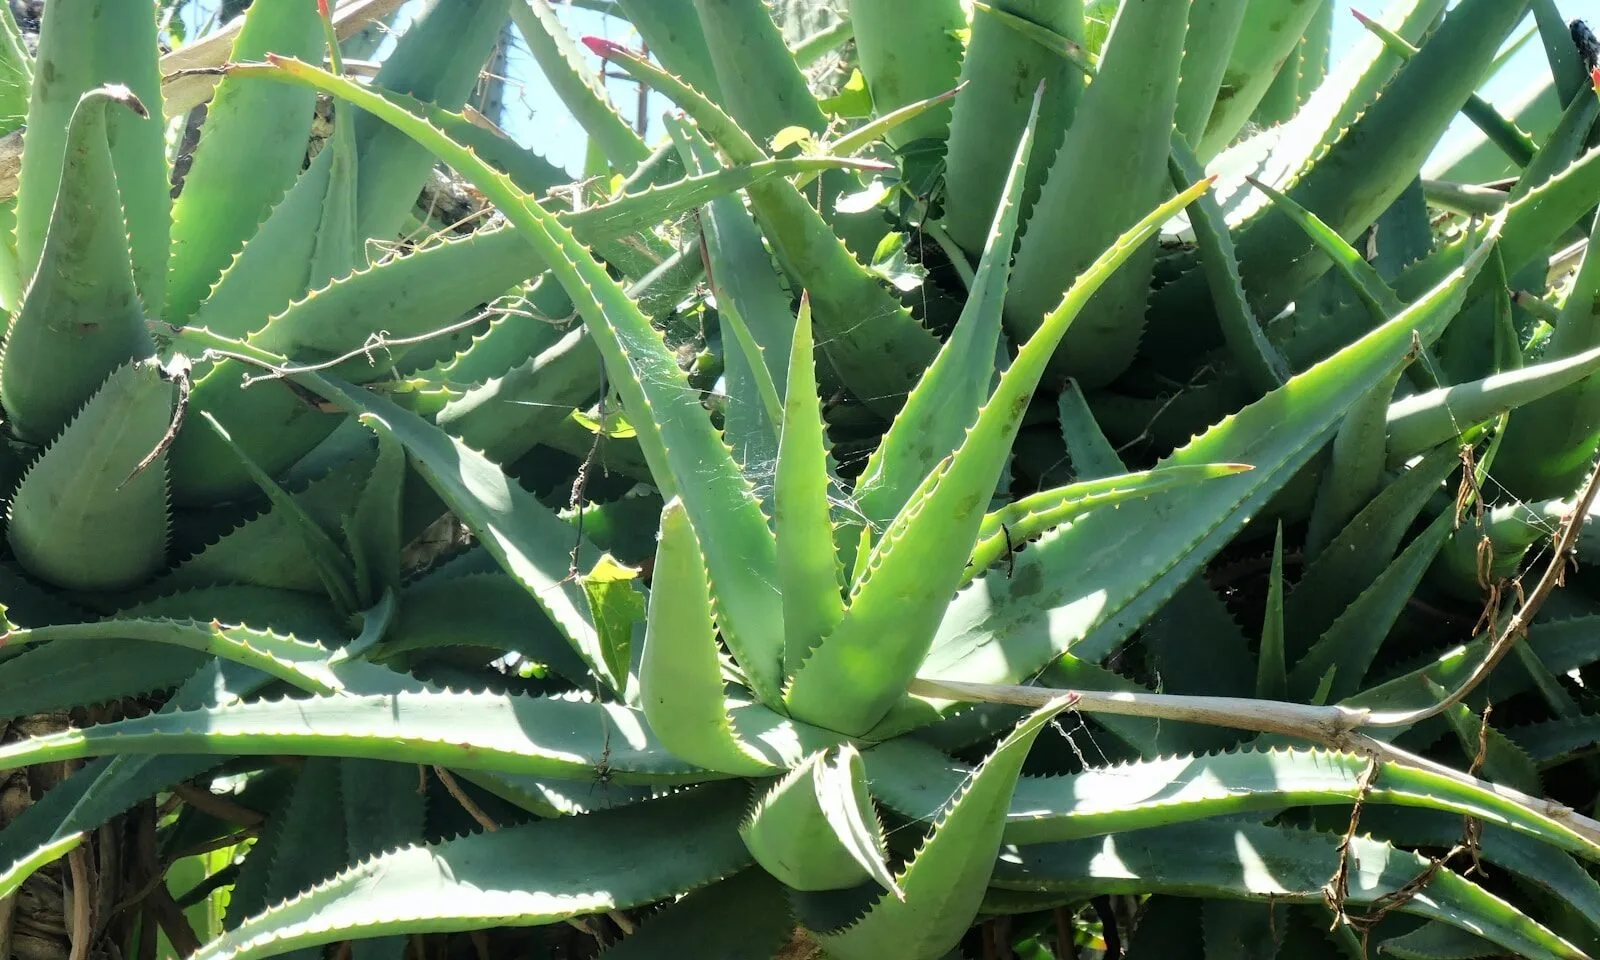
When Brown Leaves Mean Rot vs. Sun Stress
Brown aloe leaves are not one problem. Soft, wet, collapsing brown tissue screams overwatering - start at overwatering or root rot. Dry, firm brown tips or bronzing after a sudden move to stronger sun often means scorch or underwatering stress - see brown tips. Reddish-brown edge color on otherwise healthy firm leaves is frequently cosmetic stress from brighter light, not an emergency.

The diagnostic shortcut: feel the leaf. Firm and dry points one direction. Soft and squishy points another. Color alone sends many owners to water a rotting plant or withhold water from a sunburned one. Reading texture first prevents the wrong fix.
Quick Reference: Light, Water, and Soil Without the Full Lecture
If you fix the six mistakes above, this baseline usually keeps aloe alive while you learn finer details on the hub:
Light: Brightest window you have; acclimate before harsh outdoor sun. (University of Arizona Cooperative Extension)
Water: Soak thoroughly when the mix is dry deep enough to matter - often every 2–3 weeks in active growth and much less in winter - then drain completely. Never sit in saucer water. (SDSU Extension)
Soil and pot: Gritty cactus mix, drainage hole, terracotta or any breathable pot, size matched to roots. (NC State Extension)
Feed: Sparingly if at all; lean soil beats heavy fertilizer. (RHS)
For calendars, pest tables, and frost thresholds, defer to the Aloe Vera care hub.
Pet Safety: Keep Aloe Out of Reach
Aloe vera is toxic to cats and dogs. The ASPCA lists symptoms including vomiting, lethargy, diarrhea, and changes in urine color. Toxic compounds include saponins and anthraquinones concentrated in the latex layer. Keep plants off counters pets reach, and call your veterinarian plus ASPCA Animal Poison Control at (888) 426-4435 if a pet chews the plant. (ASPCA)
“Natural” does not mean safe for pets or children. Gel harvesting and pet safety belong in the same household plan.
Frost, Pests, and When to Open the Hub
Two edge cases show up right after people fix watering and light. Cold windows: aloe tissue can damage below about 40°F (4°C), especially when leaves touch cold glass on winter nights - dark water-soaked patches are frost injury, not rot. (Penn State Extension) Move the pot inward or add a sheer curtain barrier; outdoor winter thresholds live on the Aloe Vera hub.
Pests on stressed aloe: chronic overwatering weakens plants, then mealybugs colonize leaf axils and look like cotton fluff. If you corrected watering but still see white clusters, treat early - see mealybugs on Aloe Vera before they spread to neighboring pots.
Open the Aloe Vera care hub when this mistake list is not enough - you need a seasonal watering table, grow-light distance, repot timing, or a full brown-leaf taxonomy with extension anchors. Symptom shortcuts:
- Mushy base, foul soil → overwatering or root rot
- Dry tips, bronze patches → brown tips
- Stretching, pale leaves → not enough light or leggy growth
- Separating offsets → propagation
Related Guides
- Aloe Vera care hub - full species reference, seasonal calendar, pests, and YMYL depth
- Aloe Vera watering - soak-and-dry rhythm and seasonal intervals
- Aloe Vera propagation - numbered pup separation workflow
- How to water indoor plants the right way - soil-check habits that prevent succulent rot
- Snake plant care - another drought-tolerant beginner succulent with different light tolerance
Conclusion
Most aloe vera care failures are kindness errors, not neglect. Use the summary table and photos to match what you see, then fix the habit - not just the symptom. When pests, grow lights, or seasonal rescue steps outgrow a checklist, the Aloe Vera care hub carries the encyclopedia. This page carries the warnings that keep you from needing one in the first place.