How to Propagate Aloe Vera: Pups, Leaf Cuttings, and Seed
How to Propagate Aloe Vera: Pups, Leaf Cuttings, and Seed
How to Propagate Aloe Vera: Pups, Leaf Cuttings, and Seed
How Aloe Vera Reproduces in Nature
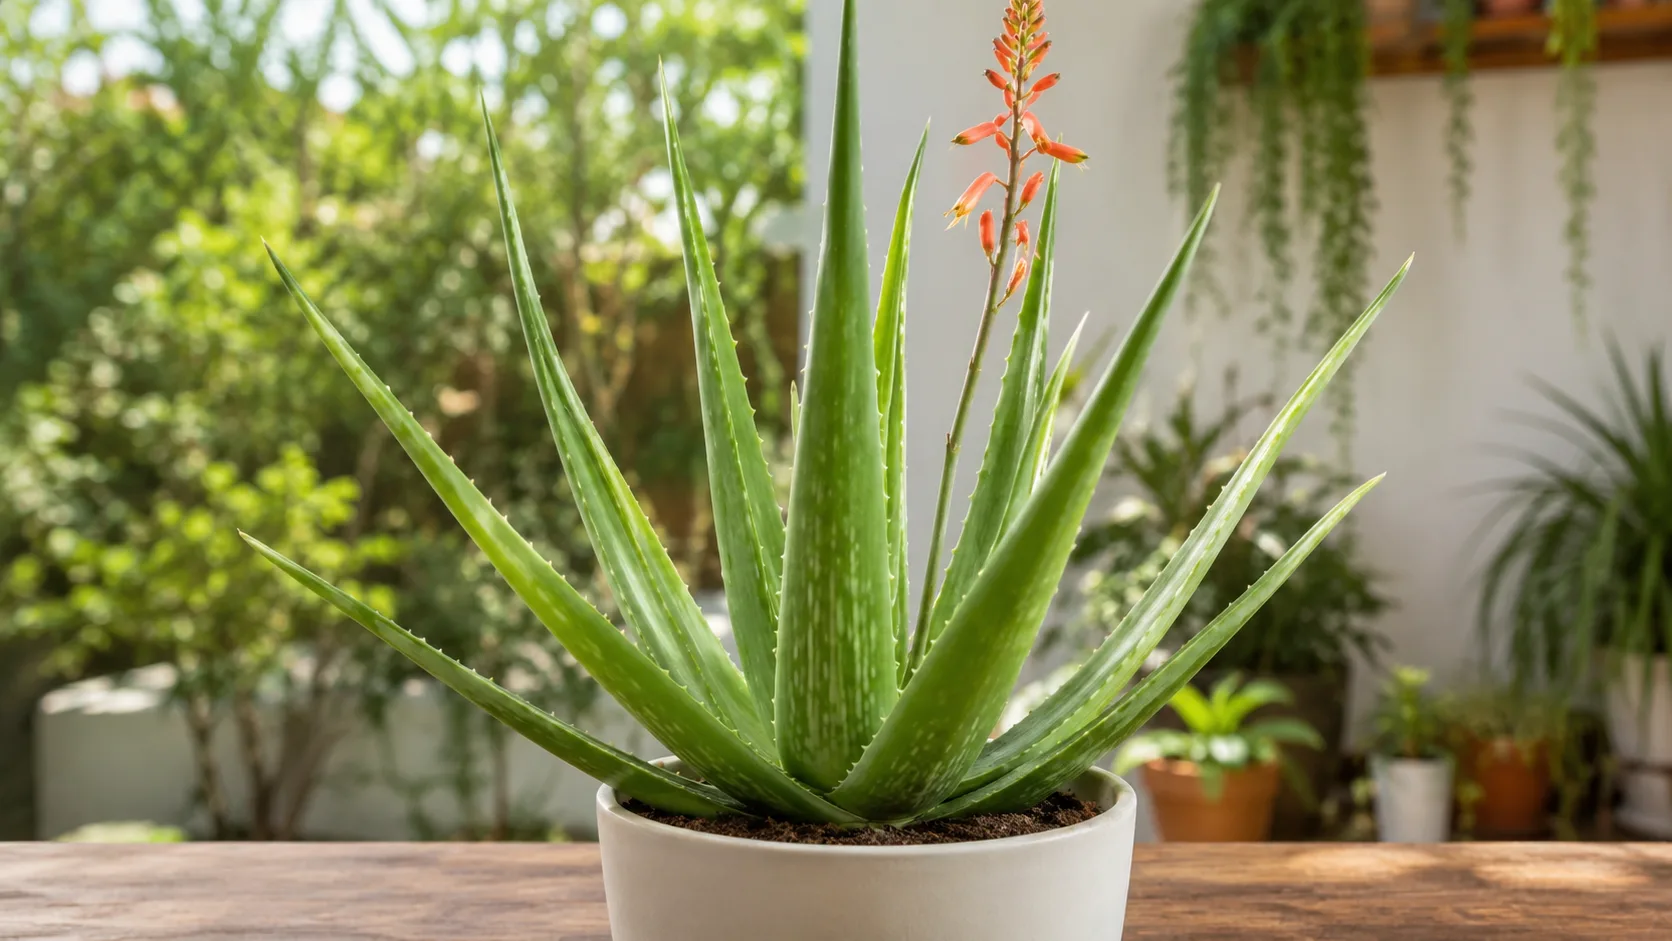
Aloe vera is a stemless or short-stemmed succulent that spreads in the wild primarily by producing genetically identical daughter rosettes at the base of the parent plant. Those daughters - called pups, offsets, or plantlets - form on short underground runners known as stolons. Each pup carries its own growing point at the center of the rosette and, in many cases, a small root system already attached. The University of Arizona Cooperative Extension describes this as the standard propagation route: remove offsets when they are a couple of inches tall, let the wound dry and scab over for about a week, then replant in fast-draining mix.
That natural habit is the key to indoor success. You are not trying to invent a new plant from a gel-filled leaf segment; you are transplanting a miniature copy of the mother that already has the machinery to grow. Seed propagation is a separate path entirely. Mature aloes can flower and set seed after cross-pollination, but indoor plants often never bloom, and even laboratory germination rates for Aloe vera seed are inconsistent. Most home growers who want more plants reach for pups first, cuttings second, and seed only when they have a specific reason to start from scratch.
Understanding this biology saves you weeks of frustration. Methods that work on jade (Crassula ovata) or many echeverias - stick a leaf in soil and wait - fail on aloe because the leaf tissue is built for water storage, not for regenerating shoots and roots. The sections below walk through all three methods honestly, with success rates and timelines that match how the plant actually behaves.
Choosing the Right Propagation Method
The easiest way to propagate aloe vera is to divide pups from a mature mother plant. Success rates for healthy offsets handled correctly typically land in the 80–90% range among experienced growers, compared with well under 50% - and often closer to 20–30% - for plain leaf cuttings. Epic Gardening, Veryplants, and multiple extension-style guides rank pup division as the default method for good reason: the pup already has meristematic tissue concentrated at the rosette base, and it often arrives with functional roots.
Leaf cuttings deserve a place in this guide because they are everywhere online, but they should be your backup plan. A detached aloe leaf without crown tissue usually rots, shrivels, or sits unchanged for months. The only leaf-adjacent approach with a realistic chance is a crown-base cut that includes a sliver of stem tissue from the central growing point - essentially a stem cutting disguised as a leaf harvest. Larry Hodgson of the Laidback Gardener makes this point bluntly: aloe leaves “simply don’t produce adventitious buds (dormant buds capable of producing an offset) on their leaves. As far as I know, no other aloe (and there are more than 500 species of them!) will grow from leaf cuttings either.” Use that when the mother plant is damaged, pup-less, or you are experimenting with material you would otherwise discard.
Seed propagation suits breeders, patient collectors, and anyone who wants a clean start without inheriting pests from a parent pot. Gardener’s Path notes that A. vera seed germination can range from 0 to 25% in ordinary conditions, with roughly 70% as an upper bound even under controlled lab setups. Viable seedlings need three to four years to reach the size of a typical nursery pup. That is not a reason to avoid seed if you enjoy the process; it is a reason to choose pups when your goal is simply “more aloe plants on the windowsill.”
| Method | Typical success | Time to established plant | Best for | |
|---|---|---|---|---|
| Pup division | High (80–90%+) | 4–8 weeks | Most home growers | |
| Crown-base cutting | Low to moderate | 2–6+ months | Damaged or pup-less plants | |
| Plain leaf cutting | Very low | Often never | Not recommended | |
| Seed | Variable (0–70%) | 3–4 years to maturity | Breeders, long projects |
When to Propagate Aloe Vera
Spring and early summer - roughly March through June in the Northern Hemisphere - is the best window for aloe vera propagation. During active growth, the plant repairs wounds faster, new roots form more readily, and the substrate dries out between waterings at a pace that discourages rot. The University of Arizona Cooperative Extension, the Royal Horticultural Society, and most indoor-care references align on warm-season timing for division and replanting.
You can separate pups in fall if the plant is healthy and your home stays warm and bright, but expect slower rooting and a higher rot risk when cool nights and shorter days keep soil damp longer. Avoid winter propagation unless you are rescuing a plant from collapse - a rotted base, a broken pot, or an emergency division - and accept that establishment may take twice as long.
Plant readiness matters as much as the calendar. Wait until pups are at least 3 to 4 inches tall with several firm leaves and, ideally, visible roots of their own. A mother that was repotted within the last month, recently moved, or showing stress from overwatering on Aloe Vera is a poor candidate for division; give it a few weeks of stable care first. Young aloes under two to three years old often produce no pups at all. A slightly snug pot and strong light encourage offsetting more reliably than an oversized container with damp, idle soil.
Supplies You Will Need
Good propagation starts with boring basics done right. For pup division, gather a clean sharp knife wiped with 70% isopropyl alcohol, a small pot 3 to 4 inches wide with a drainage hole, and a gritty succulent or cactus mix. Terracotta pots are popular because porous walls pull moisture away from the root zone faster than plastic, though any well-drained container works. Newspaper or a tray keeps the mess contained when you unpot the mother.
For cuttings, use the same knife, mix, and pots. Rooting hormone is optional; aloe pups rarely need it, and hormone will not compensate for a leaf that lacks crown tissue. Some growers dust callused cuts with ground cinnamon or sulfur as a mild antifungal - anecdotal but harmless.
For seed, you need a shallow tray or small pots, fine seed-starting medium (often 50% fine perlite and 50% sifted coconut coir or peat), a humidity dome or plastic wrap, a heat mat set near 70–75°F (21–24°C), a spray bottle for misting, and bright light - either a south window with sheer curtain or a grow light running 12–14 hours daily. Aloe seeds are tiny and need light at the surface; burying them deep reduces germination. The Royal Horticultural Society’s guidance on aloe seed sowing is to surface-sow and keep the compost at around 21°C (70°F).
The soil mix that works for all three methods is the same one your mature aloe already lives in: fast-draining, mineral-heavy substrate. A practical home blend is one part cactus and succulent potting mix plus one part perlite, pumice, or coarse sand. In humid homes or very small pots, push toward 60–70% mineral so the mix dries within a day or two after watering. Standard indoor potting soil holds too much moisture for freshly cut tissue and is one of the most common causes of propagation failure.
Method 1: Separating and Planting Pups
Pup division is the method to learn first. You are moving a small, largely complete plant - not coaxing new life from a water-storage leaf.
Identifying Pups Ready to Divide
Look at the base of the mother rosette. Healthy pups form tight miniature rosettes with firm, plump leaves and their own central growing point. They should stand 3 to 4 inches tall or taller, with three to four mature leaves, before you remove them. Gently brush soil away from the connection point; if you see white or pale tan roots emerging from the pup’s base, it is ready. Pups still glued flat to the mother with no independent roots can still work, but plan for a longer, drier establishment period.
Discard any offset with a mushy base, collapsed center, or brown soft tissue at the stolon - those are rot vectors, not propagation material. One clean pup beats three questionable ones.
Step-by-Step Pup Separation
- Dry the mother slightly. Skip watering for 5 to 7 days before division so the root ball holds together and cut surfaces are less saturated at the moment of surgery.
- Unpot the cluster. Tip the container on its side, squeeze flexible pots or run a knife around terracotta rims, and slide the whole plant out while supporting the mother rosette. Do not yank by the leaves.
- Expose the stolons. Shake or brush away loose soil until you can see where each pup connects to the parent through a short stolon - usually 1–3 cm of tissue between bases.
- Cut cleanly. Use one smooth knife stroke to sever the stolon as close to the mother as practical. Preserve as much of the pup’s root mass as possible. Pulling pups apart tears tissue and slows healing.
- Sort and inspect. Set firm pups aside for callusing. Repot the mother immediately in fresh mix if the old substrate was exhausted or compacted.
Callusing and Potting New Pups
Place separated pups in a dry, shaded, airy spot for 1 to 3 days until the cut surface forms a dry, papery scab. Pups with existing roots often need only 1–2 days; rootless offsets benefit from 2–3 days. The University of Arizona Cooperative Extension recommends allowing wounded areas to scab for about a week before replanting when conditions are humid or the cut is large - lean toward the longer end if your home is cool or damp.
Fill a small pot with completely dry succulent mix. Set the pup at the same depth it grew before, firm the substrate lightly, and keep all leaves above the soil line. Do not water for 5 to 7 days. That dry week is non-negotiable for most failures traced to “I watered it right away to help it settle.” After the waiting period, moisten only the top 1–2 cm of mix. Transition over the next two to three weeks to a normal soak-and-dry rhythm: water thoroughly only when the substrate is fully dry, often every 10–14 days for a small pup in a small pot.
Place new pups in bright, indirect light for the first 2–3 weeks. Direct sun on a plant with limited roots pulls water through leaves faster than the root system can replace it, causing thin, stressed foliage. Once you see a fresh green leaf emerging from the rosette center, the pup is established enough for its permanent bright window.
Rootless Pups and Slow Starts
A pup with no visible roots can still root from the basal meristem, but patience is part of the protocol. Extend the pre-watering wait to 7–10 days, keep the mix drier overall, and consider light misting near the base starting in week two rather than a full soak. The leaves may look slightly dull or less turgid while roots form; that is normal if the base stays firm. New central growth is a better signal than digging the plant up to check for roots - every unpotting resets progress by several days.
Method 2: Leaf and Stem Cuttings
Cuttings enter the conversation when Pinterest, a broken leaf, or a pup-less plant pushes you toward experimentation. Go in with accurate expectations.
Why Plain Leaf Cuttings Usually Fail
Aloe vera leaves do not produce adventitious buds - the dormant tissue that lets many succulents sprout roots and plantlets from a detached leaf. Larry Hodgson of the Laidback Gardener notes that medicinal aloe “simply doesn’t produce adventitious buds on its leaves,” and that this limitation applies across the Aloe genus for leaf-cut propagation. The leaf is mostly gel-filled parenchyma built to store water, not to regenerate a rosette. Meristematic cells in Aloe vera concentrate at the central growing point and pup emergence zones, not along the leaf blade.
What happens in practice is predictable. The cut end softens and turns translucent as microbes enter. The leaf slowly dehydrates without ever forming roots. Or it persists unchanged for months - alive-looking but not propagating. Veryplants and multiple houseplant references put realistic success for standard leaf cuts in the single-digit to low-double-digit percent range. Survival of the leaf fragment is not propagation; a new rosette is propagation.
Water propagation fails for the same reason, faster. Submerging gel-rich aloe tissue invites rot within days. Soil in a dry, gritty mix is the only medium worth trying, and only with the crown-base approach below.
How to Attempt a Crown-Base Cutting
If you must try a cutting, harvest stem tissue, not a random leaf mid-blade.
- Select a healthy outer leaf from the middle of the rosette - not the youngest center leaves or the oldest senescing bottom leaves.
- Cut at the base with a clean knife, taking the leaf plus a thin slice of the crown or hidden stem where the leaf attaches to the central growing point. Without that basal plate, the cutting will not produce a plantlet.
- Callus for 5–7 days minimum in dry shade. Aloe leaves are wet; the cut surface must feel hard and papery before soil contact. In humid homes, allow up to 10 days.
- Plant in dry gritty mix, burying roughly one-third of the leaf length to hold it upright. Do not water.
- Wait 2–3 weeks, then apply the first light watering if the leaf remains firm. Full soak-and-dry comes later.
- Watch the base, not the leaf tip. Success looks like a tiny new rosette or white root initials at the crown end. Softening, smell, or translucency means discard the cutting.
Take several crown-base cuttings at once if you are committed to the experiment. Most will still fail. When pups are available, use pups.
Method 3: Growing Aloe Vera From Seed
Seed propagation is slow, equipment-heavy, and unpredictable - and genuinely rewarding if you treat it as a project rather than a shortcut to free plants.
Collecting or Buying Viable Seed
Indoor Aloe vera rarely sets seed unless it is mature, well-lit, and cross-pollinated - often with another aloe species or variety. Most home growers buy seed from suppliers that list species name, harvest date, and ideally germination rate. Gardener’s Path warns that A. vera seed loses viability quickly; fresh seed within one year of harvest performs best. Old bargain seed may produce zero sprouts.
If you harvest from your own flowering plant, collect pods when they dry and split, store seed cool and dry, and sow within months. Not every seed in a pod will be viable; sow several seeds per cell and plan to thin.
Sowing, Warmth, and Germination
Fill trays or small pots with moist, fine, well-draining medium. Surface-sow seeds - press them into contact with the mix but do not bury deeply. Aloe seeds need light to germinate. The Royal Horticultural Society and grower references all surface-sow aloes and keep the compost at roughly 21°C. Cover the tray with a humidity dome or plastic wrap to hold moisture, then place it on a heat mat at 70–75°F (21–24°C) in Aloe Vera light guide or under a grow light.
Mist the surface to keep it evenly moist, not soggy. Open the dome briefly each day for fresh air to limit fungal growth. Germination usually appears in 2–4 weeks, though some seeds need up to 8 weeks. Remove the dome once most seedlings are up to prevent damping off - the fungal collapse of young stems when air is stagnant and the mix stays wet.
Pricking Out Seedlings
When seedlings show two to three true leaves beyond the initial seed leaves, transplant them into individual 2-inch pots of standard cactus mix. Handle by a leaf, not the fragile stem. Grow on in bright light with sparse watering and no fertilizer for the first few months. Seedlings stay small for a long time; reaching pup-producing size takes years, not weeks. Thin overcrowded cells ruthlessly - one strong seedling per pot beats five tangled weak ones.
First-Month Care After Propagation
The first 30 days after potting share the same rules whether you divided a pup, planted a crown cutting, or moved a seedling.
Delay the first real watering. Pups and cuttings: 5–10 days dry after potting. Seedlings: mist lightly from sprouting onward, but never let the mix stay waterlogged.
Keep light bright but indirect until new growth confirms roots are working. South-facing glass with a sheer curtain, or an east window, is ideal for unestablished plants.
Maintain warm, stable temperatures - roughly 65–80°F (18–27°C) by day with a slight night drop. Cold drafts and heating vents both cause stress.
Use small pots. A pot only 1–2 inches wider than the root mass limits the volume of wet soil surrounding healing tissue.
Do not fertilize until the plant is clearly growing. Fertilizer on unrooted cuts is wasted and can burn tender tissue.
Watch behavior, not the calendar. Firm leaves plus a new central leaf mean success. Mushy bases, sour smells, or collapsing rosettes mean remove the plant before fungus spreads to neighbors.
Troubleshooting Failed Propagations
Most failures trace to a short list of fixable mistakes. Watering too soon after potting is number one - the cut was still open to infection when moisture arrived. Skipping callus is number two. Standard potting soil that stays wet for a week is number three. Direct sun on unrooted plants dehydrates leaves before roots exist. Winter timing slows everything and magnifies rot risk.
For leaf cuttings, failure is often structural, not cultural: no crown tissue was included. No amount of callus or cinnamon fixes that. For seed, cold soil below ~65°F, buried seeds, and domes left on too long account for most empty trays.
If a pup sits unchanged for two months with firm tissue and no rot, it may simply be slow - keep it in stable bright indirect light and sparse water. If the base softens at any point, discard it. Propagation is cheap; saving a rotting plant is not.
Conclusion
Aloe vera propagation rewards growers who match method to biology. Separating pups is the reliable default: high success, weeks to establishment, and minimal special equipment when you callus the wound, use gritty mix, and delay the first watering. Leaf cuttings without crown tissue look easy online but fail far more often than they succeed; treat crown-base stem cuts as a salvage experiment, not a primary plan. Seed opens genetic diversity and clean starts but demands heat, light, patience, and acceptance of low germination - plus years before the plant looks like the aloe on your shelf.
Propagate in spring or early summer when the plant is actively growing. Give every cut surface time to dry. Keep new plants in bright indirect light until you see fresh center growth. After that, care for them like the mature aloe they are becoming - and in a few seasons, they will produce pups of their own.
When to use this page vs other Aloe Vera guides
- Aloe Vera overview - Start here for whole-plant context before deep-diving this topic.
- Aloe Vera problems hub - Jump to symptom-specific fix guides when this care topic does not resolve the issue.