English Ivy Plant Care: Light, Water & Tips
Hedera helix
English ivy prefers cool, bright indirect light. Keep humidity high to suppress spider mites - the primary indoor pest. Water when top inch dries. Toxic to pets.
English Ivy Plant Care: Light, Water & Tips
Start with wateringThe most common care mistake for English IvyWatering guide →English Ivy care essentials
Light
medium to bright indirect light
Water
Water when top inch of soil dries. Every 5–7 days in summer; every 10–14 days in winter. Prefers slightly moist soil.
Soil
Well-draining potting mix. Slightly acidic pH 6–6.5.
Humidity
40–60%
Temperature
10–21°C (50–70°F)
Fertilizer
Use balanced liquid fertilizer at half strength and stop if the plant is stressed, newly repotted, or not actively growing. Skip fertilizing in winter; overfertilizing causes salt damage.
About English Ivy
English Ivy is native to Europe, Western Asia, and North Africa, typically reaches Trails or climbs 3–8 ft indoors; lobed leaves 1–4 inches indoors, with moderate to fast growth. English Ivy has a trailing growth habit and part of the Araliaceae family. It is also known as Common Ivy and European Ivy.
| Detail | Information |
|---|---|
| Also known as | Common Ivy, European Ivy |
| Native region | Europe, Western Asia, and North Africa |
| Mature size | Trails or climbs 3–8 ft indoors; lobed leaves 1–4 inches |
| Growth rate | Moderate to fast |
| Growth habit | Trailing |
| Scientific name | Hedera helix |
| Family | Araliaceae |
English Ivy Plant Care: Light, Water & Tips
What Is English Ivy?
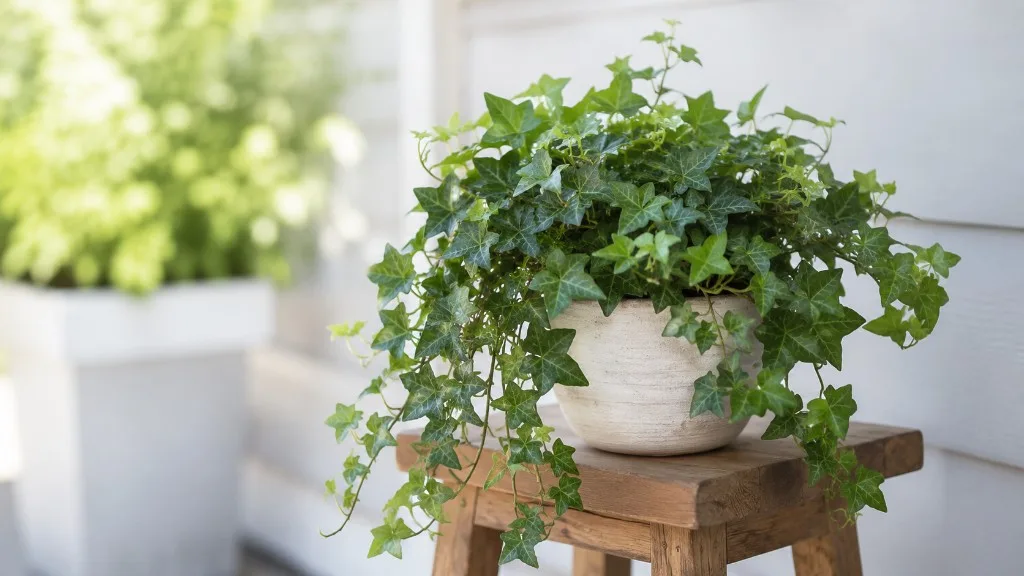
English ivy is an evergreen trailing and climbing vine grown indoors for year-round green foliage, soft texture, and a shape that works equally well cascading from a shelf or trained up a wire frame. The accepted scientific name is Hedera helix, and it belongs to the family Araliaceae - the same family as fatsia and schefflera. Retail tags may list cultivar names such as Glacier ivy, Needlepoint ivy, or Sweetheart ivy, but all are forms of Hedera helix unless the label specifies a different Hedera species.
Indoors, English ivy typically trails or climbs 3 to 8 feet with lobed leaves roughly 1 to 4 inches wide, depending on cultivar and age. Growth is moderate to fast when light, moisture, and temperature align, and it slows noticeably in dim, overheated rooms. The plant is native to Europe, Western Asia, and North Africa, which is the single most important fact about its care indoors. English ivy evolved in cool, humid woodlands - not in tropical heat - and it performs best when your home approximates that rhythm rather than a generic warm-houseplant profile.
If you are deciding whether English ivy fits your space, the honest summary is this: English ivy rewards English Ivy light guide, cool stable temperatures, and a English Ivy watering guide tied to actual soil dryness - and it punishes hot dry air, waterlogged roots, and placement purely for decoration. It is easier than a finicky fern for many growers and harder than a snake plant for anyone running a overheated apartment. The payoff is an inexpensive, long-lived vine that looks architectural in a hanging basket or on a topiary frame. Two critical caveats: English ivy is toxic to cats, dogs, and horses according to the ASPCA, and it is widely recognized as an invasive species outdoors in many regions of North America - a distinction this guide treats seriously below.
Botanical Background and Native Range
English ivy is a woody evergreen perennial that behaves differently at different life stages. Juvenile stems produce the familiar lobed leaves and cling with aerial rootlets when given a support. Mature stems - rarely seen on typical indoor specimens - develop unlobed adult leaves and can produce berry clusters that birds spread. For houseplant purposes, you are almost always growing the juvenile form, which is why the plant stays compact and lobed indoors for years.
The species spread from its native range across Europe and Scandinavia east toward Russia, and into Western Asia and North Africa, before humans carried it worldwide as an ornamental groundcover and wall vine. It was introduced to North America in the 1700s and has since escaped cultivation in urban woods, roadsides, and disturbed forests, according to the University of Maryland Extension. That history matters indoors because the plant’s tolerance for shade and neglect outdoors does not mean it prefers those conditions - it means it survives them while slowly weakening.
Knowing the family helps predict problems before they show on the leaves. Araliaceae plants generally want free-draining soil, stable roots, and protection from sudden temperature swings. Root stress appears first as yellowing, wilting, or mite outbreaks on stressed tissue. If your ivy came with a tag, keep the botanical name. Two pots labeled “ivy” at a garden center can be different Hedera species with different hardiness and moisture preferences, even when they look similar at purchase.
Trailing and Climbing Growth Indoors
English ivy’s growth habit is one of its main selling points. Left to hang, stems cascade naturally from baskets and high shelves, making it a strong choice for macramé hangers, mantels, and bookcase edges. Given a wire hoop, trellis, or moss pole, the same plant climbs through aerial rootlets and fills a vertical shape - useful if you want a living topiary rather than a dangling curtain of green.
Because growth can be fast in bright, cool conditions, plan for regular light pruning to keep the shape dense. Long bare stems with leaves only at the tips usually mean the plant wants more light or a harder trim to force side shoots. Rotating the pot every week or two keeps growth even on a windowsill. If you are comparing vines for a similar look, pothos (Epipremnum aureum) tolerates warmer, drier rooms more forgivingly but lacks ivy’s crisp lobed silhouette; English ivy is the better pick when you have a cool bright room and can commit to checking moisture consistently.
Best Growing Conditions for English Ivy
English ivy does best when four variables work together: light, water, soil, and temperature. Get those aligned and feeding, English Ivy repotting guide, and propagation become routine maintenance. Get one badly wrong - especially water in a dim corner or heat above a radiator - and the plant declines in ways that fertilizer cannot fix.
Light Requirements
English ivy prefers bright, indirect light for most of the day. The Royal Horticultural Society recommends positioning ivy in indirect or filtered light near an east-, west-, or north-facing window, and keeping it out of direct midday sun in south-facing rooms where leaves can scorch. Costa Farms horticulturist Justin Hancock, quoted by Martha Stewart, describes the ideal indoor spot as an east- or west-facing window where the plant casts a medium to strong shadow throughout the day - bright ambient light without harsh sun on the foliage.
English ivy tolerates lower light better than many flowering houseplants, which is why it survives on dim shelves longer than a coleus would. Tolerance is not preference. In low light, stems stretch, internodes lengthen, leaves shrink, and variegated cultivars revert toward green as the plant compensates for weak photosynthesis. If your variegation is fading, move the plant to a brighter spot gradually over one to two weeks rather than jumping straight into afternoon sun, which can bleach or curl leaves formed under dimmer conditions.
The fastest diagnostic is new growth, not old leaves. Compact, firm new leaves mean the light level is probably appropriate. Leggy, floppy stems with small pale leaves mean more light. Bleached patches, brown scorch, or midday curling mean less direct sun or slower acclimation. In winter at northern latitudes, a full-spectrum grow light on a 10–12 hour timer, positioned 12–18 inches above the canopy, prevents the thin, mite-prone growth that appears on ivies left on a north windowsill from November through February.
Temperature and Humidity
English ivy is a cool-climate plant indoors, and this is where most generic houseplant advice misleads new owners. A comfortable range is roughly 50 to 70°F (10 to 21°C) year-round, with nighttime temperatures slightly cooler than daytime when possible. The plant handles typical unheated bright rooms and cool bedrooms well. It struggles in hot, dry living rooms where daytime temperatures sit above 75°F (24°C) and air humidity drops below 30% from heating or air conditioning.
Watch placement near radiators, fireplace mantels, and heat vents, which can desiccate foliage within days even when the pot soil stays moist. Cold drafts below about 35°F (2°C) - common on window ledges in winter - can damage leaves and stall growth. The space behind closed curtains on a cold night can also drop below what the plant tolerates; pull pots forward after dusk or move them inward on freezing nights.
Humidity target for healthy foliage is roughly 40 to 60% relative humidity. English ivy is not as demanding as a calathea, but very dry winter air - common when central heating runs - is strongly linked to spider mite outbreaks on indoor ivy. Grouping plants, using a pebble tray with the pot elevated above the water line, or running a small humidifier near the plant all raise humidity more effectively than misting, which lasts minutes and can leave wet foliage that invites fungal spotting if air circulation is poor.
A bright bathroom can be an excellent location if the room stays cool enough, receives adequate indirect light, and has air movement. Warm steam alone does not replace light; a dim, overheated bathroom will still produce weak ivy. If your home runs hot and dry, prioritize humidity support from November through March even when the plant looks fine - mites often appear three to four weeks after humidity crashes, not the day it drops.
Soil and Drainage
Use a well-draining potting mix with enough organic matter to hold moisture without staying soggy for days. English ivy prefers slightly acidic soil around pH 6.0 to 6.5, though most quality peat-free or peat-based houseplant mixes sit close enough that hobbyists rarely need to adjust pH precisely. The RHS notes that common ivy (Hedera helix) grows best in alkaline soils outdoors; indoors, the more practical issue is structure and drainage, not fine-tuning pH.
A workable home blend is roughly two parts quality houseplant mix, one part perlite, and optionally one part fine orchid bark or coco coir for extra air space. Avoid heavy, compaction-prone mixes that stay wet in the center of the root ball after the surface looks dry - that mismatch causes more root rot on English Ivy on ivy than any single watering mistake. Always plant in a container with a drainage hole, and empty the saucer after every watering so the pot never sits in runoff.
Repot into fresh mix every one to two years because old peat-heavy substrates collapse over time, reducing oxygen at the roots. If water runs straight through the pot without soaking in, or the mix smells sour, replace it even if the calendar says otherwise.
How to Water English Ivy
The general rule for English ivy is: water when the top inch of soil is dry, then soak thoroughly until water runs from the drainage holes. More precisely, treat every 7 to 10 days in summer and every 10 to 14 days in winter as a starting interval only - pot size, soil structure, light, and room temperature all change how fast the mix dries. The RHS advises allowing the top few centimeters of compost to dry before watering again while avoiding complete desiccation, and discarding excess water from saucers so roots do not rot in standing moisture.
Use your finger or a dry wooden chopstick to check moisture an inch or two deep before every watering. A pot that feels light for its size usually needs water; a pot that still feels heavy with damp cool soil can wait. Water thoroughly and evenly rather than sprinkling a little daily, which keeps surface roots wet while the center stays unpredictably dry or soggy. Rainwater is ideal when available; tap water is acceptable for most homes unless your supply is extremely hard and you notice salt crust on the soil surface.
Watering Rhythm During Active Growth
During active growth - typically the bright, warm months when new stems extend - English ivy uses water on a steadier rhythm. The top inch dries on a predictable schedule, and new leaves emerge firm and evenly colored. Match your watering to that drying pattern rather than a fixed calendar day. If you moved the plant to a brighter spot or a larger pot, recheck moisture daily for the first two weeks because both changes alter drying speed.
When you do water, soak until roughly 10 to 20% of the volume runs out the bottom, then discard the saucer contents. This flush helps prevent salt buildup from tap water and fertilizer, which shows up later as brown leaf margins even when watering frequency is correct.
Seasonal Adjustments
In cooler, dimmer months, English ivy slows metabolically even though it keeps its leaves. The same summer interval will overwater the plant in winter if you do not adjust. Stretch the time between checks, rely more on pot weight and deep soil moisture, and pause fertilizer until new growth resumes in spring. Resume your active-season rhythm only when you see fresh tips forming and the pot drying on a faster pattern again.
Plants in a cool room need water less often than plants in a warm room at the same window, according to RHS houseplant guidance - a detail many growers miss when they group several species on one watering day. English ivy in a 62°F (17°C) bedroom may need half the frequency of ivy above a 74°F (23°C) radiator.
Common Watering Mistakes
The most common failure is watering on a schedule instead of on plant state - especially “every Sunday” regardless of season. The second is leaving the pot in a full saucer, which mimics waterlogged soil and invites root rot within weeks. The third is reacting to wilt or yellow leaves by watering more without checking whether the roots are actually dry or drowning; stressed ivy can look thirsty when the problem is saturated anaerobic mix.
If you are unsure between too dry and too wet, check deeper than the surface and inspect roots only if problems persist. Slightly too dry is usually less dangerous for English ivy than slightly too wet, though chronic drought produces crisp brown edges and leaf drop.
How to Feed English Ivy
English ivy is not a heavy feeder. A modest balanced fertilizer during active growth is enough to support steady foliage. Use a water-soluble houseplant formula at one-quarter to one-half of the label strength, applied to already-moist soil so nutrients distribute without burning roots. Monthly applications from spring through early fall suit most indoor specimens; skip feeding entirely in winter when growth stalls.
If your potting mix includes a starter fertilizer charge, wait four to six weeks after repotting before adding supplemental feed. Over-fertilizing shows up as salt crust on the soil, tip burn on older leaves, and weak floppy growth that looks like a light problem but persists after you move the plant. Flush the pot with plain water until runoff runs clear if you suspect salt buildup, then resume feeding at half strength.
Pause feeding after repotting, pest recovery, or any period when the plant is dropping leaves until you see stable new growth. Feeding a plant that cannot use nutrients adds salt without benefit.
Repotting and Root Health
Repot English ivy roughly every one to two years, or whenever roots circle the drainage holes, water runs straight through without absorbing, or the plant dries out within a day or two of watering. The best timing is early in the active growing season so roots can re-establish before winter slowdown. Move up only one pot size at a time - typically 1 to 2 inches wider in diameter - because an oversized pot holds excess moisture the root system cannot use, which is the most common post-repotting path to rot.
Use fresh well-draining mix, loosen the outer root ball gently if it is tightly bound, and water lightly for the first week to avoid drowning damaged roots. Keep the plant in bright indirect light without direct sun while it settles. Clear signs that repotting is overdue include roots on the soil surface, a top-heavy plant that tips easily, and mix that has broken down into a dense wet block even when you water carefully.
Propagation Methods for English Ivy
English ivy is one of the easiest houseplants to propagate at home, which makes it simple to refresh leggy specimens or fill additional hangers without buying new pots. Stem cuttings are the standard method.
Take a 4 to 6 inch cutting from a healthy stem, remove leaves from the lower one-third to one-half, and place the bare nodes either in water or directly into moist, well-draining potting mix. Hancock’s guidance via Martha Stewart notes that with good light, moist medium, and reasonable humidity, ivy roots readily within a few weeks. Change water every few days if water-propagating to limit stagnation, and transplant to soil once roots are 1 to 2 inches long.
Keep cuttings in bright indirect light, maintain even moisture without saturation, and avoid hot direct sun that wilts unrooted tissue. Do not propagate from mite-infested, yellowing, or recently overwatered parent material - cuttings inherit the parent’s stress and fail at much higher rates. Once rooted, pot individually into small containers with drainage and care for them as juvenile plants with slightly more attentive watering until new top growth appears.
Common English Ivy Problems
Most English ivy problems are environmental, not mysterious diseases. They develop over weeks when light, water, temperature, or humidity drift out of range, and they resolve slowly once you correct the underlying cause. Patience matters: a plant that yellowed from overwatering on English Ivy will not green up overnight even after you fix the schedule.
Yellow Leaves, Brown Tips, and Pests
Yellow leaves are the most common complaint. Causes include overwatering, underwatering on English Ivy, low light, sudden light changes, nutrient imbalance, natural older-leaf drop, and pests. Check soil moisture first - deep damp soil with yellow lower leaves usually means too much water; very dry soil with crisp yellowing means drought stress. Then assess light: if new growth is stretched and pale, increase brightness gradually. Inspect leaf undersides and stem joints for spider mites, which appear as fine webbing and stippled yellow dots and thrive in dry air.
Brown leaf tips and margins often point to low humidity, inconsistent watering, salt buildup, or fluoride/chlorine stress in sensitive cultivars. Flush the pot periodically with plain water, review your watering depth and frequency, and increase humidity if heating has been running. Brown spots with yellow halos may indicate bacterial or fungal leaf spot; remove affected leaves, improve air circulation, and avoid wetting foliage when you water.
Watch for mealybugs in leaf axils, scale along stems, and fungus gnats if the soil surface stays wet for days. Weekly inspection catches infestations early. A strong shower, manual removal, and insecticidal soap handle most outbreaks if you act before populations spread through a whole hanging basket. Mites specifically respond well to humidity correction plus repeated soap rinses on undersides; pesticide alone in a dry room often fails because eggs hatch faster than you eliminate adults.
Outdoor Planting and Invasive Risk
Indoor English ivy in a pot and outdoor English ivy on a fence are not the same management decision. Hedera helix is widely documented as an invasive species in North America and other regions where it escapes cultivation. The NC State Extension Gardener Plant Toolbox lists it as invasive in North Carolina and notes it can spread 20 to 80 feet outdoors by runners and climbing stems, smothering native vegetation and damaging trees by adding weight, holding moisture against bark, and blocking light.
The University of Maryland Extension reports that birds disperse seeds from mature berry-producing vines, allowing new infestations far from original plantings. Dense groundcover ivy blocks sunlight from native seedlings; climbing vines can accelerate tree decline and increase wind-throw risk. The California Department of Fish and Wildlife explicitly advises not planting English ivy and replacing existing outdoor specimens where feasible, citing ecological cost, difficulty of eradication once established, and toxicity to humans and livestock from leaves and berries.
Several states restrict sale or promote assessment of invasive status - Oregon and Washington have regulated sales, and Maryland prioritized English ivy for invasive species review in 2026 according to University of Maryland Extension. Even where sale is legal, planting English ivy in ground beds, on trees, or on structures that touch soil creates long-term escape risk from stem fragments and, eventually, seed if vines mature.
Safer approach: enjoy English ivy indoors or in patio containers that do not drain stems into garden beds, and choose native groundcovers or non-invasive vines for outdoor landscaping. If you inherit ivy on a property, consult your local extension office for removal guidance rather than trimming alone, because cut stems can reroot.
Is English Ivy Safe for Pets?
English ivy is toxic to dogs, cats, and horses, according to the ASPCA. The toxic principles are triterpenoid saponins (hederagenin). Clinical signs of ingestion can include vomiting, abdominal pain, hypersalivation, and diarrhea; the ASPCA notes that foliage is more toxic than berries. Common retail names - including Branching ivy, Glacier ivy, Needlepoint ivy, Sweetheart ivy, and California ivy - refer to Hedera helix cultivars and carry the same toxicity profile.
English ivy is not a pet-safe plant for homes where cats or dogs chew greenery. Hang baskets out of jump range, keep trailing stems off floor-level shelves, and supervise pets in rooms with new plants until you know their behavior. If you suspect ingestion, contact your veterinarian or the ASPCA Animal Poison Control Center at (888) 426-4435 promptly rather than waiting for severe symptoms; a consultation fee may apply.
Humans are also affected: NC State Extension lists contact dermatitis from sap exposure - redness, itching, and blisters - as a medium-severity poison characteristic. Wear gloves when pruning heavily or propagating large batches if you have sensitive skin, and wash tools and hands afterward. This is general safety information, not medical or veterinary advice; seek professional help for confirmed exposure or symptoms.
Conclusion
The most useful thing to know about English ivy is that it is a cool-climate evergreen vine from Europe, Western Asia, and North Africa that grows moderate to fast indoors to roughly 3 to 8 feet when bright indirect light, well-draining soil, and a moisture check before every watering align with its native rhythm. Place it in a cool bright room, target 40 to 60% humidity in dry winters, and treat hot, dry air as the enemy before you reach for fertilizer or pesticide.
Keep English ivy indoors or in contained patio pots, not in outdoor ground beds where it becomes an invasive ecological and structural hazard. Treat it as toxic to pets and potentially irritating to human skin, and choose a different trailing plant if you need a pet-safe alternative. When leaves yellow or mites appear, fix water, light, and humidity first - those three explain most failures. Get the environment right and English ivy becomes a durable, elegant vine worth keeping for years; get them wrong and no amount of routine care will make it look like the lush photos that sold you the plant.
When to use this page vs other English Ivy guides
- English Ivy overview - Canonical hub for this species - care topics and problems branch from here.
- English Ivy problems - Symptom-first path when you already know something is wrong.
Related English Ivy guides
How to care for English Ivy?
How much light does English Ivy need?
medium to bright indirect light
- medium to bright indirect light - medium to bright indirect light.
When should you water English Ivy?
Water when top inch of soil dries. Every 5–7 days in summer; every 10–14 days in winter. Prefers slightly moist soil.
- Check the top inch; water when dry to the touch - Water when top inch of soil dries.
- Drain excess water - Water when top inch of soil dries.
What soil works best for English Ivy?
Well-draining potting mix. Slightly acidic pH 6–6.5.
- standard potting mix - Well-draining potting mix.
- perlite (20%) - Light white granules that keep soil airy and help prevent compaction.
Grower notes for English Ivy
What matters most with English Ivy
English Ivy is easiest to grow when you judge the whole plant: new growth, root-zone moisture, light exposure, and how quickly the pot dries after watering. In practice, the care checkpoint is simple: medium to bright indirect light. Pair that with well-draining potting mix. Slightly acidic pH 6–6.5, and avoid changing water, pot size, and placement all at once.
Best placement in a real home
English Ivy belongs where medium to bright indirect light is realistic for most of the day, not only where the pot looks good. Water when top inch of soil dries. Every 5–7 days in summer; every 10–14 days in winter. Prefers slightly moist soil. If the pot stays wet longer than expected, move the plant into better light or reassess the mix before watering again. Humidity target: 40–60%. Temperature comfort zone: 10–21°C (50–70°F).
Before you buy this plant
Choose English Ivy with firm new growth, clean leaf undersides, and soil that does not smell sour or feel compacted. Be cautious if you see spider-mites, sticky residue, collapsed crowns, or a pot that is wet in poor light. Cosmetic old-leaf damage is less worrying than weak roots or active pests.
First month after bringing it home
Do not repot English Ivy on day one unless the mix is failing or pests are obvious. Quarantine it, learn how fast the pot dries, and keep care boring while it adjusts. Watch especially for spider-mites, brown-tips, and yellow-leaves. If problems appear, correct the condition first rather than stacking fertilizer, repotting, and pruning together.
Safety note for English Ivy
English Ivy is not a plant to keep within reach of pets or children. The database flags it for cats, dogs, and humans. Use gloves if sap or plant tissue is irritating, and pick a pet-safe alternative for floor pots or low shelves.
How to tell English Ivy is settling in
Also sold as Common Ivy and European Ivy, this plant should be judged by stable new growth rather than label names alone. If you plan to multiply it later, common methods include Stem cuttings and Division. Repot only when you see Roots filling pot and soil drying very quickly. If brown-tips shows up early, inspect light, watering, and roots before assuming the plant is permanently weak.
Is it pet safe?
English ivy is toxic to cats, dogs, and humans.
All parts toxic. Contains saponins causing vomiting, drooling, abdominal pain. Sap causes contact dermatitis. Keep away from pets and children.
Watering English Ivy
For English Ivy, check the top inch; water when dry to the touch and water every 7–10 days in summer; every 10–14 days in winter. Reduce watering slightly in winter.
| Detail | Information |
|---|---|
| How often | Every 7–10 days in summer; every 10–14 days in winter |
| How to check | Check the top inch; water when dry to the touch |
| Seasonal changes | Reduce watering slightly in winter |
Signs of overwatering
- Yellow leaves
- root rot
- mushy stem bases
Signs of underwatering
- Wilting or crispy leaf edges
- dry pot
Soil & potting for English Ivy
Use a mix of standard potting mix, perlite (20%) for English Ivy. Good drainage is important. Target soil pH around 6.0–7.0. Repot every 1–2 years; fast-growing, ideally in spring.
| Detail | Information |
|---|---|
| Recommended mix | standard potting mix, perlite (20%) |
| Drainage | Good drainage is important |
| Soil pH | 6.0–7.0 |
| Repotting frequency | Every 1–2 years; fast-growing |
| Best season to repot | Spring |
Signs it needs repotting
- Roots filling pot
- soil drying very quickly
Humidity & temperature for English Ivy
English Ivy prefers 40–60%, though normal home humidity is usually fine. Keep temperatures around 10–21°C (50–70°F).
| Detail | Information |
|---|---|
| Humidity | 40–60% - normal home humidity is fine. |
| Ideal temperature | 10–21°C (50–70°F) |
Fertilizer & pruning for English Ivy
Use use balanced liquid fertilizer at half strength and stop if the plant is stressed, newly repotted, or not actively growing. Skip fertilizing in winter; overfertilizing causes salt damage. for English Ivy.
| Detail | Information |
|---|---|
| Fertilizer type | Use balanced liquid fertilizer at half strength and stop if the plant is stressed, newly repotted, or not actively growing. Skip fertilizing in winter; overfertilizing causes salt damage. |
Common problems on English Ivy
Spider Mites
HighLikely cause: English ivy in dry warm indoor air develops spider mite colonies on leaf undersides - the most common and serious indoor ivy problem
Quick fix: Shower thoroughly; neem oil every 5 days for 3 weeks; maintain humidity above 50%
Full fix guide →Brown Tips
MediumLikely cause: Low humidity and dry warm air cause leaf tip and edge browning
Quick fix: Increase humidity; move away from heat sources; mist daily or use pebble tray
Full fix guide →Yellow Leaves
MediumLikely cause: Overwatering or very low light causes yellowing leaves across the plant
Quick fix: Allow soil to dry more; increase light; check for spider mites
Full fix guide →Root Rot
MediumLikely cause: Common on this plant type; confirm with recent watering, light, and root checks.
Quick fix: Inspect the plant and correct the most likely care stressor before stacking treatments.
Full fix guide →Overwatering
MediumLikely cause: Common on this plant type; confirm with recent watering, light, and root checks.
Quick fix: Inspect the plant and correct the most likely care stressor before stacking treatments.
Full fix guide →Underwatering
MediumLikely cause: Common on this plant type; confirm with recent watering, light, and root checks.
Quick fix: Inspect the plant and correct the most likely care stressor before stacking treatments.
Full fix guide →Mealybugs
MediumLikely cause: Common on this plant type; confirm with recent watering, light, and root checks.
Quick fix: Inspect the plant and correct the most likely care stressor before stacking treatments.
Full fix guide →Aphids
MediumLikely cause: Common on this plant type; confirm with recent watering, light, and root checks.
Quick fix: Inspect the plant and correct the most likely care stressor before stacking treatments.
Full fix guide →Leggy Growth
MediumLikely cause: Common on this plant type; confirm with recent watering, light, and root checks.
Quick fix: Inspect the plant and correct the most likely care stressor before stacking treatments.
Full fix guide →Slow Growth
MediumLikely cause: Common on this plant type; confirm with recent watering, light, and root checks.
Quick fix: Inspect the plant and correct the most likely care stressor before stacking treatments.
Full fix guide →Wilting
MediumLikely cause: Common on this plant type; confirm with recent watering, light, and root checks.
Quick fix: Inspect the plant and correct the most likely care stressor before stacking treatments.
Full fix guide →Drooping Leaves
MediumLikely cause: Common on this plant type; confirm with recent watering, light, and root checks.
Quick fix: Inspect the plant and correct the most likely care stressor before stacking treatments.
Full fix guide →Low Humidity
MediumLikely cause: Common on this plant type; confirm with recent watering, light, and root checks.
Quick fix: Inspect the plant and correct the most likely care stressor before stacking treatments.
Full fix guide →Not Enough Light
MediumLikely cause: Common on this plant type; confirm with recent watering, light, and root checks.
Quick fix: Inspect the plant and correct the most likely care stressor before stacking treatments.
Full fix guide →Fungus Gnats
MediumLikely cause: Common on this plant type; confirm with recent watering, light, and root checks.
Quick fix: Inspect the plant and correct the most likely care stressor before stacking treatments.
Full fix guide →Mold on Soil
MediumLikely cause: Common on this plant type; confirm with recent watering, light, and root checks.
Quick fix: Inspect the plant and correct the most likely care stressor before stacking treatments.
Full fix guide →