DIY Pebble Tray Ideas for Small Spaces That Actually Work
Five pebble tray layouts for apartments and small rooms-windowsill, desk, shelf, living room, and bathroom-with sizing, materials, and build steps.
Quick Answer: Which Layout Fits Your Small Space?
If you live in a studio, rental, or compact room, the right DIY pebble tray is less about exotic stones and more about matching tray shape to the one spot you actually have. A pebble tray is a shallow waterproof container filled with pebbles and a thin layer of water, with the pot resting on the stones-not in the water. As water evaporates, it raises humidity in a small zone around the plant. Extension sources agree the effect is local and modest, not a whole-room fix. For the science behind that limit, see our indoor humidity and pebble trays guide.
Pick your layout by footprint first:
- Narrow windowsill (22–30 inches): Long rectangular tray running parallel to the glass
- Desk or nightstand (12–16 inches wide): Single mini tray under one compact tropical
- Floating shelf or bookcase (24–36 inches): One shelf-length tray under two to four small pots
- Visible living-room surface: Shallow decorative platter sized 2–4 inches wider than the pot base
- Bathroom counter with indirect light: Small waterproof tray under a fern or orchid
This page is the layout and build spec guide. For universal setup rules, tray depth math, and water-level diagrams, use how to set up a pebble tray. For humidity comparisons, see pebble tray vs humidifier.
Materials and Tools for Every Layout
You need the same core supplies regardless of layout. The container changes; the build logic does not.
| Item | What to use | Notes |
|---|---|---|
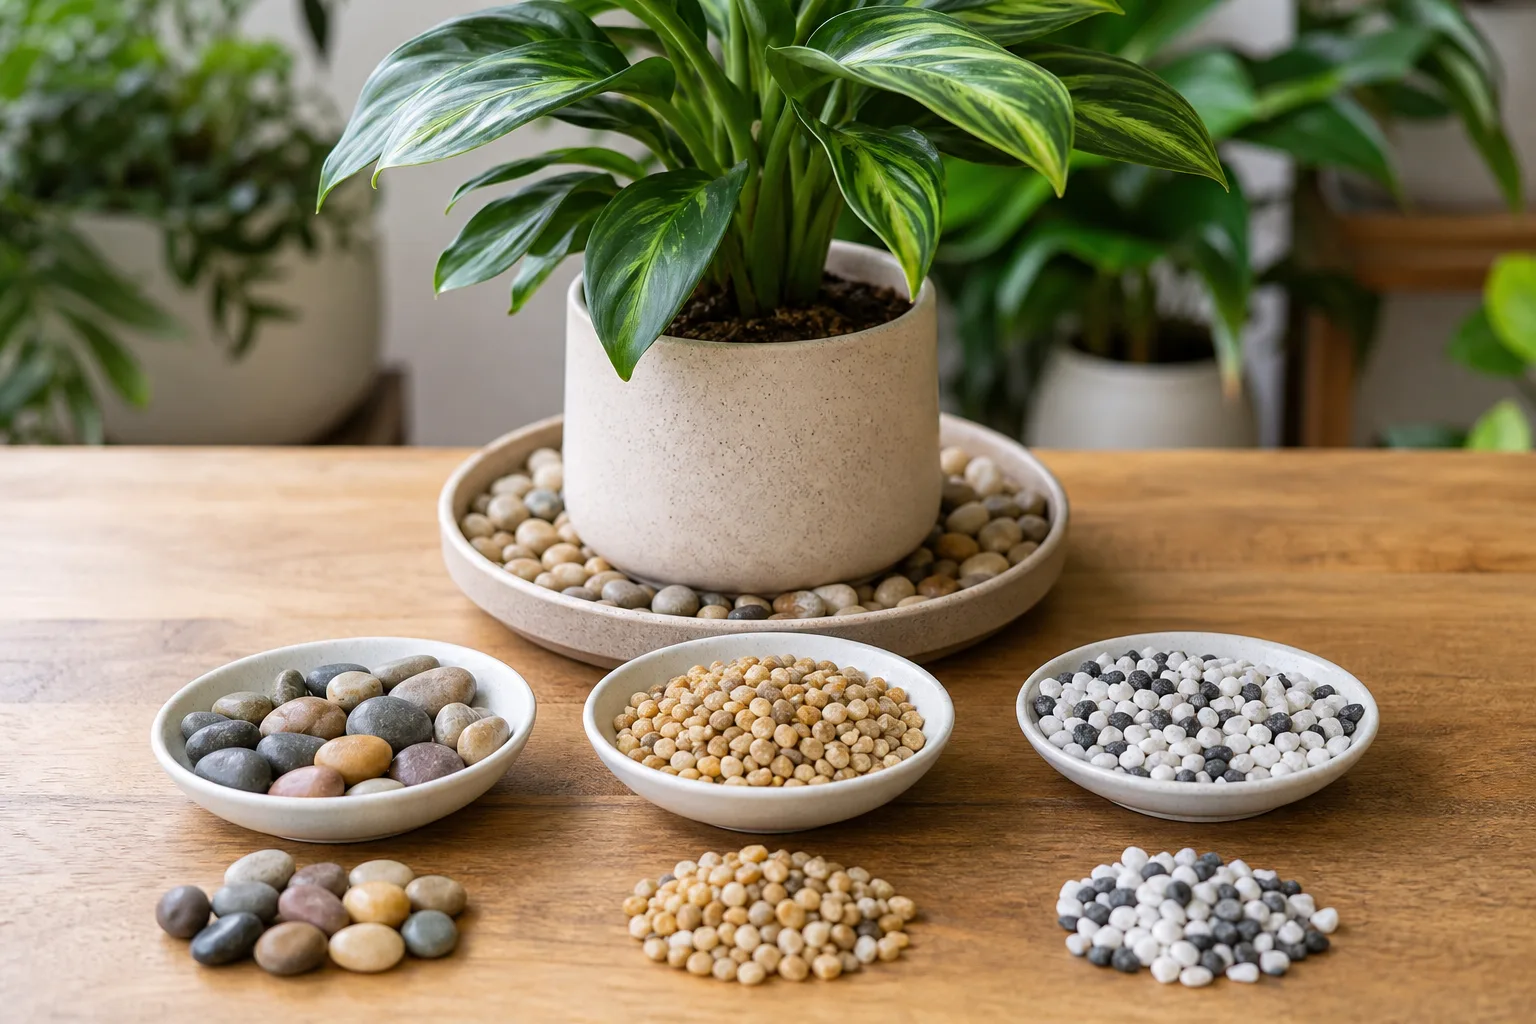
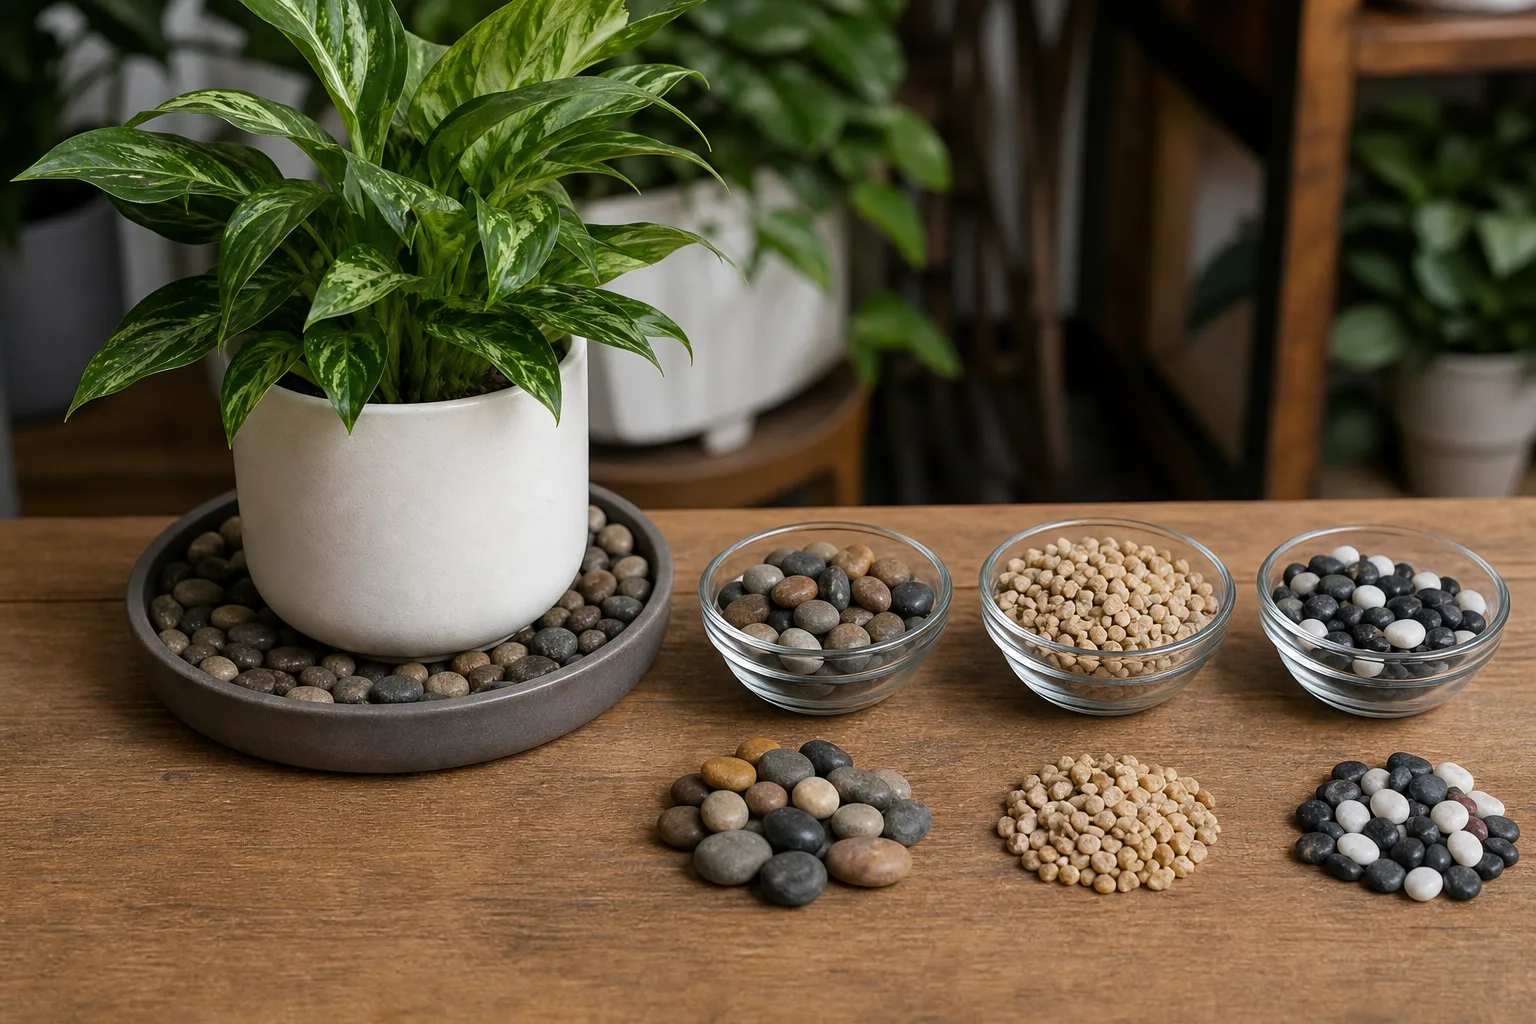
| Tray or saucer | Glazed ceramic platter, metal baking sheet with rim, plant saucer, thrifted serving tray | Must be waterproof and stable; depth 1–2 inches |
| Pebbles | Washed river rock, aquarium gravel, or clay pebbles (LECA) | Enough for a 1–1.5 inch layer |
| Water | Tap, filtered, or distilled in hard-water homes | Refill as it evaporates |
| Optional | Small hygrometer, soft brush for cleaning | Helps you track whether the tray is doing enough |
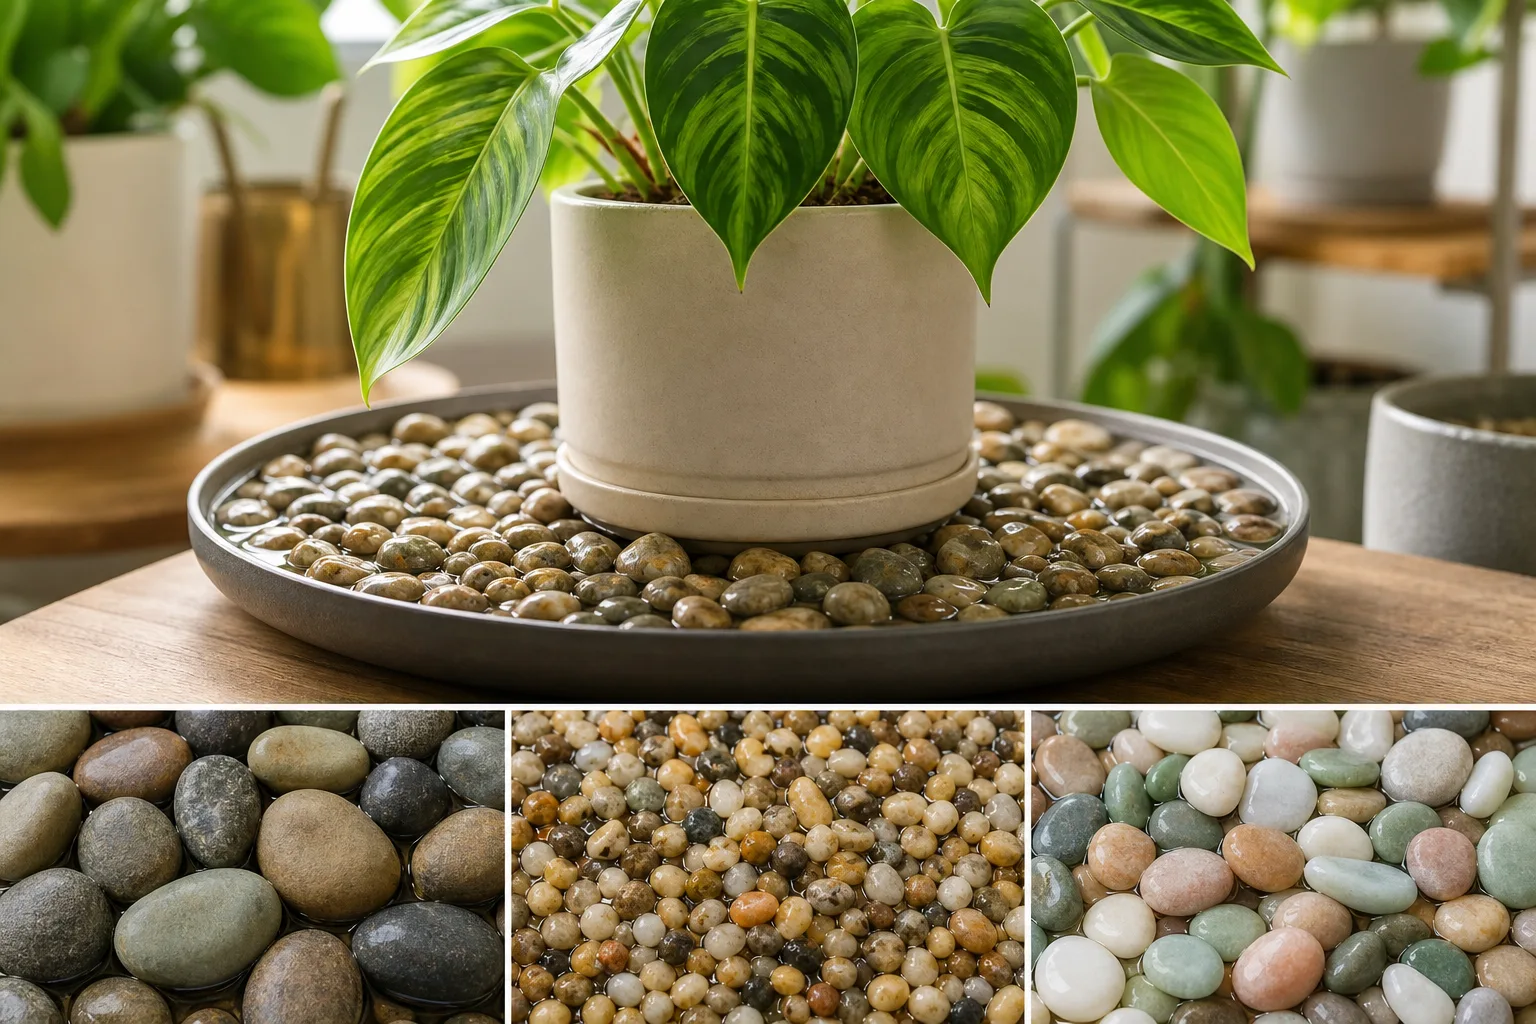
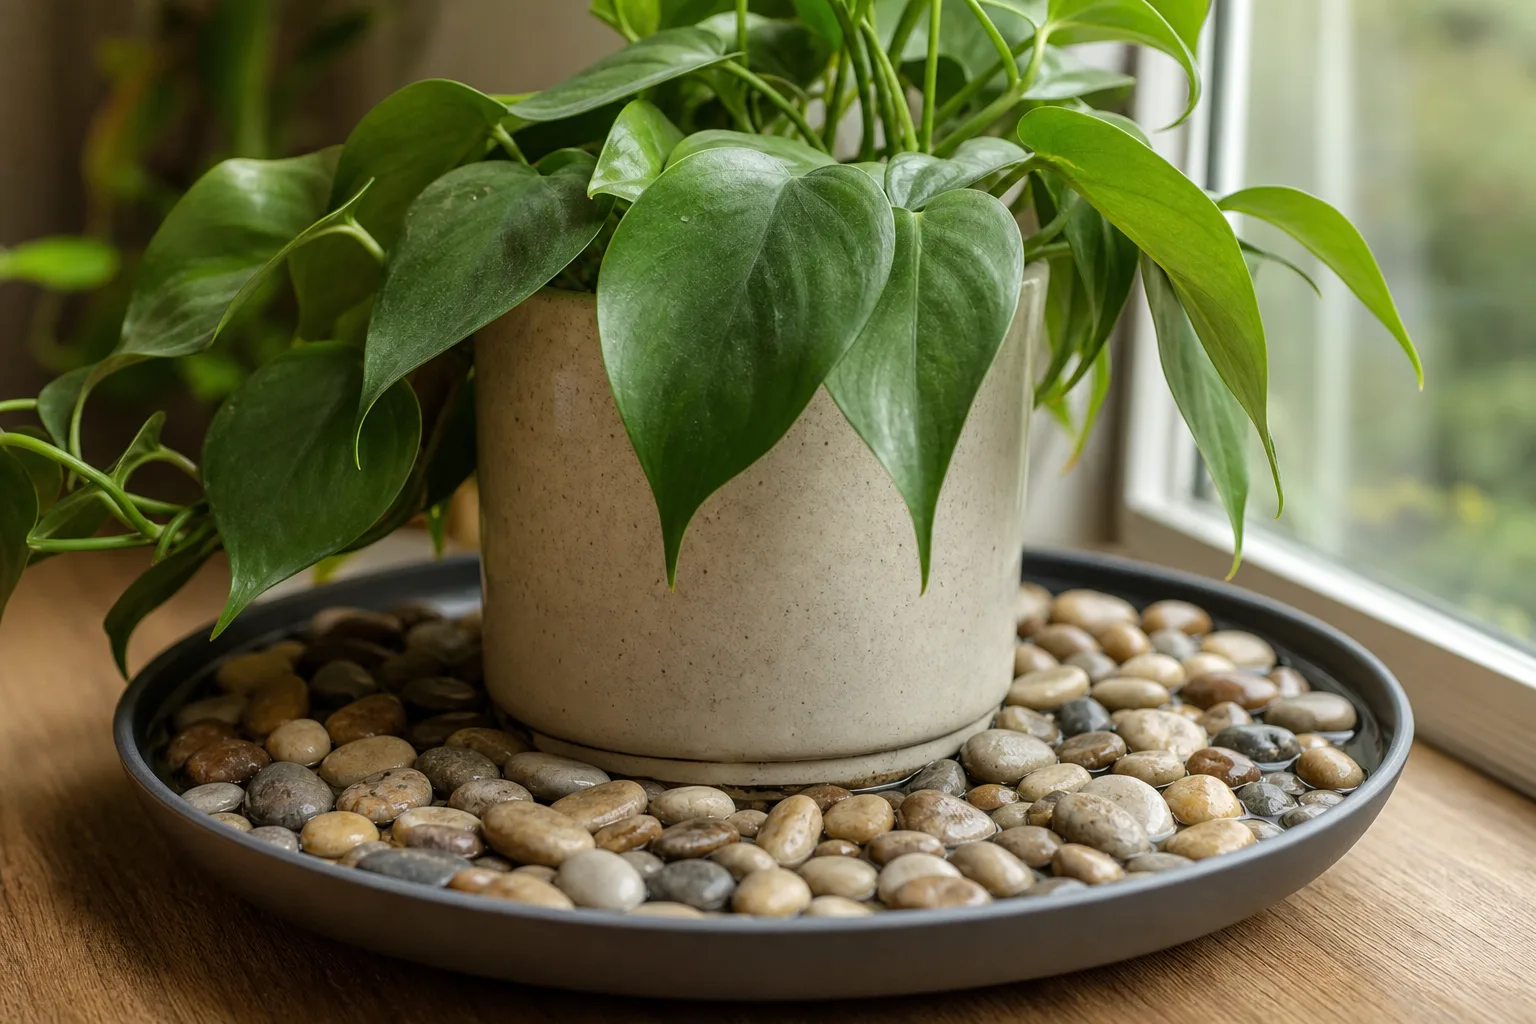
Tray width rule: Choose a tray 2–4 inches wider than the outer diameter of the pot base on each side when possible. Nebraska Extension recommends a saucer two to three inches larger on each side than the plant container. The Spruce advises a tray several inches wider than the pot base for more evaporation surface. Wider trays perform better in small rooms because the exposed water area is what does the work.
Pebbles depth rule: Fill to 1–1.5 inches so the pot base sits firmly above the waterline. Never let drainage holes touch standing water-Wisconsin Horticulture warns that wet soils invite root rot fungi.
Layout Comparison at a Glance
| Layout | Typical footprint | Plants | Refill cadence (dry heat) | Best humidity gain | Cleaning burden |
|---|---|---|---|---|---|
| Windowsill | 22–36” × 4–6” | 1–2 small | Every 2–4 days | Good local bump near glass | Low–medium |
| Desk mini | 6–8” round | 1 compact | Every 3–5 days | Modest; tight zone | Low |
| Shelf-length | 24–36” × 5–7” | 2–4 small | Every 2–3 days | Best for grouped tropicals | Medium |
| Living-room decor | 10–14” round/oval | 1 focal | Every 3–5 days | Modest; style-first | Medium |
| Bathroom counter | 8–10” round | 1 humidity-lover | Every 4–7 days | Small boost between showers | Medium–high (algae risk) |
 |
The shelf-length tray usually gives the best function-to-clutter ratio in apartments because grouping plants already raises local humidity, and one shared tray beats four separate saucers.
The 6-Step Build Checklist Every Layout Shares
Every layout on this page uses the same six steps. Run through them once; then drop your finished tray into the spot you chose above.
- Rinse tray and pebbles. Dust and garden soil invite algae and grit on furniture. Start clean.
- Add a 1–1.5 inch pebble layer. Spread evenly so the pot will sit level.
- Pour water to just below the pebble tops. The water line should sit roughly halfway up the pebbles-not submerging them.
- Set the pot on dry pebbles. Confirm drainage holes are above the water. If the base touches water, pour some out.
- Check stability. Nudge the pot. On desks and floating shelves, a wobbly tray is a spill waiting to happen.
- Place and observe for one week. Note refill timing. In heated winter air, small trays may need water every two to three days.
If any step is unclear, the illustrated walkthrough in pebble trays for plants covers the same mechanics with more troubleshooting detail.
Layout 1: Windowsill Pebble Tray
The windowsill layout is the default for apartment growers because it uses dead space that already gets light. The goal is a long, low tray that follows the sill line instead of a round saucer that looks like an afterthought.
Best For, Skip When, and Minimum Size
Best for: One or two compact humidity lovers-fittonia, small ferns, peperomia, or a young philodendron-on a sill that stays 22 inches or wider. Standard apartment sills are often 24–30 inches deep front-to-back is less important than length along the glass.
Skip when: The sill is narrower than 18 inches, slopes toward the room, or sits directly over a radiator. Heat and airflow can evaporate the tray in hours without helping the plant much. Also skip if the latch or crank blocks a long tray.
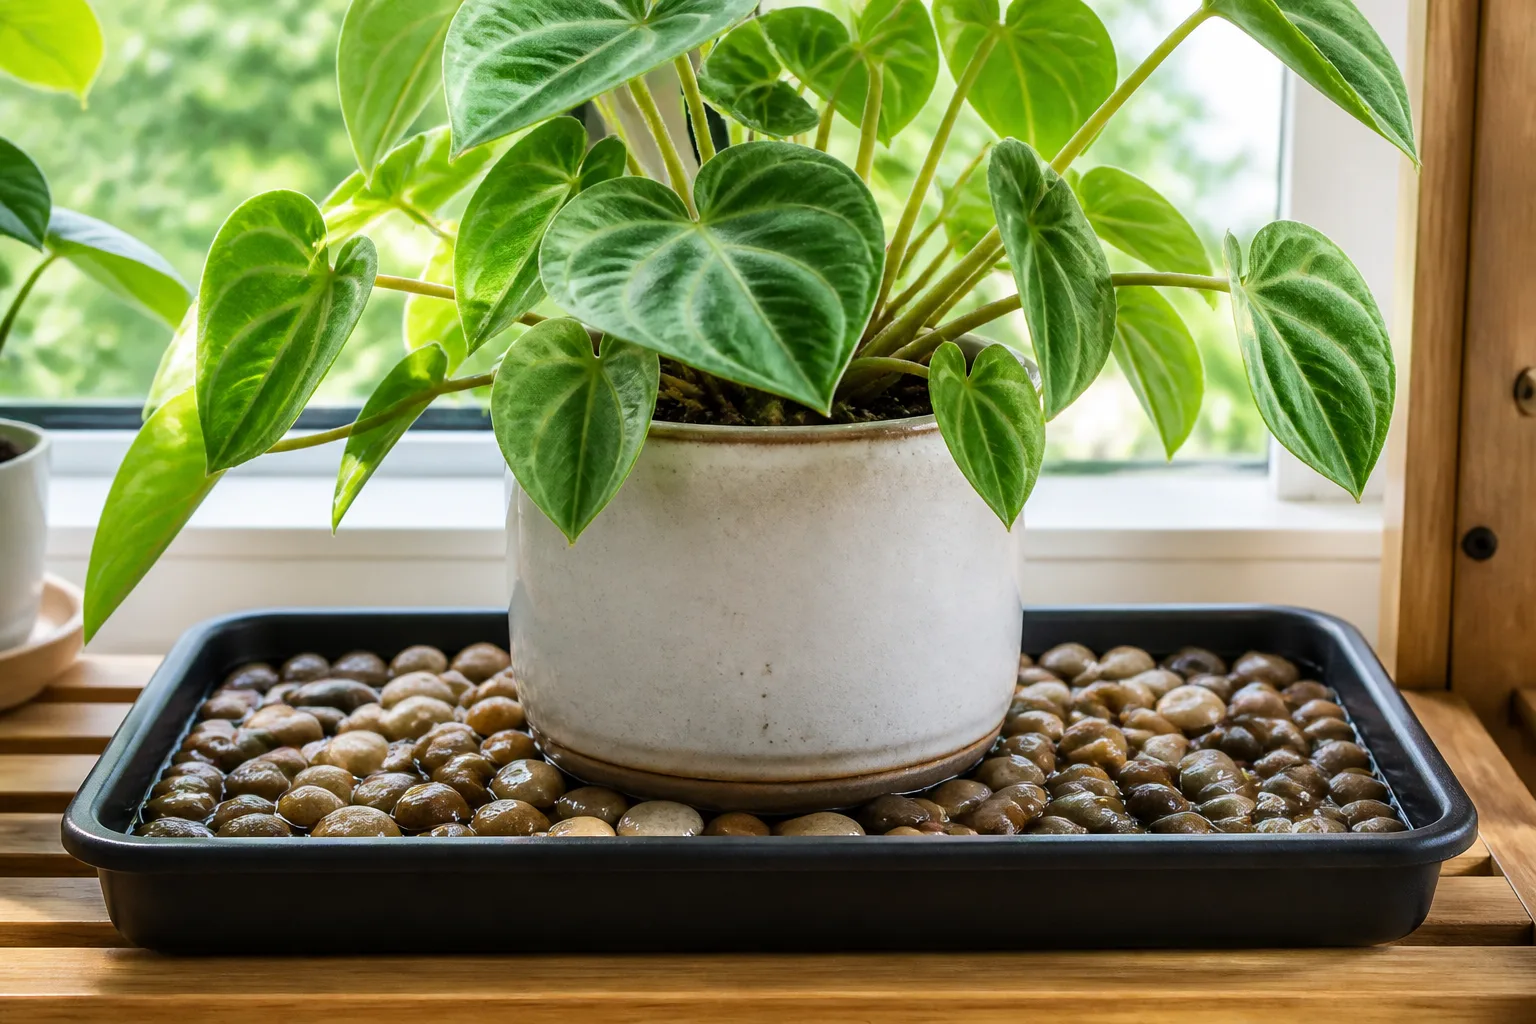
Minimum size: Tray length at least 2 inches shorter than sill length (e.g., 22-inch tray on a 24-inch sill) so you can lift it for cleaning. Width 4–6 inches; depth 1–2 inches. Household stand-ins: a slim metal baking sheet, a rectangular plant saucer, or a narrow serving tray with a waterproof liner.
Materials for this layout: One rectangular waterproof tray (22–30” × 4–6”), 2–3 cups small pebbles, water. Optional felt pads under tray corners to protect painted sills.
Documented build example: On a 24-inch apartment sill, a 22 × 5-inch glazed saucer with a 1.25-inch pebble layer holds a 4-inch fittonia pot (6-inch outer base) plus a 3-inch fern. Refill averaged every three days in January with radiator heat below. That is a realistic small-space result-not a measured humidity guarantee, but a workable maintenance rhythm.
Build steps: Run the 6-step checklist. Place the tray parallel to the window. Keep pots slightly inset from the glass so leaves do not press cold pane in winter.
Layout 2: Desk or Bedside Mini Tray
The desk mini is for growers who want one fragile plant to survive the driest microclimate in the home: a tabletop next to a monitor, lamp, or bed.
Best For and Minimum Size
Best for: A single compact plant with a pot outer diameter of 4–6 inches-fittonia, small nerve plant, or desktop fern.
Skip when: The surface is uneven, vibrates (some standing desks), or cannot tolerate a few tablespoons of water if you overfill. Also skip oversized stones on a 6-inch tray; they look bulky and tip easily.
Minimum size: Round or square tray 6–8 inches wide, 1–1.5 inches deep-roughly 2–3 inches wider than the pot base. Household stand-ins: ceramic coaster set on a waterproof liner, shallow tea saucer, or lidded dish base.
Materials: One mini saucer, 1 cup small pebbles (pea gravel or aquarium stone), water.
Build steps: Use the smallest pebbles in this guide so the fill looks neat at mini scale. After step 4, slide a paper towel under the tray once to confirm no slow leak before it sits on wood.
Layout 3: Shelf-Length Tray for Grouped Plants
This is the highest-value layout for small apartments. One tray under several plants cuts clutter and stacks two humidity tricks: evaporation plus plant grouping.
Best For, Plant Count, and Weight Notes
Best for: Two to four small tropicals that share light and watering habits on a 24–36 inch shelf or bookcase tier.
Skip when: The shelf is rated for light loads only. A filled tray plus wet pebbles plus several ceramic pots can exceed 8–12 pounds. Check shelf brackets. Floating shelves in rentals often have low weight limits-distribute weight toward wall anchors or use a bookcase instead.
Minimum size: Tray length 2–4 inches less than shelf length; width 5–7 inches; depth 1.5–2 inches. Household stand-ins: boot tray, narrow boot mat with raised edges, or two matching saucers set side by side on a waterproof liner.
Plant count: Two 4-inch pots and one 6-inch pot is a common upper limit on a 30-inch tray without crowding leaves.
Materials: One long waterproof tray (24–36” × 5–7”), 4–6 cups pebbles, water.
Build steps: Complete the 6-step checklist. Space pots so foliage does not trap stale air. Iowa State Extension notes that grouping plants raises humidity as moisture evaporates from soil and leaves-this layout leans on that effect deliberately.
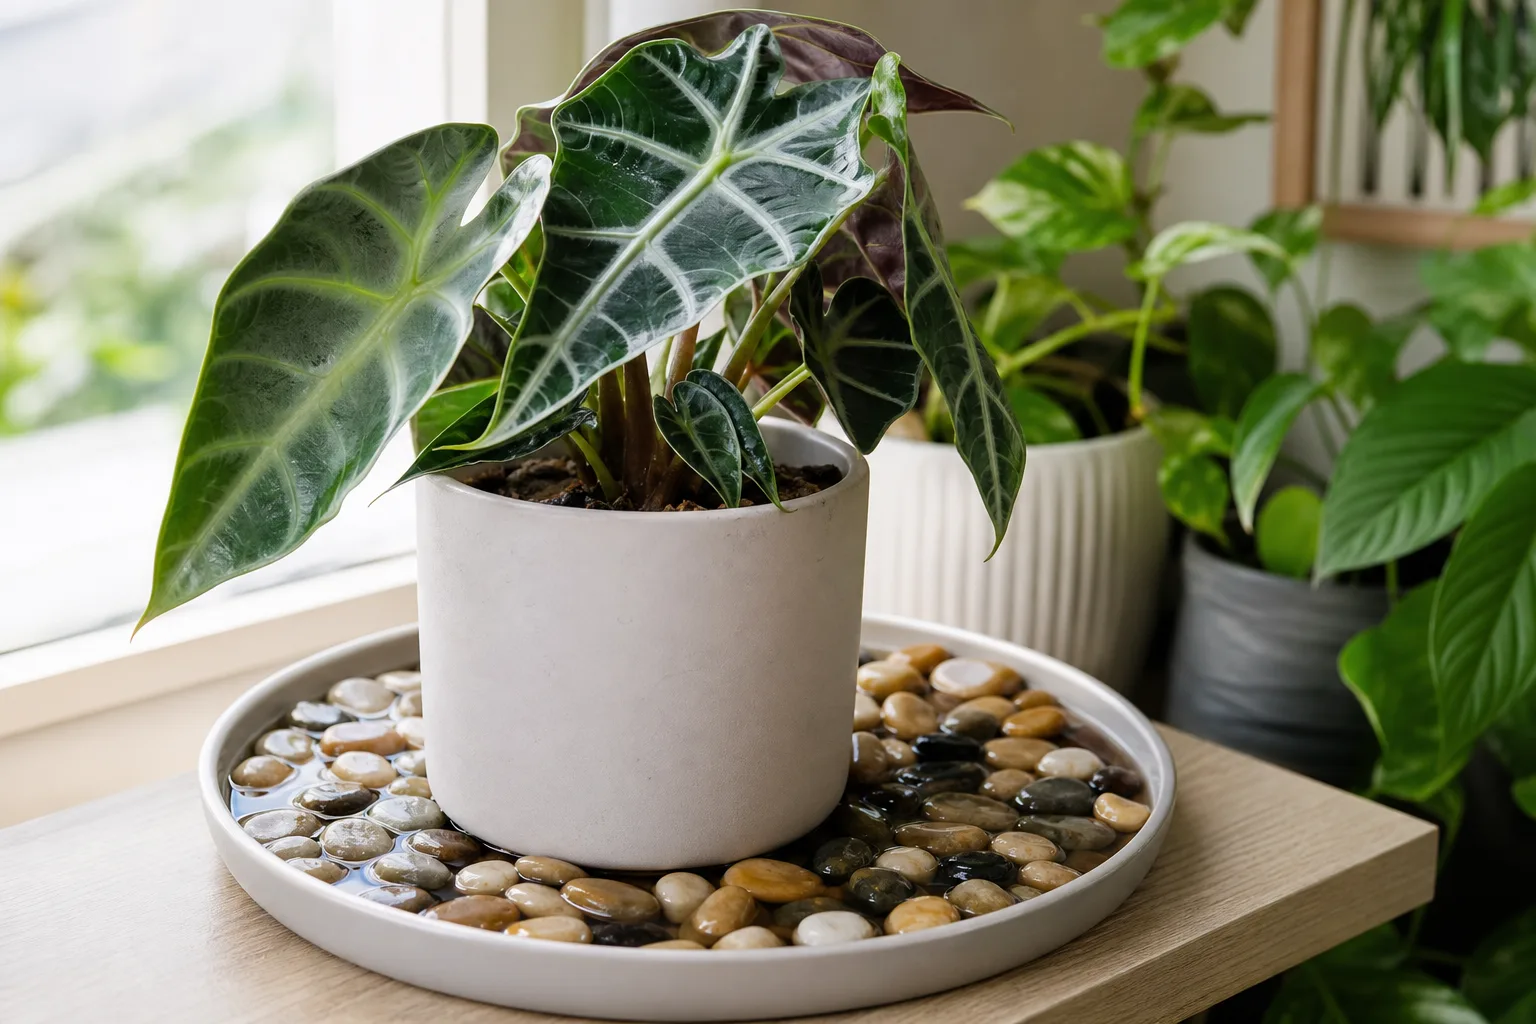
Layout 4: Decorative Living-Room Tray
When the tray sits in plain sight, it needs to read as decor. Function stays the same; the container carries more visual weight.
Styling Rules and Minimum Size
Best for: One focal humidity-loving plant on a side table, credenza, or media console where a plastic saucer would look cheap.
Skip when: You cannot keep water discreet. Murky water ruins the effect faster than plain pebbles help the plant.
Minimum size: Round or oval platter 10–14 inches wide for a 6–8 inch pot-2–4 inches wider than the pot base per The Spruce and Nebraska Extension guidance. Depth 1–1.5 inches.
Materials: Matte ceramic platter, stone-look melamine tray, or shallow metal tray with felt feet. 2–3 cups uniform river stones or white pebbles for a calm palette.
Styling rules: One stone type, one tray finish, one or two pot colors. Match tray shape to furniture lines-round on a round side table, rectangle on a linear console. See decorative pebble tray ideas and living-room styling ideas for more display-focused tips without repeating them here.
Build steps: Run the 6-step checklist. Keep the water line low enough that the tray looks nearly dry from across the room.
Layout 5: Bathroom Counter Tray
Bathrooms already swing humid after showers. A tray here is about smoothing dry spells, not reinventing the rainforest.
Light Caveat and Humidity Reality
Best for: A fern, orchid, or calathea on a counter that gets indirect light from a frosted window or bright doorway-not a windowless room.
Skip when: The bathroom has no usable light, stays cold, or the tray would sit inside a shower splash zone where soap residue builds up fast.
Minimum size: 8–10 inch round tray for one 4–6 inch pot. Depth 1 inch is enough; bathrooms refill slower than heated living rooms.
Materials: Non-slip waterproof saucer, 1–2 cups pebbles, water. Ventilate after showers so standing water does not stay warm and stagnant-warm trays can attract gnats if neglected. Wisconsin Horticulture ties fungus gnat problems mainly to overwatered potting mix, but dirty tray water does not help.
Build steps: Complete the 6-step checklist. Wipe the counter under the tray weekly. If algae appears, shorten refill intervals and rinse pebbles.
Style It Without Looking Homemade
Ugly trays share one mistake: mismatched parts. Plastic saucer, random garden stones, oversized pot-reads accidental. Fix it by reducing variables: one tray material, one pebble color, one pot finish family.
Match tray geometry to the surface. Narrow rectangle on a sill, long trough on a shelf, round platter on a round table. Leave a visible border of pebbles around the pot so the tray reads as a base, not a hidden drip pan.
Do not overfill water to make the tray “look active.” Calm, low water lines age better and match good plant care. For budget materials that still look intentional, see budget-friendly pebble tray DIY.
Care Routine for Small Trays
Small trays dry faster than large ones. In winter heat or near AC, check every two to three days until you learn your room’s rhythm. Top up with fresh water; do not just add on top of slime.
Cleaning: Empty, rinse pebbles, wipe the tray, rebuild when you see white mineral crust, green algae, or cloudy water. In hard-water cities, monthly rinses matter more. Crop and Soil recommends scrubbing pots and trays periodically to remove mineral and algae buildup. For a full maintenance schedule, see how to clean and maintain a pebble tray.
Moving trays: Lift from both ends on long windowsill trays-water plus pebbles plus pots gets heavy. Slide felt pads under corners to protect sills and counters.
Pest note: If warm standing water sits for weeks, rinse more often. Keep the pot above the waterline so roots never wick soggy mix.
When a Tray Is Not Enough
A pebble tray is a light tool. UNH Extension and Purdue guidance both point to humidifiers when dryness is severe or the plant is large. If your hygrometer stays very low and leaves still crisp after a month of tray care, upgrade the room-not the pebble color.
Skip trays entirely for succulents and cacti, unstable ledges, or spots you cannot clean. Common setup errors-pots in water, trays too small, never refilled-are covered in common pebble tray mistakes.
For plants with persistent brown tips, humidity may be only part of the story. Check watering and light before blaming the tray. Our houseplant humidity guide helps sort symptoms from causes.
Budget and Reuse Ideas
You do not need a garden-center humidity product. Thrifted platters, spare baking dishes, extra pot saucers, and clean aquarium gravel work if they are waterproof and wide enough.
| Reuse item | Layout fit | Cost tier |
|---|---|---|
| Metal baking sheet (1-inch rim) | Windowsill, shelf | $ |
| Ceramic pie dish | Desk mini, bathroom | $ |
| Boot tray | Shelf-length | $$ |
| Leftover aquarium gravel | All layouts | $ |
Clay pebbles cost more but look uniform and weigh less on floating shelves. Regular pea gravel is fine if rinsed. Compare pebble types in best pebbles for a DIY pebble tray.
Related Guides
- Pebble trays for plants - How trays fit into overall care
- How to set up a pebble tray - Universal setup and water-level rules
- Indoor humidity and pebble trays - Humidity science without repeating it here
- Pebble tray vs humidifier - When to upgrade beyond a tray
- Decorative pebble tray ideas - Styling-focused companion
Conclusion
The best DIY pebble tray ideas for small spaces match tray shape to the one surface you have-sill, desk, shelf, console, or bathroom counter-and stay honest about what evaporation can do. Build with the 6-step checklist, size the tray 2–4 inches wider than the pot base, keep roots above the waterline, and pick the layout that minimizes clutter while maximizing exposed water surface.
Use the windowsill or shelf-length version when you want the most practical humidity assist in a tight apartment. Use the decorative layout when the tray must look at home in the room. When dryness is severe, pair the tray with a humidifier or move the plant-do not expect a teacup-sized evaporation pan to fix winter heating. Get the layout right, and a pebble tray stops being a Pinterest hack and becomes a small, reliable piece of indoor plant care that earns its footprint.