DIY Pebble Tray for Houseplants: Step-by-Step
Make a DIY pebble tray for houseplants with the right tray, pebble depth, and water line-plus realistic humidity limits and cleaning advice.
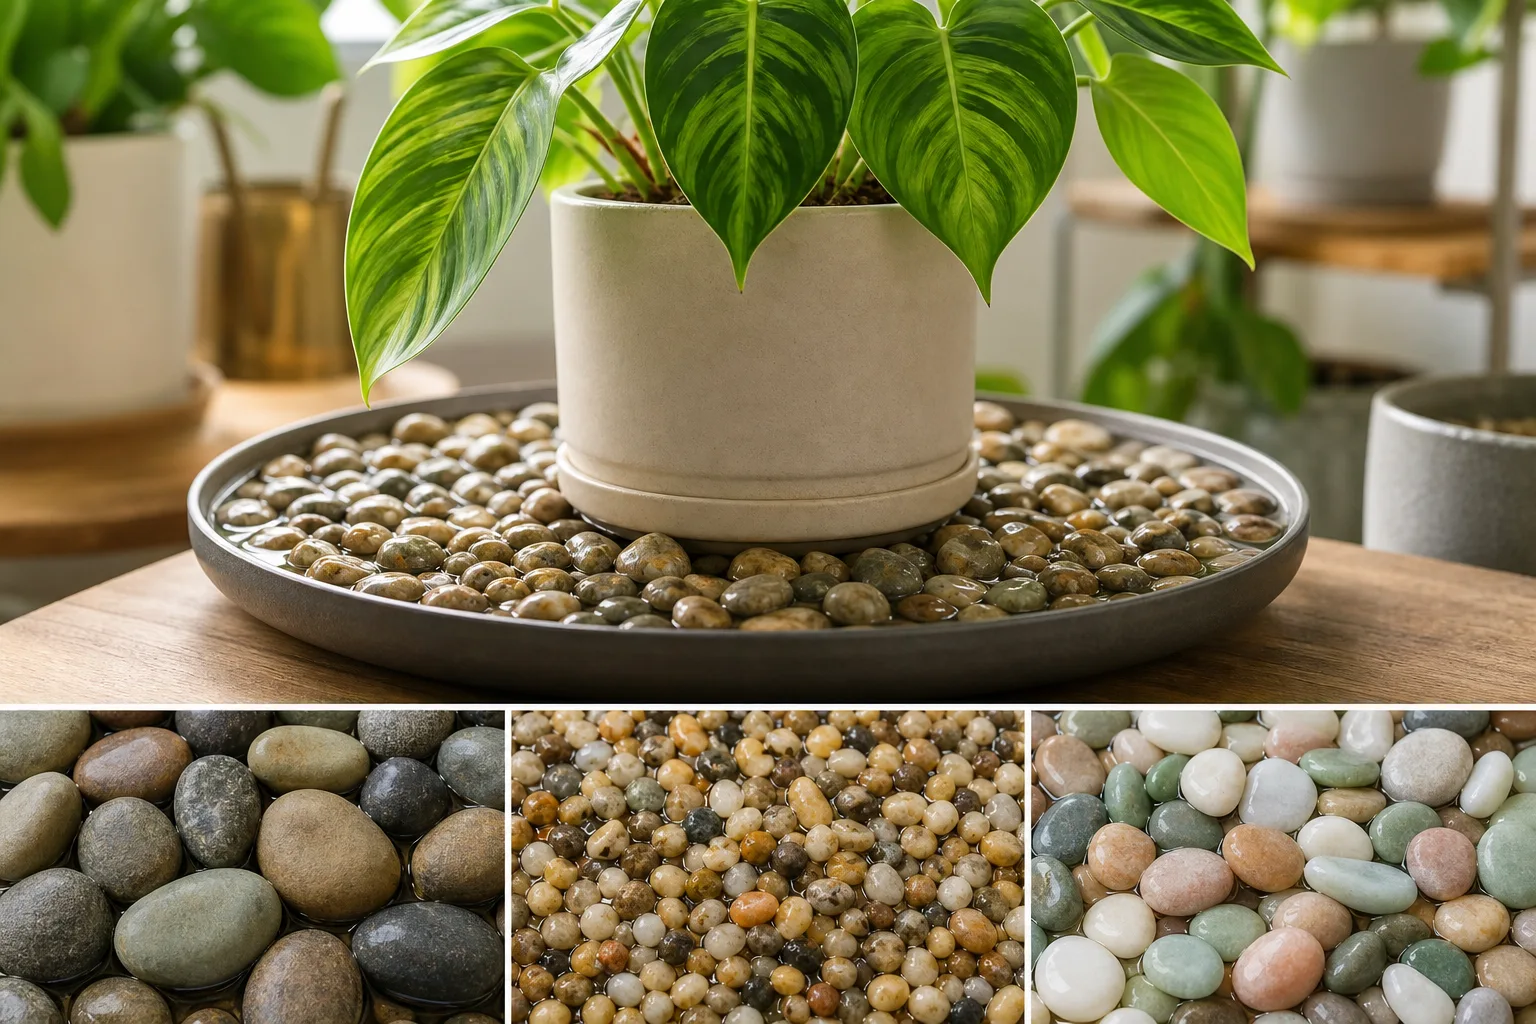
A DIY pebble tray is a shallow, waterproof tray filled with stones and water, with a plant pot supported above the reservoir. It is inexpensive, needs no electricity, and takes about ten minutes to assemble. Its usefulness, however, depends on one detail many quick tutorials blur: a tray can add moisture to the air close to a plant, but it is not a room humidifier.
This is the canonical LeafyPixels build guide. It covers materials, sizing, the safe water line, five numbered steps, a measured home example, maintenance, and the point at which you should choose a stronger humidity tool. Focused sibling guides cover the deeper evidence, styling, troubleshooting, and humidifier comparison without turning this page into 26 versions of the same setup.
What a DIY Pebble Tray Is-and Is Not
A pebble tray is an evaporation reservoir, not a self-watering device. Pebbles or gravel create a stable platform; water sits between them; and the pot rests above the waterline. As the exposed water evaporates, it can raise relative humidity in the immediate vicinity. Iowa State University Extension describes the same arrangement: shallow water, a support that holds the pot above it, and evaporation around the plant.
The tray is not meant to wick water into the potting mix. If drainage holes touch the reservoir, the lower mix can stay wet and roots may rot. The method is also not a credible way to change humidity across a large room. University of New Hampshire Extension calls the benefit small and says it is strongest with grouped plants in a room with low air circulation.
What a Pebble Tray Can Realistically Do
Use a tray when you need a modest, local assist for a small or medium plant and do not need precise whole-room control. University of Maryland Extension lists water-filled pebble trays as one way to raise humidity around indoor plants, alongside grouping plants and using an automatic humidifier. University of Maryland Extension also frames the effect as being in the area around the plants, not everywhere in the home.
Airflow, tray surface area, temperature, plant height, and the starting RH all affect the result. A broad tray under a compact plant in a calm corner has a better chance of creating a measurable microclimate than a narrow saucer under a tall floor plant beside a heating vent. Do not promise yourself a universal percentage increase; measure the exact setup you own.
A Measured LeafyPixels Example
During a LeafyPixels winter editorial check in a 14 × 12 ft forced-air heated room, a digital hygrometer at the pot lip above a grouped tray read 41% RH, while a second reading at the opposite wall was 36% RH. That was a small local difference, not proof that the tray humidified the room. The test is documented in the common pebble-tray mistakes guide, including its limits.
![]()
Treat those numbers as one observed setup, not a guaranteed result. To test your tray, record temperature and RH at leaf height for two or three days before installation, then repeat at the same times after installation without moving the plant or changing watering. UNH Extension recommends using a digital thermometer and hygrometer to judge humidity interventions rather than relying on how the air feels. University of New Hampshire Extension
Materials You Need
Gather a shallow watertight tray, clean pebbles or gravel, water, the potted plant, and optionally a digital hygrometer. Choose glass, glazed ceramic, sturdy plastic, or a sealed metal tray that will not leak onto furniture. The stones do not need a special mineral composition; they need to be clean, stable, and large enough that they cannot block or enter drainage holes.

Use a pot with drainage holes and a flat enough base to sit securely. Avoid very rounded stones if they make the pot rock. If the container is top-heavy, place a rigid saucer or an inverted waterproof plant riser on the pebble bed to distribute weight while preserving clearance above the reservoir.
| Item | Practical specification | Why it matters |
|---|---|---|
| Waterproof tray | About 1–3 in. (2.5–7.5 cm) deep | Holds a useful reservoir without hiding the waterline |
| Pebbles or gravel | Washed; enough for a stable 0.75–1.5 in. layer | Supports the pot above standing water |
| Water | Enough to remain below the pot base | Provides exposed surface for evaporation |
| Hygrometer | Digital; positioned near lower leaves | Shows whether the setup changes local RH |
| Furniture barrier | Waterproof mat if needed | Protects wood and porous surfaces from spills |
Tray Size Starting Points
There is no extension-backed formula that converts pot diameter into a guaranteed humidity gain. The table below is an editorial starting point designed to expose water beyond the pot while keeping the display stable. Wider is more useful than deeper once you have enough depth to keep the pot safely elevated.
| Pot diameter | Starting tray width | Typical use |
|---|---|---|
| 3–4 in. (7.5–10 cm) | 8–10 in. (20–25 cm) | Fittonia, small fern, young prayer plant |
| 5–6 in. (12.5–15 cm) | 10–12 in. (25–30 cm) | Compact calathea, small peace lily, orchid |
| 7–8 in. (17.5–20 cm) | 12–16 in. (30–40 cm) | Medium foliage plant or small grouped display |
| Larger than 8 in. | Consider a grouped tray or humidifier | Large canopies sit too far from a small saucer |
The tray should extend beyond the pot on every side and should not flex under its weight. If you cannot see any open water surface around the container, size up. If a larger tray becomes unstable or visually impractical, that is evidence that another humidity method may fit better.
Build Your DIY Pebble Tray in Five Steps
The build has five steps. Complete them in order and use the side-view clearance check before you walk away. The most important result is not a pretty stone layer; it is a pot that cannot contact the reservoir even after a refill.

1. Wash the Tray and Pebbles
Rinse the tray and stones to remove dust, soil, and loose mineral residue. Use a brush and ordinary dish soap on previously used materials, then rinse thoroughly. Do not use stones taken from a treated landscape bed unless you know they are free of herbicide, fertilizer, and other residues.
Dry the outside of the tray and place it on a waterproof surface. Check for hairline leaks before adding the plant, especially with old ceramic dishes or repurposed metal trays.
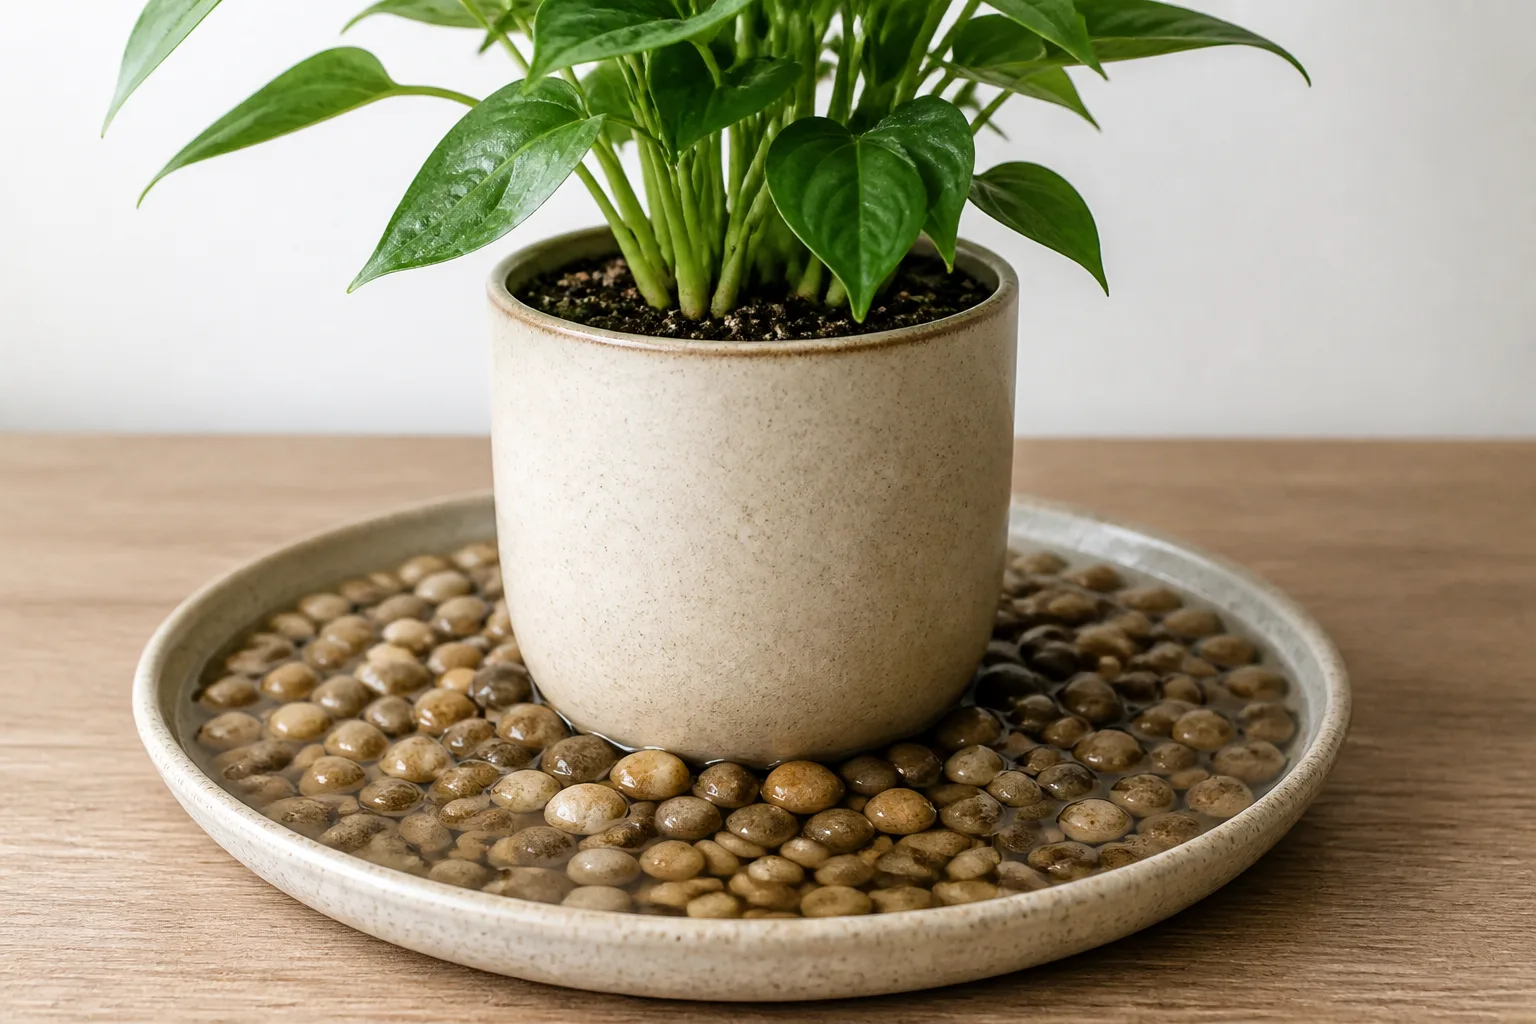
2. Add a Stable Pebble Layer
Spread the pebbles into a level layer roughly 0.75–1.5 inches (2–4 cm) deep. Press gently on the center and edges to find unstable pockets. Add or rearrange stones until the pot can sit flat without rocking.
Pebbles are supports, not decoration alone. Keep small loose stones away from broad drainage holes, and do not put pebbles inside the plant pot as a substitute for well-drained potting mix.
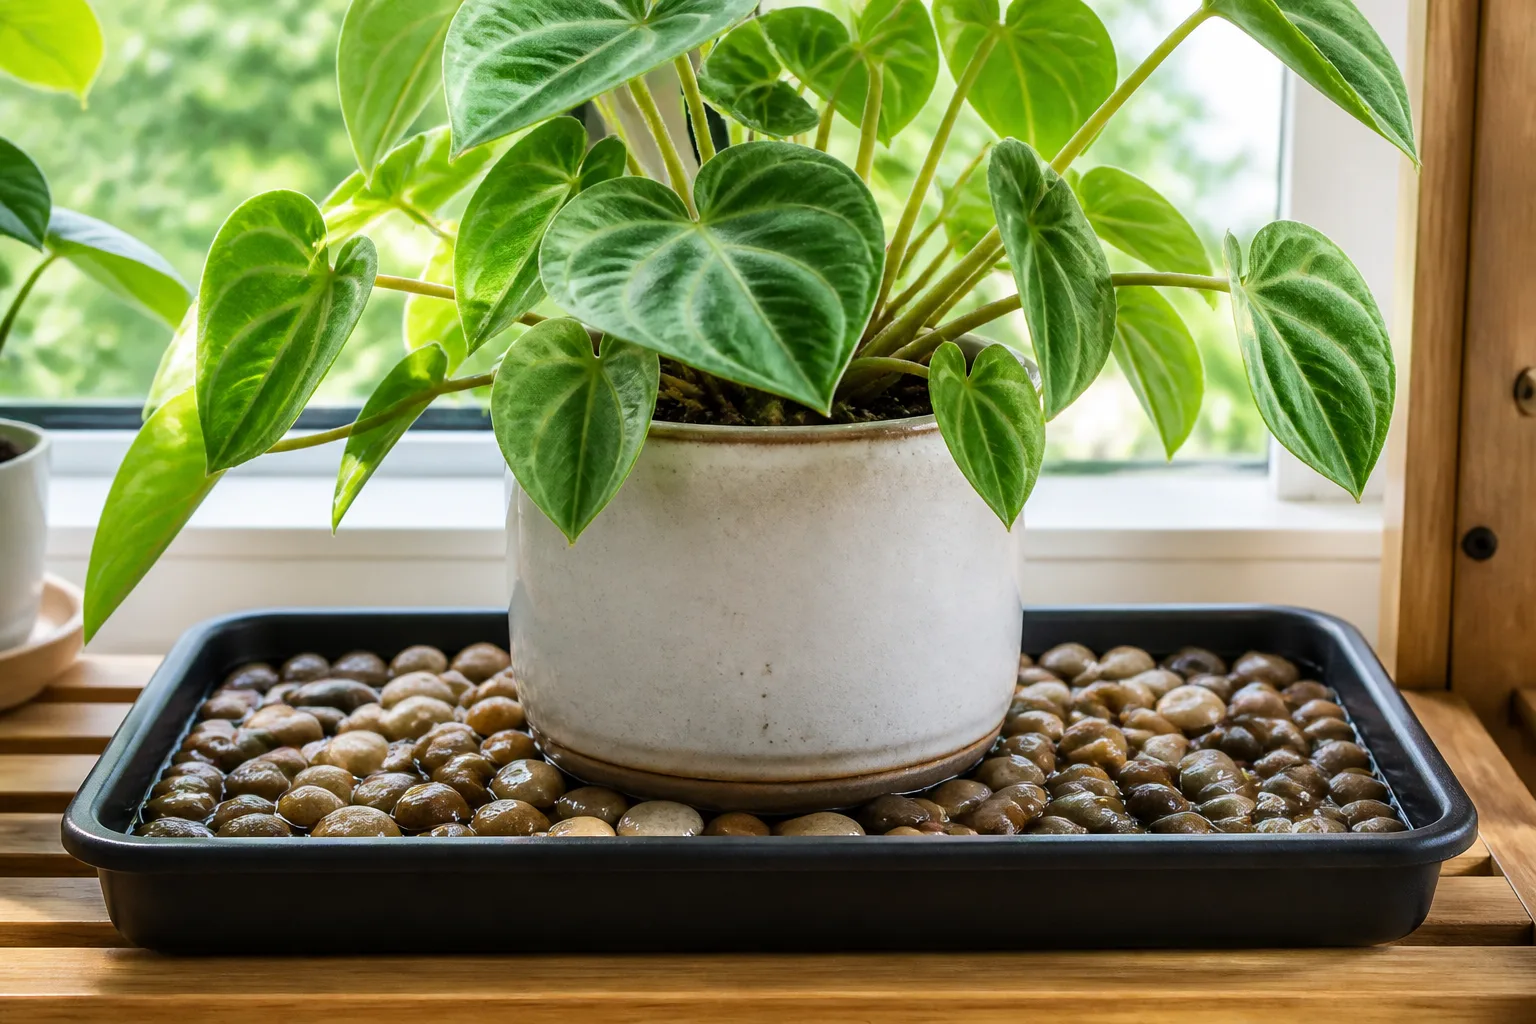
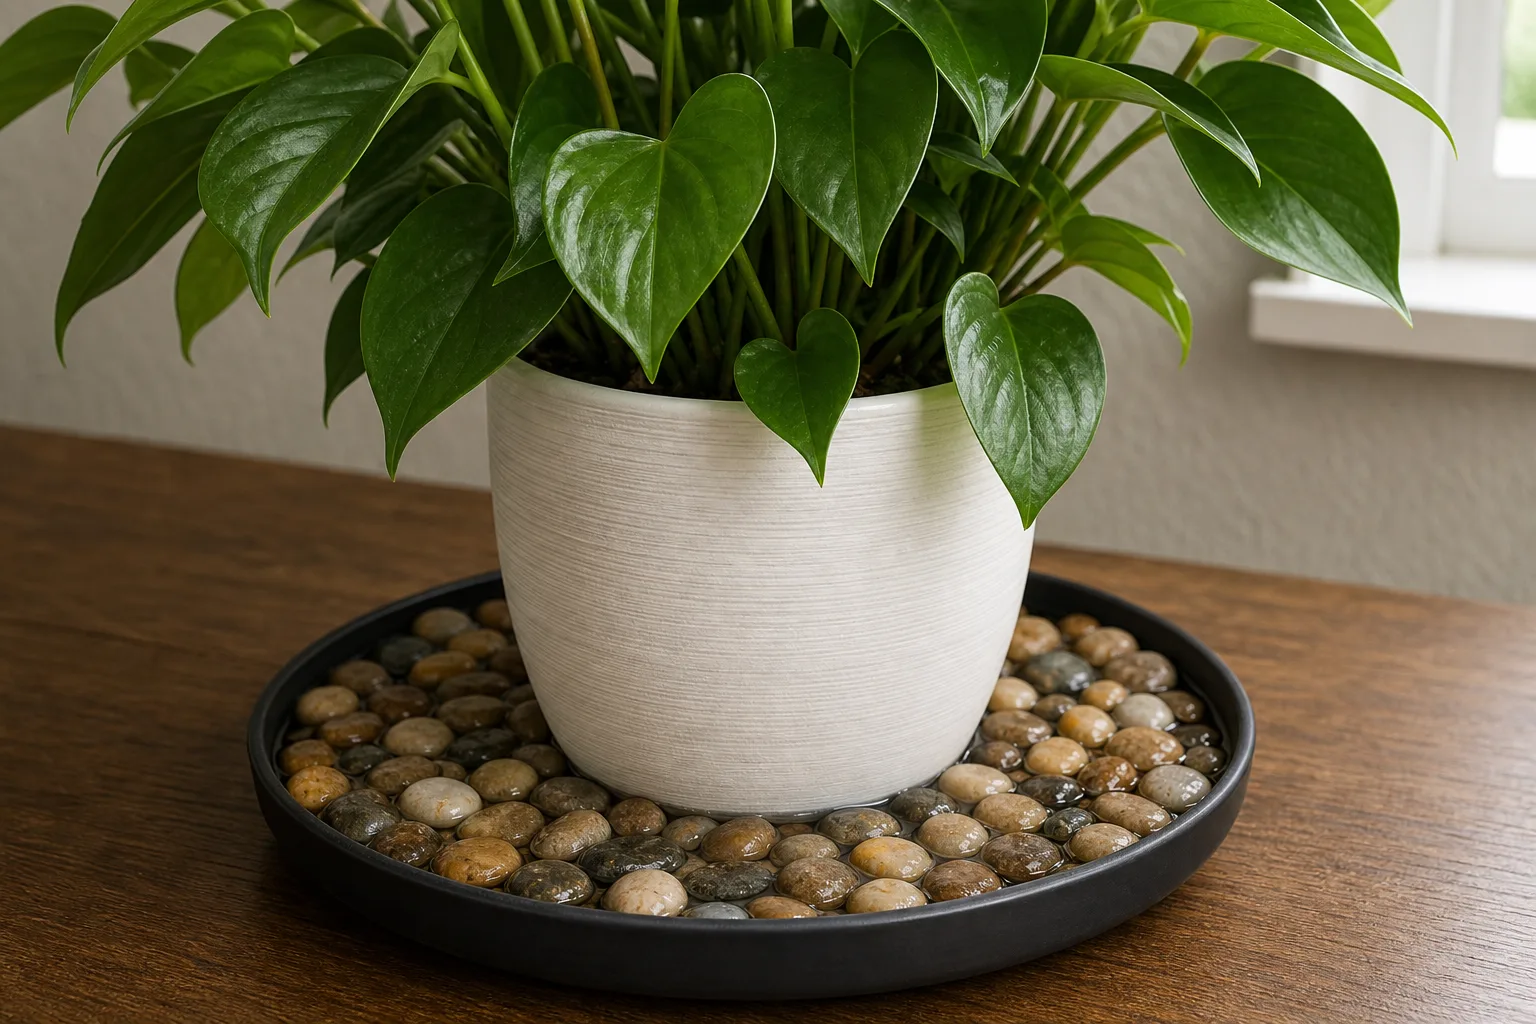
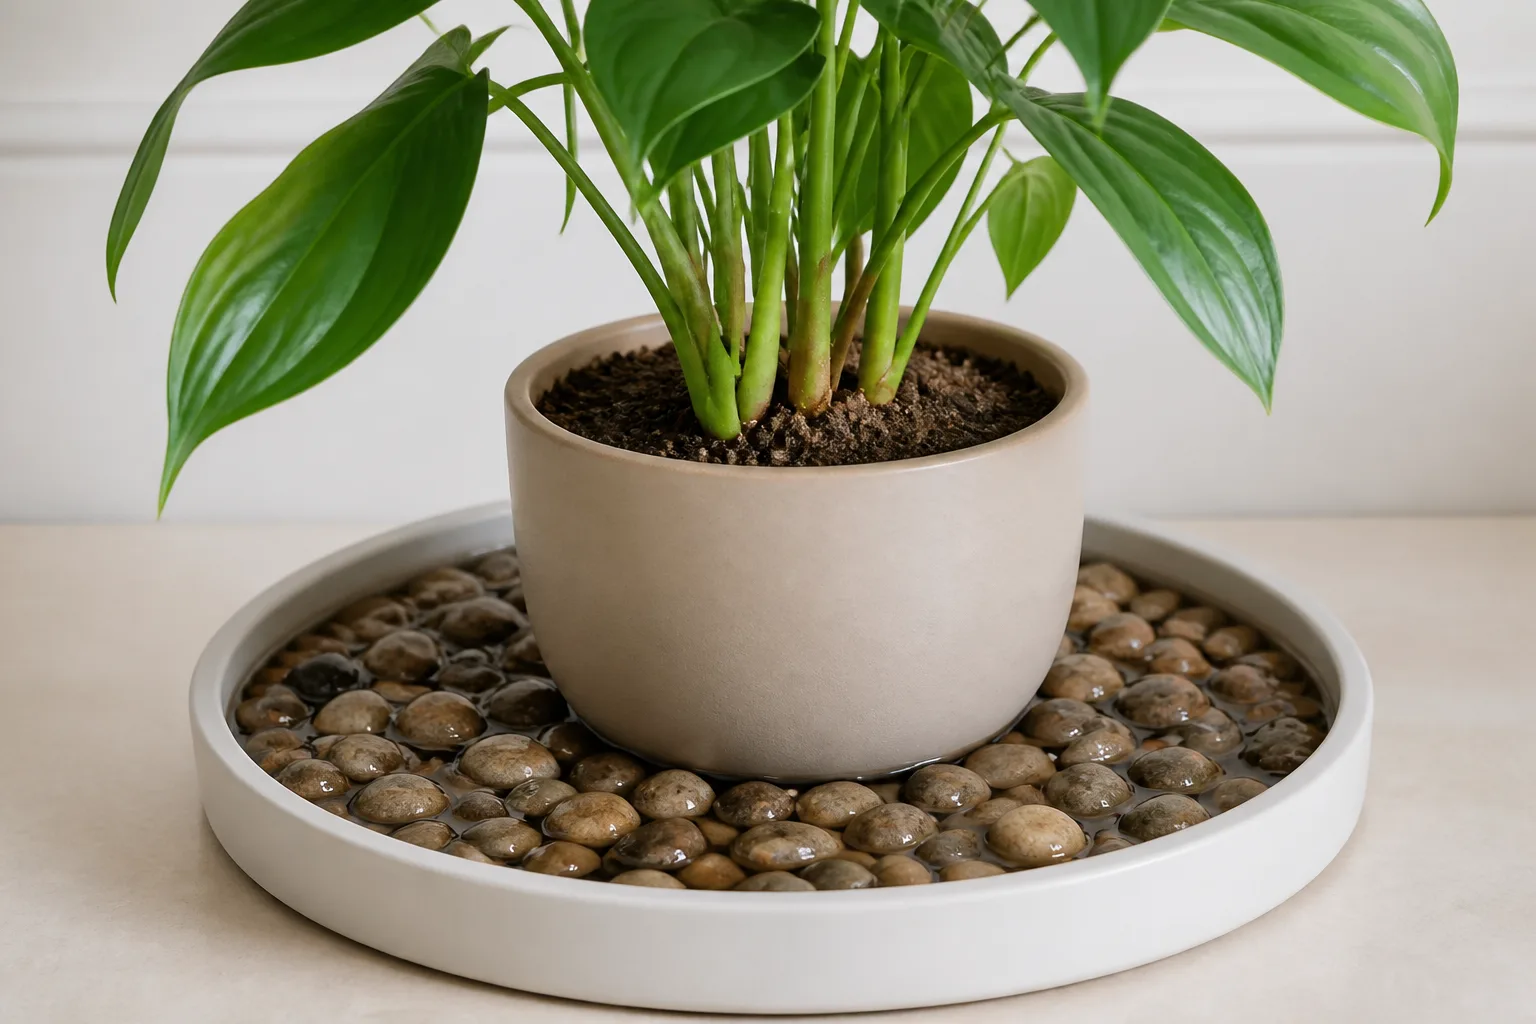
3. Set the Water Line Below the Pot
Pour water slowly between the stones until the level sits below the surface that will support the pot. Leave a visible dry gap between the water and the future pot base. Illinois Extension specifically warns that pots on water-filled pebble trays should not sit directly in water.
Use a side view rather than guessing from above. If the tray is opaque, insert a clean wooden skewer beside the stones, remove it, and use the wet mark to estimate the reservoir depth. Stop early; you can add more water after the pot is positioned.
4. Place the Pot and Check Clearance
Center the plant over the broadest part of the tray. Look from the side with a flashlight and confirm that the pot base and drainage holes remain above the water. Press lightly on the rim to confirm that the container cannot settle into a low pocket.
After watering the plant at a sink, let it drain before returning it to the tray. A pebble tray should not become a basin of fertilizer runoff. Iowa State advises never allowing houseplants to remain in collected water because roots held wet for long periods can rot. Iowa State University Extension
5. Position the Tray and Measure
Place the setup in suitable light, away from radiators, heating vents, air conditioners, and strong fans. Moving air disperses the small amount of added moisture quickly. UNH Extension recommends keeping humidity-sensitive plants away from dry heat sources and drafty locations. University of New Hampshire Extension
Set a hygrometer near the lower leaves rather than directly on the wet stones. Log RH and temperature at consistent times. If there is no repeatable change and the plant still needs higher humidity, do not deepen the water until it touches the pot; choose a broader tray, group compatible plants, use an enclosure for a small plant, or move to a humidifier.
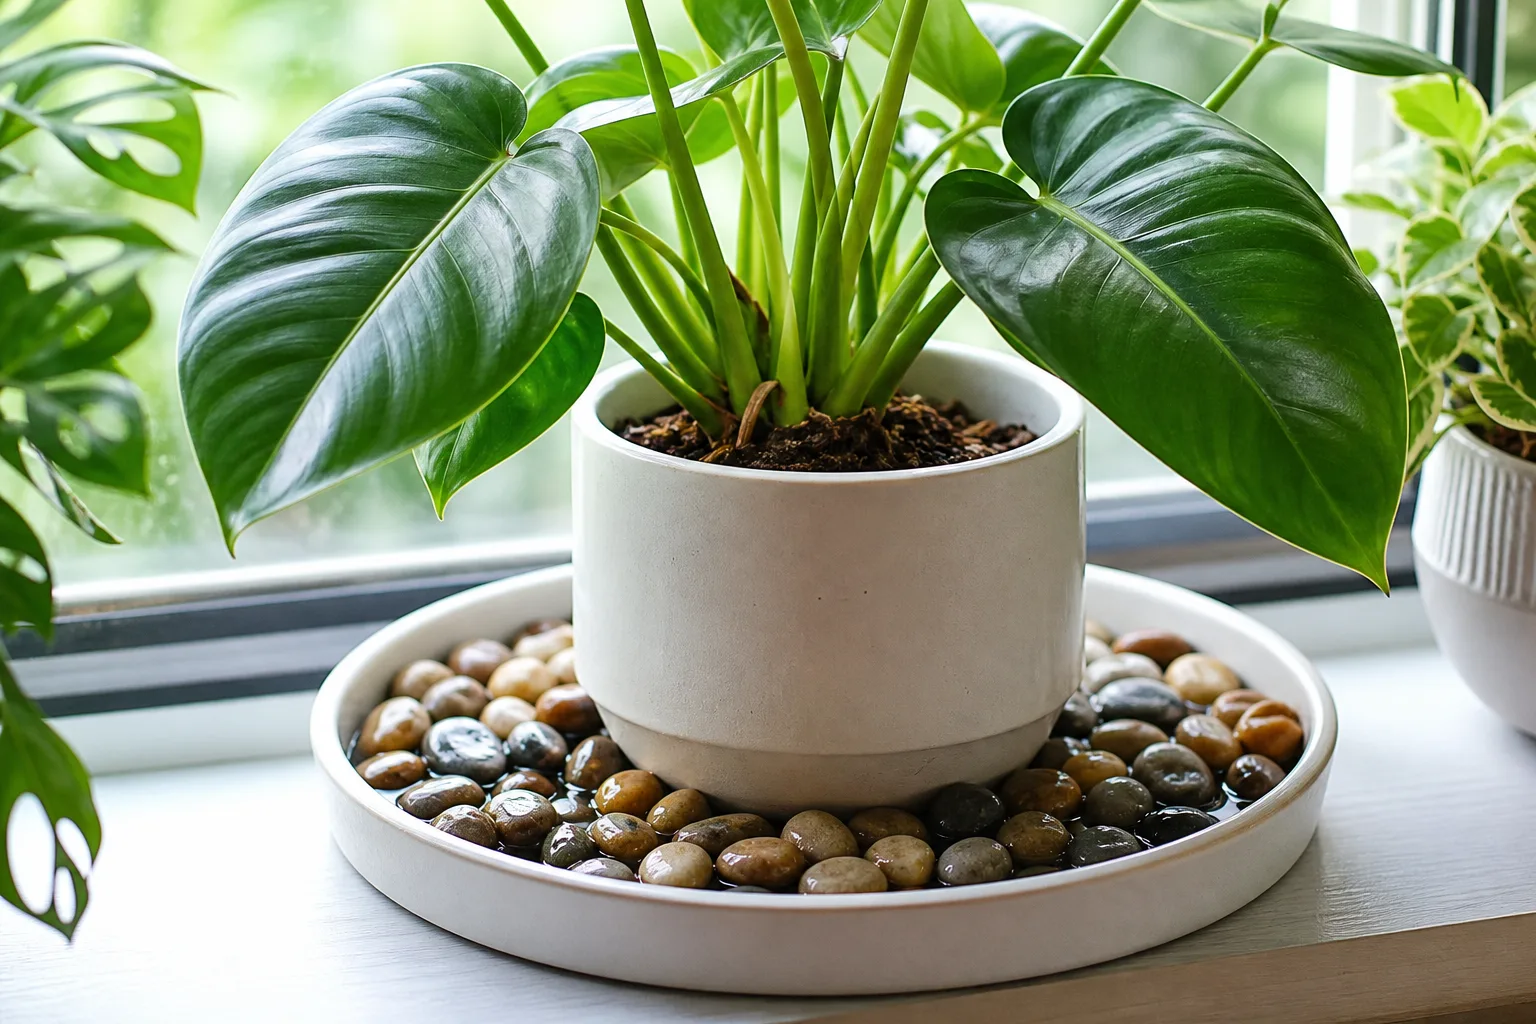
The Correct Water Line at a Glance
The safe arrangement is simple: tray at the bottom, water between the pebbles, pot above the water. The water may contact lower stones, but it must not reach the pot base or drainage holes. Recheck after every refill because shifting stones and an uneven surface can erase the original clearance.
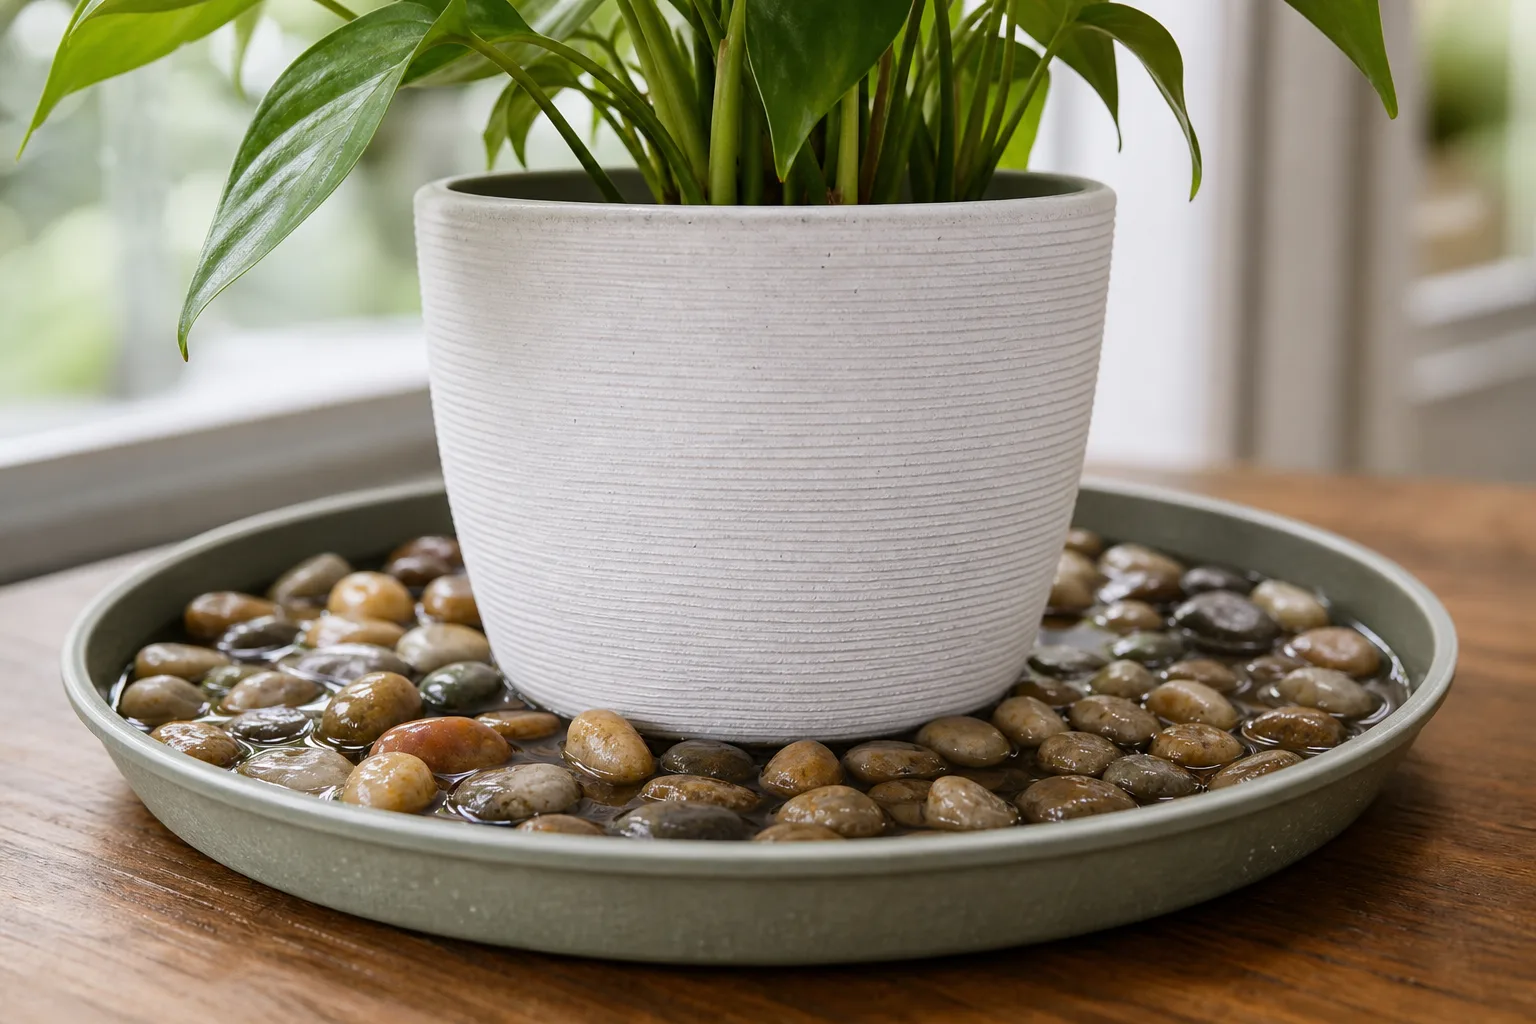
Wrong setup: water covers the pebble tops, the nursery pot is damp underneath, or the lower potting mix stays wet despite normal drying conditions. Correct setup: the pot feels dry on the outside, water remains visible below it, and the reservoir can evaporate without functioning as continuous bottom watering.
Best Candidates for a Pebble Tray
Small, low-growing, humidity-sensitive plants are the clearest candidates because their lower foliage stays close to the evaporation zone. Fittonia is a practical example: Missouri Botanical Garden recommends either a room humidifier or a wet pebble tray for this high-humidity plant. Missouri Botanical Garden
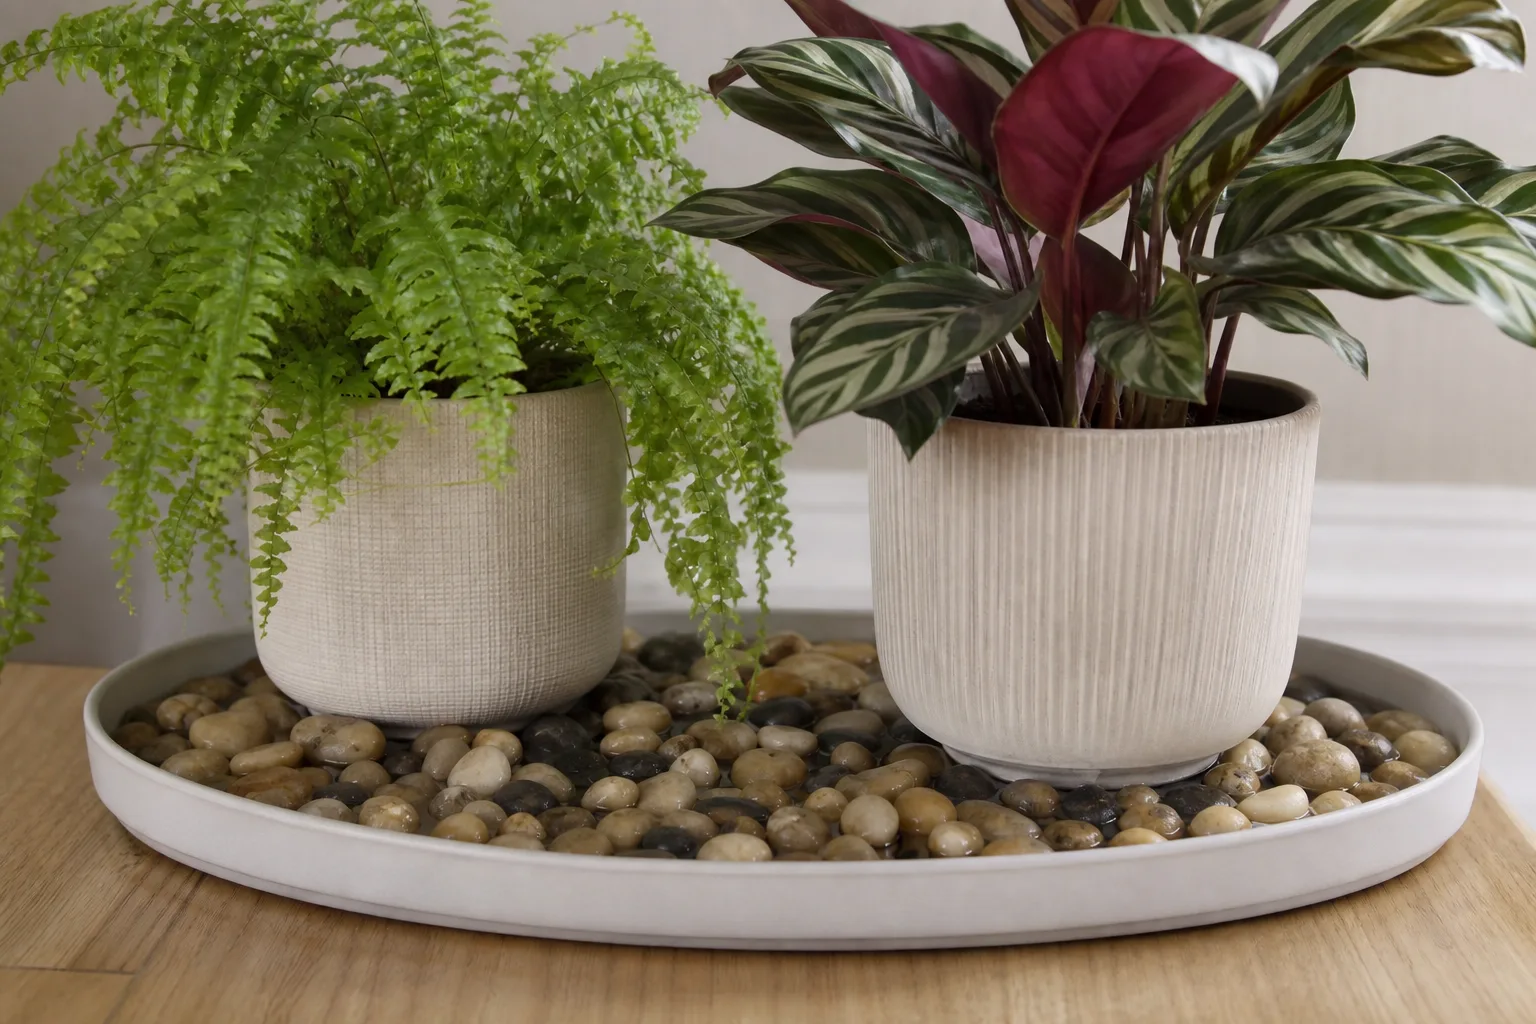
Some ferns, prayer-plant relatives, compact aroids, and orchids may also justify a tray when measured air is dry. Species needs vary. Iowa State reports an indoor ideal of roughly 40–70% RH for orchids, recommends a humidity gauge, and lists pebble trays among several options. Iowa State University Extension-Orchids The RHS gives 60% or higher as a target for bird’s nest fern, illustrating why a small tray may be supportive without being sufficient. Royal Horticultural Society
Use the plant’s own guide rather than the word “tropical” alone. A fittonia in a 4-inch pot is a more plausible tray candidate than a mature Monstera deliciosa whose leaves sit several feet above the reservoir.
Plants and Situations That Should Skip It
Most cacti and succulents are comfortable in the low humidity of ordinary homes and rarely need a tray. University of Maryland Extension identifies cacti and succulents as the broad exceptions to its advice that indoor plants benefit from higher humidity nearby. University of Maryland Extension Do not add humidity as a reflex when an arid-adapted plant is wrinkled; inspect watering, roots, light, and soil first.
Skip the tray when the pot is already slow to dry, drainage is poor, a cachepot collects water, or roots show signs of rot. Also skip it as the primary tool when a large room is chronically dry, several large plants need the same correction, or condensation and mold are already concerns. A tray cannot diagnose brown tips: Iowa State lists humidity, inconsistent watering, fertilizer salts, and water quality among several causes. Iowa State University Extension-Diagnosis
Pebble Tray vs. Humidifier, Grouping, and Misting
| Method | Best use | Control | Main limitation |
|---|---|---|---|
| Pebble tray | One small plant needing a modest local assist | Low | Small, variable effect near the reservoir |
| Plant grouping | Compatible plants in one calm, bright area | Low | Crowding can reduce inspection and airflow |
| Humidifier | Whole plant shelf or room with persistently low RH | High with a humidistat | Cleaning, electricity, and room moisture management |
| Terrarium or cloche | Small plants needing stable high humidity | Medium to high | Heat buildup and ventilation must be managed |
| Misting | Cleaning suitable foliage or temporary wetting | Very low | Humidity effect is brief and some foliage should stay dry |
Iowa State describes humidifiers as effective for raising room humidity and says misting does not raise RH for more than a few minutes. Iowa State University Extension UNH similarly says a portable humidifier near plants offers the most benefit when more consistent control is needed. University of New Hampshire Extension Choose based on measured gap and scale, not purchase price alone.
For a whole-room device, monitor the building as well as the plants. The U.S. Environmental Protection Agency recommends keeping indoor relative humidity below 60%, ideally 30–50% where possible, to reduce moisture and mold problems. U.S. Environmental Protection Agency
Cleaning, Refilling, and Seasonal Maintenance
Top up when the exposed reservoir becomes shallow, but repeat the side-view check each time. Refill frequency may change from daily to weekly depending on tray area, room temperature, airflow, and season. Heated winter air often speeds evaporation, so a calendar is less useful than looking at the actual waterline.
Empty and scrub the tray when you see algae, slime, debris, mineral crust, or smell stale water. A weekly visual check is sensible; the actual deep-clean interval depends on the water and room. Lift the plant first, discard the old water, brush the stones and tray, rinse well, rebuild, and verify clearance. Do not treat fertilizer runoff or dirty reservoir water as a permanent feature.
Refill Guide by Tray Size
A practical refill guide helps when the side view is hard to read - for example with opaque trays or dark stones. The amounts below are starting ranges for a typical round tray with a 1 to 2 inch pebble layer and a single houseplant pot centered on the stones. Always confirm with a side view; your pebbles may hold more or less water depending on size and shape.
|| Tray inner width | Pebble depth | First fill (starting pour) | Typical top-up when low | ||---|---|---|---| || 6 in (15 cm) | 1–1.5 in | ¼–½ cup (60–120 ml) | 2–4 tbsp | || 8 in (20 cm) | 1–2 in | ½–¾ cup (120–180 ml) | ¼ cup | || 10–12 in (25–30 cm) | 1–2 in | ¾–1 cup (180–240 ml) | ⅓–½ cup |
Pour to the low end of the range when pebbles are large and leave big gaps between stones. Use the high end for small gravel that holds more water in the voids. If the water reaches the pebble tops before you finish pouring, stop - the tray is already full. Better Homes & Gardens notes that refill frequency depends on tray size and how warm and dry the home is, which is why wider trays often need more frequent small top-ups rather than deeper flooding.
Signs You Overfilled (and How to Fix It)
You overfilled if water touches the pot base, wicks into the nursery saucer under the pot, or hides the dry pebble line entirely. Early signs include constantly damp soil at the bottom of the pot, fungus gnats, a sour tray smell, or visible algae on standing water.
Fix it fast:
- Lift the pot off the tray and set it on a dry surface or rack.
- Pour off excess water until the pebble tops are visibly dry and the remaining water sits only in lower gaps.
- Check the nursery saucer - empty any pooled water there too.
- Let the potting mix dry to your plant’s normal watering threshold before the next top watering; do not compensate by pouring from above while the bottom is still soggy.
- Re-seat the pot and pour only a small top-up, re-checking the side view.
If the mix has smelled sour or stayed wet for weeks, inspect roots when you next repot. The same warning that motivates the side-view check applies here - chronic bottom wetness is how healthy roots turn mushy. The Spruce is direct that drainage holes touching tray water can keep soil wet and lead to root rot, which is why the dry-pebble-top visual rule matters more than any specific refill number.
Budget Builds and Sourcing
A budget pebble tray is a targeted tool, not a universal accessory. Plan to spend $0 to about $20 for one small to medium tray. Prices vary by region; treat the ranges below as planning numbers, not quotes.
|| Build tier | What you use | Typical cost | Best for | ||---|---|---|---|---| || Scavenge | Existing plastic saucer plus washed garden gravel | $0 | Testing the method before spending | || Dollar store | Plastic saucer plus bag of decorative pebbles | $3–$8 | Fast first build, small pots | || Garden center or big-box | Glazed saucer or shallow tray plus river rock plus optional hygrometer | $10–$20 | Wider tray, prettier setup, measuring results |
A scavenged setup works when you already have a waterproof saucer under a nursery pot and can source clean stones. Wash both before use. A scavenged tray is the smartest way to answer “does this help my plant?” before buying decorative gravel. The dollar-store build is the sweet spot for most beginners: a 6 to 8 inch plastic plant saucer for $1 to $2 and a small bag of decorative pebbles or aquarium gravel for $2 to $5. Skip “humidity station” marketing - a plain saucer and medium gravel work because evaporation does not care about branding.
Scavenging Safety: Washing Outdoor Stones
Free gravel from a driveway or garden bed can work, but only after proper prep. Rinse stones under running water until the runoff runs clear, soak in plain water for 30 to 60 minutes, drain, and rinse again to reduce surface dust, salts, and debris. Skip stones from areas treated with herbicides, road salt, or unknown chemicals. Never use porous unglazed terracotta saucers as your only water barrier on wood furniture unless you add a waterproof liner - terracotta can wick moisture outward. University of Maryland Extension lists tray material as one of the practical setup choices that affect both plant health and furniture protection.
When to Skip the Tray and Use a Humidifier
Buy or borrow a humidifier when room humidity stays far below what your plants need, you are caring for several humidity-sensitive species, or a hygrometer shows the tray is not moving the needle. University of New Hampshire Extension is clear that humidifiers provide the most benefit when whole-room humidity is the problem, while pebble trays help a little in the immediate plant zone. The budget decision path is simple: try a $0 to $8 tray first if one plant needs a modest boost, then upgrade to a humidifier if dry air is severe or symptoms persist after fixing watering and light.
Cleaning Cadence and Common Failures
A clean pebble tray stays useful because it stays modest. Build a simple two-tier routine and the tray rarely becomes a maintenance problem.
Weekly reset (~2 minutes): Empty stale water, pick out fallen leaves and soil bits, quick-rinse the tray if film is forming, confirm the pot still sits above the waterline.
Monthly deep clean (~10–15 minutes): Remove the pot, dump pebbles into a colander, rinse and scrub stones and tray, reassemble with fresh water below the pebble tops.
Most algae, biofilm, mineral crust, and odor come from chronic moisture plus neglect. Algae likes wet surfaces and light. Mineral buildup shows up when water evaporates and leaves dissolved salts behind. Fungus gnats are primarily associated with moist organic potting media - not clean water over inert stones - so a dirty tray is one avoidable contributor rather than the root cause. Penn State Extension recommends allowing the top one to two inches of soil to dry between waterings to reduce fungus gnat egg-laying and larval survival. Address plant watering habits alongside tray hygiene.
Vinegar for Hard-Water Crust
Diluted white vinegar (about one part vinegar to three parts warm water) is useful when white crust does not scrub off with soap - typical in hard-water homes where calcium and magnesium carbonate accumulate as water evaporates. Soak heavily crusted pebbles for 20 to 30 minutes, then scrub and rinse thoroughly under running water for at least two to three minutes. University of Maryland Extension explains that hard water leaves crusty mineral deposits as dissolved salts concentrate during evaporation. Vinegar is acidic; you do not want concentrated residue sitting in a tray that holds water near plant roots. Skip vinegar on routine weekly cleans, and skip bleach unless a specific extension protocol for sterilizing empty pots calls for it.
Warning Signs Your Tray Needs Attention
Watch for these - not subtle clues:
- Green film on stones or water surface
- Sour or musty smell
- White chalky crust on pebbles or tray rim
- Tiny flying gnats when you water or disturb the tray
- Pot base sitting lower than you remember
- Cloudy water you keep topping off instead of replacing
Any of these means clean now, adjust the water level, and review whether hard water or over-refilling is accelerating the mess. Cornell Cooperative Extension and Master Gardeners of Northern Virginia both describe pebble trays as shallow water below stones, with the pot elevated - not sitting in standing water. Refill when water drops low rather than keeping the tray constantly full; constantly full trays stay dirtier and concentrate salts faster.
Styling After the Safe Build
A pebble tray that works for the plant can still look accidental. Once the water line and clearance are correct, styling is mostly about proportion, palette, and stone finish. Match the tray to the room’s material palette, not only the pot: warm wood and linen rooms suit terracotta and taupe stone; crisp minimal rooms suit ceramic and white filler. A wider tray improves both stability and the styled “frame” effect - choose something visibly wider than the pot on every side rather than something that barely clears the rim.
Pot-to-Tray Sizing at a Glance
|| Pot diameter | Recommended tray width | Stone size | Tray depth | Water below stones | ||---|---|---|---|---| || 4 in (10 cm) | 8–10 in (20–25 cm) | ½–¾ in (13–19 mm) pea gravel | 2 in (5 cm) | ~⅛ in (3 mm) below stone tops | || 6 in (15 cm) | 10–12 in (25–30 cm) | ½–1 in (13–25 mm) river pebbles | 2–2½ in (5–6 cm) | ~⅛ in below tops | || 8 in (20 cm) | 12–14 in (30–36 cm) | ¾–1¼ in (19–32 mm) river rock | 2½–3 in (6–8 cm) | ~¼ in (6 mm) below tops | || Grouped 4–5 in pots | 18–24 in (46–61 cm) long tray | ½–1 in mixed neutral pebbles | 2–3 in | Same rule: pot never in water |
Wider trays expose more surface area and evaporate faster in dry heat, so they may need more frequent small top-ups, not deeper flooding. Flora Grubb Gardens recommends wider trays because a larger surface creates more evaporation and a slightly larger moist-air pocket around grouped plants.
Mixed-Stone Advice Without Looking Cheap
Keep one dominant stone finish per tray. Two or three close tones look natural; high-contrast rainbow mixes read cluttered. Medium pebbles (½–1 inch / 13–25 mm) lift the pot, hide water marks, and look refined. Tiny grit looks messy; oversized cobbles waste tray depth and wobble small pots. Rinse bagged stone before use - dust clouds water and leaves white film on pale stones.
When a Pebble Tray Is Just Decor (Not a Humidity Tray)
A decor pebble tray sits on a coffee table or ottoman and corrals books, candles, vases, or remotes. Its job is visual order and tactile contrast, not humidity. A humidity pebble tray sits under a pot, holds pebbles and a shallow water layer, and is supposed to evaporate water around the leaves. Same words, different products. Mixing them up is common on plant-focused sites because both use “pebble tray” in the name.
For living-room styling - decor trays on coffee tables, anchor-and-height-and-softness formulas, and seasonal swaps - see a separate decor guide rather than this build page. The rule on this page stays the same: a tray meant to help the plant must hold water below the stones and keep the pot safely above the waterline. If the tray is dry and purely decorative, none of the water rules apply, but neither does the humidity claim.
Before / After: A Two-Week Observation Protocol
A before-and-after test only makes sense when the starting point is documented. Set the protocol up once, log it the same way each time, and you will know whether the tray is helping or just sitting under the pot.
Baseline Checklist Before You Start
- Measure RH with a hygrometer at plant height, not across the room.
- Photograph new growth and any damaged leaf edges.
- Check soil moisture and drainage - wilting from soggy roots mimics humidity stress.
- Note light and vents - afternoon sun and heat registers crisp leaves too.
- Inspect for pests - spider mites thrive in dry air and cause speckling separate from humidity.
- Record room temperature - warm air holds more moisture but also speeds transpiration loss from leaves.
Checkpoints to Compare
| Checkpoint | What to record |
|---|---|
| Day 0 (before tray) | RH at plant height and across the room, soil moisture, photo of new growth |
| Day 3 | RH at plant height; tray refill cadence (every 48 hours? every three days?) |
| Day 7 | New leaf quality vs day 0; any algae, mineral film, or smell in the tray |
| Day 14 | Hygrometer average at plant height; first visible difference on new growth |
In a typical winter editorial check in a forced-air heated room, a digital hygrometer 6 inches above a properly built tray reads a few percentage points higher than the opposite wall - a modest but repeatable microclimate shift consistent with extension guidance that pebble trays help around the plant, not throughout the space. The exact gap depends on tray size, water temperature, airflow, and how close the plant sits to the water surface.
What Counts as Improvement
Improvement shows up as healthier new tissue: leaves that open without immediate crisping, fewer fresh brown tips per week, and slightly less midday wilt when heat runs. Hygrometer readings at plant height may rise 2 to 6 percentage points - not a leap to 60% but enough for borderline plants. Iowa State Extension frames pebble trays as raising humidity in the vicinity of the plant, which aligns with small measured gains rather than room transformation.
No change is also informative. If new leaves still burn after two weeks while humidity at the plant barely moves, the tray is likely too small, the room is too dry and too mobile, or humidity was never the main problem. Old damage staying brown is not failure; only fresh damage continuing at the same rate signals the tray is not helping. Documenting “no change” with photos and hygrometer logs saves weeks of guessing.
Common Mistakes and Fast Fixes
| Mistake | Why it fails | Fast fix |
|---|---|---|
| Pot touches water | Keeps the lower mix wet and raises root-rot risk | Lower the water or raise the support layer |
| Tray barely matches the pot | Leaves little exposed evaporating surface | Use a broader, rigid tray |
| Tall plant over tiny saucer | Foliage is far from the local effect | Use a humidifier or group smaller plants |
| Setup beside a vent | Airflow strips away the microclimate | Move to stable, appropriate light |
| No hygrometer | Improvement becomes guesswork | Log RH and temperature at leaf height |
| Brown tips treated as proof | Brown tips have several possible causes | Review watering, salts, roots, light, and pests |
| Reservoir stays grimy | Creates odor and sanitation problems | Empty, scrub, rinse, and refill cleanly |
If the tray is correctly built but produces no repeatable RH change, that is not permission to submerge the pot. It is a result: the method is too small for the environment or humidity was not the limiting factor. Use the pebble tray vs. humidifier guide for the next decision and the brown-tip diagnosis guide when leaf damage is the original problem.
Related Guides
- Do pebble trays really increase humidity? examines the evidence and limits behind the local-humidity claim.
- Pebble tray vs. humidifier helps when a measured humidity gap needs a stronger tool.
- Pebble tray FAQs is the FAQ hub covering water level, refills, LECA, mold, fungus gnats, calatheas, ferns, and humidity limits.
- How to water indoor plants is the better starting point when the root zone stays wet or swings too dry.
Conclusion
A DIY pebble tray is worth building when a small humidity-sensitive plant needs a modest local assist and the pot can remain safely above the reservoir. Use a broad watertight tray, washed stable stones, a clearly visible dry gap below the pot, and a hygrometer near the lower leaves. Clean the setup when residue appears and treat its effect as something to measure, not assume.
Keep three rules: water below the pot, expectations limited to the microclimate, and results checked with a sensor. If the room remains too dry or the plant needs stable high humidity, a humidifier or enclosure is the more appropriate tool.