No Drainage Hole on Lavender: Causes, Checks & Fixes
Quick answer
Lavender in a pot without drainage holes traps water at the root zone and can cause crown rot within days in humid or rainy weather. First step: drill multiple bottom holes immediately, repot into holed terracotta with gritty mix, or keep the plant in a nursery pot lifted out of decorative cachepots after every watering.
No Drainage Hole on Lavender: Causes, Checks & Fixes
This guide covers no drainage hole on Lavender. See also the general No Drainage Hole guide, watering, and light pages for this plant.
No Drainage Hole on Lavender: Causes, Checks & Fixes
Quick answer
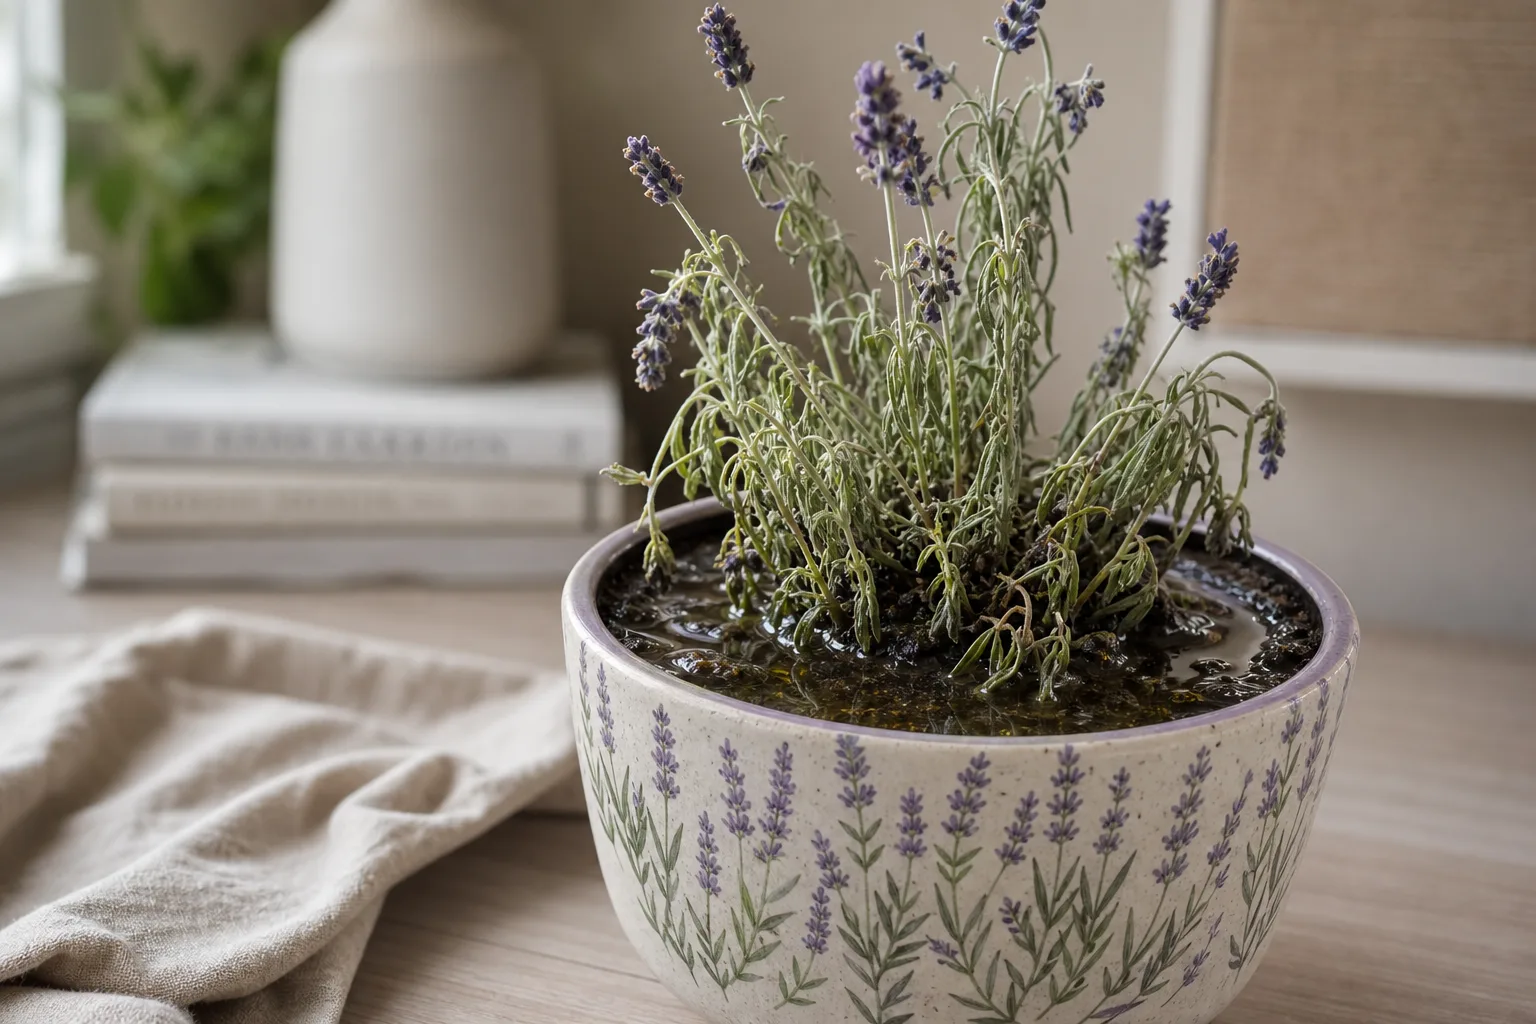
English lavender (Lavandula angustifolia) in a pot with no drainage hole traps water at the root zone-fatal for a Mediterranean shrub that needs dry to medium, well-drained soil in full sun. Decorative cachepots, sealed ceramics, and foil-wrapped gift planters cause crown rot in humid or rainy weather faster than most growers expect because lavender’s woody crown sits at the soil line where stagnant water collects first.
First step: drill holes or repot into holed terracotta with gritty mix-never leave lavender sitting in standing bottom water. For mix recipes and pH targets, see the lavender soil guide. For full repot procedure and crown-depth rules, see lavender repotting.
This page covers sealed-bottom and cachepot failure only. If your pot has holes but symptoms still match, compare with poor potting setup, compacted soil, or root rot before drilling again.
Why missing holes kill lavender
Lavender roots require oxygen between drinks. In nature they grow in lean, rocky soils that drain within minutes of rain. A sealed container eliminates the exit path-every watering becomes partial waterlogging at the bottom of the root ball, and the center stays saturated long after the surface looks acceptable.
Dampness more than cold is responsible for killing lavender, and Illinois Extension notes that lavender is highly susceptible to root rot in heavy, poorly drained soils. A pot with no hole guarantees that dampness in containers, especially through wet winters or humid summers when evaporation slows.
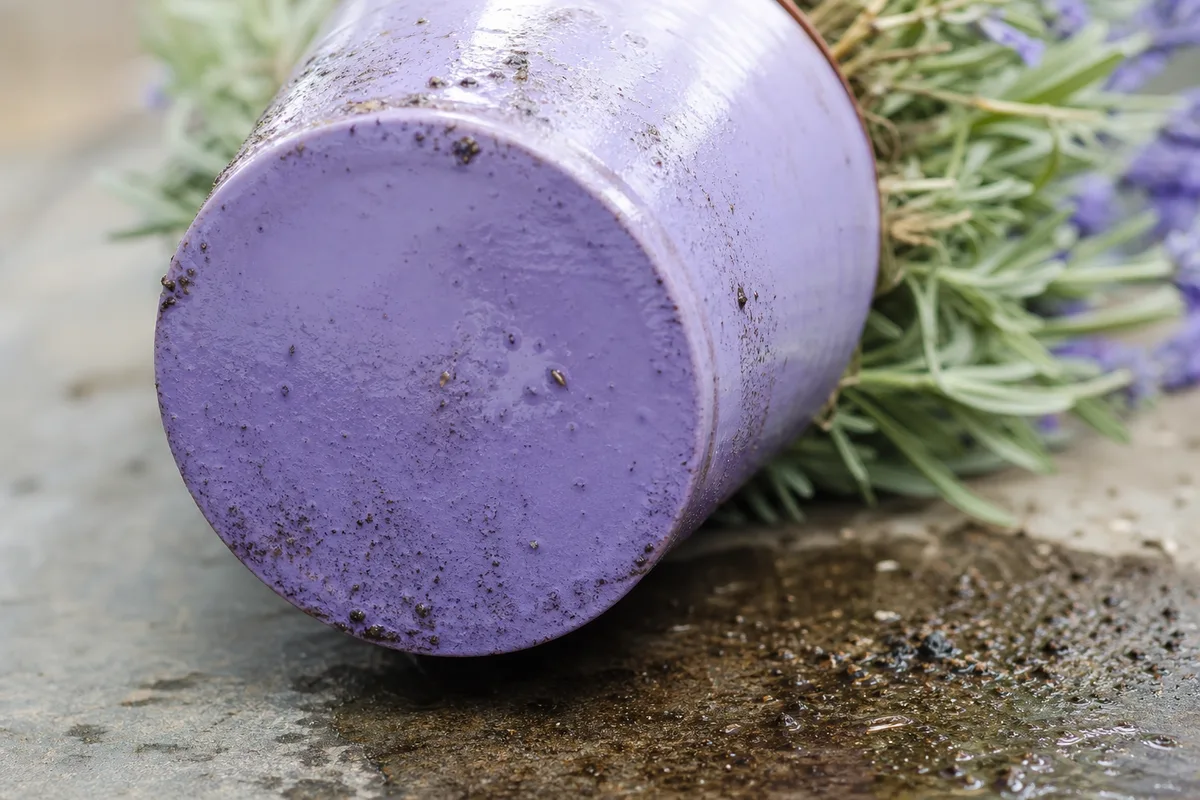
Lavender’s woody crown makes sealed-pot failure especially dangerous. Unlike soft-stemmed herbs whose bases stay above soggy mix, lavender’s lignified stem tissue sits right at the soil line-the first place water pools when drainage is blocked. Crown tissue can rot within days in a sealed pot during rainy weather, while the upper foliage may still look green enough to delay action.
Cachepots used for aesthetics often hide the failure mode. An inner nursery pot inside a sealed outer planter works only if you lift the inner pot to water, let it drain completely, and empty the outer shell before returning it. Illinois Extension warns that plants in a pot liner must never stand in water unless they are aquatic-remove the inner pot and drain accumulated water from the outer container every time.
Terracotta vs. plastic changes drying speed but not the sealed-pot rule. Unglazed clay wicks moisture through porous walls and can mask early trouble in a holed pot, but a sealed terracotta planter still traps water at the base. Plastic sealed pots usually fail faster because walls do not breathe. Either material without exit holes is an emergency for lavender.
What no-drainage problems look like on lavender
Without exit holes, damage follows a predictable wet-rot pattern on lavender:
No Drainage Hole symptoms on Lavender - compare with healthy tissue on the same plant.
- Mix stays wet at 7 cm (about 3 inches) depth for many days after one watering
- Pot feels heavy continuously; sour or musty smell when lifted
- Grey wilting stems and dull silver foliage while soil remains damp-the wilting paradox of failed roots
- Soft crown at the soil line on advanced cases; tissue dents when pinched
- Decorative outer pot holds a visible water layer when the inner pot is removed
- White mold or algae on the soil surface from chronic moisture
- Fungus gnats hovering near the pot-larvae thrive in constantly moist peat
Firm stems with completely dry gritty mix in a holed terracotta pot point away from drainage failure. Crispy needle tips alone with light pot weight suggest drought or heat stress, not sealed-pot rot-see underwatering if that pattern fits.
How to confirm the cause
Inspect in this order:
- Bottom inspection - Are there open holes? Are they blocked by roots, saucer mat, or decorative feet pressed flush to the tray?
- Cachepot water - After watering, is standing water visible in the outer decorative shell when you lift the inner pot?
- Gravel layer myth - Is the plant in a sealed pot with only pebbles at the base? Stones do not substitute for holes.
- Moisture probe - Does mix stay wet at 7 cm depth for many days after your normal watering rhythm?
- Pot weight and smell - Heavy and sour after a modest drink?
- Crown firmness - Soft or grey at soil line while upper stems still look acceptable?
- Unpot if unsure - Mushy brown roots confirm rot from trapped water regardless of watering discipline.
If holes exist but saucer water is never emptied, the functional problem matches no drainage-roots sit in stagnant liquid. Pour away water that drains into the saucer or outer pot so the plant does not sit in it for long, per lavender watering dry-down practice.
No-hole only vs. sibling problems
| Pattern | No drainage hole | Poor potting setup | Compacted soil | Dry hydrophobic soil | Root-bound | Root rot (advanced) |
|---|---|---|---|---|---|---|
| Pot bottom | Zero holes or blocked exit | May have holes | Holes present | Holes present | Holes present | Any |
| Water behavior | Pools at base; never fully drains | Slow drain; oversized wet pot | Water sits on surface; exits slowly | Runs down walls; core stays dry | Drains fast; roots circling | Chronic wet; sour smell |
| Crown | Softens fast in sealed pot | Often buried too deep | Firm unless secondary rot | Firm if caught early | Firm; stalled growth | Soft, grey, collapsing |
| First fix | Drill holes or repot with holes | Correct mix, size, crown depth | Refresh or repot gritty mix | Bottom-soak once to re-wet | Repot one size up | Unpot, trim rot, gritty repot |
| Page link | This page | Poor potting setup | Compacted soil | Dry hydrophobic soil | Root-bound | Root rot |
Use this table before repotting unnecessarily. Simple overwatering in a holed terracotta pot with correct mix may fix with schedule change only-sealed containers never do.
First fix for lavender
Repot immediately into terracotta with multiple drain holes and fresh gritty mix, OR drill four to six holes in the existing pot if material allows-elevate on feet so holes never seal to a saucer.
If using a decorative pot, keep lavender in a holed nursery pot; lift out when watering; never let the cachepot collect runoff. Illinois Extension drainage guidance recommends a pot liner inside decorative containers, piercing foil wraps, or drilling the decorative pot before planting.
Drill holes vs. repot to holed terracotta
Drilling works on unglazed terracotta, thin glazed ceramic, and rigid plastic. Use a masonry or tile bit for glazed surfaces, drill from the inside outward with light pressure, and aim for holes roughly 1 cm across spaced around the base. Place the pot on pot feet or a grid saucer so holes stay open. Thick vintage ceramic, concrete, or metal planters may crack-repot into pre-holed terracotta instead of risking the container and your drill.
Repotting is the safer path when stems are already soft at the base, soil smells sour, or the sealed pot is not drillable. Move to holed terracotta sized to the root mass-only one pot size larger than the current root ball, per lavender repotting guidance. Mature English lavender usually finishes in a 12- to 16-inch container, while dwarf cultivars may stay smaller in bright conditions. Use roughly one part compost to three parts coarse grit, perlite, or pumice; full recipes and pH 6.5–8.0 targets live in the lavender soil guide.
Do not water for about a week after rot rescue repot. Make drainage correction before fertilizer, pesticide, or upsizing the pot.
Step-by-step recovery
After drainage is restored-or during emergency repot from a sealed pot:
- Unpot gently - Slide lavender out; rinse roots lightly to see tissue color. Do not aggressively score the woody crown-trim only visibly mushy roots with sterile scissors.
- Trim rot - Remove black, slimy root tissue; air-dry cut surfaces briefly. Discard all old wet mix; do not reuse saturated peat.
- Transfer to holed terracotta - Sized to root mass, not oversized. Crown sits at the same depth as before-never buried deeper.
- Fresh gritty mix - Crown above soil line; no gravel layer at the bottom of a sealed pot.
- Water once - Soak until water runs from holes; drain completely; empty saucer within 30 minutes.
- Full sun and dry-down - Water only when mix is dry at 7 cm depth, matching lavender watering rhythm.
- Discard sealed-pot use - Or switch permanently to lifted nursery-pot protocol with dry outer shell.
If advanced crown rot leaves little healthy root, take cuttings from firm upper stems while repotting-lavender roots slowly and salvage may depend on vegetative backup.
Recovery timeline
Healthy lavender moved from sealed to holed pots before rot often needs no root surgery-stop pooling water and wait for normal dry-down. Early rescue with firm crown and minor root trim may show new silver shoots in three to five weeks in warm, bright conditions.
Advanced crown rot in a long-term sealed pot is often fatal at the base even when upper stems look salvageable. Old grey foliage will not revert; new firm shoots from nodes mark success. If decline continues despite holed terracotta and dry-down, escalate to root rot workflow.
Causes to rule out
Overwatering in a holed pot mimics sealed-pot rot but may fix with schedule change only if mix and holes are adequate. Probe at 7 cm-if dry-down works between drinks and water exits freely, drainage is not the primary issue.
Compacted or peat-heavy mix in a holed pot still rots roots, but restoring exit holes remains step one. Chronic slow drain with holes present points to compacted soil or poor potting setup rather than zero holes.
Dry hydrophobic soil gives light pots, water channeling down pot walls, and dry core despite surface moisture-opposite of sealed-pot heaviness. See dry hydrophobic soil for bottom-soak rescue.
Underwatering gives light pots, dusty dry mix throughout, and limp but firm stems with crisp needle edges-not sour soil or chronic heaviness.
Root-bound plants in holed pots drain quickly but stall growth with circling roots. Pot weight stays moderate; crown stays firm unless a secondary watering mistake followed binding.
What not to do
Do not add a gravel layer at the bottom of a sealed pot “for drainage.” Illinois Extension calls this a myth: water perches in the soil above the gravel until pore space fills, then excess drains below-stones at the base do little to keep lavender roots out of saturated mix. A sealed pot is trapped regardless of pebbles.
Do not leave lavender in cachepot water for aesthetics. Do not assume lavender toughness survives standing water-lavender will not thrive in wet or waterlogged soils even when labeled drought-tolerant.
Do not water on a calendar without checking dry-down after fixing holes. Do not fertilize a stressed plant in wet mix. Do not repot into a larger sealed decorative pot. Do not rely on fungicide without fixing drainage and removing mushy tissue.
How to prevent drainage failure next time
Only holed terracotta or drilled containers for lavender. Pair holes with gritty, fast-draining alkaline mix and run the instant runoff test after every repot: water should move through the column in seconds, not pool on the surface.
Cachepots are decorative only-inner nursery pot lifts out for every watering; outer shell stays dry. When buying decorative pots, drill before planting or keep the plant in a removable inner pot. Confirm holes stay open as roots grow-matting roots can block drainage over years.
For balcony and patio culture, treat rainy season and wet winter in outdoor sealed-looking planters as preemptive repot weather-move lavender to holed terracotta before weeks of cloud cover reduce evaporation. English lavender (L. angustifolia) is more cold-hardy than Spanish types but still dies in cold, wet, sealed containers.
Lavender care cross-check
Drainage holes are non-negotiable for container lavender-gritty mix cannot compensate for a sealed bottom. Baseline culture for light, water, and species notes lives on the lavender overview. If symptoms shift toward chronic wet culture without a sealed pot, review overwatering before changing containers again.
When to worry
Any lavender in a sealed pot through rainy season or humid summer is emergency repot priority. Escalate immediately if:
- Crown goes soft or grey at the soil line
- Soil smells sour while the pot is heavy
- Stems collapse despite surface appearing merely damp
- Mushy roots exceed one-third of the root mass on inspection
- Decline continues within seven to ten days after adding holes without emptying saucers
Early conversion to holed pots prevents most losses; delayed action is how otherwise hardy lavender dies in pretty planters.
Related lavender problems
- Root rot - when mushy roots and sour smell confirm advanced failure
- Poor potting setup - wrong mix, oversized pot, or buried crown with holes present
- Compacted soil - slow drain despite open holes
- Dry hydrophobic soil - water runs off while core stays dry
- Root-bound - circling roots in an otherwise draining pot
- Lavender soil - mix ratios, pH, and drainage tests
- Lavender repotting - step-by-step procedure and crown-depth rules
Conclusion
Lavender in a pot without drainage fails because Mediterranean roots need oxygen between waterings, not perpetual moisture at the bottom of the container. Confirm sealed pots, pooled cache water, or blocked holes; fix by drilling, repotting with holes, and emptying saucers; prevent with nursery liners or holed terracotta only. Judge success by firm crown, no sour smell, and new silver shoots-not by keeping a decorative pot that traps water.
When to use this page vs other Lavender guides
- Lavender watering guide - Use for routine moisture checks before assuming no drainage hole is the main issue.
- Lavender problems hub - Browse all 51 common issues on this species.