Lavender Propagation: Softwood Cuttings and Seed Guide
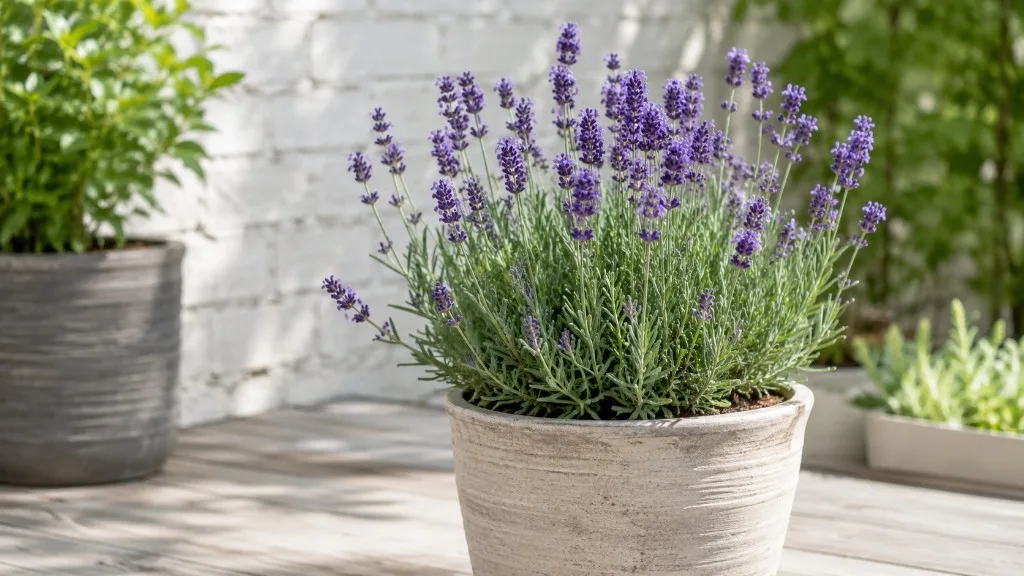
Lavender Propagation: Softwood Cuttings and Seed Guide
Lavender Propagation: Softwood Cuttings and Seed Guide
Why Lavender Propagation Favors Cuttings Over Seed
Lavender propagation is most reliable when you start with softwood cuttings taken from healthy, actively growing stems. Lavender is a woody Mediterranean shrub in the Lamiaceae family - the same group as rosemary, sage, and thyme - and it evolved for sun, sharp drainage, and seasonal growth flushes rather than constant moisture. That biology makes stem cuttings a natural fit: you are asking a piece of green growth to reroot while it still has the cellular flexibility to form new tissue. Seeds work, but they are slower, more variable, and often disappointing if you expect a named cultivar like ‘Hidcote’ or ‘Munstead’ to reproduce exactly. The Royal Horticultural Society notes that lavender is easy to propagate from cuttings and that plants grown this way will be identical to the parent, while seeds from cultivars may produce offspring that differ from the source plant. (RHS)
For most home gardeners the practical goal is simple: more of the lavender you already like, rooted in one growing season, without gambling on germination rates or genetic drift. Softwood cuttings taken in early to midsummer typically root in three to six weeks when light, warmth, and moisture are balanced. Seed propagation belongs in the toolkit when you want large quantities cheaply, enjoy the full lifecycle, or are working with seed strains bred for reliability - but it is not the fastest path to a flowering hedge identical to a neighbor’s plant. Understanding that distinction upfront saves months of frustration and empty pots.
Cuttings also let you bypass some of lavender’s trickiest early-life vulnerabilities. Young lavender hates cold, wet soil - the RHS explicitly warns against planting in winter when immature plants rot easily in damp conditions. (RHS) A rooted cutting you harden off in late spring or early summer enters the garden at the season lavender prefers. Seedlings, by contrast, may spend a full year in protected conditions before they are sturdy enough for the same transition. Neither method is effortless, but cuttings align better with how lavender actually grows.
What Softwood Cuttings Produce That Seeds Cannot
A softwood cutting is a clone. Every cell carries the same genetics as the parent Lavandula angustifolia plant or hybrid such as Lavandula × intermedia. Flower color, fragrance intensity, mature height, and cold hardiness - within the limits of environment - will match what you started with. That matters because lavender commerce is cultivar-driven. Two pots labeled “lavender” at a garden center can be different species or selections with different winter tolerance and scent profiles. When you propagate from a plant you have already observed for a season, you remove the label lottery.
Seeds introduce variability by design. Sexual reproduction shuffles traits. Even with species L. angustifolia, seed-grown plants can differ in compactness and bloom timing. With named cultivars, divergence is expected. The RHS states plainly that seeds from cultivars will produce plants that may vary from the parent. If your priority is a uniform row along a path or a container collection with matched habit, cuttings are the correct tool. Seeds shine when you accept - or welcome - diversity, or when you are growing from reputable seed lines marketed for seed propagation rather than cloning.
Softwood material roots faster than older wood because the stem is still metabolically active. The outer tissue is flexible, nodes are willing to callus, and the cutting has not yet lignified into the stiff, brown base that older lavender shrubs develop. That is why the same shrub can yield excellent softwood in June and stubborn hardwood in November. You are not failing as a propagator when winter cuttings stall; you are working with different tissue chemistry.
Softwood, Semi-Ripe, and Hardwood: Knowing Your Cutting Types
Lavender cuttings fall into three categories defined by stem maturity, not by calendar alone. Softwood comes from the current season’s fresh green shoots - flexible, easily bent, often slightly aromatic when crushed. Semi-ripe (semi-hardwood) is later-summer growth that has begun to firm at the base while the tip may still be somewhat pliable. Hardwood is mature wood taken after flowering, typically in late autumn, from newer flushes rather than the oldest bare stems when possible.
The RHS recommends softwood or semi-ripe cuttings from young plants in early to midsummer, and hardwood cuttings after flowering in late autumn, preferably from relatively new growth. (RHS) Illinois Extension notes that lavender is best started from cuttings, while seed is slow to germinate and many varieties do not come true from seed. Semi-ripe cuttings are the backup if you missed the spring flush but your plant is still growing. Hardwood is a advanced-season project with lower percentages and longer waits; worth knowing, but not where you should start if you want predictable results.
Visually, test a shoot with a gentle bend. Softwood flexes without snapping and may show lighter green coloration. Semi-ripe resists more at the base. Hardwood feels stiff, may be partially brown, and often refuses to root unless you provide cool humidity and patience over many weeks. Across all types, the same rules apply: choose non-flowering or lightly flowering shoots when possible, strip lower leaves to expose bare stem, and plant in gritty, free-draining medium. Lavender’s Achilles’ heel in propagation is wet stagnation at the stem base - the Mediterranean adaptation that keeps mature plants drought-tough works against you when a cutting sits in soggy compost.
Best Time to Propagate Lavender
Timing for lavender propagation is less about a single magic date and more about matching method to the plant’s growth phase. Lavender pushes soft new stems when days lengthen, temperatures rise, and the parent plant is in active growth - typically late spring through early summer in temperate climates. That is your softwood window. Attempting the same workflow on dormant winter stems fights the plant’s physiology: metabolism is low, callus formation is slow, and cold damp media invites rot.
Seed sowing follows a different clock. Collect ripe seedheads in late summer, dry them, then store cool and dry over winter. Sow in spring into small pots or trays of peat-free seed compost. Many lines benefit from cold stratification before sowing - a period of cold, moist conditions that breaks seed dormancy. Skip stratification and germination can be patchy or delayed by weeks. Cuttings and seed both succeed when you respect seasonal rhythm rather than forcing propagation during plant stress.
Avoid propagating from a parent that was recently shipped, severely dehydrated, or showing root rot on Lavender. Stabilize the donor plant first. Propagation multiplies quality or weakness equally. A stressed English lavender may still produce cuttings that look fine initially, then collapse because the tissue lacked reserves. Give the parent a week or two of consistent care - Lavender light guide, appropriate watering, no heavy feeding right before you cut - so stems contain enough energy to survive detachment.
The Early-to-Midsummer Softwood Window
The sweet spot for lavender softwood cuttings is early to midsummer, when new shoots are long enough to harvest but have not turned woody. In many Northern Hemisphere gardens that maps to May through June, shifting slightly earlier in mild coastal climates and later where spring arrives slowly. Walk your plant after morning dew dries and look for lateral shoots three to six inches (8–15 cm) long that have not yet formed woody bases. The ideal cutting feels firm but bends without cracking.
Take cuttings in the morning when stems are fully hydrated. A dehydrated afternoon cutting wilts faster and roots slower. If a heat wave is forecast, postpone unless you can provide bright indirect light and steady humidity without cooking the propagator. Softwood dries out in hours on a hot windowsill. Plan your workflow: tools sterilized, pots filled, hormone ready, parent plant watered the day before but not sodden at cutting time. Rushed propagation is how healthy stems end up on a dry counter while you hunt for perlite.
Choosing a Healthy Parent Plant for Cuttings
The parent plant is half the equation in lavender propagation. Select a vigorous Lavandula angustifolia or known hybrid with compact habit, clean foliage, and no active pest issues. Avoid stems with gray mold, scale clusters, or the telltale wilt of root problems. Lavender is generally trouble-free in suitable conditions, but rosemary beetle and other cosmetic pests can hitchhike on cuttings into your propagation bench.
Prioritize youngish growth on the outer crown rather than the oldest woody heart of the shrub. Lavender does not reliably break new shoots from old bare wood - the same pruning reality that makes mature plants hard to rejuvenate also limits propagation value in ancient stems. If your only lavender is a ten-year-old woody mound, you may still find usable soft shoots at the periphery after spring growth. If not, consider buying a healthy container plant specifically to serve as stock, or take semi-ripe cuttings from a friend’s younger plant with permission.
Species and hardiness matter for what happens after rooting. English lavender and its hybrids are the hardiest commonly grown types and suit permanent outdoor planting in many climates. Spanish lavender (Lavandula stoechas) and other tender species propagate similarly but often need frost-free overwintering. Know what you are cloning before you invest bench space. The RHS groups lavenders by hardiness and notes that tender types are best treated as container plants protected in winter. (RHS)
Gardeners in regions concerned about Xylella fastidiosa should follow local guidance on sourcing plant material. Lavender is among plants considered higher-risk hosts in some regulatory frameworks. Propagating from a trusted local plant reduces unknown exposure compared to importing unverified stock, though it does not replace official biosecurity rules where they apply.
Tools, Medium, and Setup for Lavender Cuttings
Clean, sharp tools prevent crushed stems that rot before they root. Use bypass secateurs, garden snips, or a razor blade for the final cut. Wipe blades with rubbing alcohol between plants if any donor shows disease signs. You need small pots or cell trays with drainage holes, a clear plastic bag or propagation dome, labels, and a watering can with a fine rose or spray bottle for gentle moisture.
The rooting medium must drain fast while holding enough moisture for callus formation. A proven mix is equal parts peat-free multipurpose compost and coarse grit, perlite, or horticultural sand - or the container recipe the RHS suggests for established lavender: peat-free loam-based compost such as John Innes No. 2 with up to 25 percent coarse grit by volume. (RHS) Lavender prefers slightly alkaline conditions (pH 6.5–7.5) in the long run, but cuttings root fine in neutral propagation mixes; adjust at transplant if your native soil is strongly acid.
Optional rooting hormone containing indole-3-butyric acid (IBA) improves consistency, especially for semi-ripe and hardwood material. Softwood often roots without hormone, but a light dip in powder or gel is cheap insurance when you are taking your first batch. Do not exceed label rates - a heavy hormone crust can inhibit rooting. Fill pots loosely, water the mix before inserting cuttings so the medium is evenly moist but not dripping, and create holes with a dibber so hormone is not scraped off when you plant.
How to Take Softwood Lavender Cuttings Step by Step
Lavender propagation from softwood follows a repeatable sequence. First, identify a healthy non-flowering shoot. Flower buds divert energy away from root formation; if only flowering stems are available, snip off buds and use the stem anyway, accepting slower rooting. Second, cut three to four inches (8–10 cm) of stem just below a leaf node with a clean angled or straight cut. Third, strip leaves from the lower two-thirds of the cutting, leaving a small tuft of foliage at the top for photosynthesis. Fourth, optionally dip the base in rooting hormone. Fifth, insert the stem one to two inches (2.5–5 cm) into pre-moistened gritty mix, firming gently so it stands upright. Sixth, label with cultivar name and date. Seventh, cover with a humidity dome or slip the pot into a clear bag supported so plastic does not touch leaves. Eighth, place in bright indirect light and maintain light moisture.
Space cuttings so leaves do not overlap densely; airflow prevents mold. A single four-inch pot can hold three to five cuttings if you are space-limited, but individual cells make transplanting less disruptive. Bottom heat around 65–70°F (18–21°C) accelerates rooting if you have a mat; it is not mandatory in a warm room. What is mandatory is consistency - alternating bone-dry and waterlogged days kills more lavender cuttings than weak hormone ever will.
Some growers ask about water propagation. Lavender can produce roots in water, but soil-rooted cuttings generally transition to garden conditions with less shock because roots adapted to grit from the start. If you experiment in water, change the water every few days, exclude leaves below the waterline, and transplant to gritty mix as soon as roots reach half an inch (1 cm) rather than waiting for long translucent roots that break at transplant.
Cutting Length, Leaf Removal, and Rooting Hormone
Length matters because lavender cuttings need enough stem buried to anchor and enough leaf surface to photosynthesize, but not so much top growth that transpiration overwhelms a rootless stem. Three to four inches total length with one to two inches buried is the standard target. If your shoot is longer, you can trim the top after cutting; if shorter, wait a week for more growth rather than forcing marginal material.
Remove leaves that would sit below the soil line - buried lavender leaves rot quickly and spread decay up the stem. Pinch or slice cleanly rather than tearing, which strips bark. At the top, keep roughly one pair of leaf whorls or a short cluster. If the remaining top is large, trim leaf tips by a third to reduce water loss. This is not bonsai aesthetics; it is moisture budgeting.
Rooting hormone is most helpful when conditions are less than ideal - cool room, semi-ripe wood, or a cultivar with a reputation for stubborn rooting. Dip the base, tap off excess, and plant immediately. Store opened hormone in a cool dark place; old product loses efficacy. Hormone is not a substitute for drainage. A powdered stem in soggy compost still rots.
Light, Humidity, and Temperature While Cuttings Root
Rooting lavender cuttings requires bright indirect light - enough for the top leaves to photosynthesize, not so intense that enclosed plastic cooks the stems. A north-west or east-facing windowsill, or a shaded bench in a greenhouse, works well. Direct midday sun inside a sealed bag frequently hits 100°F+ and collapses cuttings in a single afternoon. If only a south window is available, diffuse light with sheer curtain or open the dome for part of the day once callus forms.
Humidity should stay high for the first one to two weeks, then gradually lower. Condensation on the inside of the dome each morning is a good sign. Stagnant water pooling on the soil surface is not - vent briefly if mold appears on mix. After you see new growth or resistance when you tug gently, remove the cover for increasing periods over several days to acclimate leaves to normal room humidity.
Temperature influences speed more than success within a reasonable range. Aim for 60–75°F (15–24°C) at rooting zone. Colder slows callus; hotter without airflow invites fungal issues. Nighttime drops are fine. Avoid placing pots on frigid windowsills in late spring; roots initiate faster with warm soil. Lavender is not a tropical cutting, but it is not rooting well on an unheated porch in March either.
How Long Lavender Cuttings Take to Root
Softwood lavender cuttings commonly root in three to four weeks under warm, bright conditions. Semi-ripe cuttings taken in late summer often need four to six weeks. Hardwood cuttings may take six to ten weeks or longer, and a meaningful percentage may fail even with good technique. These are ranges, not contracts - a cool room can double softwood timelines without indicating failure.
Test roots by a gentle tug at three weeks for softwood. Resistance with no slide means roots are forming. Visible roots emerging from drainage holes are a clear green light. Do not uproot cuttings daily; each inspection damages fine root hairs. One careful check at the three-week mark and another at five weeks is enough discipline.
Top growth is a lagging indicator. Some cuttings root silently for weeks before pushing new shoots; others show perky top leaves while roots are still minimal. Combine tug test, drainage-hole inspection, and overall turgor. A cutting that browns from the base upward has failed - remove it before decay spreads to neighbors. A slightly wilty but green cutting often recovers once roots catch up after you uncover the dome.
Transplanting and Hardening Off Rooted Cuttings
When roots fill the outer edge of the root ball or you see healthy white tips through the hole, move each cutting to its own three- to four-inch (9–10 cm) pot of gritty compost. Handle by the root mass, not the stem. Water in lightly and place in bright light without humidity cover. Hold fertilizer until you see definite new top growth - young roots burn easily in concentrated feed.
Hardening off bridges the gap between windowsill and garden. Over seven to ten days, expose plants to longer periods outdoors in a sheltered spot, bringing them in if frost threatens. Lavender wants full sun eventually - six or more hours of direct light daily for mature performance - but freshly potted cuttings appreciate a gradual introduction so leaves do not scorch. The RHS recommends planting lavender in April or May as soils warm, and warns against winter planting of young plants. (RHS) Schedule your propagation so rooted cuttings are ready for that window.
In the ground, space plants according to mature spread - often 30–90 cm (1–3 ft) depending on cultivar. In containers, use pots 30–40 cm (12–16 in) in diameter with large drainage holes and the same grit-heavy mix. Water the first summer regularly while roots establish; thereafter established lavender is drought-tolerant in open ground but container plants still need summer attention.
Growing Lavender From Seed
Growing lavender from seed is the slower, more variable branch of lavender propagation, but it rewards patient growers with large numbers of plants at low cost. Collect seed from your own dried flower heads in late summer, or purchase fresh seed from reputable suppliers. Old seed loses viability; store in a paper envelope in a cool, dry place and sow within a year for best results.
Understand genetic expectations before you sow. Species L. angustifolia from seed generally produces lavender-like plants, but traits will vary. Named cultivars almost never breed true from seed. Seed lines such as ‘Munstead’ or ‘Vera’ are sometimes sold for seed growing because they are selections with relatively consistent seed performance, but even then expect some diversity. If uniform deep-purple spikes are non-negotiable, use cuttings.
Germination is often slow and uneven. Many sources recommend cold stratification: mix seed with slightly moist sand or vermiculite in a sealed bag at 35–40°F (2–4°C) for three to six weeks in a refrigerator, not freezer. Check periodically for mold; the medium should be moist, not wet. After stratification, sow on the surface of peat-free seed compost, press lightly, and cover with a thin dusting of fine grit or vermiculite - lavender seed needs light or very shallow burial to germinate well.
Cold Stratification and Sowing Lavender Seed Indoors
After stratification, fill trays or small pots with sterile peat-free seed mix. Scatter a few seeds per cell - lavender seedlings are tiny and you can thin later. Mist the surface and cover with a clear lid or plastic wrap. Place under bright light at 65–70°F (18–21°C). Germination may begin in two to four weeks but can stretch longer; some seeds straggle in over months. Patience is part of the method, not a sign of failure.
Vent daily to prevent damping-off - the fungal collapse that kills seedlings at soil line. Once seedlings show true leaves, remove cover gradually. A small fan in the room improves airflow and strengthens stems. Do not overwater; seedlings want evenly moist surface, not saturation. Thin to the strongest seedling per cell when they have enough leaves to handle.
Caring for Lavender Seedlings After Germination
Lavender seedlings are delicate for the first two to three months. They need bright light - a sunny windowsill supplemented with a grow light if stems stretch - and careful watering with a fine nozzle. Feed at quarter strength balanced liquid fertilizer only after the second set of true leaves, and even then sparingly. Lavender evolved for lean soil; excess nitrogen produces soft, floppy growth that rots easily.
Pot up when roots reach pot edges, usually into slightly deeper cells with the same gritty mix you will use at maturity. Handle by leaves, not fragile stems. Disturb roots minimally. Seedlings can remain under protection until they reach 10–15 cm (4–6 in) and outdoor lows stay above frost. Many seed-grown lavenders flower modestly in year one but reach full presence in year two - plan your garden layout with that timeline.
Compare to cuttings: a rooted softwood cutting in June may be a respectable small shrub by autumn if hardened off well; seed-grown plants rarely match that pace. The seed path is volume and experimentation; the cutting path is speed and fidelity.
Cuttings vs Seed: Which Propagation Method to Choose
Use this decision frame when planning lavender propagation. Choose softwood cuttings if you want a clone of a specific plant, need results within one season, are expanding a hedge or container collection with uniform habit, or are propagating a cultivar that will not breed true from seed. Choose seed if you want many plants inexpensively, are willing to accept variation, enjoy seedling selection for vigor, or are growing species lavender where genetic diversity is acceptable.
Cuttings demand more attention per plant during the rooting weeks but less calendar time overall. Seed demands stratification patience, longer nursery care, and tolerance for blanks in the tray. Neither method fixes a fundamentally wrong environment. Full sun, sharp drainage, and restraint with water remain non-negotiable after propagation regardless of how the plant started.
If you are new to lavender, start with five to ten softwood cuttings from one healthy donor. Success with eight rooted plants teaches more than a hundred seeds with spotty germination and unexplained damping-off. Add seed experiments once you have the rooting rhythm in muscle memory.
Common Lavender Propagation Mistakes
The most common lavender propagation failure is overwatering. Lavender cuttings need moisture at the base to callus, but the medium must never stay waterlogged. Soggy compost excludes oxygen, stem tissue browns from the bottom up, and mold follows. Water when the top half-inch of mix is approaching dry, not on a daily reflex. If in doubt, wait an extra day inside a humidity dome.
Taking flowering or woody stems is the second classic error. Buds and hard wood both slow rooting. If your shrub only offers woody shoots, try semi-ripe side shoots lower on the plant or wait until next spring’s soft flush. Cutting into ancient bare wood without green growth is propagation theater - lavender rarely cooperates.
Other mistakes include stripping too many leaves (nothing left to photosynthesize), burying leaves (they rot), skipping hardening off (sun-scorched new plants), planting out in cold wet soil (winter losses), and expecting seed to match a named parent (genetic mismatch disappointment). Using dull tools that crush stems belongs on the list too - a ragged wound is an invitation to decay.
Leaving cuttings in sealed plastic too long after roots form produces soft, etiolated growth that collapses outdoors. Removing the dome on schedule is as important as putting it on at the start. Label pots; lavender varieties look identical for months.
Aftercare for New Lavender Plants
New lavender - whether from softwood cuttings or seed - needs a gentle first season. Water when the root zone dries, not on autopilot. In containers, that may mean once or twice weekly in hot summer; in ground, less once roots chase moisture deeper. Never let pots sit in saucers of runoff. Lavender’s drought tolerance is a mature trait, not a day-one guarantee.
Hold heavy pruning until plants are established. A light tip pinch to shape is fine, but hard cutting into young wood removes the very growth you need for bushiness. Feed lightly in spring of year two if growth is pale; many lavenders never need rich feeding. The RHS notes lavender likes low-nutrient soil and plants in the ground generally do not require feeding. (RHS)
Watch for rosemary beetle and cuckoo spit on young foliage - usually cosmetic. Root rot from heavy soil is the serious threat. If leaves gray and wilt while soil stays wet, improve drainage immediately rather than propagating again from a dying plant. Annual late-summer trimming after flowering keeps mature lavender compact; that is maintenance for year two onward, not a task for fragile newcomers still filling their first pot.
When handling lavender, remember pet safety. The ASPCA lists lavender (Lavandula species) as toxic to cats and dogs; concentrated essential oils pose greater risk than garden plants, but keeping propagated trays away from curious pets is sensible. Wash hands after working with sap and foliage.
Conclusion
Lavender propagation succeeds when you match method to goal. Softwood cuttings taken in early to midsummer from healthy, non-flowering shoots root in gritty, well-drained mix within three to six weeks, producing clones identical to the parent - the fastest reliable path for most gardeners. Seed remains valuable for scale and experimentation but requires cold stratification, patience through slow germination, and acceptance that cultivars will not reproduce true. Whichever route you choose, drainage, bright light, and disciplined moisture matter more than any single product. Start with a few well-prepared cuttings this season, harden rooted plants before full sun, and plant out when warm soil arrives. The skills transfer to every lavender you grow afterward.
When to use this page vs other Lavender guides
- Lavender overview - Start here for whole-plant context before deep-diving this topic.
- Lavender problems hub - Jump to symptom-specific fix guides when this care topic does not resolve the issue.
- Transplant Shock on Lavender - Escalate here when propagation adjustments are not enough.
- Damping Off on Lavender - Escalate here when propagation adjustments are not enough.