Norfolk Island Pine Care: Light, Water & Tips
Araucaria heterophylla
Norfolk Island Pine needs 4–5 hours of bright light daily, 50%+ humidity, moderately moist soil, and monthly rotation for symmetrical growth. Toxic to pets.
Norfolk Island Pine Care: Light, Water & Tips
Start with wateringThe most common care mistake for Norfolk Island PineWatering guide →Norfolk Island Pine care essentials
Light
bright indirect light with some direct sun, a few hours of direct morning sun
Water
Every 5–7 days - allow top 2–3 cm to dry. Keep consistently moist. Maintain higher humidity alongside regular watering.
Soil
Slightly acidic potting mix (pH 4.5–6.0) with 20 % perlite. Well-draining and slightly moisture-retaining.
Humidity
50–60%
Temperature
16–24°C (60–75°F)
Fertilizer
Feed lightly during active growth. Use monthly in spring and summer.
About Norfolk Island Pine
Norfolk Island Pine has a upright growth habit.
| Detail | Information |
|---|---|
| Growth habit | Upright |
| Scientific name | Araucaria heterophylla |
Norfolk Island Pine Care: Light, Water & Tips
What Is Norfolk Island Pine?
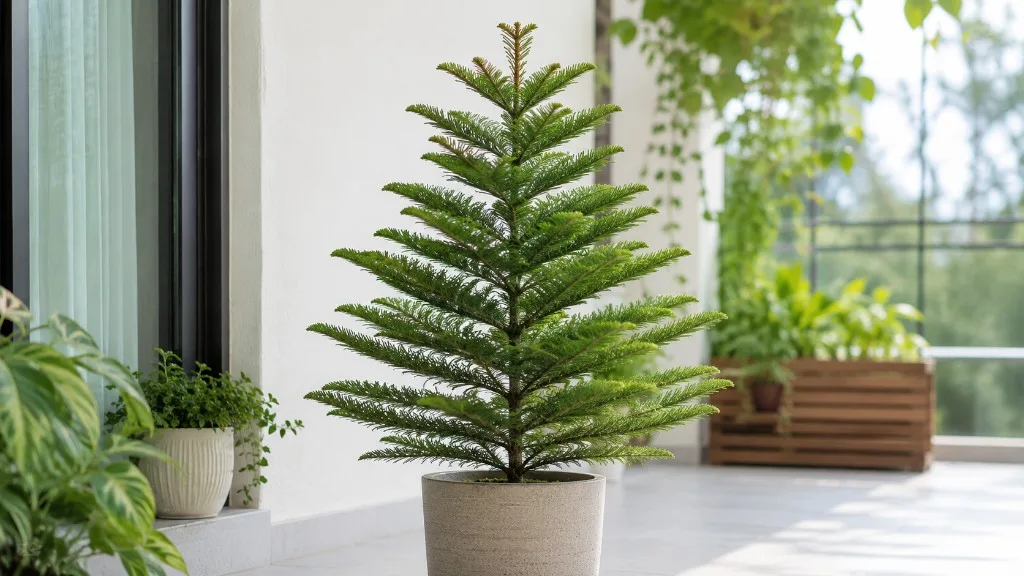
Norfolk Island pine is a symmetrical, slow-growing indoor tree that looks like a miniature evergreen but belongs to an entirely different branch of the conifer family tree. The accepted botanical name is Araucaria heterophylla - you may also see the older synonym Araucaria excelsa on vintage labels. In commerce it goes by Norfolk pine, star pine, triangle tree, house pine, and living Christmas tree, because young plants hold tight whorls of soft branches that read like a decorated evergreen long before they reach room-height proportions.
Indoors in a container, Norfolk Island pine typically reaches 6 to 10 feet (1.8 to 3 m) over many years, growing at a slow to moderate rate - often 3 to 6 inches (8 to 15 cm) per year in good conditions according to horticultural references including Oregon State University Landscape Plants. It is not a fast filler plant. It is a long-horizon architectural specimen that rewards stable care with decades of structure. Outdoors in USDA Hardiness Zones 10 and 11, it can persist in warm coastal climates; everywhere else it is grown as a houseplant or seasonal patio plant brought in before cold nights.
If you are deciding whether this tree fits your home, the honest summary is this: Norfolk Island pine rewards bright light, cool stable air, and humidity above what most winter homes provide - and it punishes hot dry drafts, dark corners, and watering by calendar instead of by soil moisture. It is easier than a finicky ficus with constant leaf drop, and harder than a snake plant that tolerates neglect. The payoff is a clean vertical silhouette that works in corners, entryways, and holiday displays without needing bloom cycles to justify the floor space. One critical caveat for buyers who treat common names literally: this is not a true pine, and care rules written for Pinus species will mislead you.
Botanical Background and Why It Is Not a True Pine
Norfolk Island pine belongs to the family Araucariaceae, an ancient lineage of cone-bearing trees that predates the pine family Pinaceae by millions of years. True pines - genus Pinus - evolved for cold-tolerant temperate climates with needle clusters and resinous wood. Araucaria heterophylla evolved on a small subtropical island in the South Pacific, where warm oceanic air, steady rainfall, and moderated temperatures define the baseline. That native context is the single most important fact about indoor care: you are hosting a tropical conifer, not a temperate one.
The species is endemic to Norfolk Island, an external territory of Australia roughly 1,400 km east of the Australian mainland, with a smaller population on nearby Philip Island. According to conifers.org, the climate is subtropical with about 1,350 mm of annual rainfall and relatively little seasonal variation - conditions that translate indoors to steady moisture, stable temperatures, and humidity well above winter heating levels. The epithet heterophylla means “different leaves,” referring to the two foliage forms: juvenile plants carry soft, awl-shaped needles on spreading branches, while mature trees in habitat develop overlapping scale-like leaves on massive trunks you rarely see in living rooms.
Do not confuse Norfolk Island pine with Cook pine (Araucaria columnaris), a closely related species often sold under similar names and frequently leaning noticeably toward light in cultivation. Both are Araucariaceae conifers, but Cook pine tends toward a narrower, sometimes tilted column, while Norfolk Island pine maintains a more symmetrical whorled silhouette in youth. If your tag is missing, compare branch angle and whether the whole plant leans - but for care purposes, both species want bright light, good drainage, and humidity above dry-room defaults.
The Indoor Tree Form and Living Christmas Tree Role
Norfolk Island pine earns its place in homes through structure, not flowers. Young plants display whorls of four to seven horizontal branch tiers spaced evenly up a central trunk, each tier slightly shorter toward the tip, producing the classic “little Christmas tree” silhouette that nurseries market heavily from late autumn onward. That symmetry is real botany, not pruning artifice - the plant grows in discrete tiers naturally, which is why it works as a living Christmas tree without shearing.
Using it for the holidays is fine if you respect what happens after the lights come off. Do not leave dense ornament weight on soft juvenile branches for weeks, and do not let the pot sit in a dim interior spot once decorations are stored - the most common post-holiday failure is moving a tree from a bright shop display to a dark hallway “until spring.” Transition it to the brightest cool room you have, ideally within a few days of the display ending. If you decorated with incandescent lights that radiate heat against needles, inspect branch tips for desiccation and increase humidity while the plant recovers.
As an indoor tree form, Norfolk Island pine suits corners, flanking furniture, and office atriums where vertical emphasis matters more than tabletop color. Because it grows slowly, it will not outgrow a sensible floor pot in a single season - but it will outgrow a windowsill eventually. Plan for a long-term floor location with ceiling clearance and access to bright light from at least one direction. Rotate the pot one quarter turn weekly if light arrives from only one window; otherwise the crown leans toward the glass and lower branches on the shaded side thin out over time, as Purdue University Consumer Horticulture notes for one-sided light sources.
Best Growing Conditions for Norfolk Island Pine
Norfolk Island pine does best when your room approximates the bright, cool, humid rhythm of its native island - not the hot dry microclimate created by a south window plus a radiator. The four variables that decide almost every outcome are light, water, soil, and temperature with humidity. Align those and feeding, Norfolk Island Pine repotting guide, and holiday display become routine. Misalign any one - especially light or winter humidity - and the tree declines through needle browning and branch loss that cannot be reversed on dead tissue.
Light Requirements
Norfolk Island pine needs bright light to hold tight whorls and deep green needles. A practical indoor target is Norfolk Island Pine light guide for most of the day, with a few hours of gentle direct sun - ideally morning sun through an east window - benefiting color and density. Medium light survives; dim corners produce leggy, sparse tiers and accelerated lower-branch drop. Full midday sun through unfiltered south or west glass can bleach or scorch needles, especially on plants acclimated from low-light retail displays.
The fastest diagnostic is new growth at the tip, not old lower branches. Compact whorls with firm, evenly green needles mean the tree is probably getting enough light. Long gaps between whorls, pale yellow-green new needles, or a pronounced lean toward the window mean it wants more exposure - move it closer, add a sheer curtain only if afternoon sun is harsh, or supplement with a full-spectrum grow light on a 10–12 hour timer positioned several feet above the crown. Crisp brown patches on sun-facing needles mean reduce direct intensity or acclimate more slowly over one to two weeks when moving from a dim shop to a bright sill.
Outdoors on a sheltered patio in warm months, dappled shade to partial sun works in humid climates; bring the plant in before nights drop toward 50°F (10°C), and never expose it to 35°F (2°C) or below, which can kill tissue (Illinois Extension). Indoors year-round, prioritize consistent bright exposure over occasional sunbathing - Norfolk Island Pine overview keeps its shape on steady indirect light plus morning rays more reliably than on alternating dark weeks and blazing weekends.
Temperature and Humidity
Norfolk Island pine prefers cooler indoor temperatures than many tropical houseplants - a detail generic “warm and wet” advice often skips. Purdue Extension describes the ideal indoor climate as bright and cool, with daytime temperatures around 60 to 70°F (15 to 21°C) and slightly cooler nights. Most homes sit within a workable band of 65 to 75°F (18 to 24°C), but trouble appears at the margins: hot air blasting from heating vents, cold window glass in winter, and uninsulated drafty sills all stress the tree faster than a few degrees on the thermostat.
Humidity is the other half of the comfort equation and the reason many Norfolk Island pines look fine in summer and brown at the tips by February. The species thrives at roughly 50% relative humidity or higher. Average heated homes often fall to 15 to 30% in winter unless you actively add moisture - a gap large enough to crisp needle tips even when watering is technically correct. A humidifier near the plant is the most effective fix for both people and trees. Pebble trays with the pot elevated above the water line help at the local scale. Grouping plants raises ambient humidity modestly. Misting is a poor substitute - the effect lasts minutes and wet foliage in stagnant air can invite fungal issues.
Watch placement relative to HVAC: neither directly under a cold AC vent nor above a heat register is acceptable long-term. If you must choose between a cool bright room and a warm dim one, choose light and add humidity - darkness causes structural decline that humidity alone cannot fix. If your tree browns only in winter despite good light, suspect dry air before root disease unless the soil stays wet for days.
Soil and Drainage
Use a slightly acidic, well-draining potting mix that holds moisture without staying waterlogged. A workable target is pH 4.5 to 6.0 (NC State Extension) with roughly 20% perlite or pumice by volume for aeration - the principle matters more than a branded recipe. Norfolk Island pine roots need steady moisture in the root zone plus oxygen between waterings, not alternating floods and bone-dry peat bricks.
Avoid heavy garden soil in containers and avoid oversized decorative pots without drainage holes. Cachepots are fine only if you empty runoff after every watering. The mix should feel like a wrung-out sponge through most of the root ball - not mud, not dust. Repot into fresh mix every one to two years for young trees, or when water runs straight through old degraded peat, because compacted substrate is one of the fastest paths to root rot on Norfolk Island Pine in a species that already dislikes soggy conditions.
How to Water Norfolk Island Pine
The general rule for Norfolk Island pine is water when the top 1 to 2 inches (2.5 to 5 cm) of mix feel dry, then soak thoroughly until a small amount runs from the drainage hole. This plant prefers evenly moist soil during active growth, not wet feet - “moist but not soggy” is the phrase every reliable guide repeats because it matches the island climate: regular rain, sharp drainage on volcanic substrate. Your job indoors is to mimic the rhythm, not the calendar. A fixed “every seven days” schedule will overwater the tree in winter and underwater it in a bright summer bay window.
Check moisture with a finger, a wooden skewer, or by lifting the pot - a noticeably lighter pot means the root zone has dried more than the surface shows. Water until water exits the bottom, then discard saucer water within 15 minutes so roots are not standing in stale liquid. Because the tree has a relatively small root mass compared with its aerial size in youth, surface dryness is a reliable trigger; waiting until the entire pot is desiccated produces brown crispy needle tips that persist on old tissue even after you correct watering.
Norfolk Island Pine watering guide During Active Growth
During the warm, bright months when new whorls are expanding, Norfolk Island pine uses water steadily. Water thoroughly when the top layer dries, typically every 5 to 10 days for a medium floor pot in bright indirect light - but your interval depends on pot volume, mix composition, and airflow. Younger, smaller plants dry faster than older trees in large containers; do not copy a friend’s schedule without matching pot size and room conditions.
After purchase, expect a short acclimation period. Retail trees often arrive in peat-heavy mix from greenhouse humidity. Do not compensate for transplant stress by watering more frequently unless the pot is genuinely dry at depth; stabilize light and humidity first, then refine the interval based on how fast your specific container dries in your home.
Seasonal Adjustments
In cooler, dimmer months, growth slows and the pot dries more slowly. Stretch the interval between waterings and reduce or pause fertilizer until new spring growth appears. The most common winter failure mode is continuing a summer watering rhythm while the tree sits in lower light - the mix stays wet, roots suffocate, and whole branches turn yellow-brown and drop. Pair slower watering with humidity management; dry air and overwatering together produce the confusing picture of wet soil plus crispy tips.
If you run heat aggressively and the tree sits near a register, the pot may dry faster even in winter - adjust by checking moisture, not by season alone. Resume the active-growth rhythm only when you see new bright green tips and the pot dries on a predictable but not frantic schedule.
Common Watering Mistakes
The single most damaging mistake is watering on autopilot without checking the mix. The second is letting the pot sit in a full saucer or sealed cachepot, which suffocates roots within days even when the surface looks fine. The third is giving small daily splashes instead of a full soak when the tree is dry - that wets only the top inch while the center stays parched, producing tip browning that looks like humidity problems but traces to uneven root-zone moisture.
People also misread needle drop. Underwatering tends to brown tips first on branches that look otherwise structurally sound. Overwatering tends to yellow and drop whole branch sections, sometimes with soft tissue at the base and a sour-smelling mix. Always pair symptoms with a depth moisture check before adding more water. If stems are mushy and the mix smells anaerobic, stop watering, inspect roots, trim brown soft tissue, and repot into fresh mix - recovery is slow and lower branches may not regenerate.
How to Feed Norfolk Island Pine
Norfolk Island pine is a light feeder during active growth, not a heavy consumer of fertilizer. A balanced water-soluble houseplant fertilizer - for example 10-10-10 or 20-20-20 - diluted to one-quarter to one-half of the label rate is sufficient for most indoor specimens. Apply to already-moist soil every four to six weeks from spring through early fall, or monthly if growth is visibly strong and light is high. Purdue Extension recommends feeding with a product formulated for indoor foliage plants while the tree is actively growing.
Hold fertilizer entirely during winter rest, after a major repot until new tips appear, and while the tree is recovering from root rot or pest damage. Overfeeding produces salt buildup and brown needle margins that mimic drought stress but persist despite correct watering. If margins crisp despite good moisture, flush the pot with plain water at two to three times the pot volume and pause feeding for six to eight weeks. If your mix included a slow-release starter charge at purchase, delay supplemental feeding for the first month to avoid doubling up on salts.
Repotting and Root Health
Repot Norfolk Island pine roughly every one to two years while it is young and actively adding whorls, or whenever roots circle drainage holes, water runs straight through without soaking in, or the tree becomes top-heavy for its container. The best timing is early spring as growth resumes, giving a full bright season to refill the root zone. Older, slow-growing specimens may stay two to three years between repots if drainage remains good and growth is steady.
Choose a pot only one size larger - typically 1 to 2 inches (2.5 to 5 cm) wider than the current root ball. Oversized pots hold excess wet mix around roots that cannot use it, which is the most common trigger for rot after repotting. Use fresh, slightly acidic well-draining mix, maintain the same planting depth, and water lightly for the first week while cut roots heal. Keep the tree in bright indirect light and skip fertilizer until you see new tip growth.
Signs It Is Time to Repot
Physical signs include roots emerging from drainage holes, a top-heavy tree that wilts despite recent watering, or mix that has broken down into fine mud that stays wet for a week. Performance signs include stalled whorl production for a full growing season despite adequate light, or chronic tip burn that persists after you have corrected watering and humidity - sometimes indicating mineral-loaded old mix rather than current care errors.
Do not repot a tree actively collapsing from overwatering until you have inspected roots and removed rot. Moving a failing root ball into fresh mix without fixing moisture habits rarely saves Norfolk Island pine. Conversely, a healthy tree that dries out within a day of watering in midsummer is telling you the root mass has outgrown the container - waiting until branches drop is unnecessary delay.
Propagation Methods for Norfolk Island Pine
Home propagation of Norfolk Island pine is possible but limited compared with easy houseplants like pothos. According to NParks Singapore, the practical methods are seed and stem cuttings of erect terminal shoot tips - female cones and viable seed are seldom produced in indoor cultivation, so most hobbyists will never see seed. Commercial production relies on nursery propagation; your realistic home path is a terminal cutting taken from the upright leader if you have access to a healthy mature specimen and patience for slow rooting.
Take a 4- to 6-inch (10 to 15 cm) cutting from the top of the central leader using clean, sharp shears, keeping the stem upright - lateral side branches do not restore the symmetrical tree form reliably. Remove lower needles, dip in rooting hormone if you use it, and place the cutting in moist, well-draining mix under bright indirect light with high humidity - a clear dome or bag with daily ventilation helps. Rooting can take many weeks to months and success rates are moderate; this is not a weekend project.
Do not propagate stressed, pest-infested, or post-holiday declining trees. Weak cuttings fail at high rates and inherit the parent’s environmental damage. If your goal is a second tree cheaply, buying a small juvenile plant is often more practical than rooting a lateral branch that will never develop classic whorled symmetry. Division is not applicable - this is a single-trunk tree, not a clumping perennial.
Common Norfolk Island Pine Problems
Most Norfolk Island pine problems are environmental, not mysterious diseases. The tree signals distress through needle color, branch persistence, and tip texture long before the entire specimen collapses. The useful habit is to check light, moisture, humidity, and drafts in that order before reaching for pesticide or extra fertilizer.
Brown Needles, Branch Drop, and Pests
Brown needle tips usually point to low humidity, underwatering, salt buildup, or heat stress from vents and radiators. Raise humidity with a humidifier, confirm the top 1 to 2 inches dry before watering, and flush salts if you have fed heavily. Tips that are already brown will not green again - judge success by undamaged new whorls after four to six weeks of corrected conditions.
Whole lower branches browning slowly is often normal aging in lower light - Norfolk Island pine naturally sheds shaded tiers over time. If many branches drop quickly across the whole plant, suspect overwatering, cold drafts, or severe underwatering instead. Purdue Extension notes that widespread browning usually traces to water imbalance, hot or cold drafts, or humidity far below 50% rather than a single missing nutrient.
Yellowing or soft stems with wet mix indicate advanced overwatering and possible root rot - reduce watering, inspect roots, repot if tissue is brown and mushy. Sudden needle drop after a move often reflects light shock or draft exposure during transport; stabilize placement and humidity before assuming disease.
Watch for spider mites in dry winter air - fine webbing and stippled needles are the tell. Mealybugs hide in branch axils as white cottony clusters. Scale appears as immobile bumps along stems. Fungus gnats indicate overly wet surface mix; let the top layer dry slightly between waterings. Catch pests with weekly inspection. A strong shower, manual removal, and insecticidal soap applied per label directions handle most infestations if you act before populations spread.
Leggy, sparse whorls mean insufficient light - move the tree or add a grow light before lower branches fail entirely. Once a tier is dead, it does not backbud like a deciduous tree; prevention matters more than repair.
Is Norfolk Island Pine Safe for Pets?
According to the ASPCA’s toxic and non-toxic plant listing - filed under “Australian Pine” with common names including Norfolk pine, house pine, and Norfolk Island pine - Araucaria heterophylla is non-toxic to dogs, cats, and horses. That official classification surprises some gardeners who have read secondary sources calling the plant “mildly toxic,” but the ASPCA is the authoritative reference for pet safety in North American households and lists no toxic principles for this species.
Non-toxic does not mean edible or desirable to chew. Ingesting any plant material can still cause mild gastrointestinal upset in sensitive pets - vomiting or reduced appetite - simply from unfamiliar fiber, not necessarily from a classified toxin. Sap may irritate skin on sensitive individuals. Do not rely on “non-toxic” as permission to let pets treat the tree as a toy. Low branches on juvenile plants are at perfect height for dogs and cats to bat, and fallen needles can attract chewing even when the tree is otherwise out of reach.
Practical guidance for pet households: elevate young trees on sturdy stands, anchor tall specimens if you have climbing cats, and remove fallen needles from floors where curious mouths find them. If your pet shows persistent vomiting, lethargy, or loss of appetite after contact with any houseplant, contact your veterinarian or the ASPCA Animal Poison Control Center at (888) 426-4435 (a consultation fee may apply) - bring a photo of the plant tag for identification. This is general information, not veterinary advice.
If you need a completely chew-proof display, Norfolk Island pine is safer than many popular holiday plants such as poinsettia (mildly irritating) or true yew (highly toxic) - but placement discipline still matters. The ASPCA listing is reassuring; your layout strategy is what prevents problems.
Conclusion
Norfolk Island pine (Araucaria heterophylla) is a tropical conifer, not a true pine, grown indoors for its symmetrical whorled tree form and long-lived architectural presence. Give it bright indirect light with optional morning sun, cool stable temperatures away from HVAC blasts, humidity near 50% or higher, and water when the top 1 to 2 inches of mix dry - and it will hold green tiers for years, including seasons as a living Christmas tree if you return it to bright conditions after decorations come down. Expect slow vertical growth toward a eventual 6- to 10-foot indoor ceiling over many years, not a quick hedge.
When something looks wrong, read the tree in context: leggy pale whorls mean more light; crispy tips in winter mean humidity or uneven watering; sudden branch loss on wet soil means roots; slow lower-branch browning in shade may be normal aging. Fix environment before escalating to fertilizer or repotting. Repot on a modest schedule, feed lightly during active growth, and treat propagation as a specialist project rather than a guaranteed copy of the parent silhouette. Do that, and Norfolk Island pine becomes one of the most distinctive indoor trees you can grow - as long as you respect its cool, humid, bright native logic and use the ASPCA non-toxic listing as reassurance while still keeping curious pets from making it a chew toy.
When to use this page vs other Norfolk Island Pine guides
- Norfolk Island Pine overview - Canonical hub for this species - care topics and problems branch from here.
- Norfolk Island Pine problems - Symptom-first path when you already know something is wrong.
Related Norfolk Island Pine guides
- Norfolk Island Pine watering
- Norfolk Island Pine light
- Norfolk Island Pine soil
- Norfolk Island Pine propagation
- Norfolk Island Pine fertilizer
- Norfolk Island Pine repotting
- Norfolk Island Pine pruning
- Brown Tips on Norfolk Island Pine
- Leggy Growth on Norfolk Island Pine
- Root Rot on Norfolk Island Pine
- Yellow Leaves on Norfolk Island Pine
- Norfolk Island Pine problems
How to care for Norfolk Island Pine?
How much light does Norfolk Island Pine need?
bright indirect light with some direct sun, a few hours of direct morning sun
- bright indirect light with some direct sun - bright indirect light with some direct sun, a few hours of direct morning sun.
- a few hours of direct morning sun - bright indirect light with some direct sun, a few hours of direct morning sun.
When should you water Norfolk Island Pine?
Every 5–7 days - allow top 2–3 cm to dry. Keep consistently moist. Maintain higher humidity alongside regular watering.
- Check top 2 inches - Every 5–7 days - allow top 2–3 cm to dry.
- Drain excess water - Maintain higher humidity alongside regular watering.
What soil works best for Norfolk Island Pine?
Slightly acidic potting mix (pH 4.5–6.0) with 20 % perlite. Well-draining and slightly moisture-retaining.
- Well-draining mix - Well-draining and slightly moisture-retaining.
Grower notes for Norfolk Island Pine
What matters most with Norfolk Island Pine
Norfolk Island Pine is easiest to grow when you judge the whole plant: new growth, root-zone moisture, light exposure, and how quickly the pot dries after watering. In practice, the care checkpoint is simple: bright indirect light with some direct sun, a few hours of direct morning sun. Pair that with slightly acidic potting mix (pH 4.5–6.0) with 20 % perlite. Well-draining and slightly moisture-retaining, and avoid changing water, pot size, and placement all at once.
Best placement in a real home
Norfolk Island Pine belongs where bright indirect light with some direct sun, a few hours of direct morning sun is realistic for most of the day, not only where the pot looks good. Every 5–7 days - allow top 2–3 cm to dry. Keep consistently moist. Maintain higher humidity alongside regular watering. If the pot stays wet longer than expected, move the plant into better light or reassess the mix before watering again. Humidity target: 50–60%. Temperature comfort zone: 16–24°C (60–75°F).
Before you buy this plant
Choose Norfolk Island Pine with firm new growth, clean leaf undersides, and soil that does not smell sour or feel compacted. Be cautious if you see brown-tips, sticky residue, collapsed crowns, or a pot that is wet in poor light. Cosmetic old-leaf damage is less worrying than weak roots or active pests.
First month after bringing it home
Do not repot Norfolk Island Pine on day one unless the mix is failing or pests are obvious. Quarantine it, learn how fast the pot dries, and keep care boring while it adjusts. Watch especially for brown-tips, yellow-leaves, and leggy-growth. If problems appear, correct the condition first rather than stacking fertilizer, repotting, and pruning together.
Safety note for Norfolk Island Pine
Norfolk Island Pine is not a plant to keep within reach of pets or children. Treat it as an inaccessible display plant. Use gloves if sap or plant tissue is irritating, and pick a pet-safe alternative for floor pots or low shelves.
How to tell Norfolk Island Pine is settling in
If you plan to multiply it later, common methods include Terminal stem cuttings and Seeds. If yellow-leaves shows up early, inspect light, watering, and roots before assuming the plant is permanently weak.
Is it pet safe?
Norfolk Island Pine is toxic to cats and dogs.
ASPCA lists Norfolk Island Pine as toxic to cats and dogs-can cause depression, vomiting, and loss of appetite if ingested.
Watering Norfolk Island Pine
Every 5–7 days - allow top 2–3 cm to dry. Keep consistently moist. Maintain higher humidity alongside regular watering.
Soil & potting for Norfolk Island Pine
Slightly acidic potting mix (pH 4.5–6.0) with 20 % perlite. Well-draining and slightly moisture-retaining.
Humidity & temperature for Norfolk Island Pine
Norfolk Island Pine prefers 50–60%, though normal home humidity is usually fine. Keep temperatures around 16–24°C (60–75°F).
| Detail | Information |
|---|---|
| Humidity | 50–60% - normal home humidity is fine. |
| Ideal temperature | 16–24°C (60–75°F) |
Fertilizer & pruning for Norfolk Island Pine
Use feed lightly during active growth. Use monthly in spring and summer. for Norfolk Island Pine.
| Detail | Information |
|---|---|
| Fertilizer type | Feed lightly during active growth. Use monthly in spring and summer. |
Common problems on Norfolk Island Pine
Brown Tips
HighLikely cause: Very low humidity from dry heated indoor air
Quick fix: Increase humidity to 50%+; keep away from heating vents
Full fix guide →Leggy Growth
MediumLikely cause: Insufficient light causing asymmetric or drooping growth
Quick fix: Move to brightest available position; rotate monthly
Full fix guide →Root Rot
MediumLikely cause: Persistently wet soil
Quick fix: Repot in acidic draining mix; correct watering frequency
Full fix guide →Yellow Leaves
MediumLikely cause: Overwatering or root rot
Quick fix: Allow top 2–3 cm to dry; ensure drainage
Full fix guide →