Norfolk Island Pine Repotting: When & How
Norfolk Island Pine Repotting: When & How
Norfolk Island Pine Repotting: When & How
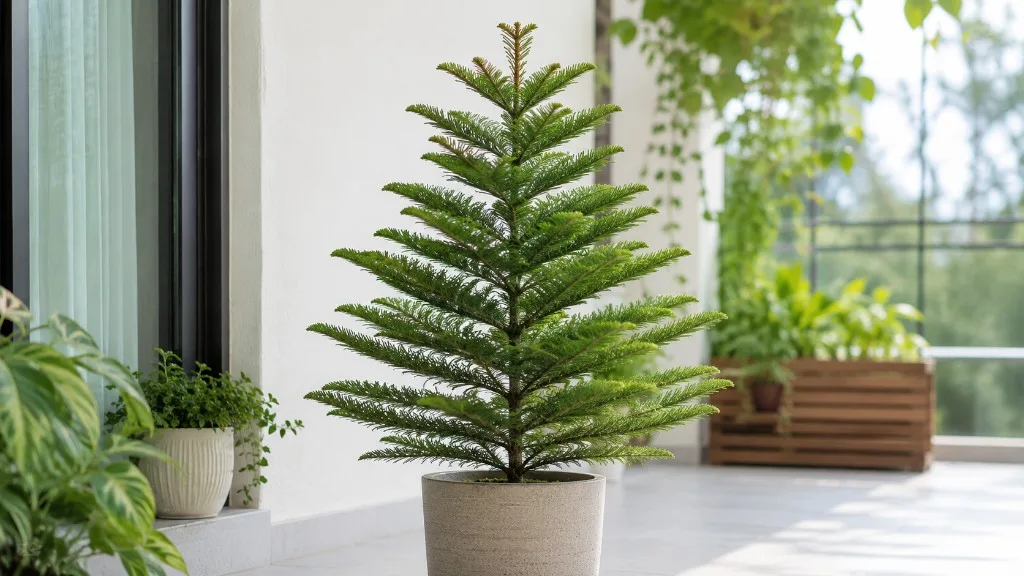
A Norfolk Island pine sitting in the same decorative pot for three holiday seasons can look perfectly healthy while its roots quietly exhaust the soil beneath the surface. Araucaria heterophylla is sold by the millions each winter as a living Christmas tree, but it behaves like a slow-growing conifer indoors - not like a fast tropical that bounces back from aggressive root work. Repotting Norfolk Island Pine overview is less about upgrading to a bigger showpiece container and more about refreshing root-zone chemistry, giving delicate roots a modest amount of new space, and keeping a naturally top-heavy tree from tipping over. Get those three priorities right in spring, when new growth is starting at the branch tips, and your tree will settle in with minimal stress. Rush the job in winter, jump two pot sizes, or bare-root the plant, and you may spend the next two months watching lower branches yellow while the root system struggles to recover.
Why Repotting Works Differently for Norfolk Island Pine
Most houseplant repotting advice assumes a plant that grows quickly, tolerates root pruning, and fills a larger pot within a single season. Norfolk Island pine breaks every one of those assumptions. Indoors, it grows slowly - often only a few inches per year once it passes the small nursery stage - and its roots are described by the New York Botanical Garden Mertz Library as rather delicate. That combination means the tree does not need frequent disturbance, and it does not forgive rough handling.
Araucaria heterophylla Is a Slow-Growing Conifer, Not a Fast Tropical
In its native habitat on Norfolk Island in the South Pacific, Araucaria heterophylla can reach forest-giant proportions. In a living room, it typically tops out at a manageable container size and spends years building a symmetrical pyramid of soft needle-like foliage. The root system mirrors that patience: roots grow downward more than outward, developing a taproot-style habit that prefers vertical space in the pot. Unlike philodendrons or pothos, which can be divided, stripped, and repotted aggressively, Norfolk Island pine recovers slowly from root damage because fine root hairs - the structures that absorb water and nutrients - are easily stripped away during rough teasing or bare-rooting.
The practical implication is straightforward. Repotting Norfolk Island pine is a maintenance event, not a growth accelerator. You are renewing compacted soil, correcting salt buildup, addressing circling roots at the outer edge of the root ball, and restoring stability - not forcing the tree into a dramatic size jump. Many experienced growers keep the same pot diameter for years and refresh only the upper soil layer through top-dressing, sizing up only when the root ball genuinely fills the current container.
When to Repot Norfolk Island Pine
Timing matters more for this species than for most houseplants because recovery depends on active growth. Norfolk Island pine sends water and nutrients toward its apical buds - the growing tips at the ends of branches - during its active phase. That energy flow is what powers root re-establishment after a pot change. Without it, the tree sits in fresh soil with damaged roots and no biological momentum to repair them.
Spring Is the Best Window for Active Recovery
Spring, as new growth begins at the branch tips, is the safest and most effective time to repot Norfolk Island pine. Early to mid-spring gives the tree the full stretch of lengthening days and warming room temperatures to rebuild its root system before summer heat arrives. Early summer works as a backup if you missed the ideal window, but only while active growth is still visible and temperatures remain consistently above roughly 13°C (55°F).
Avoid repotting in late fall and winter unless you are dealing with an emergency such as active root rot on Norfolk Island Pine. During the short-day season, Norfolk Island pine growth slows, root activity drops, and the tree has less capacity to handle the stress of disturbed soil and broken fine roots. A winter repot usually does not kill a healthy specimen outright, but recovery stretches from weeks into months, and lower branch yellowing is far more common. If your tree is not in crisis, mark your calendar for the first warm weeks of spring and use the intervening months to gather supplies and inspect the root ball.
Signs Your Norfolk Island Pine Actually Needs a New Pot
Norfolk Island pine does not send loud signals when it wants a new pot. The most reliable approach combines a calendar check - has it been more than two or three years since the last soil refresh? - with a physical inspection of the root zone. Repot when you have evidence of a real problem, not because a new decorative cachepot caught your eye at the garden center.
Root-Bound and Fast-Drying Mix
The clearest sign is a root-bound root ball. Lift the pot gently and look at the drainage holes: white or tan roots pushing through indicate the tree has used the available space. Slide the plant out of its container and check whether roots circle tightly around the bottom and sides, forming a dense mat that holds the shape of the old pot. When a root-bound Norfolk Island pine is watered, water often runs straight down the gap between the root ball and pot wall rather than soaking evenly through the mix.
A second reliable sign is fast drying. If your Norfolk Island Pine watering guide has not changed but the pot goes dry within a day or two of a thorough soak, roots may have displaced most of the soil volume. The tree is not necessarily unhealthy yet, but the soil system is failing and salt buildup becomes more likely with each fertilizer application. Compacted mix that drains slowly, smells sour, or develops a white mineral crust on the surface is another trigger - sometimes the right move is a same-size repot with fresh mix rather than a larger container.
Top-Heavy Plants That Wobble Without Obvious Root Crowding
Top-heavy instability is a sign that is easy to overlook because the foliage can look lush while the base is precarious. Norfolk Island pine forms a symmetrical pyramid that becomes increasingly top-heavy as it gains height. A shallow or lightweight pot that was adequate for a 30 cm seedling becomes dangerous for a 90 cm tree. If the plant rocks easily when brushed, leans despite upright growth, or has tipped after a minor bump, the root-to-container ratio is out of balance even if roots are not yet circling aggressively.
Stability problems often appear after the tree is moved from a heavy nursery pot into a tall, narrow decorative container with little weight at the base. The fix is not always a larger diameter - sometimes a deeper, heavier pot of the same or slightly larger size solves the tipping without adding excess wet soil volume. Think stability before size: a glazed ceramic or stone pot with a wide base can anchor a top-heavy tree far better than a lightweight plastic cylinder one size up.
How Often Norfolk Island Pine Needs Repotting
Most indoor Norfolk Island pines need repotting every two to three years, and some mature specimens go four years or longer between full repots when top-dressing keeps the upper soil layer fresh. The NYBG Mertz Library notes that repotting is needed only every two to three years under normal conditions, though plants can be repotted sooner when roots appear on the soil surface or through drainage holes. Young trees in small nursery pots may need an earlier first upgrade within the first year or two after purchase, especially if they were root-bound when you brought them home from a holiday display.
Frequency should follow the plant, not a rigid schedule. A Norfolk Island pine kept slightly root-bound in a stable environment may grow more slowly but remain healthy for years - a trade-off some growers accept to limit size indoors. Conversely, a tree in bright light with regular feeding will exhaust soil nutrients and structure faster. The useful question is not “has it been two years?” but “has the soil system stopped supporting healthy new growth?” If new tip growth is pale, compact, and appropriately colored, the pot drains predictably, and the tree is stable, delay the repot and top-dress instead.
Choosing the Right Pot Size and Shape
Pot selection for Norfolk Island pine involves two separate decisions: how much wider the new container should be, and how deep and heavy it needs to be for the tree’s current height. Conflating those decisions leads to the two most common repotting failures - oversized pots that stay wet too long, and shallow pots that invite circling roots and tipping.
The One-Size-Up Rule and Why Bigger Pots Backfire
The safe rule is one size up: choose a new pot only 2 inches (5 cm) wider in diameter than the current one. A tree in a 20 cm pot moves to a 25 cm pot, not a 30 cm or 35 cm showpiece. The reason is moisture physics, not aesthetics. An oversized pot holds a large volume of soil that the existing root system cannot dry out between waterings. That unused wet soil becomes a breeding ground for root rot pathogens, and even with identical watering habits, trees in oversized containers experience more root stress over time.
Norfolk Island pine prefers consistently moist - not waterlogged - soil. A pot that is only slightly larger gives roots room to expand without creating a swampy outer zone the tree cannot reach. If you are repotting because of root rot, the correct size may actually be the same diameter or slightly smaller, not larger. Match the pot to the healthy portion of the root ball after you remove damaged tissue, not to the size of the foliage canopy.
Depth, Weight, and Stability for a Top-Heavy Tree
Diameter is only half the equation. Norfolk Island pine roots grow downward, and a pot that is at least as deep as it is wide gives the taproot habit room to develop without circling at the bottom. A shallow bowl-shaped container forces roots into a horizontal spiral that makes the tree less stable and harder to water evenly.
Weight matters increasingly as the tree grows taller. A lightweight plastic pot that worked for a tabletop seedling will not anchor a floor-standing specimen. Glazed ceramic, stone, or a heavy terracotta pot provides a low center of gravity that resists tipping. If you prefer plastic for moisture retention, place it inside a heavy outer cachepot for display - but ensure the inner pot has drainage holes and is never sitting in collected water. A general proportional guideline used by several houseplant references suggests a pot diameter roughly one-third the height of the tree, which keeps the base visually and physically balanced as the pyramid of foliage grows above it.
Every pot must have a drainage hole. Norfolk Island pine cannot tolerate standing water at the root zone. Empty the saucer within 30 minutes of watering, especially during the first weeks after repotting when you are recalibrating moisture levels in fresh mix.
Soil Mix and Drainage for a Successful Repot
Fresh soil is the main reason to repot, so the mix you choose matters as much as the pot. Norfolk Island pine prefers a slightly acidic, well-draining indoor potting medium. The NYBG Mertz Library recommends a mildly acidic, soil-based potting mixture with additions of peat moss and coarse sand or perlite. A practical home blend starts with a quality indoor potting mix and amends it with 20% perlite for aeration, matching the slightly acidic range of pH 4.5–6.0 that NC State Extension cites for this species.
The mix should drain freely while holding enough moisture that the root ball does not swing from saturated to bone-dry within hours. Orchid bark or coarse sand added in small amounts improves structure without making the mix too lean. Avoid garden soil, heavy compost, or mixes with water-retaining crystals designed for moisture-loving tropicals - those hold water around Norfolk Island pine roots longer than the tree can use it, especially in an oversized pot.
Do not add a layer of pebbles at the bottom of the pot. Despite persistent advice to the contrary, a pebble layer creates a perched water table that keeps the lower root zone wetter than the soil above it. Fill the pot uniformly with the same mix from bottom to top, place a small mound at the base to support the root ball, and settle soil around the sides with a chopstick or pencil rather than packing it with your fingers.
Step-by-Step Norfolk Island Pine Repotting
Repotting Norfolk Island pine goes smoothly when everything is within reach before you lift the tree out of its pot. Gather a new pot one size up (or the same size for a soil-only refresh) with drainage holes and enough weight for stability, fresh potting mix pre-moistened slightly, a hand trowel, clean sterile pruning shears, a chopstick or pencil, and a watering can with a narrow spout. Water the tree 24 hours before repotting so the root ball holds together during removal - workable moisture, not a dripping mass that falls apart in your hands.
Work on a stable surface at roughly pot height so you are not lifting a top-heavy tree overhead. The entire procedure should take less than thirty minutes once supplies are ready - prolonged root exposure is the enemy.
Step 1: Inspect and slide out. Tip the pot gently on its side, support the trunk base with one hand, and ease the root ball out. If the tree resists, run a knife around the inside rim rather than yanking the trunk, which can snap lower branches or tear roots at the crown.
Step 2: Assess the root ball. Healthy roots are firm and white to tan. Mushy, brown, or foul-smelling roots indicate rot and need trimming before replanting. Circling roots at the outer edge can be loosened lightly; the dense center of the root ball should remain intact.
Step 3: Prepare the new pot. Add enough fresh mix at the base so that when the root ball sits on it, the original soil line aligns with the new pot rim. The trunk flare - where stem meets roots - must not be buried deeper than it was before. Burying the base invites bark rot and instability.
Step 4: Position and fill. Set the root ball on the base layer, center it for even weight distribution, and fill around the sides with fresh mix. Use a chopstick to settle soil into gaps without compressing the root ball. Leave roughly 2 cm between the soil surface and the pot rim for watering space.
Step 5: Water lightly and stabilize. Water until a small amount drains from the bottom, then stop. Do not soak repeatedly on day one. If the tree is tall, verify it stands upright without wobbling before moving it back to its growing location.
Minimizing Root Disturbance During the Move
The single most important technique in Norfolk Island pine repotting is minimal root disturbance. Do not bare-root the plant. Do not wash old soil from the root ball under a running tap. Do not aggressively tease apart the center of the root mass. Keep as much of the original soil attached as possible - it protects fine root hairs and preserves the microbial environment the tree has already adapted to.
Limit your root work to the outer third of the ball. Gently loosen circling roots at the bottom and sides with your fingers or a chopstick. Trim only roots that are clearly dead, mushy, or circling so tightly they form a solid woody mat. If the root ball is healthy and simply needs fresh soil around it, you may not need to loosen anything at all beyond placing it in the new pot and filling the gap with mix. Every minute the roots spend exposed to air and every centimeter of fine root you strip away extends recovery time by weeks.
Handle the trunk and root ball together, never pull the tree by its foliage. The lower branches of indoor Norfolk Island pines are often fragile and shed easily under stress. Supporting the base of the trunk while you work keeps the crown stable and reduces the mechanical damage that compounds transplant shock.
Post-Repot Care and Recovery Timeline
The first four to six weeks after repotting set the tone for the entire year. Norfolk Island pine needs a conservative routine while roots explore the fresh mix around the undisturbed core of the old root ball.
Light: Keep the tree in bright, indirect light - the same level it had before repotting, or slightly less if you moved it during the procedure. Avoid direct afternoon sun on a stressed root system. Do not relocate the tree to a dramatically brighter or darker spot during recovery.
Watering: Water lightly for the first two weeks. Fresh mix often holds moisture differently than depleted old soil, and overwatering is the most common post-repot killer. Check the top 2–3 cm with your finger and water only when it approaches dry. Never let the root ball go completely bone-dry, but err on the slightly dry side rather than the wet side.
Fertilizer: Hold all fertilizer for at least four to six weeks. Roots with broken fine hairs cannot process nutrients efficiently, and concentrated salts in fertilizer burn tender new root tips. Resume your normal feeding schedule only after you see healthy new growth at the branch tips.
Humidity and temperature: Maintain stable room temperatures between 16–24°C (60–75°F) and avoid cold drafts from doors or air conditioning vents. Humidity around 50–60% supports needle health but is less critical than consistent moisture management in the pot.
Recovery timeline: Mild transplant shock - slight droop of lower branches, a brief pause in new tip growth - usually clears within one to two weeks with proper care. Full root re-establishment takes four to six weeks. New growth at the apical buds, in the right color and spacing, is the clearest sign the tree has accepted its new container. Old yellowed needles will not green up again; watch the tips, not the lower interior branches.
Top-Dressing vs Full Repot: When a Lighter Refresh Is Enough
Not every soil problem requires lifting the entire tree. Top-dressing - removing the top 3–5 cm of old mix and replacing it with fresh soil each spring - can extend the interval between full repots by a year or more. This lighter refresh addresses salt crust on the surface, adds organic matter as the old mix decomposes, and improves water penetration without touching the delicate root core.
Choose top-dressing when the tree is stable, not root-bound, and the lower soil still drains well. Choose a full repot when roots circle the bottom, water runs through without absorbing, the tree is top-heavy and unstable, or the mix smells sour throughout the pot - not just at the surface. Large mature Norfolk Island pines that are difficult to move often thrive with annual top-dressing and a full repot only every four or five years.
If you top-dress, scratch the old surface lightly to blend the new mix in without damaging surface roots. Water gently afterward and apply the same no-fertilizer rule for four weeks. Top-dressing does not solve circling roots at the bottom of the pot; when those appear, a full repot in spring is unavoidable.
Emergency Repotting for Root Rot
Root rot is the one situation that overrides seasonal timing. If you find mushy, dark roots and a sour smell when inspecting the pot - or if lower branches are yellowing despite careful watering - repot immediately regardless of the calendar. Emergency repotting is more invasive than a routine spring upgrade, and that is acceptable because the alternative is losing the tree.
Remove the plant from its pot and brush away as much old soil as possible without destroying the remaining healthy root tissue. This is the rare case where more soil removal is justified, because the old mix likely harbors pathogens. Trim all soft, brown, or hollow roots back to firm white tissue with sterile shears. Let the root system air for an hour if conditions are warm and humid, then replant in fresh mix in a pot sized to the remaining root mass - often the same size or one size smaller than the original.
Water once lightly, then keep the tree in Norfolk Island Pine light guide and do not fertilize for six to eight weeks. Recovery from root rot takes longer than routine transplant shock, and some lower branches may not survive. Patience and conservative watering matter more than any other intervention.
Common Norfolk Island Pine Repotting Mistakes
Even experienced growers make these errors with Norfolk Island pine because the advice that works for fast-growing tropicals actively harms this slow conifer.
Jumping more than one pot size is the most damaging routine mistake. A larger pot feels generous, but excess wet soil causes more Norfolk Island pine deaths than tight roots ever do. One size up, every time.
Bare-rooting or aggressive root pruning strips the fine hairs that absorb water. Keep the root ball intact, loosen only the outer edge, and trim only dead tissue. If you have already bare-rooted a tree and it is struggling, stop watering heavily, keep it in stable bright light, and wait - do not repot again to “fix” the problem.
Repotting in winter for convenience rather than necessity adds weeks of stress. Wait for spring unless rot or severe root-binding leaves no choice.
Fertilizing immediately after repotting burns tender roots and compounds shock. The tree has enough stored energy to sit quietly for a month; let it use that energy for root repair, not foliage pushing.
Choosing style over stability - a tall narrow decorative pot with no weight at the base - invites tipping and makes watering inconsistent. Prioritize a wide, heavy base for any tree above 60 cm.
Burying the trunk deeper than the original soil line causes bark decay at the base and can kill the tree slowly. Match the old soil line exactly.
Ignoring drainage by using a pot without holes or letting the saucer stay full creates the root rot that forces emergency repotting later. Drainage is non-negotiable.
Conclusion
Norfolk Island pine repotting is a spring job built on restraint: refresh the soil, go one size up, disturb the roots as little as possible, and anchor a top-heavy tree in a deep, weighted pot with a drainage hole. Most indoor specimens need this attention only every two to three years, and many go longer with annual top-dressing. Watch for roots at the drainage holes, mix that dries too fast, and a trunk that wobbles in a lightweight container - those are your real signals, not the calendar alone. Handle the root ball gently, match the original soil line, hold fertilizer for a month, and let new tip growth tell you when the tree is back on track. Done correctly in spring, a repot is barely noticeable within a few weeks. Done aggressively in the wrong season or the wrong pot, it becomes a months-long recovery project that no living Christmas tree deserves.
When to use this page vs other Norfolk Island Pine guides
- Norfolk Island Pine overview - Start here for whole-plant context before deep-diving this topic.
- Norfolk Island Pine problems hub - Jump to symptom-specific fix guides when this care topic does not resolve the issue.
- Root Rot on Norfolk Island Pine - Escalate here when repotting adjustments are not enough.