Brown Tips on Norfolk Island Pine: Causes, Checks & Fixes
Quick answer
Brown tips on Norfolk Island Pine usually follow dry winter air, inconsistent watering, salt or fluoride in tap water, or heat-vent exposure-not a fertilizer shortage. First step: stick your finger 2–3 cm into the mix and read humidity at canopy height with a hygrometer before you trim or flush.
Brown Tips on Norfolk Island Pine: Causes, Checks & Fixes
This guide covers brown tips on Norfolk Island Pine. See also the general Brown Tips guide, watering, and light pages for this plant.
Brown Tips on Norfolk Island Pine: Causes, Checks & Fixes
Quick answer
Brown tips on Norfolk Island Pine (Araucaria heterophylla) are a localized stress signal on soft, awl-shaped needles-not always root failure. This subtropical conifer grows in symmetrical horizontal whorls, and the outermost needle tips desiccate first when transpiration outpaces water uptake. Illinois Extension notes that needle drop and tip browning often follow exposure to dry air or dry soil indoors. PlantTalk Colorado lists excessive needle browning as a sign of too little humidity, inconsistent watering, or drafts from furnaces and air conditioners.
First step: stick your finger 2–3 cm into the mix and read humidity at canopy height with a hygrometer. A light pot with dry mix means underwatering may share blame with dry air. Moist soil with brown tips on the vent-facing side points to heat and humidity stress, not rot. Only after you know water pattern and air moisture should you trim, flush salts, or relocate the tree.
Scope note: This page is the margin-necrosis triage guide-humidity, watering, salt, vents, mites, and safe trimming across all causes. If dry air is already the confirmed primary problem and you need humidifier workflow for a tall holiday tree, follow the low humidity on Norfolk Island pine guide instead.
Brown tips vs. low humidity - which page to use
Both URLs address crispy Norfolk Island pine needles, but the first action you take depends on what you have already confirmed:
| What you see | Soil at 2–3 cm | Humidity at top whorls | Start here |
|---|---|---|---|
| Crispy outer tips; winter heat just turned on | Moist or normal | Below 40% | Low humidity guide - humidifier setup |
| Brown tips on vent-facing side only | Moist | Any | This page - placement and draft audit |
| White crust on soil + tip burn after feeding | Any | Above 50% | This page - salt flush and water quality |
| Tips brown on multiple whorls; no crust; good placement | Normal | Above 50% | This page - fluoride / tap-water minerals |
| Pale dots + webbing on needle undersides | Any | Often low | This page first, then spider mites |
| Entire tiers drop; soggy soil; soft lower trunk | Wet for days | Any | Root rot - not tip burn alone |
The low-humidity page covers sustained humidifier recovery, pebble-tray limits on specimens over 90 cm, and winter spider-mite prevention in dry rooms. This page covers salt flush, trim technique, lookalike routing, and the seven-step confirmation path so you do not duplicate humidifier advice when the real issue is vent scorch or mineral crust.
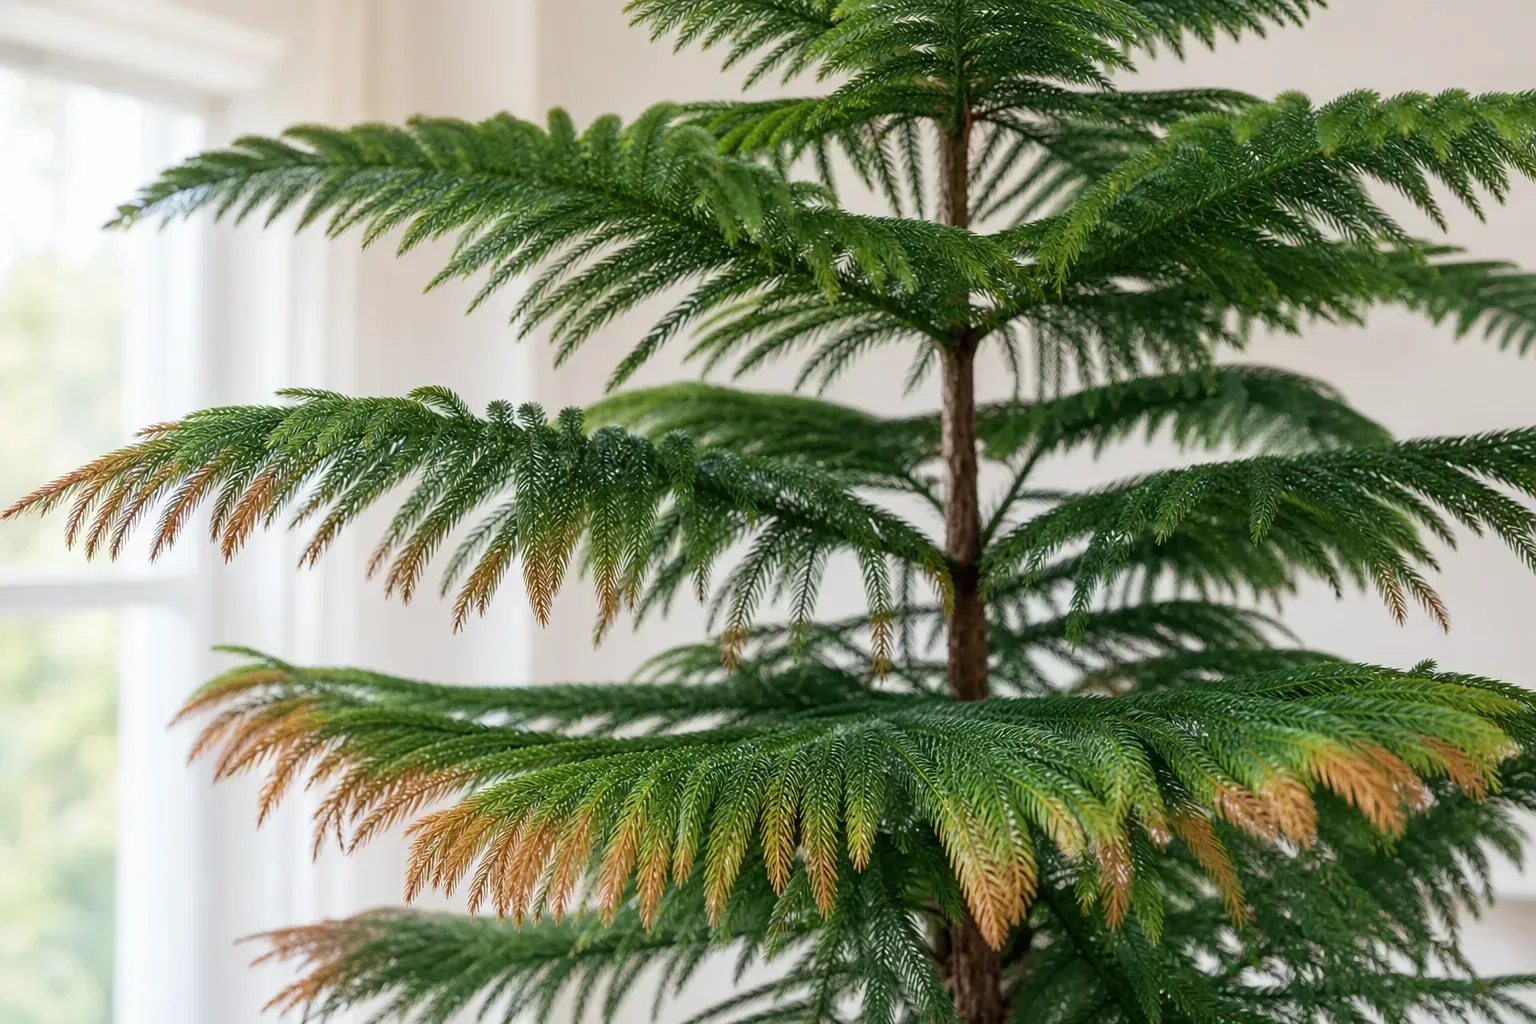
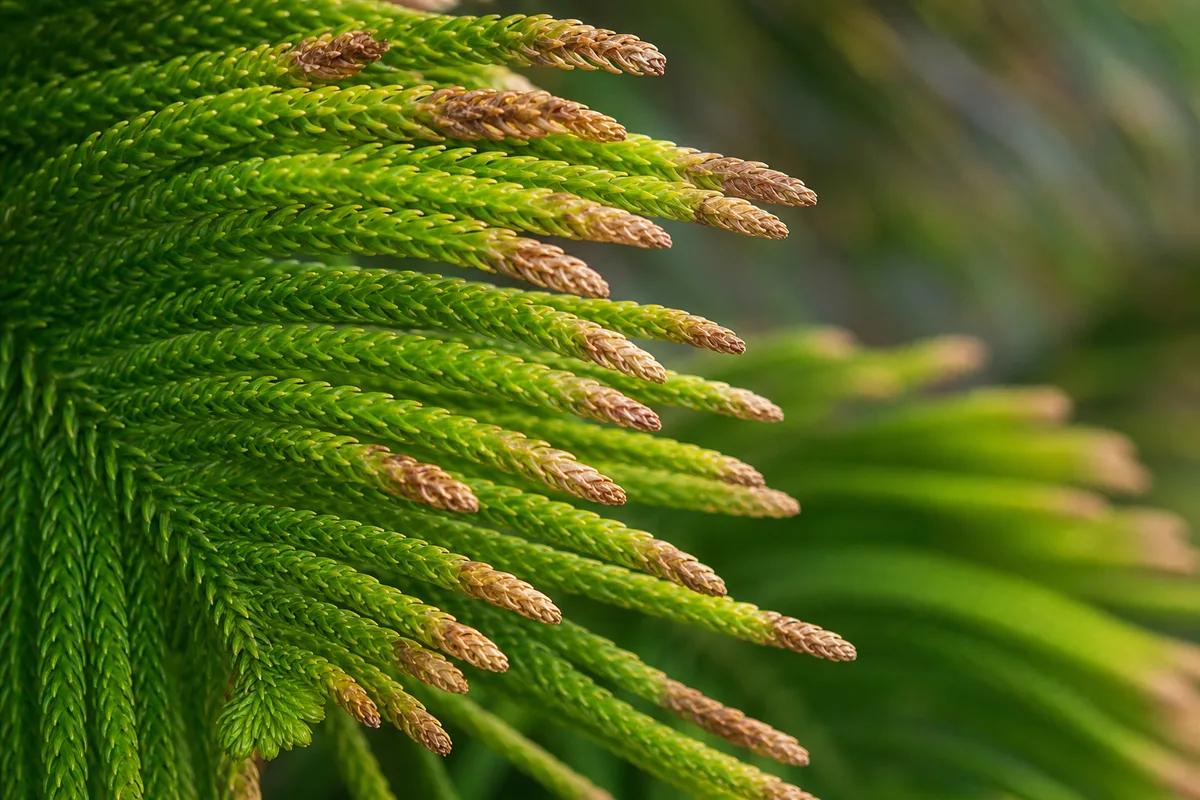
What brown tips look like on Norfolk Island Pine
Norfolk Island Pine is not a true pine. Its juvenile needles are soft and overlap in a herringbone pattern on tiered branches-quite different from the waxy needles on outdoor Pinus species. Tip damage therefore shows up as dry, tan-to-brown crispy margins on those soft needles, usually before whole branches fail.
Brown Tips symptoms on Norfolk Island Pine - compare with healthy tissue on the same plant.
Photo guide - three patterns to compare before you fix
Use these visual checks at the tree (original macro photos pending for a future update):
- Vent-side asymmetric burn - Outer whorl needles on one side show a narrow tan band at the tips while the opposite side stays greener; the browned side faces a floor register, radiator, or fireplace. Soil moisture is often normal because the problem is localized dry heat, not drought.
- White salt crust on soil surface - Chalky mineral film on the pot rim or soil top with margin burn on several whorls even when a hygrometer reads 50% or higher. Points to accumulated salts or fluoride from tap water and fertilizer, not humidity alone.
- Spider mite stippling on needle undersides - Fine pale dots plus occasional webbing in dry heat; tips brown while adjacent needles look dull gray-green rather than the uniform symmetrical margin burn of pure humidity stress.
Typical patterns include:
Crispy brown tips on outer or upper whorls (most common in winter):
- Narrow tan band at the needle point, sometimes creeping slightly inward
- Dry, papery texture on needles that still feel attached and plump at the base
- Often worse on the side facing a heat vent, radiator, fireplace, or hot window glass
- Lower interior whorls may stay green while perimeter needles crisp first
Slow browning after holiday display:
- Tips brown within one to three weeks of sitting on a mantel, foyer table, or near a floor register
- Tree looked fine in December but outer tiers dull after permanent relocation stress plus dry forced air
- Central leader stays green while outer needles on the exposed side brown asymmetrically
Salt or fertilizer burn at margins:
- Brown tips appear after heavy feeding or months of hard tap water
- White mineral crust on soil surface or pot rim
- Tips may look burnt on multiple whorls even when humidity and placement seem acceptable
Spider mite stippling mixed with tip dryness:
- Fine pale dots on needle undersides plus occasional webbing in dry heat
- Tips brown while adjacent needles look dull gray-green-not the uniform symmetrical margin burn of pure humidity stress
Unlike fungal leaf spots, tip burn is usually symmetrical at margins, dry to the touch, and without yellow halos or spreading wet lesions. A few lowest branches browning slowly in dim light can be normal lower-branch loss as the tree matures; widespread tip burn on active upper growth during heating season is not normal ageing.
Why Norfolk Island Pine gets brown tips
In native habitat on Norfolk Island, this tree grows in coastal, humid conditions-not the 20–30% relative humidity many heated homes reach in winter. Soft juvenile needles lose water quickly through transpiration; tips are the farthest point from roots and dry first.
Low humidity and heat vents
PlantTalk Colorado recommends about 50 percent humidity for Norfolk Island pine indoors. North Carolina Extension notes the species adapts to warm, dry home air but still needs management in heated rooms-misting and sparing winter watering are commonly recommended. Dry forced air from vents strips moisture from outer whorls faster than pebble-tray evaporation can replace it on tall specimens. Asymmetric burn on the vent-facing side maps to draft physics on symmetrical whorls: one horizontal tier loses moisture on the exposed face while the opposite needles still transpire at normal rates.
When humidity alone is the confirmed driver, hand off to the low humidity guide for humidifier placement on specimens 90 cm to 1.5 m tall.
Inconsistent watering
Norfolk Island pine prefers consistent moisture when actively growing and slightly drier soil in winter per Illinois Extension winter care guidance-water when the top inch of soil is dry, then soak until a little water exits the drainage hole. Long dry spells followed by heavy soaking stress roots; tips burn even when the needle base still looks green. Chronic underwatering produces the same crispy margins with light pots and dusty mix at depth-see underwatering on Norfolk Island pine when that pattern dominates.
Salt and fluoride in tap water
Heavy fertilizer on dry soil, skipped flushing, and hard municipal water can scorch sensitive foliage at needle margins. Ask Extension recommends rainwater or distilled water when possible for Norfolk Island pines prone to tip browning. Fluoride in municipal water can cause necrotic tips and margins on sensitive plants; fluoride does not dissipate when tap water sits out overnight the way chlorine can. If tips brown on multiple whorls with no vent asymmetry and no humidity drop, suspect minerals before you add another humidifier.
Hot windows and AC blow paths
Hot, sunny windows and AC blow paths raise leaf temperature and transpiration while room air stays dry. Missouri Botanical Garden lists spider mites as a common indoor pest on this species; dry air makes mite flare-ups more likely and can combine stippling with tip dryness-cross-check spider mites on Norfolk Island pine if webbing appears.
Sudden light reduction
Sudden light reduction after holidays can yellow and drop entire branches if the tree was not acclimated-different from slow margin burn alone. If branches go long and droopy far from windows, see not enough light on Norfolk Island pine.
How to confirm the cause
Work through these checks in order before repotting, fertilizing, or heavy pruning:
- Soil moisture at 2–3 cm depth - Dry and dusty with a light pot confirms drought stress is in play. Cool, damp, or soggy for days suggests overwatering or poor drainage-not a humidity-only fix.
- Hygrometer at canopy height - Hold the meter near top whorls, not on the floor. Below 40% with active tip browning strongly supports dry air. Many houseplants prefer 40–50% or higher; this tree does best around 50–60% at branch height.
- Placement audit - Is the pot within 1–2 m of a heat vent, radiator, fireplace, or AC louvers? Asymmetric browning on one side maps to a draft or heat source.
- Season and display history - Did tips appear within weeks of turning on central heat or after a holiday mantel placement? Seasonal timing fits environmental tip burn.
- Salt crust check - White mineral film on soil surface plus tip burn after heavy feeding points to salt stress. Flush only if crust or feed history supports it.
- Pest inspection - Tap a branch over white paper; check needle undersides with a hand lens. Stippling and webbing mean mites overlap with tip damage-stabilize humidity before or alongside pest treatment.
- New growth condition - Green, plump central leader with only older outer tips browned often means past stress. Browning on emerging whorls means the current environment is still wrong.
Lookalike symptoms to rule out
| What you see | Likely cause | Differentiating check |
|---|---|---|
| Crispy tips on outer whorls; dry winter room | Low humidity or underwatering | Hygrometer below 40% at canopy; or dry mix plus light pot |
| Brown tips on vent-facing side only | Heat vent / radiator scorch | Damage maps to vent; soil moisture may be normal |
| White crust on soil + tip burn after feeding | Salt / fertilizer buildup | Heavy feed history; flush test in spring |
| Lower branch drop with wet soil | Overwatering / root stress | Pot heavy; sour smell; soft lower stems |
| Long droopy branches far from windows | Too little light | Humidity normal; sparse upper growth |
| Pale dots + webbing on needle undersides | Spider mites | Mites visible; dull gray-green needles |
| Slow loss of lowest branches only | Normal ageing on mature indoor tree | Upper active growth stays green; dim lower light |
If soil is evenly moist, stems are firm, and tips are crispy in a dry heated room, humidity and placement are the likely path-not fertilizer. For a dedicated humidity recovery workflow, see low humidity on Norfolk Island pine.
First fix for Norfolk Island Pine
Move the tree out of the path of heating vents, radiators, fireplaces, and AC output-then check whether the top inch of soil is dry.
Pull the pot back until no forced air hits foliage directly. If the tree sat on a holiday mantel or foyer register, treat that placement as the primary cause until proven otherwise. Give it bright indirect light with some morning sun in the new spot-do not trade one stress for a dark corner.
If the top inch of mix is dry and the pot feels light, water thoroughly until a little water exits the drainage hole and discard saucer runoff within fifteen minutes per the Norfolk Island pine watering guide. If soil is already moist and tips brown on the vent side, skip extra water-overwatering to compensate for dry air worsens root stress.
Do not trim all brown tips on day one. Do not fertilize a stressed tree. Do not repot while diagnosing tip burn. Relocation plus one accurate watering read is the first fix; humidifier setup and salt flushing follow from what you confirmed.
Step-by-step recovery
After the first fix, work through recovery in order:
- Raise ambient humidity to 50% or higher at canopy height - A cool-mist humidifier running several hours daily is more reliable than occasional misting. Illinois Extension recommends pebble trays and grouping houseplants for local moisture; pair trays with a humidifier on specimens over 90 cm so upper whorls benefit. Full humidifier workflow for tall trees lives on the low humidity guide.
- Stabilize watering rhythm - Allow the top 2–3 cm to dry, then soak. Dry air increases transpiration; underwatering on top of low humidity accelerates tip burn. Avoid soggy soil-see overwatering if mix stays wet for days.
- Flush accumulated salts in spring if white crust or post-feeding tip burn appeared - Run plain room-temperature water through the pot at two to three times the pot volume. Let it drain fully; skip fertilizer for several weeks afterward. Use rainwater or distilled water if hard tap water persists after flushing.
- Inspect for spider mites weekly - If webbing appears, rinse needle undersides gently, then treat with insecticidal soap or horticultural oil on a labeled schedule if populations persist. Fix humidity so mites do not rebound immediately.
- Trim cosmetic damage last - Once new growth looks clean, snip fully dead brown tips with clean scissors, following the natural curve of each soft needle. Leave a thin brown edge rather than cutting into green tissue-trimming into living green on soft Araucaria needles often causes secondary browning along the cut margin. Never prune the central leader to remove tip burn-the tree’s symmetrical structure depends on that growing point unless it is fully dead.
- Rotate the pot monthly if light comes from one window so whorls stay symmetrical as recovery begins.
Do not mist heavily on cool evenings. Brief misting alone does not sustain humidity for hours and can leave needles damp overnight in a cool room.
Recovery timeline
Tip burn recovery is slow but predictable:
- Week 1–2: No further spread of brown tips after relocation, accurate watering, and humidifier use
- Week 3–6: New growth at branch tips looks greener and plumper; mite activity drops if humidity holds
- Month 2+: Fresh whorls extend normally; old browned needle tips remain cosmetic unless you trim them
Damaged needle tissue does not heal backward-judge success by new whorls and a firm green central leader, not by old tips re-greening. If entire tiers brown from the trunk outward while soil stays soggy, suspect root trouble instead of cosmetic tip burn alone.
Documented recovery case (January 2026): A 1.2 m holiday Norfolk Island pine sat on a foyer mantel above a floor register for twelve days after New Year. Hygrometer at top whorls read 32%; outer vent-facing needles showed tan crispy margins within ten days. Relocated to bright indirect light away from the register, watered when the top inch dried, and ran a cool-mist humidifier targeting 55% at canopy height. Tip spread stopped within two weeks; a new green whorl at the branch tips appeared at roughly six weeks. Existing brown margins stayed cosmetic until trimmed.
What not to do
Do not increase watering frequency solely because tips are brown-that raises root rot risk when soil was already moist. Do not fertilize a browning tree to “green it up”-salts worsen margin burn. Do not prune the central leader for cosmetic tip damage. Do not rely on floor-level pebble trays alone for a tall tree without canopy-height humidity. Do not stack repotting, heavy tier pruning, and pesticide on the same day.
How to prevent brown tips next time
Before heating season, set up humidity monitoring at branch height and keep the tree several feet from vents year-round. Run a humidifier whenever indoor relative humidity drops below 50% near the canopy. Water when the top inch dries per the watering guide, empty saucers after every soak, and flush salts once or twice a year if you feed regularly.
When buying or receiving a holiday Norfolk Island Pine, plan permanent placement in bright light with humidity support-not a temporary spot near a fireplace. After December, move promptly to a stable room before outer whorls crisp. Full species context: Norfolk Island pine overview.
When to worry
Treat as urgent when multiple horizontal tiers brown and drop within days, the trunk softens at the base, soil stays waterlogged while needles brown widely, or spider mite webbing spreads unchecked across whorls. Those patterns can combine dry air with pest damage or root failure-if soil is soggy and lower stems soften, unpot the same day and follow the root rot on Norfolk Island pine recovery protocol before cosmetic trimming.
Lower urgency applies when a few outer needles show crispy tips in dry winter air while the central leader stays green and firm and soil moisture is balanced. Monitor for two to four weeks after correcting placement and humidity; if new tips stay clean, the tree is recovering.
For repeated tier collapse after you have ruled out vents and dry air, contact your local cooperative extension office before stacking pesticides or heavy pruning.
Where to go next - escalation summary
| If your diagnosis points to… | Next step |
|---|---|
| Dry air confirmed; need humidifier workflow for a tall tree | Low humidity guide |
| Cosmetic tip burn only; new whorls look clean | Trim dead margins following needle curve; preserve central leader |
| White crust + margin burn after feeding | Spring salt flush; switch to rainwater or distilled water |
| Soggy soil + tier collapse + soft trunk | Root rot guide - same-day unpot |
| Webbing and stippling on needle undersides | Spider mites guide after humidity stabilizes |
| Light too dim; long droopy branches | Not enough light guide |
Frequently asked questions
Should I read this brown-tips page or the low-humidity page for Norfolk Island Pine?
Use this page when you need to triage margin necrosis across humidity, watering, salt, vents, and mites before picking one fix. Use the low-humidity page when a hygrometer already confirms dry air below 40% at canopy height and you want humidifier placement, tall-specimen setup, and sustained winter recovery-not salt-flush or trim technique.
What should I check first when Norfolk Island Pine needles turn brown at the tips?
Check soil moisture 2–3 cm deep, pot weight, humidity at the top whorls-not floor level-and whether browned needles face a heat vent, fireplace, or holiday display spot. Norfolk Island pine shows tip burn on soft outer needles before lower branches fail, so placement and air moisture matter as much as the watering calendar.
Will brown Norfolk Island Pine needle tips turn green again?
No-browned needle tissue is permanent and will not re-green. Recovery shows in new whorls with plump, evenly green needles at branch tips within four to eight weeks once humidity, watering, and placement stabilize. Trim fully dead tips only after new growth looks clean.
When are brown tips urgent on Norfolk Island Pine?
Escalate if entire horizontal tiers brown and drop within days, the trunk softens at the base, soil stays soggy while needles brown widely, or spider mite webbing spreads across multiple whorls. A few winter brown tips on outer needles with firm wood and a green central leader can wait for a humidity and placement fix.
Is fluoride in tap water making my Norfolk Island Pine tips brown?
It can contribute when tips brown on multiple whorls despite good humidity and placement, especially after months of hard municipal water without flushing. White crust on soil plus margin burn after feeding fits salt buildup more clearly. Switch to rainwater or distilled water and flush salts in spring if crust or feed history supports it-resting tap water overnight removes chlorine but not fluoride.
Related Norfolk Island Pine guides
- Low humidity on Norfolk Island pine - sustained humidifier recovery when dry air is the confirmed driver
- Norfolk Island pine watering guide - top-inch dry check and soak rhythm
- Root rot on Norfolk Island pine - tier collapse with soggy soil and soft trunk
- Overwatering on Norfolk Island pine - when moist soil plus wide browning is not vent scorch
- Underwatering on Norfolk Island pine - light pot and dusty mix with crispy tips
- Spider mites on Norfolk Island pine - stippling and webbing overlap in dry heat
- Norfolk Island pine overview - species ID, holiday display context, and full care hub