Spider Mites on Croton: Causes, Checks & Fixes
Quick answer
Spider mites on croton show as fine stippling and webbing on colorful leaves, often beside a bright south or west window in dry winter heat. First step: move the plant away from neighbors and rinse every leaf underside with lukewarm water to knock off live mites before any spray.
Spider Mites on Croton: Causes, Checks & Fixes
This guide covers spider mites on Croton. See also the general Spider Mites guide, watering, and light pages for this plant.
Spider Mites on Croton: Causes, Checks & Fixes
Quick answer
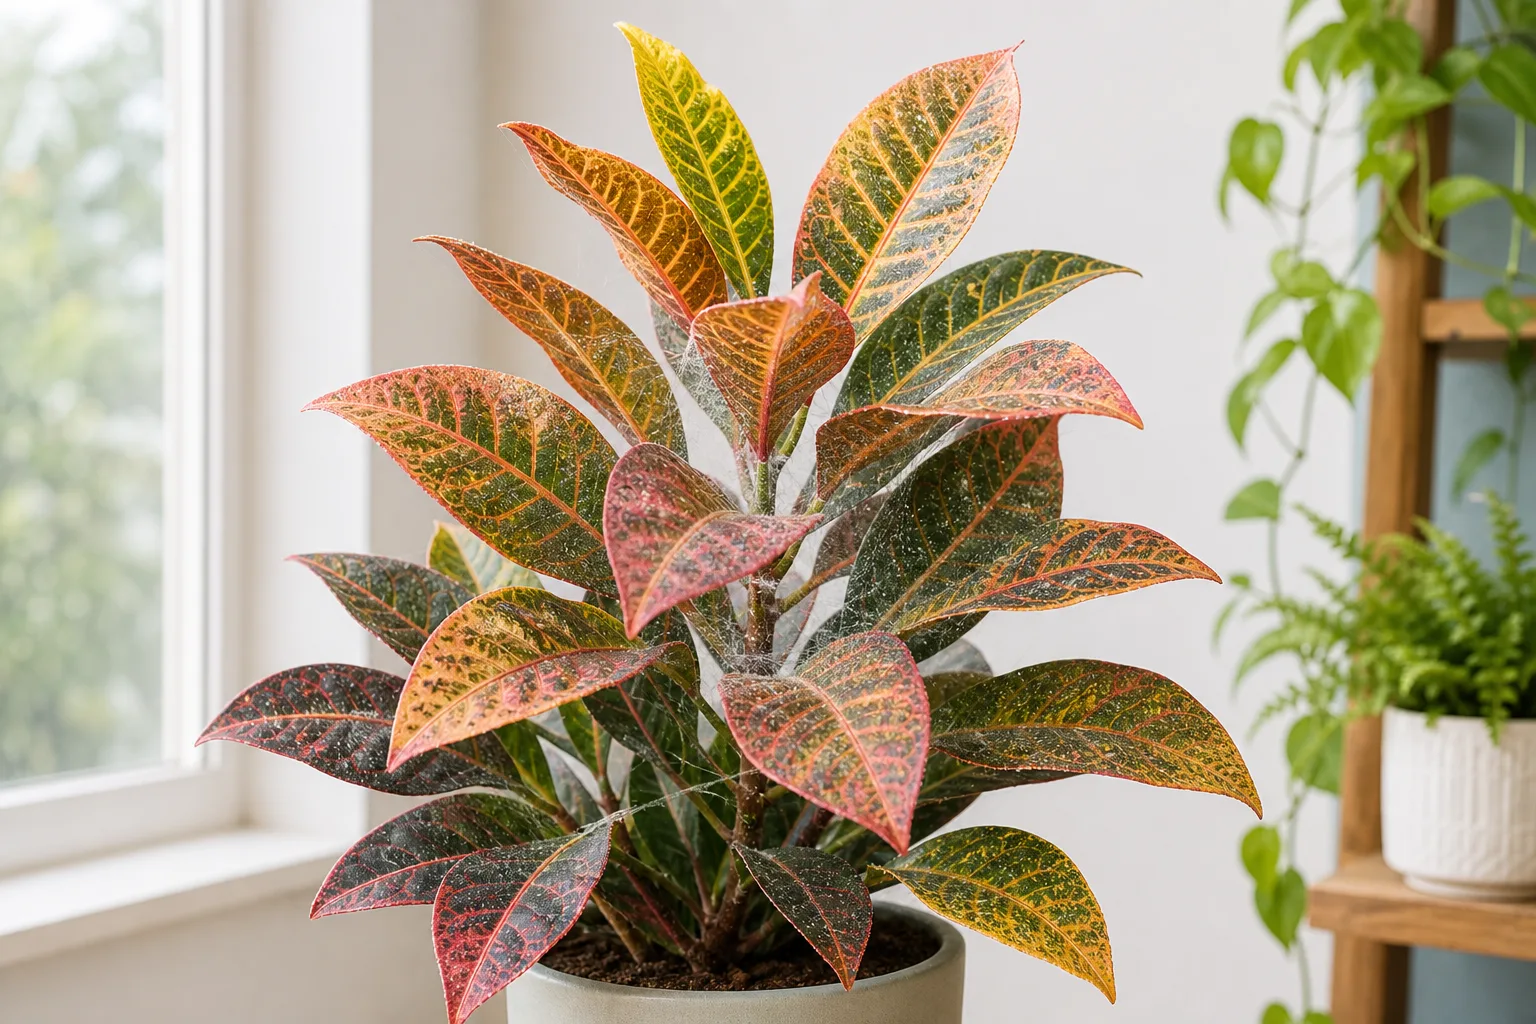
Spider mites on croton (Codiaeum variegatum) appear as fine stippling on colorful leaves, dull bronzed patches, and eventually delicate webbing at leaf axils and along woody stems. The paradox for croton owners: this plant needs bright south- or west-window light to hold vivid color, yet that same placement beside glass in winter heat creates the hot, dry microclimate spider mites prefer indoors.
First step: move the plant away from neighbors and rinse every leaf underside with a firm stream of lukewarm water. That physical knockdown confirms active mites and buys time before you choose soap, oil, or a miticide.
Wear gloves when handling infested stems-milky sap from cut or crushed tissue irritates skin on this Euphorbiaceae shrub. Keep pets away from wet sprayed foliage; croton is toxic if chewed.
What spider mites look like on Croton - especially variegated leaves
Spider mites are barely visible dots-often red, amber, or green-concentrated on leaf undersides and young stem tissue. On croton their feeding leaves a distinctive pattern:
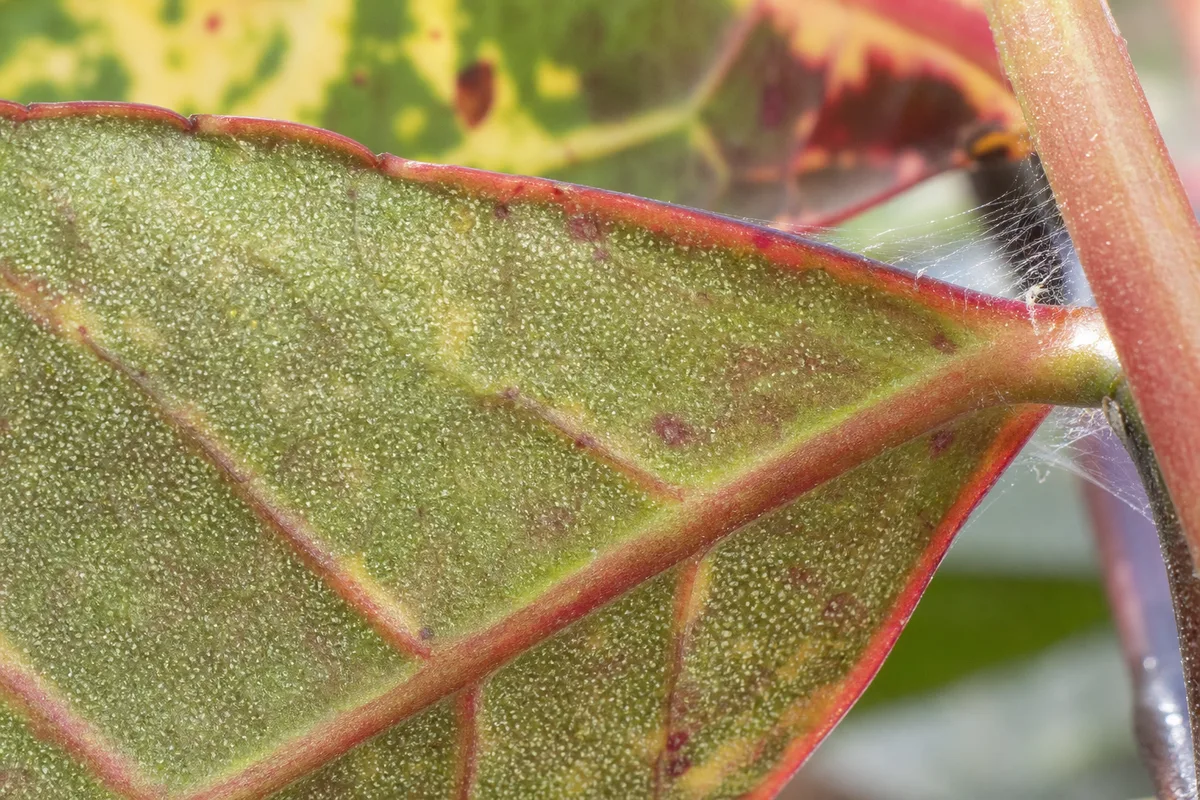
Spider Mites symptoms on Croton - compare with healthy tissue on the same plant.
- Stippling: thousands of tiny yellow or white dots where individual leaf cells were drained
- Dulled variegation: red, orange, and yellow pigments lose contrast before leaves bronze or crisp-stippling is harder to spot on multicolor foliage than on plain green houseplants until damage advances
- Fine webbing between leaves, at stem joints, and along woody lower branches
- Progressive leaf drop on a plant already sensitive to environmental change
Croton leaves are thick, glossy, and leathery-not fuzzy. Early stippling can hide in the color pattern until you tilt leaves toward light or inspect with a magnifier. By the time webbing is obvious at stem axils, the colony has usually been present for weeks.
Cultivar visibility note: On broad-leaf cultivars such as Petra and Mammy, stippling often shows first as a flat, dusty look across red or orange zones before you see individual dots. On Gold Dust, tiny yellow speckles on green leaves can mask mite stippling until bronzing spreads-check undersides on the newest shoots regardless of cultivar tag.
Unlike aphids on croton, mites do not leave sticky honeydew or soft-bodied clusters on new shoots. Unlike cold-stress leaf drop, mite damage shows dots and silk, not uniform yellowing after a draft.
Why croton gets spider mites
Croton evolved in warm, humid tropical forest margins across Malaysia, Indonesia, and the Pacific. Indoors, the conflict is environmental: you place the pot within a few feet of bright glass to preserve color-exactly where winter sun and radiator heat bake leaf surfaces dry while central heating drops room humidity below 30%.
Common triggers on codiaeum:
Bright window + winter heat. South- and west-facing sills deliver the light croton needs for pigment, but afternoon sun through glass plus a heating vent underneath creates mite-friendly dry air. See croton light needs for placement that balances color and stress.
Dry interiorscape air. Spider mites are among the pests that limit long-term indoor display of croton per NC State Extension-mites are the plant’s most common indoor pest, not an occasional surprise.
Dusty glossy leaves. Croton accumulates dust that blocks inspection and gives mites cover on waxy surfaces.
Recent relocation or leaf drop. A croton shedding leaves from a move is already stressed; mites colonize weakened tissue at stem tips while you focus on watering rhythm. Match moisture to light per the watering guide rather than compensating with extra water alone.
Crowded plant shelves. Mites crawl short distances and ride on tools, hands, or breeze between pots on a sunny shelf.
Spider mites thrive in warm, dry conditions on houseplants-the same winter room where croton holds color is often their best habitat.
Confirm mites vs. aphids, thrips, low humidity, and cold leaf drop
Work through these checks before spraying anything:
- White-paper tap test. Hold a suspect leaf over white paper and flick the underside. Moving specks confirm live mites.
- Magnifier scan. Inspect newest leaves and stem joints at 10× magnification. Look for dots plus silk threads-not pear-shaped aphids or silvery thrips scars.
- Webbing check. Fine silk at leaf axils distinguishes mites from thrips, mineral spray residue, or clean humidity tip burn.
- Honeydew scan. Sticky shine on upper leaves with soft insects on new shoots points to aphids, not mites.
- Recent environment change. Mass leaf drop after a cold car ride or draft below about 50°F fits cold stress-look for uniform drop without stippling.
- Light cross-check. Green revert and leggy stretch without dots may mean insufficient light rather than pests.
Symptom lookalike comparison
| What you see | Likely cause | Key differentiator |
|---|---|---|
| Pale dots + webbing on undersides | Spider mites | Tap test shows moving specks |
| Sticky residue + soft insects on new shoots | Aphids | Honeydew, no silk webbing |
| Silvery scars, distorted new leaves | Thrips | No classic stippling + webbing combo |
| Crisp brown tips, no dots | Low humidity / placement | Margins only; no undersurface colonies |
| Uniform yellow drop after cold exposure | Cold stress / relocation | No stippling; often follows a move or draft |
| Bleached patches after sudden bright sun | Sun scorch | Margins or patches, not evenly spaced dots |
Confirmed mites show stippling with undersurface activity or webbing. Suspected mites with only dry tips and no dots may be humidity or watering imbalance-recheck undersides with a lens before treating.
First fix: isolate, rinse, and treat safely
Isolate and rinse. Move the croton away from other plants. In a sink, shower, or-when temperatures stay above about 50°F-a shady outdoor spot, spray every leaf underside and stem with a strong lukewarm stream for several minutes. UF IFAS recommends washing indoor crotons in shade to manage dust and spider mites. Rotate the pot so water reaches axils where webbing hides.
This single step:
- Removes a large fraction of adults and eggs through physical washing
- Confirms you are treating the right problem
- Avoids stacking pesticides on day one
Let the plant drain and dry in bright indirect light-not direct afternoon sun on wet foliage, which can scorch variegated leaves. Do not repot or fertilize on day one; croton under pest stress needs stable roots, not extra disturbance.
Shower and shady outdoor rinse options
Indoor showering works year-round. For large specimens, carry the pot to a shaded patio or porch when weather allows, rinse thoroughly, and bring it back once foliage dries. Avoid rinsing in full sun-wet croton leaves in harsh light burn easily. In winter, the bathroom shower is safer than a cold outdoor blast.
Dense crown caution: Mature crotons with tightly stacked leaves can hold water in the crown after repeated indoor showers. Tilt the pot to drain, blot trapped water between leaf bases with a dry cloth, and allow 24 hours of airflow before the next rinse. Prolonged crown wetness on a stressed plant invites stem rot-space shower treatments at least three to four days apart unless you are rinsing outdoors in warm shade with fast drying.
Insecticidal soap, horticultural oil, and repeat schedule
If stippling persists or webbing remains after the first rinse, apply insecticidal soap or horticultural oil labeled for mites. Coat all leaf surfaces, especially undersides, until the solution barely drips. Apply in early morning or evening so wet leaves are not hit by intense window sun.
Every 5–7 days: Repeat soap or oil at least three times. Mite eggs hatch in cycles; one spray rarely clears an outbreak.
Between sprays: raise ambient humidity with a pebble tray or small humidifier near the plant-target 40–60% RH when possible, not soaking the crown. Dry indoor air increases pest pressure on foliage.
Prune only if needed. Remove a heavily webbed leaf or two and bag it. Do not strip the plant bare unless most leaves are already lost-croton drops enough foliage from stress without extra pruning.
Inspect neighbors weekly. Treat any adjacent pot showing early stippling.
Sap and pet safety during treatment
Wear gloves when wiping stems or pruning-broken stems release irritating latex sap that can stain fabric and irritate skin and eyes. Wash hands before touching your face.
Croton ingestion causes drooling, vomiting, and diarrhea in pets. During treatment, keep cats and dogs out of the room until sprayed leaves are fully dry. If a pet chews treated or stressed foliage, contact your veterinarian or the ASPCA Animal Poison Control Center at (888) 426-4435. This is general information, not veterinary advice.
Recovery timeline and leaf-drop expectations
Days 1–3: Webbing loosens after the first rinse; live mite activity should drop on re-inspection.
Week 1–2: Stippling stops spreading to new leaves if treatment coverage was thorough.
Weeks 2–4: After three timed spray cycles, new tip leaves should emerge without fresh dots. Old stippled leaves stay marked permanently-that is normal on croton.
Winter recovery: Growth may slow in low light; judge success on the next colorful flush in spring, not on immediate refoliation.
Editorial observation: On a west-window Petra croton beside a radiator in February, stippling stopped spreading after the second weekly rinse-and-soap cycle; clean orange-tipped growth appeared in week four while older bronzed leaves stayed cosmetic. That timeline matches what extension sources describe for contact treatments on woody-stemmed houseplants when humidity improves and neighbors are treated.
Croton already drops leaves from relocation and cold-mite damage plus environmental stress can compound leaf loss. Hold watering steady per your normal dry-down check; do not flood a partially defoliated plant. See the croton overview for how this species responds to stacked stress.
If stippling spreads through three spray rounds, escalate to a miticide labeled for spider mites or consult your local extension office-general insecticides labeled for insects often miss mites.
What not to do
One-and-done spraying. A single soap application leaves eggs to hatch. Plan three cycles minimum on a 5–7 day schedule.
Treating only leaf tops. Mites feed on leaf undersides. Incomplete coverage guarantees return.
Spraying horticultural oil or neem on sun-heated leaves. Soaps, horticultural oils, and neem oil on wet foliage in hot direct window sun can burn glossy variegated croton leaves-especially red and yellow zones. Treat at dawn, dusk, or after moving the pot briefly away from harsh afternoon glass. Test one leaf and wait 48 hours before full application.
Assuming insecticides kill mites. Mites are arachnids, not insects-products labeled for insects only may fail. Use miticides, horticultural oil, or insecticidal soap labeled for mites.
Raising humidity by overwatering on Croton. Pebble trays and room humidifiers target air, not soggy soil. Wet mix on a defoliating croton invites root trouble.
Ignoring sap exposure. Manual wiping without gloves spreads sap and risks skin irritation-common on Euphorbiaceae houseplants.
How to prevent spider mites on croton
Match prevention to how croton actually lives in your home:
- Humidity in heated seasons - Aim for 40–60% RH near foliage; pebble tray or humidifier beats occasional misting alone
- Weekly winter inspections - Check undersides with a magnifier when the furnace runs and air is dry
- Shady rinse habit - Occasionally wash dusty foliage in shade to remove early colonies before webbing spreads
- Quarantine new crotons two weeks before shelf placement with your collection
- Stable bright placement - Enough light for color without baking leaves against cold glass and heat vents
- Avoid crowding multiple tropicals so mites cannot walk between pots
Strong culture helps: bright acclimated light, consistent moisture, and stable warmth make new growth less inviting-but dry winter air still requires inspection, not hope alone.
When to escalate - miticides, extension help, and pet ingestion
Treat as urgent when:
- Webbing spans multiple stems and returns within days of rinsing
- New growth emerges already stippled despite two treatment cycles
- Mites appear on several plants in the same bright, dry room
- A pet shows vomiting or drooling after chewing croton leaves during or after treatment
Lower urgency when stippling is on one branch, stems are firm, and the first rinse removes visible mites. Monitor for a week before adding sprays.
Miticide product classes and label guidance
When three rinse-and-soap cycles fail, read labels for the word miticide-not just “insecticide.” Ohio State Extension notes that regular insecticides usually do not kill spider mites, and products labeled only for mite suppression are often weak. For indoor croton in pet households:
- Contact miticides (abamectin, bifenazate, spiromesifen) - Professional-grade concentrates sold online or through greenhouse suppliers; require thorough underside coverage and often a different mode of action if control fails within five to seven days
- Soaps and horticultural oils - Your first escalation tier before concentrates; still require complete leaf coverage
- Pyrethroid insecticides (e.g., bifenthrin) - Labeled for many insects but poor sole control for spider mites; avoid reaching for general bug sprays when the label lacks mite activity
Label checklist before any indoor spray: confirm miticide or mite-active oil/soap on the label; note re-entry interval and drying time before pets return; spray in shade or evening away from hot glass; rotate to a different mode of action if mites persist after one correctly applied product. When in doubt, contact your local cooperative extension office for identification and product selection rather than stacking unlabeled mixes.
Spider mites rarely kill a mature croton with firm woody stems if caught before severe defoliation-but mite pressure remains a limiting factor for long-term indoor croton display per NC State. Fix pests first, then stabilize light and humidity so the next colorful flush can emerge clean.
Escalation summary: rinse-only vs. miticide path
Use this fork after your six confirmation checks:
- Rinse and monitor - Stippling on one or two leaves, no webbing, tap test shows few mites. Isolate, one thorough rinse, recheck in three days; add humidity support.
- Rinse plus three soap/oil cycles - Active stippling, early webbing, firm woody stems. Standard path for most indoor crotons; judge success on clean new tip growth in weeks 2–4.
- Miticide escalation - Webbing returns within days after two rinse-and-soap cycles, or stippling spreads to new growth despite thorough coverage. Read miticide labels per above; rotate mode of action if no control in five to seven days.
- Not mites - Uniform leaf drop after cold exposure, no dots or silk. See low humidity or cold-stress care instead of repeated sprays.
Permanent cosmetic note: Stippled and bronzed leaves will not re-green. Success means clean new variegation at stem tips, not repaired old tissue.
Your weekly winter scouting routine
From November through March, when furnace heat and bright glass stack dry air beside your croton:
- Monday or watering day - Tilt three newest leaves toward a window and scan undersides with a phone flashlight.
- After any neighbor gets pests - Rinse your croton in the shower even if you see no dots yet.
- When humidity drops below 35% - Refill pebble trays or run a small humidifier; dry air is the habitat you are fighting.
- Before rotating seasonal plants onto the sunny shelf - Two-week quarantine for anything new.
Five minutes weekly beats a three-cycle rescue in February. If you find stippling, start at isolate-and-rinse-do not wait for webbing to spread across the crown.
Related croton problems
- Aphids on croton - sticky honeydew and soft colonies on new shoots
- Mealybugs on croton - white cottony patches in leaf axils on the same bright shelf
- Low humidity on croton - dry-air stress that favors mites and dulls color
- Croton overview - species care hub: light, water, leaf drop, toxicity
- Croton watering guide - moisture rhythm without overwatering a stressed plant
- Croton light needs - bright placement without baking foliage against glass
FAQs
How can I confirm spider mites on Croton?
Hold a leaf over white paper and tap the underside-moving specks confirm live mites. On croton, look for thousands of tiny pale dots that dull red or yellow variegation, plus fine silk at leaf axils and stem joints. Dry brown tips without stippling or webbing usually point to low humidity or placement stress, not mites.
Can I rinse my croton outside to treat spider mites?
Yes, when outdoor temperatures stay above about 50°F. UF IFAS recommends taking dusty indoor crotons to a shady spot and washing foliage with a steady stream of water-this removes mites and webbing while avoiding sun-scorch on wet leaves. Let the plant drain fully before returning indoors, and repeat every few days alongside soap or oil if stippling persists.
Will damaged Croton leaves recover from spider mites?
Stippled and bronzed leaves stay cosmetic once drained-croton does not repair old tissue. Recovery shows in clean new leaves at stem tips after two to three weekly treatment cycles. Heavy defoliation on firm woody stems usually regrows in spring if mites are controlled and humidity improves.
Are spider mites or normal leaf drop more common on croton?
Both happen, but the pattern differs. Mites show stippling, undersurface colonies, and silk at stem joints-often on a plant beside a dry, bright window. Normal relocation or cold-stress drop is uniform yellowing and shed without dots, usually right after a move or draft below about 50°F. Run the white-paper tap test before treating; do not spray a croton that is only adjusting to a new spot.
Will insecticidal soap damage croton’s leaf color?
Soap and oil rarely fade established pigment when applied in shade or evening on dry-temperature leaves. Risk rises when you spray hot afternoon sun through glass on wet variegated foliage-red and yellow zones can bleach or crisp. Test one leaf, wait 48 hours, and treat when the pot is out of direct harsh light. Incomplete underside coverage fails against mites; color damage usually comes from sun plus wet spray, not soap chemistry alone.
Is it safe to spray croton for spider mites with pets in the home?
Croton is toxic to pets, and wet sprayed foliage adds risk if cats or dogs chew leaves. Keep pets out of the treatment room until leaves are dry, wear gloves because milky sap irritates skin, and contact your veterinarian if ingestion is suspected. Insecticidal soap and horticultural oil are contact treatments-follow label drying times before allowing pets near the plant.
How do I prevent spider mites on Croton next time?
Raise humidity toward 40–60% with a pebble tray or humidifier in heated winter rooms, inspect leaf undersides weekly when the furnace runs, and keep croton in bright light without baking foliage against cold glass. Quarantine new plants two weeks, and link watering rhythm to your light level so dry air stress does not stack with drought.
When to use this page vs other Croton guides
- Croton watering guide - Use for routine moisture checks before assuming spider mites is the main issue.
- Croton problems hub - Browse all 16 common issues on this species.
- Low Humidity on Croton - Different entry point when symptoms overlap with spider mites.
- Slow Growth on Croton - Different entry point when symptoms overlap with spider mites.