How to Propagate Croton: Stem Cuttings and Air Layering
How to Propagate Croton: Stem Cuttings and Air Layering
How to Propagate Croton: Stem Cuttings and Air Layering
Croton propagation is one of the more rewarding houseplant projects you can take on - if you use the right tissue and respect the plant’s latex sap. Codiaeum variegatum is grown for bold, variegated foliage that does not come true from seed, so the practical way to duplicate a cultivar you already love is vegetative: stem cuttings rooted in soil or water, or air layering on a stem still attached to the parent plant. Both methods work because they include nodes with axillary buds and living stem tissue capable of forming adventitious roots. What does not work, despite what social media jars sometimes suggest, is rooting a single detached leaf. That route produces a blind cutting - roots maybe, but never a new stem.
Croton is not as forgiving as pothos or coleus. It wilts faster when unrooted, its milky sap complicates hormone uptake, and it punishes cold drafts and soggy media more sharply than many beginners expect. The Royal Horticultural Society notes that codiaeums are propagated from softwood cuttings in early summer, and Wisconsin Extension lists air layering in spring as an equally reliable route. Those timing windows matter. So does gear: wear gloves whenever you cut, wrap moss, or handle freshly wounded stems. The payoff for getting the details right is a genetic match to a parent plant whose color pattern you chose deliberately - something no seed packet can promise.
Wear Gloves First - Croton Sap Is Irritating
Before you reach for pruners, put on nitrile or garden gloves. Croton belongs to Euphorbiaceae, the same family as poinsettia, pencil cactus, and rubber tree - plants known for free-flowing, latex-rich sap. When you sever a croton stem, it bleeds a thick, milky white liquid almost immediately. The RHS Growing Guide for codiaeum warns that this sap is a skin and eye irritant, and that all parts of the plant are poisonous if ingested. Contact dermatitis is common enough that experienced growers treat glove use as non-negotiable, not optional.
The sap creates a second, mechanical problem for propagation. If you dip a freshly cut stem straight into rooting hormone powder, the latex can seal over the hormone before it contacts vascular tissue. Pat the cut end dry with a paper towel, then wait five to ten minutes until a thin dry film forms over the wound. Only then apply hormone if you are using it. Rushing this step is one of the most common reasons croton cuttings callus without rooting even when light, warmth, and humidity look correct.
If sap touches bare skin, wash immediately with warm water and soap. Alcohol-based hand sanitizer is not a reliable substitute for soap on euphorb sap. Avoid touching your face or eyes while working. Keep cuttings, trimmings, and used paper towels away from children and pets. The ASPCA lists croton as toxic to dogs and cats, with ingestion causing vomiting, diarrhea, and depression. Propagation is safe at home when you treat the sap as a real hazard rather than a cosmetic nuisance.
Why Stem Cuttings and Air Layering Work (and Leaf Cuttings Don’t)
Croton can be multiplied by stem cuttings and air layering because both methods preserve a length of stem with at least one node - the joint where leaves attach and where axillary buds sit dormant until stimulated. Those buds are what generate new shoots after roots form. A node also hosts the meristematic cells that can differentiate into adventitious roots when moisture, warmth, and oxygen align. Wisconsin Extension describes vegetative propagation as the only reliable way to maintain specific croton cultivars, since seed-grown offspring will not match the parent’s variegation.
Air layering works on the same principle but keeps the stem connected to the parent plant’s root system while new roots form on a wounded section wrapped in moist sphagnum moss. The attached stem continues receiving water and sugars during the weeks roots develop, which reduces the catastrophic wilting that can kill severed cuttings in marginal conditions. Air layering is especially useful on leggy specimens with long bare lower stems you want to shorten without discarding the top growth.
Leaf cuttings do not work for producing a new croton plant. A detached leaf may root in water or soil - sometimes impressively - but it lacks the axillary bud needed to generate a stem. Horticultural writers call this a blind cutting: alive, rooted, and permanently incomplete. UF/IFAS Gardening Solutions specifies stem cuttings with leaves attached - not detached leaves alone - as the standard propagation method, and Wisconsin Extension recommends air layering or softwood cuttings rather than seed for maintaining named cultivars. Begonias, African violets, and many succulents can regenerate from leaves; croton cannot. If someone shows you a rooted croton leaf on social media, you are looking at a botanical dead end, not a baby plant.
How Croton Stem Propagation Actually Works
Stem propagation asks wounded tissue to perform two jobs at once: limit water loss through the remaining leaves while building a root system from nodes or buried stem sections. A croton cutting without roots still transpires moisture from its glossy leaf surfaces. If it loses water faster than the stem can replace it, leaves droop, margins brown, and the cut end rots before roots appear. Your setup must close that gap: enough leaf area for modest photosynthesis, enough humidity or medium moisture to keep the stem hydrated, and enough oxygen that anaerobic bacteria do not consume the cutting first.
Adventitious roots emerge from cells near nodes or from the basal wound itself when conditions favor cell division toward root initials rather than callus alone. On croton, nodes may appear as slight swellings or leaf scars along a semi-woody stem. Burying or submerging at least one node in moist medium or water gives roots a defined zone to form. The upper leaves continue limited gas exchange and energy production, supporting the expensive metabolic work of root construction even before those roots are functional.
Croton’s semi-woody mature stems root more slowly than soft herbaceous tips. That is why most guides emphasize softwood cuttings from actively growing shoots rather than hard, brown lower branches. The tissue is juicier, cells divide faster, and the sap flow is easier to manage on young growth. As stems age and lignify, rooting percentages drop unless you shift to air layering on the living plant.
Nodes, Axillary Buds, and Blind Cuttings
A node is the minimum viable unit for croton propagation. A pretty leaf floating in a jar - with no stem segment and no bud - cannot become a bushy plant no matter how long you wait. If a leaf tears off with a sliver of stem that still carries a node and axillary bud, treat it as an extremely short stem cutting, not a leaf propagation. Those salvage cases are rare and low-percentage compared with a proper 10–15 cm (4–6 inch) tip cutting with multiple nodes.
For a standard stem cutting, aim for at least one node buried or submerged, with two nodes improving redundancy if the lower one fails. Keep one or two sets of leaves at the tip for photosynthesis; remove every leaf that would sit underground or underwater, because buried leaves rot and foul the medium within days. Large top leaves can stay whole if humidity is high, but many growers remove the lowest remaining leaf pair to reduce transpiration load on an unrooted stem.
Choosing Healthy Croton Stems for Cuttings
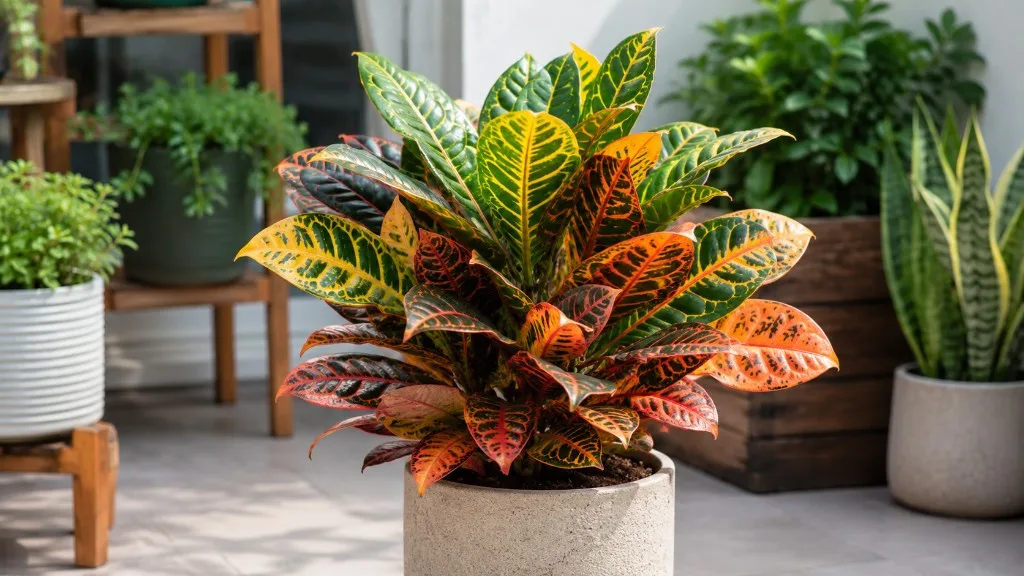
Start with a healthy parent plant that is actively growing, not drought-stressed, pest-ridden, or shedding leaves from cold drafts. Croton telegraphs stress through limp new tips, dull color, and simultaneous leaf drop that no amount of rooting hormone will fix. Weak parent tissue produces weak cuttings. If the plant looks tired but you still want to propagate, take material from the firmest new growth at the branch tips rather than stiff, leafless lower wood.
Prefer non-flowering stems or shoots that have not diverted energy into inflorescences. Croton is grown for foliage; flowering stems can still root, but they often root slower and establish less vigorously than leafy vegetative shoots. If your specimen is otherwise healthy and only flowering lightly, you can still use it - just choose the most vigorous leafy side shoots available.
Which Stems to Take and Which to Skip
Take cuttings from terminal or lateral soft shoots roughly 10–15 cm (4–6 inches) long with two or more leaf pairs. BBC Gardeners’ World recommends a stem about the thickness of a pencil and around 12 cm long for softwood cuttings, cut at a 45-degree angle just above a node on the parent so the mother plant heals cleanly. On the cutting itself, cut just below a node at the base so the highest possible area of vascular tissue is exposed for rooting.
Reject stems that are mushy, blackened, coated in fine webbing from Spider Mites on Croton, or heavily scarred. Avoid cuttings taken immediately after the parent sat in bone-dry soil or sat in waterlogged anaerobic mix; both extremes reduce success rates sharply. If you are propagating a prized cultivar with unstable color on stressed tissue, take two or three cuttings rather than betting on one. Redundancy costs little beyond an extra pot and a few weeks of patience.
The Best Time to Propagate Croton
Croton roots fastest during active growth, when light is strong, days are lengthening, and room temperatures stay consistently warm. Spring through early summer is the classic window for softwood stem cuttings. Wisconsin Extension pairs air layering with spring and softwood cuttings with summer, reflecting how growers historically align technique with tissue maturity. In practice, any period when your plant pushes firm, colorful new leaves is workable indoors - provided you can keep temperatures roughly 18–27°C (65–80°F) and Croton light guide stable.
Calendar timing alone is a weak signal compared with plant readiness. The parent should show firm new tips, normal variegation for the cultivar, and no active pest outbreak. Do not propagate as a panic response to sudden mass leaf drop from a cold window or heating vent; stabilize the plant’s environment first, then take cuttings from whatever healthy tissue remains. Propagation during acute stress sometimes succeeds, but it is a poor teacher when you are learning the method for the first time.
Avoid taking cuttings in late fall or winter unless you can supply supplemental warmth and consistent light. Croton is tropical in origin - Malaysia, Indonesia, and northern Australia - and cold nights on a windowsill routinely stall or kill unrooted cuttings that would have rooted easily in June. If you must propagate in winter, use a warm room, a humidity dome, and realistic expectations about a longer timeline.
Tools, Materials, and Safe Handling
You need modest equipment: sharp bypass pruners or a knife, nitrile gloves, small pots with drainage holes, fresh water or moist propagation mix, optional clear plastic bag or dome, labels if you run multiple cultivars, rooting hormone powder or gel (optional but helpful on croton), sphagnum moss for air layering, plastic wrap or grafting tape, and 70% isopropyl alcohol for disinfecting blades. Bypass cuts heal cleaner than crushing anvil pruners on semi-woody stems. Disinfect before cutting and between plants if pests or rot have been an issue.
For soil propagation, use a light, airy, fast-draining mix. The RHS recommends peat-free ericaceous compost amended with grit for codiaeums; a propagation blend of two parts perlite to one part potting mix, or straight moist perlite, works well for cuttings because it holds moisture without collapsing into mud. Dense garden soil and heavy peat without perlite stay wet too long and invite stem rot - the second most common failure after latex-blocked hormone.
For water propagation, any clear glass or jar that supports the cutting without submerging leaves is adequate. Narrow openings can help hold stems upright. For air layering, gather moistened sphagnum moss, plastic film, twist ties or tape, and a sharp knife for the ring cut or upward slit.
Keep a dedicated waste bag for sap-coated trimmings and paper towels. Wash tools and gloves after the session. Do not compost euphorb cuttings if pets frequent the compost area.
Preparing Croton Stem Cuttings Step by Step
Preparation is where croton propagation succeeds or fails before the cutting meets medium or water. Assemble containers first, put on gloves, and decide whether each cutting goes to soil, water, or stays on the parent for air layering before you cut - fresh wounds should not sit on the counter while you hunt for a pot.
Step 1: Select and cut. Choose a healthy soft shoot and sever 10–15 cm (4–6 inches) of stem, cutting just below a node at the base with one clean stroke. On the parent plant, cut just above a node so the stub can heal and branch cleanly.
Step 2: Manage the sap. Blot the cut end with a paper towel until bleeding slows. Set the cutting aside on a dry surface for five to ten minutes until latex forms a thin dry film. Skipping this step often produces callus without roots.
Step 3: Strip lower leaves. Remove all leaves from the lower third to half of the cutting - everything that will be buried or submerged. Any leaf in water rots within days. Any leaf pressed into wet soil without airflow mildews and spreads decay to the stem.
Step 4: Trim the top (optional). Keep one or two leaf sets at the tip. If leaves are very large, you may remove the lowest remaining pair to reduce wilting, but do not strip the cutting bare.
Step 5: Rooting hormone (optional but useful). After the latex film forms, dip the basal ¼ inch (6 mm) in IBA rooting hormone powder or gel. Tap off excess. Hormone is not magic, but on croton it measurably improves rooting consistency compared with untreated cuts in many home trials.
Step 6: Insert immediately. Plant in pre-moistened medium or place in water within minutes. Delay increases dehydration and contamination risk.
Method 1 - Rooting Croton Stem Cuttings in Soil
Soil propagation - more accurately, a soilless perlite-heavy medium - is the method the RHS foregrounds for codiaeums: softwood cuttings rooted in gritty, fast-draining compost under humid cover. It hides roots from view but produces them in conditions closer to the croton’s long-term pot, which can reduce transplant shock compared with water-grown roots.
Fill a 10–12 cm (4–5 inch) pot with pre-moistened perlite or a 2:1 perlite-to-potting-mix blend. Use a pencil to make a planting hole so you do not scrape hormone off the stem when inserting. Bury at least one node; two nodes below the surface improves odds if one site fails. Firm the medium lightly so the stem stands without packing so tightly that air is excluded.
Water once to settle the medium, then manage moisture so it stays evenly damp like a wrung-out sponge, never saturated mud. Pots without drainage are a common failure point; use holes and empty saucers after watering. Expect rooting in roughly four to eight weeks depending on warmth, light, and cutting quality - faster at the upper end in warm summer rooms, slower in cool winters.
Mix, Humidity Dome, and the Tug Test
Croton cuttings lose water through leaves faster than unrooted stems can replace it from dry air. A clear plastic bag or humidity dome over the pot - propped so plastic does not touch leaves - reduces wilting during the first two to three weeks. Vent daily for a few minutes to prevent mold. Condensation streaming down the walls can mean the setup is too sealed or too warm; crack the dome slightly if stems look soggy.
Place the pot in bright, indirect light. Direct midday sun inside a sealed bag cooks stems. BBC Gardeners’ World suggests a warm spot with bottom heat if available - a heat mat set to gentle warmth can shorten rooting time - but many home growers succeed on a bright counter at stable room temperature.
The tug test helps assess roots without destructive digging: after four weeks, give the stem a very gentle upward tug. Resistance suggests roots have anchored. No resistance does not always mean failure - keep waiting if the stem is still firm and leaves have not collapsed. Aggressive tugging breaks delicate root initials. When resistance is clear and new growth or root tips are visible at drainage holes, pot the cutting into a small individual container with rich, well-draining houseplant mix matching mature croton care: moist but never soggy, with perlite or grit for aeration.
Method 2 - Rooting Croton Stem Cuttings in Water
Water propagation is popular because you can watch roots form and catch stem rot early. It works on croton when you respect the same node rules and sap handling as soil - but success rates are often slightly lower than perlite for semi-woody euphorbs, and the water-to-soil transition is the fragile phase.
Place the prepared cutting in a clean jar with enough room-temperature water to submerge the stripped nodes while keeping all leaves above the waterline. Set the jar in bright, indirect light, not direct sun that overheats the water. Change water every three to seven days, or sooner if it clouds, smells stale, or develops slime on the glass. Stagnant, oxygen-poor water is a direct route to basal stem rot.
Expect visible root initials in two to four weeks under warm, bright conditions, with usable roots often arriving between four and six weeks. Cool rooms, dim corners, or cuttings taken from stressed parents stretch that schedule. Do not fertilize the water; the cutting cannot metabolize salts meaningfully until it has roots and later soil.
Managing the Water-to-Soil Transition
Roots formed in water are structurally adapted to aquatic oxygen levels. Moving a long, fragile water root system into dense wet soil without acclimation often causes transplant shock, leaf drop, or rot. Pot when roots are roughly 5 cm (2 inches) long - some growers transplant at 2.5 cm (1 inch) to catch roots before they become overly specialized for water.
Transition gradually if roots are extensive: over several days, add small amounts of moist potting mix to the jar or move the cutting into a loose, half-water, half-perlite slurry before final potting in well-draining mix. Keep humidity high and light bright but indirect during the first week after potting. Hold fertilizer until new growth indicates the root system is actively working in soil - usually a few weeks post-transplant.
Method 3 - Air Layering a Leggy Croton
Air layering lets you root a stem while it is still attached to the parent plant. Wisconsin Extension lists it alongside summer cuttings as a standard codiaeum propagation route. The technique is especially valuable when you have a tall, leggy croton with attractive top growth and a long bare stem you would like to remove - or when severed cuttings from that same plant have repeatedly callused without rooting.
Select a healthy stem region 30–45 cm (12–18 inches) below the active top growth if you plan to remove a significant bare section later. Wearing gloves, make a 2.5 cm (1 inch) ring cut through the bark around the stem, or a shallow upward-angled slit, then scrape away the green cambium layer so the wound cannot heal closed. You are interrupting phloem flow to encourage root formation at that site while the stem still receives water from the parent roots.
Apply rooting hormone to the exposed inner tissue. Pack moist sphagnum moss wrung out like a damp sponge around the wound, then wrap clear plastic film tightly above and below the moss ball so it stays humid and opaque to light. Secure with twist ties or tape. Check weekly: remoisten moss if it dries, and watch for white roots pressing against the plastic.
When roots fill the moss - typically several weeks to a few months depending on warmth - cut the stem below the new root ball with gloved hands and a sterilized blade. Pot the rooted section in well-draining mix, water lightly, and keep humidity high for the first week as it adjusts to independent life. Trim the parent back to a node above the old air-layer site; it should branch from remaining buds.
When Air Layering Beats Cuttings
Choose air layering when the plant is large, valuable, or stressed by repeated cutting attempts, when you want a bigger rooted transplant with less wilting risk, or when you are correcting leggy architecture without throwing away the top. Choose stem cuttings when you want multiple new plants quickly from side shoots, when the parent is bushy enough to spare several tips, or when you prefer a simpler setup without moss wraps.
Air layering demands patience and dexterity but returns higher success rates on older semi-woody stems that would root poorly if severed outright. It is not complicated - it is deliberate. For a single spectacular cultivar you cannot afford to lose, it is often the safest clone path.
Stem Cuttings Versus Air Layering: Which to Choose?
Both methods produce true clones. Your choice should match plant architecture, risk tolerance, and how many plants you need.
Stem cuttings in soil or perlite are faster to set up, let you propagate several shoots from one pruning session, and work beautifully on young soft growth in warm months. They fail more often when cuttings are taken from hard wood, when latex is not dried before hormone, when medium stays waterlogged, or when humidity is too low and leaves desiccate.
Stem cuttings in water add visibility and are satisfying for beginners who want proof of progress, but croton’s water-to-soil transition requires care, and rot in unchanged jars is common.
Air layering is slower and more hands-on, yet it keeps the stem hydrated through rooting, handles leggy mature stems better, and yields a larger established root ball before separation. It is the repair tool when cuttings keep failing on the same plant.
If you are pruning a bushy young croton in summer, soil or water cuttings are the efficient default. If you are rescuing a sparse, top-heavy specimen with a bare trunk, air layer the upper section and prune the parent after roots form. There is no moral superiority to either method - only tissue type, timing, and your patience budget.
Aftercare Once Roots Form
New croton plants need steadier, more boring conditions than mature specimens. Keep the potting mix lightly moist, not wet. Hold fertilizer until you see new growth or until at least four to six weeks have passed in the new pot - roots need to acclimate before salts are welcome. Avoid Croton repotting guide again immediately; croton dislikes root disturbance while establishing.
Light should be bright and indirect, with gradual introduction to the stronger sun that mature crotons often tolerate. A freshly rooted cutting in harsh direct window sun frequently drops leaves. Temperature stability matters: drafts from AC vents, winter windowsills, and frequently opened doors cause leaf drop that mimics failure even when roots are healthy.
Humidity in the 40–80% range typical of comfortable homes is usually adequate once roots are working. Do not mist leaves as a crutch; focus on stable watering and light. The first sign of real success is not a root you can see - it is new firm leaves or a fresh tip pushing from the axillary bud that was waiting underground.
Quarantine new propagations two to three weeks away from other plants if pests have been a problem on the parent. Spider mites love stressed croton foliage. Inspect undersides weekly during the first month.
Common Croton Propagation Failures and Fixes
Basal rot with mushy stems usually means waterlogged medium, stagnant jar water, or a leaf buried below the surface. Discard the cutting, sterilize the container, and restart with drier medium and cleaner water changes.
Wilting with a firm stem often indicates insufficient humidity or excessive leaf area on an unrooted cutting. Add a humidity dome, remove one leaf pair, or move away from dry heating vents.
Callus without roots after eight weeks points to latex sealing hormone, cold temperatures below 18°C (65°F), or a cutting taken from overly woody tissue. Retry with softer growth, enforce the five-to-ten-minute dry period, and consider air layering on the parent instead.
Rooted leaf with no shoot is a blind cutting, not a delayed success. Restart with a proper stem section including nodes.
Sudden leaf drop after potting water roots signals transplant shock. Stabilize humidity, shade slightly, and avoid fertilizing or repotting again until new growth appears.
Sap rash on forearms means gloves were skipped or hands were not washed before scratching skin. Treat with soap and water immediately; persistent rashes may need medical guidance, as euphorb dermatitis can escalate with repeated exposure.
Conclusion
Propagating croton comes down to three non-negotiables: wear gloves against irritating latex sap, use stem tissue with nodes - never leaf-only cuttings - and match your method to the plant in front of you. Softwood stem cuttings rooted in perlite-heavy mix or clean water are the everyday route for bushy plants in active growth. Air layering is the precision tool for leggy, semi-woody specimens that need to stay hydrated while roots form. Dry the sap before hormone, keep humidity high without soaking the stem, and wait for firm new growth as your success signal rather than impatience with the calendar.
Croton rewards careful handlers with clones that carry the exact foliage you selected - something seed cannot replicate. Start in spring or summer when the plant is pushing fresh tips, take redundant cuttings if the cultivar matters, and treat sap, nodes, and oxygen in the rooting zone as seriously as light and water afterward. Get those right, and you will add new plants without buying another pot or gambling on a rooted leaf that never becomes a tree.
When to use this page vs other Croton guides
- Croton overview - Start here for whole-plant context before deep-diving this topic.
- Croton problems hub - Jump to symptom-specific fix guides when this care topic does not resolve the issue.