Overwatering on Croton: Causes, Checks & Fixes
Quick answer
Overwatered Croton shows a heavy wet pot, limp colorful leaves, and yellow lower foliage while the mix stays damp. First step: stop watering until the top 1–2 inches of mix dry and verify drainage holes are open.
Overwatering on Croton: Causes, Checks & Fixes
This guide covers overwatering on Croton. See also the general Overwatering guide, watering, and light pages for this plant.
Overwatering on Croton: Causes, Checks & Fixes
Quick answer
Overwatering on Croton (Codiaeum variegatum) means the root zone stays wet too long for roots to breathe-not that you splashed once too generously. This Euphorbiaceae tropical wants evenly moist, well-drained soil during active growth, but it drops leaves when kept too wet or too dry for extended periods. The dangerous pattern is limp colorful leaves while the mix is still damp-owners see droop and add more water, which makes oxygen-starved roots fail faster.
First step: stop watering until the top 1–2 inches of mix feel dry and crumbly, then verify drainage holes are open and saucers are empty. Do not fertilize, repot into a larger container, or move the plant repeatedly while you diagnose. If stems stay firm and roots look pale when you peek through drain holes, drying on a corrected schedule is usually enough; soft stems or sour smell means inspect roots before the next drink.
For year-round dry-down depth and seasonal watering rhythm, see the croton watering guide-especially the section on signs you are overwatering. This guide covers whole-plant stress from chronic wet roots-yellowing, wilt-on-wet-soil, edema, and root decline. White fuzz on the soil surface alone is usually harmless mold on soil feeding on organic matter; overwatering can include that cosmetic sign, but the fix here targets root-zone oxygen, not scraping the top layer.
Why croton is easy to overwater indoors
Croton is not a succulent, but its thick, waxy leaf coating slows visible wilting. By the time mature leaves droop, roots may have been stressed in damp mix longer than a surface glance suggests. That delay traps growers into the classic mistake: watering wilted croton when soil is already wet.
Several setup habits keep croton roots oxygen-starved even when watering “feels” moderate:
Calendar watering without soil checks. Croton in a bright window may need water every five to seven days in summer but only every ten to fourteen days in winter when growth slows. A fixed weekly schedule in a cool, dim room leaves mix wet for weeks. NC State Extension notes crotons need bright light with some direct sun and should be watered liberally during active growth-but “liberally” means when the top layer has dried, not on autopilot.
Low light slows dry-down. In insufficient light, the plant uses less water and the pot evaporates slowly. The same watering that worked in summer becomes overwatering in a dim winter corner. Low light plus frequent water also causes edema-corky blisters on leaf undersides when roots take up water faster than leaves transpire.
Oversized pots and cachepots. A small root ball in a large container sits in wet mix that dries slowly. Decorative outer pots without drainage, or saucers left full after watering, keep the bottom saturated. Never allow plants to sit in drainage water.
Compacted peat that looks dry on top. Old peat shrinks and can feel dry at the surface while the center stays waterlogged. You wait for the top inch, water again, and the root ball never aerates. If dry-down suddenly stretches from five days to three weeks without a season change, poke deeper before assuming the plant needs less water.
Fear of drought after past leaf drop. Croton drops leaves when moved or chilled. Some owners compensate with extra water after any stress event-even when soil is already damp-which pushes a recovering plant toward rot.
Pot-weight baseline in bright vs. dim light. A 15 cm ‘Petra’ in a south-window sill may feel noticeably lighter five to seven days after a soak in July; the same pot in a north hallway in January can stay heavy for twelve to eighteen days with identical calendar watering. Lift the container after every good drink to learn what “heavy” means in your room-that comparison matters more than any generic day count.
What overwatering looks like on Croton - symptom photo guide
Overwatering on croton is a pattern of wet soil plus declining foliage, not a single yellow leaf. Use the visual cues below to compare what you see at home. Labeled photos are planned for this section; until then, match your plant against these descriptions.
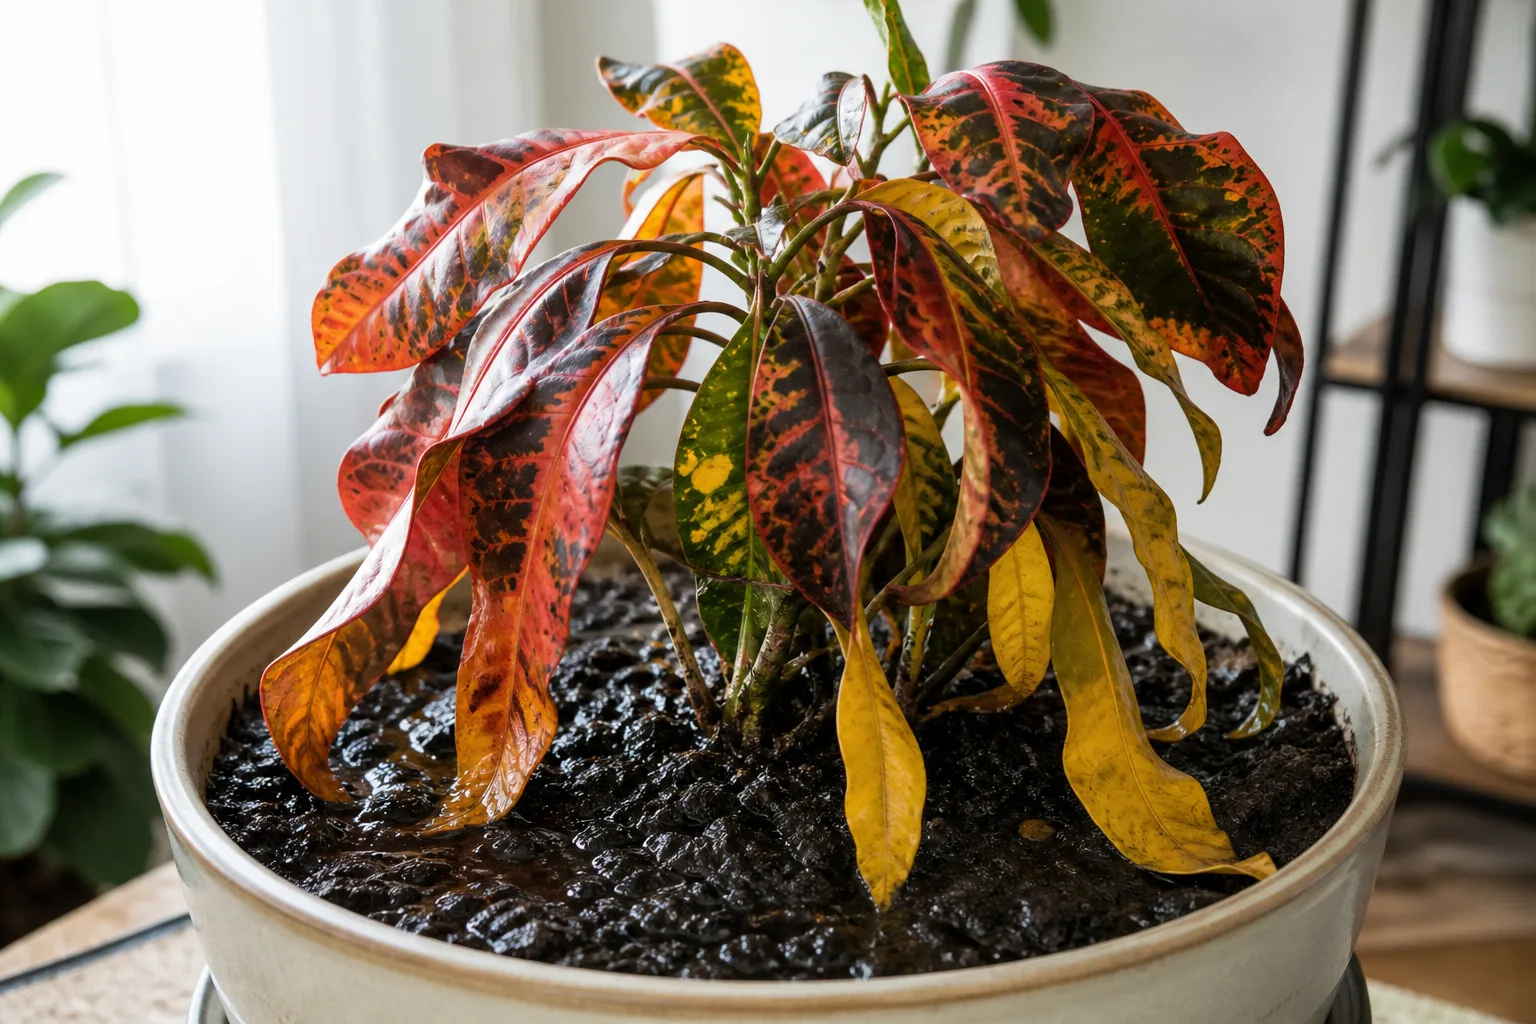
Yellow lower leaves and limp colorful foliage on wet potting mix - the wilt-on-wet-soil pattern typical of overwatered croton.
Limp colorful leaves on a heavy, wet pot
What to look for: Broad red, orange, or yellow-green leaves hang downward while the pot feels cool and heavy several days after watering. Lower leaves may yellow first. The foliage still shows cultivar color-it does not look uniformly pale like drought stress-but the whole canopy lacks turgor. This is the hallmark wilt-on-wet-soil trap: the plant looks thirsty while roots are drowning.
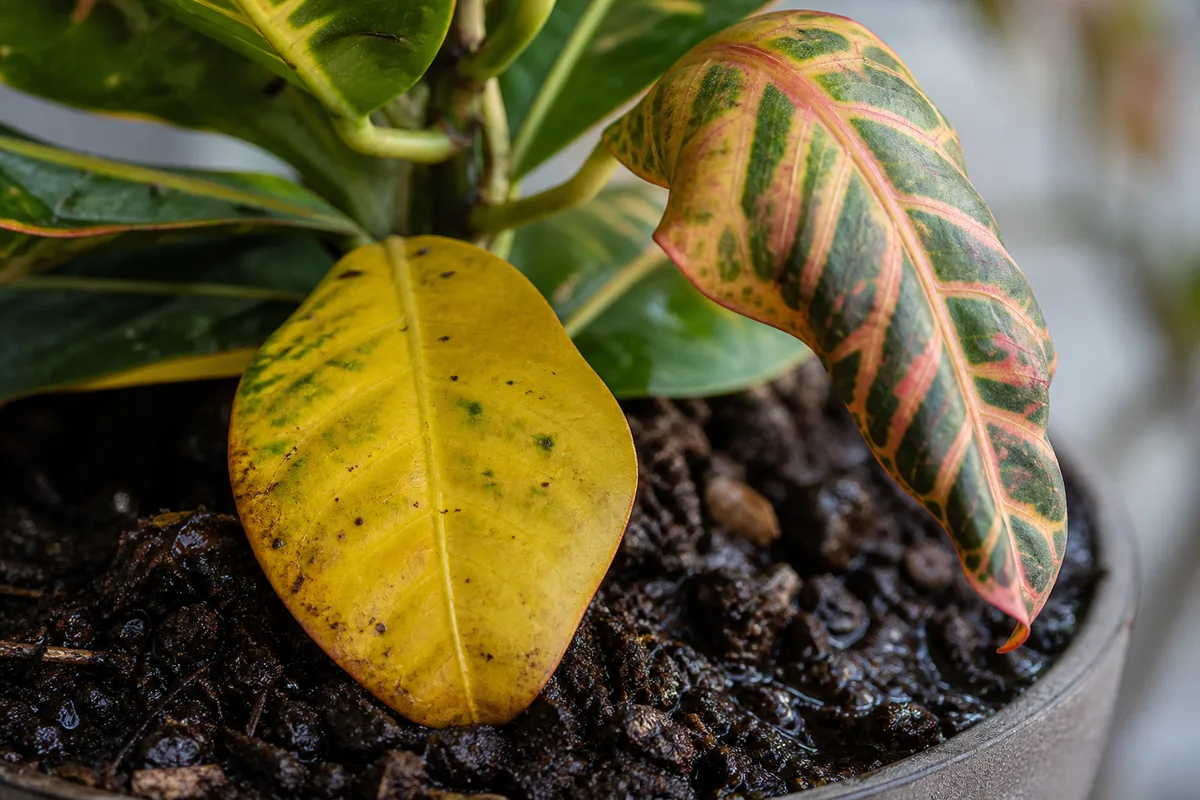
Yellow lower leaves with damp mix
What to look for: Older leaves at the bottom turn solid yellow or chartreuse while soil at the first knuckle stays dark, cool, and clingy. On croton, one aging lower leaf is normal; rapid yellowing across several lowers on wet soil is not.
Edema blisters on leaf undersides
What to look for: In low light with frequent watering, small corky or water-filled bumps appear on the underside of thick croton leaves-often along midribs on ‘Petra’ and ‘Mammy’ types. Upper surfaces may look fine. This is excess root uptake the leaf cannot transpire away.
Wet-at-depth soil with a dry-looking surface
What to look for: The top quarter-inch of peat looks pale and cracked, but a chopstick or finger at the first knuckle pulls out dark, clinging particles. The pot still feels heavy. This cross-section pattern is common in older peat-based mixes and explains why surface-only checks fail.
Pale vs. mushy roots on unpotting
What to look for: Healthy croton roots are firm, pale tan or white, and smell like damp earth. Overwatered roots turn brown, black, or translucent, feel squishy between fingers, and may smell sour. A ring of dead outer roots around a still-firm crown means early escalation-not another week of surface dry-down alone.
Other supporting signs
Watch for these alongside the visuals above:
- Wilting that does not improve after you water-damaged roots cannot move water upward even when soil is wet
- Fungus gnats hovering when you disturb the surface-larvae thrive in constantly moist upper soil (see fungus gnats guide)
- White or gray fuzz on soil from saprophytic mold-often a surface warning of the same moisture problem (see mold on soil)
- Sour or rotten smell from the mix when you lift the plant or press near drain holes
- Soft stems at the soil line in advanced cases-escalate toward root rot
Croton’s bold foliage makes wet-soil wilt visually confusing. A plant can look thirsty while roots are drowning. That is why pot weight and knuckle-depth moisture matter more than leaf posture alone.
Overwatering vs. underwatering: croton’s confusing overlap
Both extremes cause mass leaf drop on croton-too wet or too dry for extended periods. The fix depends on which direction you missed-adding water to wet soil makes overwatering worse; letting a dry pot stay dry makes drought worse.
| What you observe | Pot weight | Soil at 1 inch | Stem at soil line | Likely cause |
|---|---|---|---|---|
| Limp leaves, yellow lowers | Heavy | Wet, cool, clings | Firm (early) or soft (late) | Overwatering |
| Limp leaves, crispy edges | Light | Dry, crumbly | Firm | Underwatering |
| Mass drop after move | Normal | On your usual schedule | Firm | Relocation shock-see wilting |
| Yellow lowers, wet soil, sour smell | Heavy | Wet for weeks | Softening | Root rot |
| White fuzz on soil only | Medium-heavy | Surface wet, plant firm | Firm | Mold on soil-cosmetic surface fungus |
| Lower yellow on wet soil | Heavy | Damp days | Firm | Also compare yellow leaves causes |
The one rule that prevents the trap: if soil is wet at the first knuckle, do not water-even if leaves droop. If soil is dry and crumbly an inch down, soak and drain-even if you watered recently on calendar. Full dry-down depth by season lives in the croton watering guide.
How to confirm overwatering
Work through these checks in order before Croton repotting guide or trimming roots:
- Pot weight - Lift the pot after a known good watering to learn heavy. A stressed croton on wet mix feels noticeably heavy; drought shows the opposite.
- Knuckle test - Push your finger to the first knuckle (½–1 inch) in growth season or second knuckle (1–2 inches) in winter. Cool, clingy, dark soil that stays that way for many days after watering confirms excess moisture. Water when the top half-inch to inch dries during active growth-not while still damp at depth.
- Chopstick or skewer probe - Push a dry wooden chopstick or bamboo skewer to the bottom of the pot and leave it two to three minutes. Pull it out: clinging dark particles mean moisture remains deep even when the surface looks acceptable; clean and dry wood means the root zone has dried enough for the next soak. Especially useful in deep pots where your finger cannot reach the zone roots actually use.
- Wilting response - Water a small amount on the surface. If leaves stay limp on already-wet soil, roots are likely failing-not thirsty.
- Smell - Sour or swampy odor from drain holes or when you tip the pot means anaerobic conditions, not harmless surface mold alone.
- Drainage audit - Confirm holes are open, saucers empty, and no decorative cachepot is holding runoff. Standing water at the bottom keeps roots saturated even when the top looks acceptable.
- Root peek - If safe, gently slip the plant partway out. Pale, firm roots support early overwatering with recovery likely after dry-down. Brown, mushy roots mean escalate to root-rot protocol.
- Companion signs - Gnats, edema, and surface mold support a wet-root diagnosis but are not required; firm colorful foliage on chronically damp soil still counts as overwatering stress.
If the pot is light, soil is dusty dry an inch down, and leaves perk after a soak, you are dealing with drought-not this guide.
First fix: stop watering and correct drainage
Hold all watering until the top 1–2 inches of mix are dry and crumbly-use the second knuckle in winter when growth slows. That single pause is the correct first action for early overwatering with firm stems.
While the mix dries:
- Empty saucers and cachepots after any prior watering; never let the pot sit in runoff
- Move to brighter indirect light only if the plant has been in a very dim spot-acclimate over several days so sudden harsh sun does not scorch leaves on an already stressed plant
- Improve airflow around the pot so the surface dries predictably
- Remove fallen leaves from the soil surface so decaying organic matter does not keep the top layer wet
Do not fertilize a waterlogged plant-salts on stressed roots add injury. Do not repot into a larger pot “to help drying”; extra wet soil around a small root ball worsens the problem. Do not prune heavily or relocate repeatedly-croton drops leaves when moved, which masks whether your dry-down is working.
If mold appears only on the soil surface while stems stay firm, you may scrape the top layer per the mold on soil guide-but still fix the wet-root rhythm; scraping without drying brings fuzz back within days.
Step-by-step recovery when roots are stressed
If leaves keep declining after the top two inches have dried once, or you suspect root damage, follow this escalation:
1. Inspect roots carefully
Unpot when the mix is moist enough to release the root ball without shattering it. Rinse away old mix gently. Healthy croton roots are firm and pale tan or white. Brown, black, or mushy tissue is dead.
Wear gloves when handling croton-sap from this Euphorbiaceae plant can irritate skin, and croton is toxic to dogs and cats if chewed. Keep pets away from trimmed roots and discarded mix.
2. Trim only dead tissue
Sterilize scissors between cuts. Remove mushy roots back to firm tissue. If stems are soft at the base, cut back to firm woody tissue only if green growth remains above-otherwise salvage may require stem cuttings (see root rot guide).
3. Air-dry the root ball briefly
Let trimmed roots sit in air for a few hours on newspaper-not days-in a warm room. The goal is to stop active rot, not desiccate the plant.
4. Repot into fresh, airy mix
Use rich, well-draining potting mix with perlite in a pot sized to the trimmed root mass-usually the same size or one size smaller, never a jump upward. Confirm drainage holes. Water once lightly to settle mix, then resume the knuckle-test rhythm from the watering guide.
5. Stabilize environment
Keep temperature above 60°F, away from cold drafts below 50°F, and in Croton light guide. Hold fertilizer until new firm growth appears at stem tips for two weeks.
Recovery timeline and what new growth tells you
Mild overwatering with firm stems often stabilizes within one to two weeks once the top layer dries reliably between drinks. Lower yellow leaves may not re-green-they drop and are replaced slowly.
Moderate root stress after trim and repot may take four to six weeks before colorful new leaves at branch tips look normal. Judge success by firm stems and fresh tip growth, not by saving every yellowed lower leaf.
Severe rot with soft stems may not recover as a whole plant; stem cuttings from firm upper growth are the backup (detailed in root rot recovery).
Leaves that wilted on wet soil rarely “re-firm” in place-they are often shed while roots rebuild. That is normal, not a sign to water again.
Reviewed case: firm stems, pale roots, and north-window dry-down
Editorial case note reviewed by LeafyPixels Review Board - composite of common indoor croton setups.
A ‘Petra’ croton in an 18 cm plastic nursery pot showed limp orange-red leaves and three yellow lowers while the top inch stayed cool and clingy ten days after the owner’s last weekly watering. Pot weight felt heavy; stems were firm at the soil line. A chopstick probe pulled dark particles from the center; no sour smell. The plant sat on a north-facing sill in a 68°F room in late January.
Actions taken: stopped all watering; emptied a half-full saucer; moved the pot 1 m closer to an east window over five days (no direct midday sun on stressed leaves); removed two fallen leaves from the surface.
Measured outcome: top 1–2 inches dried by day 10; pot felt noticeably lighter by day 12; lower yellow leaves dropped but stems stayed firm; one small firm leaf opened at a branch tip on day 21; color on new growth looked normal by day 28. No repotting was needed because a root peek through the drain hole showed pale, firm roots on day 14.
This pattern-calendar watering in dim winter light, waxy leaves hiding early wilt, firm crown on wet mix-is the mild overwatering signature dry-down alone can fix. Escalate to root trim only when smell, softness, or mushy roots appear.
What not to do
Do not add water because leaves droop when soil is already wet at the knuckle-that deepens root failure. Do not fertilize to ” perk up” a soggy plant. Do not repot into a bigger pot hoping extra soil absorbs moisture; it holds more water around roots. Do not mist leaves instead of fixing soil moisture-roots need aeration in the mix, not humidity on foliage.
Do not confuse surface mold with the whole problem-scraping white fuzz without drying the root zone leaves overwatering untreated (mold vs. overwatering). Do not assume every leaf drop means drought-croton drops foliage from wet soil, dry soil, cold, and moves alike; always check moisture at depth first.
Do not handle trimmed roots bare-handed if pets might contact sap; contact your veterinarian if a pet chews croton tissue.
How to prevent overwatering next time
Build prevention around how your pot dries, not a generic calendar:
- Knuckle test every time - Top ½–1 inch dry in active growth; 1–2 inches in winter per UW Extension croton guidance
- Chopstick probe in deep pots - Confirm the center dries, not just the surface
- Bright enough light - Enough exposure that the pot dries predictably between drinks; dim corners need less water frequency, not more sympathy watering
- Soak-and-drain discipline - Water thoroughly until runoff, wait 15–30 minutes, then empty saucers completely
- Right-sized pots - Match container to root mass; upsize only one step at repot
- Open drainage - No sealed cachepots; drill holes if needed
- Refresh compacted mix - Repot when peat stays waterlogged at center despite dry surface
- Watch early alarms - Fungus gnats and surface mold often appear before dramatic leaf drop; treat them as moisture feedback
When seasons change, lengthen dry-down depth in fall and winter-continuing summer frequency through December is a common overwatering trigger.
When to worry
Escalate beyond simple dry-down when:
- Stems soften at the soil line or smell sour despite surface drying attempts
- Leaves wilt on wet soil with no improvement after one full dry-down cycle
- Roots are brown and mushy when you unpot-shift to root rot recovery
- Mass leaf drop continues on damp soil for more than two weeks after corrected watering
- Multiple plants in the same wet, dim corner all show yellow lowers and gnats-fix the environment, not just one pot
Early overwatering with firm stems and pale roots is recoverable. Advanced soft crown tissue on saturated mix may require trim, repot, or stem salvage-not another week of “waiting it out” while watering on hope.
If sour smell, soft stems, or mushy roots persist after two full dry-down cycles with corrected drainage and light, contact your local cooperative extension office or a Master Gardener helpline for a root-health assessment before repeated repotting. Chronic rot in an oversized peat-heavy mix sometimes needs hands-on diagnosis beyond what a text guide can confirm remotely.
For the full seasonal watering rhythm, soak-and-drain technique, and moisture paradox that makes croton tricky, see the croton watering guide.
When to use this page vs other Croton guides
- Croton watering guide - Use for routine moisture checks before assuming overwatering is the main issue.
- Croton problems hub - Browse all 16 common issues on this species.
- Root Rot on Croton - Different entry point when symptoms overlap with overwatering.
- Yellow Leaves on Croton - Different entry point when symptoms overlap with overwatering.
- Wilting on Croton - Different entry point when symptoms overlap with overwatering.