Low Humidity on Croton: Causes, Checks & Fixes
Quick answer
Croton (Codiaeum variegatum) needs more humidity than pothos or snake plant-adapted to 40–60% RH, stressed below about 30%. First step: scan for forced-air vents, radiators, and AC drafts, then move the pot out of that dry microclimate before you change watering.
Low Humidity on Croton: Causes, Checks & Fixes
This guide covers low humidity on Croton. See also the general Low Humidity guide, watering, and light pages for this plant.
Low Humidity on Croton: Causes, Checks & Fixes
Quick answer
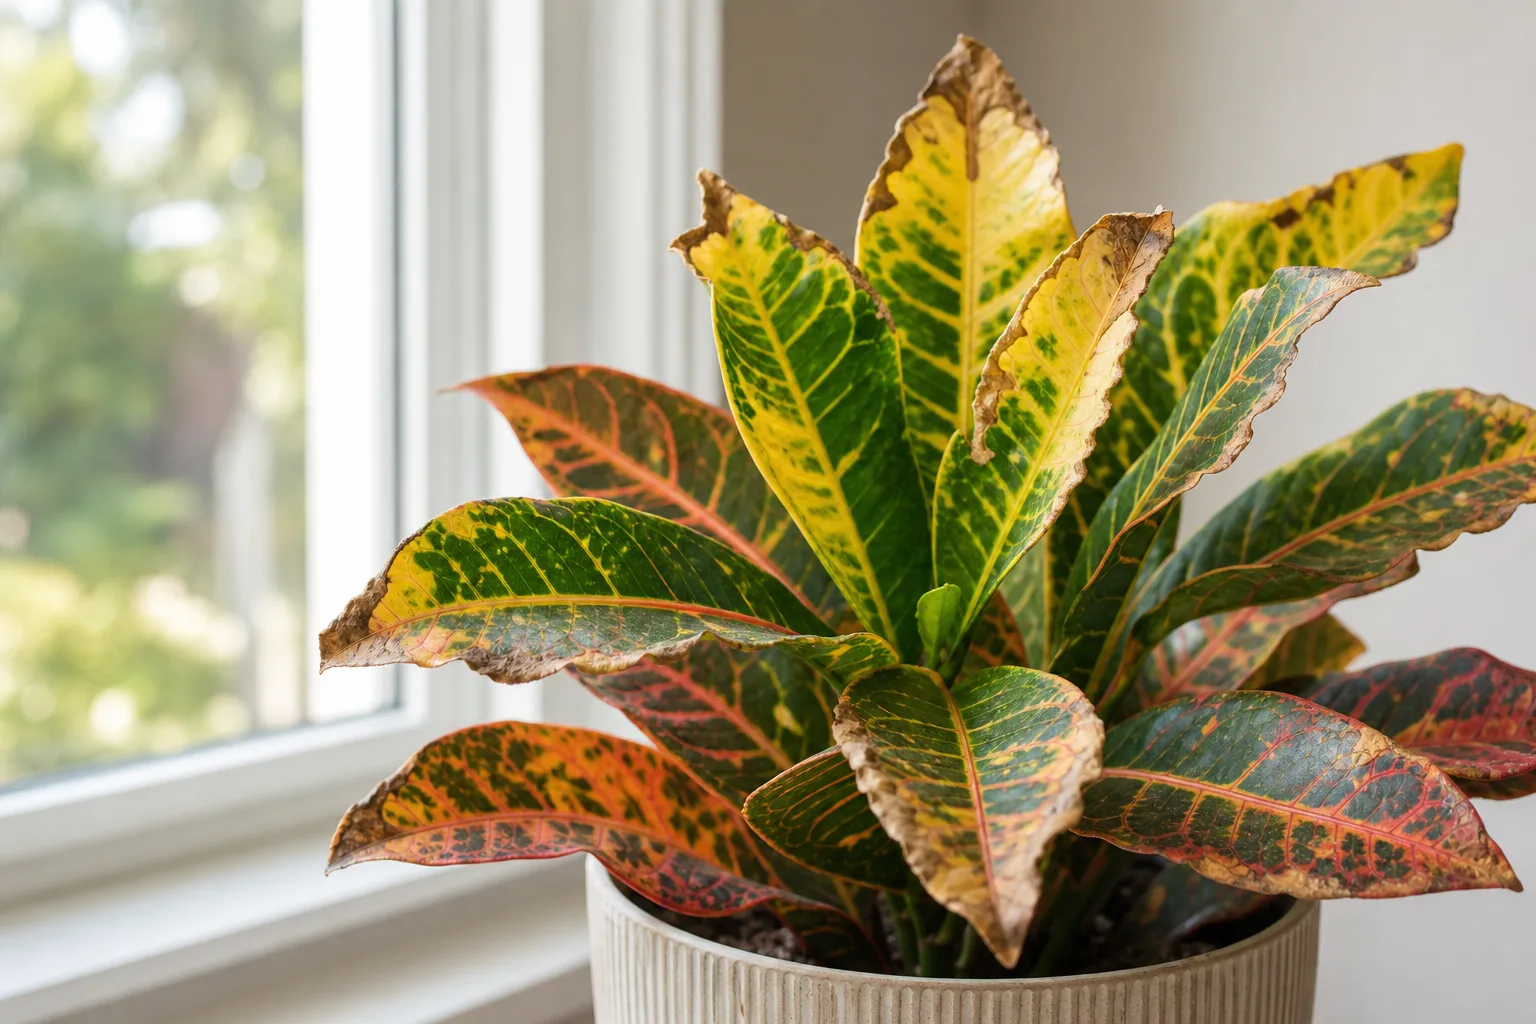
Low humidity on croton (Codiaeum variegatum) shows up when indoor air is drier than this tropical shrub expects-most often in heated winter rooms, beside forced-air vents, or after a move from a humid greenhouse to a dry apartment. Croton is not a desert plant. It evolved in warm, humid forest margins and needs high air humidity to stay in good condition indoors, even though many specimens adapt to 40–60% relative humidity without constant distress.
Below about 30% RH, leaf edges brown, colors dull, and spider mite risk rises sharply on a species already prone to mites in dry interiorscape use.
First step: move the pot off the driest microclimate-heat vent, radiator ledge, or direct AC blast-before you water more or start misting. Scan placement with your hand at foliage height; if hot or cold dry air hits the leaves, relocation is the fastest fix.
Does croton need high humidity?
Yes-more than most common houseplants, though not greenhouse orchid levels year-round.
Croton belongs to the spurge family from Malaysia, Indonesia, and the western Pacific, where ambient humidity runs well above typical heated homes. Wisconsin Extension describes croton as a tropical plant that does best with moderate to high humidity and warm temperatures between 60 and 85°F. The RHS Growing Guide for codiaeum lists high air humidity alongside Croton light guide and consistent warmth as non-negotiables for keeping codiaeums looking their best.
Practical indoor targets:
| RH range | What to expect on croton |
|---|---|
| 40–60% | Adapted range for most healthy indoor specimens; stable color and firm margins when light and watering also match |
| 30–40% | Marginal-watch margins on newest leaves, especially near glass or vents |
| Below ~30% | Brown leaf edges, accelerated transpiration stress, leaf drop compounded by cold drafts, spider mite outbreaks |
PlantTalk Colorado notes crotons need 40 to 80 percent humidity and suffer when forced-air heating or AC dries the room without a buffer. Your thermostat can read 72°F while the microclimate beside a floor register is far drier-that is where croton fails first.
Compared with pothos or snake plant, croton is more demanding. Beginners who succeed with low-humidity survivors often struggle with croton in the same spot until they add a humidifier or move the pot away from winter heat paths. See the croton overview for full temperature and humidity context.
What low humidity looks like on Croton
Dry-air stress on croton announces itself through leaf margins, color, and pests-not the uniform yellowing of overwatering.
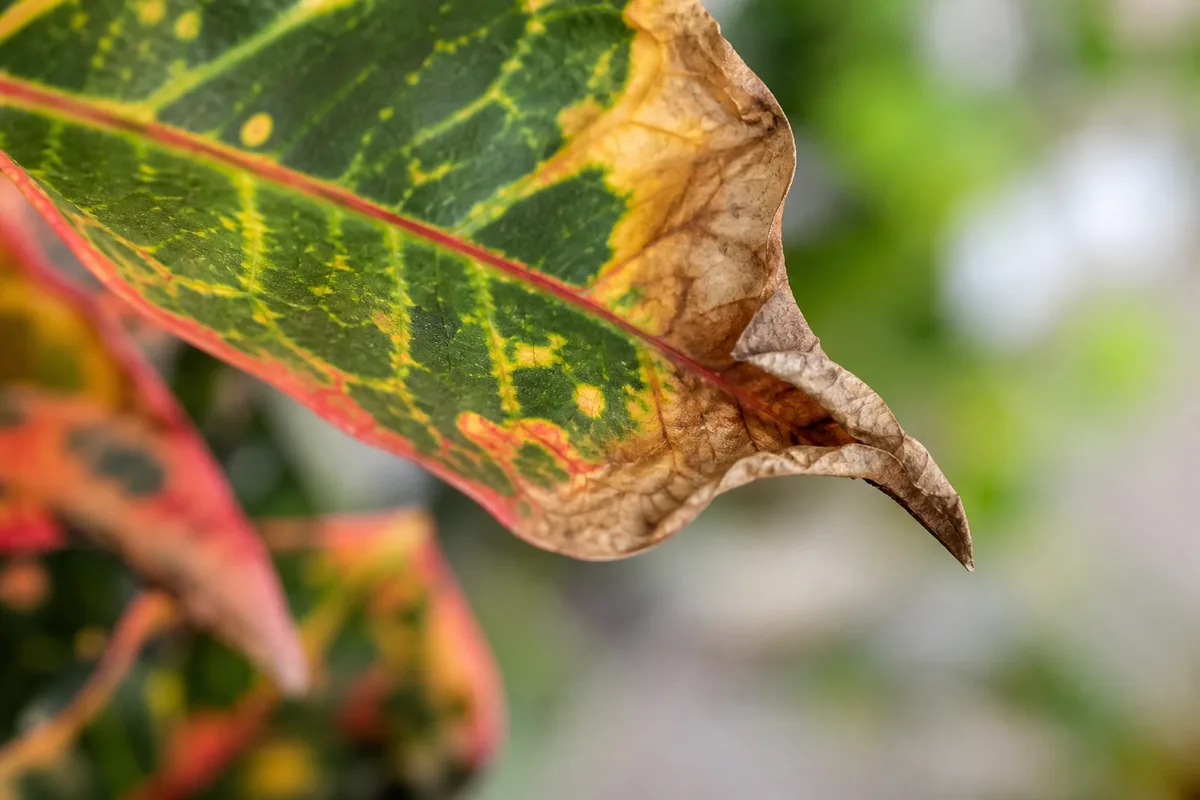
Brown crispy leaf margins on a variegated croton leaf from dry indoor air - compare with firm green tissue at the leaf center.
Brown or tan leaf edges and tips, often starting on the newest or most exposed leaves-the side facing a heat vent, radiator, or sunny winter window. On heavily variegated cultivars like Petra, pigment fades at the margins before the leaf center chloroses, because transpiration pulls water fastest from thin edge tissue.
Upward curl or slight cupping on young leaves in very dry air, especially when the pot sits in a bright, warm window where light and dryness stack.
Premature leaf drop that looks like relocation shock but persists for weeks after purchase-often cold draft plus dry air together. The RHS lists leaf drop when compost is too dry, air is too dry, the plant sits in a cold draught, or temperature stays below 15°C (59°F).
Spider mite acceleration-fine yellow or bronze stippling, dusty leaf undersides, and webbing in warm, dry indoor air. NC State Extension notes that spider mite susceptibility sometimes limits croton’s interiorscape use; dry winter rooms are the classic setup. See spider mites on croton if stippling is present.
Dull or grayish foliage without obvious sun scorch-color intensity drops when the plant loses too much water from leaves faster than roots replace it, even if soil moisture is adequate.
Unlike underwatering, low humidity often appears with soil that is not completely dry-owners sometimes overwater when brown edges look like “thirst,” compounding stress with wet roots.
Why Croton gets low humidity stress indoors
Three patterns cause most croton dry-air problems:
Winter heating. Forced-air furnaces, radiators, and space heaters drop room RH into the 20–30% band just when croton is growing slowly in lower light. The plant transpires less but leaf margins still desiccate in the dry microclimate near heat sources.
Vent and draft placement. AC vents in summer and heat registers in winter create localized dry zones that hygrometers across the room miss. A pot on a radiator shelf or directly under a ceiling vent can show margin burn while the rest of the room reads acceptable.
Greenhouse-to-home transition. Nursery crotons leave humid bench conditions and land in dry apartments. Some leaf drop is normal relocation stress, but continued margin browning on new growth means the new air moisture is too low-not that the plant needs more water on calendar autopilot.
Bright window + dry air combo. Croton wants strong light for color, but a south or west sill in winter combines intense sun through glass with very dry air, increasing water loss from foliage. UF IFAS notes crotons thrive in warm, humid conditions outdoors; indoors, that pairing must be engineered with placement and humidity buffers.
How to confirm the cause
Work through this numbered confirmation workflow before Croton repotting guide, fertilizing, or spraying:
- Measure RH at leaf height - Place a hygrometer beside the canopy for 24 hours. Readings below 35% with margin browning strongly support dry-air stress. One spot check is not enough; day-night swings matter in heated rooms.
- Vent and draft scan - Run your hand along the stem at foliage height. Feel for hot dry blasts from floor registers, cold AC streams, or drafty winter glass. Note whether damage is worst on the exposed side.
- Soil moisture at depth - Press a finger into the top inch and use a skewer deeper if needed. Dry mix through the top two inches plus wilt points toward underwatering or both drought and dry air. Moist mix with margin-only browning points to air humidity or localized heat, not thirst.
- Read the leaf pattern - Even brown margins on multiple leaves without stippling → environmental dryness. Random bronze patches plus webbing → spider mites. Uniform tip burn on oldest leaves only after heavy fertilizing → salt buildup, overlapping with brown tips.
- Check timing - Symptoms appearing when heat first runs (October–March in northern climates) fit dry air. Sudden drop within days of purchase fits relocation shock layered on low humidity-fix placement and RH, then wait before repotting.
- Cold cross-check - Temperature below about 50°F (10°C) or sustained cold drafts cause croton leaf drop independent of humidity. Wisconsin Extension notes leaf drop below 50°F; cold + dry together is worse than either alone.
Symptom lookalike table
| What you see | Likely cause | Differentiating check |
|---|---|---|
| Brown margins, no stippling, worst near vent | Low humidity | RH below 40%; soil not fully dry |
| Light pot, dry soil, wilt recovers after soak | Underwatering | Top 2 in dry; margins on many leaves |
| Yellow lower leaves, wet soil, gnats | Overwatering | Sour smell; soft stems-see overwatering |
| Stippling, webbing, dusty undersides | Spider mites | Tap test; mites thrive in dry heat |
| Bleached gray patches after sudden west-sun move | Sun scorch | Damage on sun-facing side only |
| Whole-plant drop after repot or room change | Relocation shock | Firm stems; stable care for 2–3 weeks |
| Tip burn on oldest leaves after feeding | Salt / fertilizer burn | Crisp tips persist despite good RH |
If mites and dry air overlap, treat both-raising humidity alone will not clear an active infestation.
First fix for Croton
Move the pot out of forced-air paths and the driest microclimate before any other intervention.
Practical steps:
- Shift the container at least 3–5 feet from heat registers, radiator surfaces, and direct AC vents
- Pull pots off window ledges that bake in afternoon sun through dry winter glass, or add a sheer and a humidity buffer
- Rotate once to see whether one side shows worse margin burn-that side was likely in the dry stream
After relocation, wait five to seven days and watch new growth, not old crispy edges.
Raise local humidity (after placement)
Ranked by reliability for croton:
- Small cool-mist humidifier near the plant, targeting 40–60% RH at foliage height-the most dependable fix in heated winter rooms
- Grouping plants together on a tray-raises local moisture modestly through shared transpiration
- Pebble tray with the pot base above the water line-NC State Extension recommends wet pebbles to meet humidity requirements indoors; effect is local but helpful
- Occasional shower or wipe-down-UF IFAS suggests washing foliage occasionally to manage dust and mites; not a substitute for ambient RH
Misting alone underperforms for croton. It spikes humidity for minutes, leaves foliage wet in dim corners where fungal spotting risk rises, and does not change the air the plant breathes all day. Use misting as a supplement after placement and a humidifier-or for mite rinses-not as the primary strategy.
Make one care change at a time so you can read the plant’s response. Do not simultaneously repot, fertilize, and install a humidifier on day one.
Step-by-step recovery
After moving off dry heat and adding a humidity buffer:
- Hold watering to the pot - Water when the top inch dries per our watering guide. Dry air is not fixed by keeping soil soggy.
- Wipe dust from leaves with a damp cloth so gas exchange and light reach the surface-dusty crotons in dry air attract mites faster.
- Inspect undersides weekly for stippling or webbing; rinse with lukewarm water if mites appear, then follow the spider mites guide.
- Trim fully brown leaf tips only for appearance once conditions stabilize-cosmetic pruning is optional; damaged tissue will not re-green.
- Hold fertilizer until new growth looks firm and margins on fresh leaves stay clean for two weeks.
Recovery timeline
Expect direction of change on new leaves within two to three weeks, not an instant repair of old margins.
- Week 1: Old brown edges remain; leaf drop may slow after moving off the vent
- Weeks 2–4: Next flush should show cleaner margins if RH and placement improved
- Months 2–3: Canopy color and density improve as branching resumes; older damaged leaves can be pruned for shape
If new leaves still crisp at the edges after six weeks with RH above 40% and correct watering, reassess light intensity, cold drafts, fluoride or salt in tap water (overlaps with brown tips), or active mites.
What not to do
- Do not overwater when brown edges look like drought-check RH and soil moisture first
- Do not mist heavily in a dim corner where leaves stay wet overnight-poor airflow invites fungal issues
- Do not stack repotting, hard pruning, and pesticide on the same day as a humidity overhaul
- Do not place croton touching cold window glass in winter-cold + dry compounds leaf drop
- Do not assume a humidifier fixes mites-treat pests separately if stippling is present
Croton sap irritates skin and the plant is toxic to pets; wear gloves when pruning and keep repositioned pots out of reach when moving them toward humidifiers or windows.
How to prevent dry-air stress next winter
- Pre-season placement audit - Before heat runs, move crotons off registers and hot ledges; note which windows dry out in January
- Target 40–60% RH in the croton room with a humidifier on a timer when central heat is active
- Pebble tray or grouping as a backup in moderately dry rooms-not a replacement in desert-dry heated air
- Weekly mite checks November through March when indoor RH is lowest
- Stable temperature - avoid cycling the pot between rooms; croton drops leaves when humidity and temperature swing together
Align everyday care with the overview guide so light, water, and humidity work as a system-not isolated fixes when margins brown.
When to worry
Act quickly when:
- Stippling and webbing spread on new growth-mites in dry heat can defoliate croton fast; isolate and treat
- Leaf drop accelerates while soil stays wet-dry air may have pushed overwatering; inspect roots
- Margins brown on every new leaf despite RH above 45%-look for salt buildup, cold drafts below 59°F, or insufficient light dulling the plant’s recovery capacity
You can observe when:
- Older leaves show historic margin burn but newest leaves emerge clean after a vent move and humidifier-recovery is underway
- A recently purchased croton drops lower leaves once while you stabilize RH-common shock if stems stay firm
Conclusion
Low humidity on croton is a placement and air-moisture problem on a tropical species that shows stress at the leaf margins before the rest of the plant looks obviously sick. Scan for vents and radiators, move the pot once to a stable spot, target 40–60% RH with a humidifier when winter heat drops room air below 30%, and judge recovery on new leaves-not old brown edges. Pair humidity fixes with correct watering and mite vigilance; dry air rarely travels alone on this colorful, demanding houseplant.
When to use this page vs other Croton guides
- Croton watering guide - Use for routine moisture checks before assuming low humidity is the main issue.
- Croton problems hub - Browse all 16 common issues on this species.
- Brown Tips on Croton - Different entry point when symptoms overlap with low humidity.