Pilea Peperomioides Pruning: When, How, and Mistakes
Pilea Peperomioides Pruning: When, How, and Mistakes to Avoid
Pilea Peperomioides Pruning: When, How, and Mistakes to Avoid
First, snap or snip any fully yellow lower leaf at its petiole base - where the leaf stalk meets the central stem - using clean sharp scissors. Do not pull attached petioles. This single sanitation step clears natural senescence without touching live tissue, and it shows you whether yellowing is isolated (normal aging) or spreading (light or moisture stress).
Quick Answer
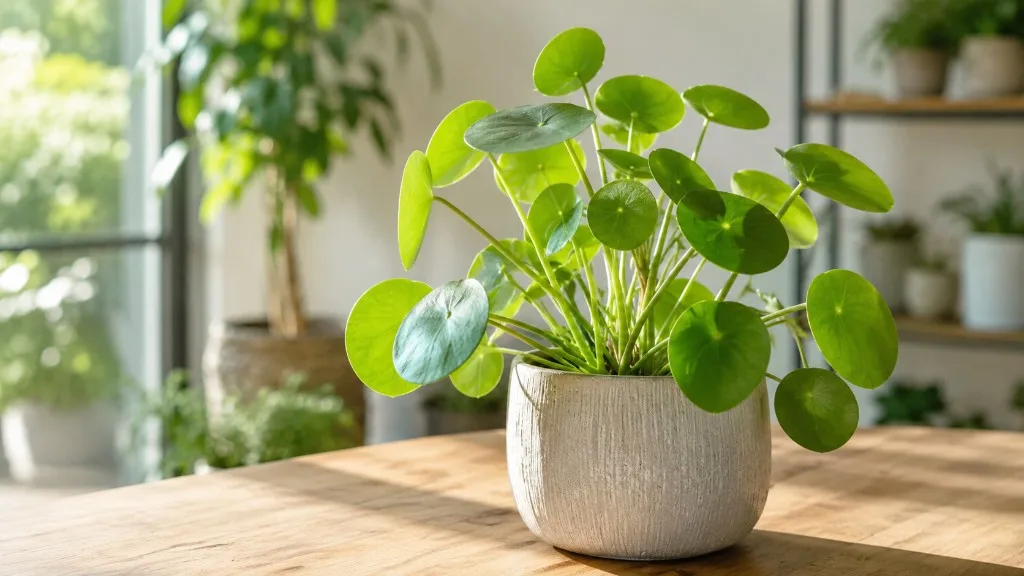
Pilea peperomioides - the Chinese money plant or pancake plant - grows as a single upright central stem with round peltate leaves and frequent pups at the base. NC State Extension notes that leggy growth results from inadequate light, and the plant is generally compact at 8–12 inches tall indoors. Pruning is maintenance, not a schedule: remove yellow lower leaves as they appear, optionally detach pups for propagation or a cleaner single-stem look, and shorten a stretched central stem 6–10 mm (about ¼ inch) above a node in spring or summer when the plant is actively growing. Limit routine removal to no more than one-third of total foliage per session. Pruning cannot fix lean without Pilea Peperomioides light guide and fortnightly rotation - scissors do not replace turning the pot.
What Pruning Does for Pilea Peperomioides
Unlike trailing vines, pilea grows from one dominant vertical stem. Each round leaf attaches on a long petiole that joins the stem at a node - the slightly raised ring where new buds can activate. The terminal bud at the top holds apical dominance, so the stem extends upward and leaves cluster toward the brightest side of the room. In low light, internodes stretch and lower leaves age out, leaving a bare lower stem with a leafy crown - the classic leggy pilea.
Pruning serves four practical jobs on Pilea Peperomioides overview:
- Removes failing tissue - yellow, damaged, or pest-marked leaves that no longer photosynthesize
- Manages basal pups - offsets that compete for space or supply propagation material
- Redirects growth - a stem cut above a node can activate buds below for a bushier top
- Controls height - shortens an overgrown central stem that has outgrown its shelf
RHS pilea guidance states that tall stems on upright bushy pileas can be cut back in spring or summer to stimulate new growth from the base, though a woody or weak plant may be better replaced through propagation. Pruning does not substitute for light. If new leaves after a cutback are small and spaced far apart, improve placement before expecting a compact coin-leaf silhouette.
When to Prune Pilea Peperomioides
Pilea tolerates light leaf removal any time, but timing changes speed, not survival. Structural stem cuts during active growth produce faster bud break and fuller regrowth.
Best season for stem cutbacks
Spring through early summer is the ideal window for shortening a leggy central stem or harvesting pups with confidence. NC State Extension recommends propagation by offsets or stem cuttings during the plant’s active growth in spring or early summer. By then daylight is increasing, the pot dries on a predictable rhythm, and new leaves are already unfurling. Early autumn works as a second option if your space stays warm and bright.
Avoid major stem cuts in late autumn and winter unless the plant is blocking a walkway or you accept a slower response. A topped stem that rebounds in three weeks during June may sit unchanged until March if cut in December.
Cuts that cannot wait
Some trimming should not wait for spring:
- Fully yellow or brown dry leaves - snip at the petiole base any time
- Soft, mushy stem tissue - cut back into firm green stem only after you have corrected chronic overwatering on Pilea Peperomioides; do not prune aggressively into rot
- Leaves with active pest damage - remove the worst affected foliage once you have a treatment plan for the rest
When not to prune
Delay major stem work when:
- root rot on Pilea Peperomioides is suspected - soggy mix, soft stem base, widespread yellowing. Fix moisture and roots first
- The plant was recently repotted or moved - let it stabilize two to three weeks
- Light is very low - a hard cutback in a dim corner produces weak, spaced regrowth
What to Check Before Cutting
Before any shaping cut, inspect the whole plant:
- Lower leaves - are yellow leaves isolated on the oldest petioles, or spreading up the stem?
- Stem base - is it firm and green at the soil line, or soft and dark?
- Light direction - which way do leaves face? A strong lean toward one window means rotation matters as much as scissors
- Pups - how many offsets sit at the base, and do they have their own small roots?
- Nodes on the main stem - locate the rings below the leafy crown where a cut could activate new growth
If yellowing is climbing the stem and the mix stays wet, pruning leaves will not help - address watering and light first.
The First Cut to Make
Remove only fully yellow or clearly dead lower leaves at the petiole base. Work from the bottom upward one leaf at a time. This pass is safe any season and reveals the live framework before you decide on pup removal or stem shortening.
Do not start by topping the stem or pulling pups unless the plant is severely leggy or overcrowded at the base and you have already cleared failing foliage.
How to Prune Pilea Peperomioides Step by Step
Removing yellow lower leaves
Mature pileas naturally shed the oldest leaves as the stem lengthens. When a lower leaf is mostly yellow - not just a pale spot - snip the petiole where it meets the central stem. Use bypass pruners or sharp scissors wiped with rubbing alcohol. Never tug a leaf that still resists; tearing leaves ragged wounds that heal slowly on fleshy pilea tissue.
One yellow leaf at a time on an otherwise healthy plant is normal. Several yellowing at once usually signals too little light, overwatering, or both - correct those before removing live green tissue.
Detaching pups at the base
Pilea peperomioides readily produces offsets around the base. RHS propagation guidance recommends detaching these when large enough and potting individually. Wait until a pup has several leaves and visible roots several centimetres long - often easiest at Pilea Peperomioides repotting guide when you can see the root mass.
Trace the pup to its connection point and cut with a clean knife, including a small root section. Alternatively, tease it away gently if roots are well established. Leaving pups creates a fuller multi-stem pot; removing them emphasizes the classic single coin-leaf tree look and reduces competition for the main stem.
Shortening a leggy central stem
When the lower stem is bare and the leafy crown sits on a tall stretch of naked tissue, you can top the plant. Identify the highest node below the leafy section - or the point where bare stem meets healthy leaves - and cut 6–10 mm above that node with sharp bypass pruners.
New growth typically emerges from buds at nodes below the cut, often producing a bushier top if light is adequate. The rooted base may also push fresh pups from remaining nodes. Do not cut mid-stem between nodes; a stub without a bud rarely produces useful regrowth on pilea.
For severely leggy plants, rooting the healthy top section in water and starting fresh is sometimes more reliable than waiting for the bare base to fill in - especially if the lower stem is woody or pale.
Where to Cut on the Stem
A node on pilea is the slight swelling where a petiole attaches to the central stem. Always place shaping cuts just above a node, leaving a short stub of stem (about 6–10 mm) above the ring. The cut severs apical dominance at the tip and can wake lateral buds at that node or below.
For yellow leaves, cut at the petiole base, not mid-blade. For pups, cut at the point where the offset’s stem meets the mother plant’s root zone, keeping roots intact on the pup.
How Much You Can Safely Remove
Follow the one-third rule: remove no more than one-third of total leaves in a single session under normal conditions. Pilea rebounds quickly in bright indirect light - NC State Extension lists rapid growth as a trait - but an over-trimmed plant in a dim corner or while root-bound will stall.
Spread major rejuvenation over two sessions spaced several weeks apart during spring or summer if more than one-third needs to go.
What Not to Cut
Avoid these common errors:
- Green healthy leaves on a sparse plant - each coin leaf feeds recovery; remove only failing or excess tissue
- Between nodes on the main stem - no bud means no regrowth from the stub
- Pups with only one or two tiny leaves - they root poorly and stress the mother plant
- The entire plant to soil level unless you are deliberately restarting from a rooted base with known viable nodes
Do not bury the stem deeper at repot to correct lean. Covering the green stem encourages rot at the soil line. Stake lightly, improve light, and rotate instead.
Using Pruning Cuttings
Stem sections and detached pups from pruning are usable propagation material. A topped stem with several healthy leaves roots readily in water; NC State Extension lists stem cuttings and offsets as recommended propagation methods in spring or early summer. Plant when roots reach 2–5 cm (1–2 inches).
This is optional - discard trimmings if you do not want more plants. Pilea is non-toxic to cats and dogs per the ASPCA, so pet-safe cleanup is straightforward.
Aftercare and Recovery
After pruning:
- Bright indirect light - pilea etiolates quickly in low light after cutbacks
- Rotate the pot every one to two weeks so new leaves do not all face one direction
- Water when the top inch of mix dries in summer; less in winter - reduced leaf area needs less moisture, but do not let the plant dry to wilting
- Hold fertilizer until new growth is visible unless the plant was already actively growing in spring
During active growth, new leaves or buds at nodes below a stem cut often appear within two to four weeks. Visible bushiness at the top develops over six to ten weeks as secondary leaves expand. Winter cuts may take twice as long.
Signs Pruning Worked - or Went Too Far
Pruning worked when:
- New leaves unfurl at or below a stem cut within a few weeks
- Yellowing stops at the lowest natural leaf and does not climb
- Pups root cleanly and the mother stem stays firm
- The plant holds an upright posture with regular rotation
Pruning went too far or was badly timed when:
- The stem softens at the base after a hard cutback combined with wet soil
- No bud break appears below a node cut after six weeks in warm bright conditions
- Remaining leaves cup, curl, or pale - usually light or water stress, not the cut itself
- Lean returns immediately because the pot was never rotated
Mistakes to Avoid
- Pruning without rotation - lean returns after every cut if light hits one side only
- Removing pups too early - weak propagation and slower mother recovery
- Overwatering after leaf removal - soggy mix on reduced transpiration invites root rot
- Burying stem to fix lean - stem rot at the soil line
- Cutting between nodes - bare stub with no regrowth
- Expecting scissors to fix low light - legginess returns on stretched new internodes
Conclusion
Pilea peperomioides pruning is straightforward crown and base maintenance: yellow leaves off at the petiole, optional pup harvest when rooted, leggy central stems cut above nodes in spring or summer, and regular rotation for symmetry. The plant is forgiving and pet-safe, so trimmings can become new plants rather than waste. Light and rotation preserve the coin-leaf silhouette that scissors alone cannot create - prune to support the shape, not to replace basic placement.
When to use this page vs other Pilea Peperomioides guides
- Pilea Peperomioides overview - Start here for whole-plant context before deep-diving this topic.
- Pilea Peperomioides problems hub - Jump to symptom-specific fix guides when this care topic does not resolve the issue.
- Leggy Growth on Pilea Peperomioides - Escalate here when pruning adjustments are not enough.
- Slow Growth on Pilea Peperomioides - Escalate here when pruning adjustments are not enough.
- Brown Tips on Pilea Peperomioides - Escalate here when pruning adjustments are not enough.
Related Pilea Peperomioides guides
- Pilea Peperomioides overview
- Pilea Peperomioides watering
- Pilea Peperomioides light
- Pilea Peperomioides soil
- Pilea Peperomioides propagation
- Pilea Peperomioides fertilizer
- Leggy Growth on Pilea Peperomioides
- Slow Growth on Pilea Peperomioides
- Brown Tips on Pilea Peperomioides
- Pilea Peperomioides problems