Pilea Peperomioides (Chinese Money Plant) Repotting: When
Pilea Peperomioides (Chinese Money Plant) Repotting: When, How, and Mistakes to Avoid
Pilea Peperomioides (Chinese Money Plant) Repotting: When, How, and Mistakes to Avoid
Most pilea peperomioides repotting guides treat the Chinese money plant like any upright houseplant: tip it out, go one size up, water lightly, wait two weeks. That misses the scenario pilea owners actually face - a pup-heavy clump with a top-heavy coin-leaf canopy, fragile petioles that snap when you tug the pot, and offsets that multiply faster once fresh mix arrives. Pilea peperomioides is an upright herb in Urticaceae with a shallow spreading root mass and a central stem that wobbles in the wrong pot shape. Repot when roots crowd or mix fails, choose a wide shallow container for stability, separate mature pups while the plant is out of the pot, refresh with well-draining mix, and resume weekly rotation once new coin leaves firm up. Do that in spring and most indoor pileas recover within a few weeks without losing their signature silhouette.
Quick Decision: Repot Now, Split Pups, Emergency Only, or Wait Until Spring
| Situation | Action | Notes |
|---|---|---|
| Roots at drain holes + spring growth | Full repot, one size up | Ideal routine window |
| Four or more crowded pups, stable mother | Repot + split mature pups | See propagation guide for potting divisions |
| Sour soil, mushy roots, wilting on wet mix | Emergency repot now | Trim rot, smaller pot if needed |
| Slightly tight roots, healthy growth, mid-winter | Wait until spring | Optional top-dress only |
| New purchase, first month home | Wait | Let plant acclimate unless mix is failing |
| Water runs through in seconds, stalled growth | Full repot with fresh mix | Root ball has displaced most medium |
Why Repotting Matters for Pilea Peperomioides
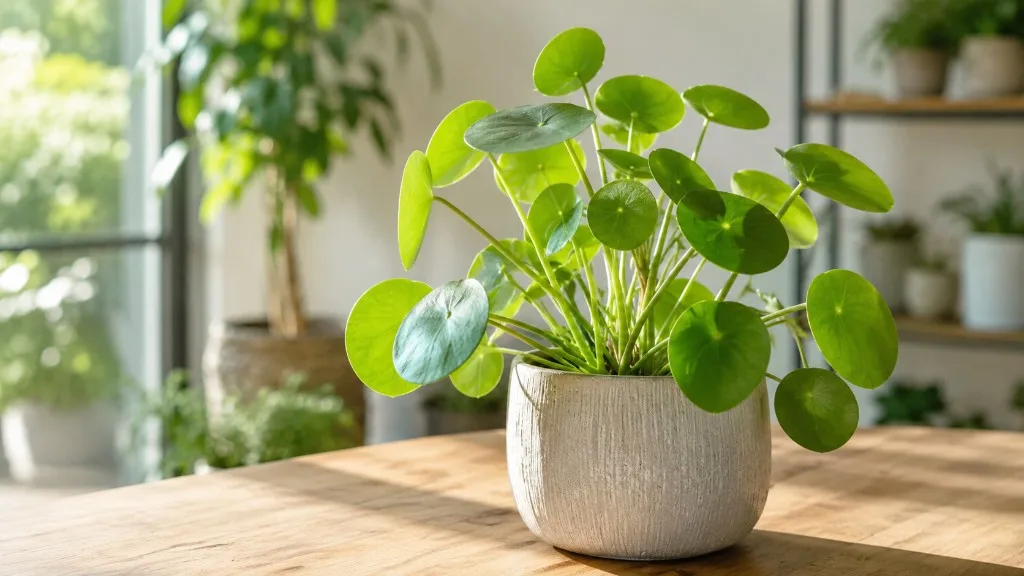
Pilea peperomioides - the Chinese money plant, friendship plant, or UFO plant - is a compact upright perennial that typically reaches about 8 to 12 inches (20–30 cm) tall indoors with a similar spread when pups stay attached. It is not a succulent and not a deep-rooted tree; it evolved on shaded moist rock faces in southwestern China, where drainage is sharp and roots spread horizontally rather than plunging deep. That biology shapes every repot decision: you are refreshing a shallow root zone, stabilizing a top-heavy stem, and often managing offsets that share the same soil volume.
Urticaceae root habit and coin-leaf handling
The long petioles attach at the center of each peltate, coin-shaped leaf - a structure that looks sturdy but bruises easily when you grab leaves to lift the plant. Always handle pilea by the pot rim or root ball, never by petioles. Below soil, roots are relatively fine and moderate in depth compared with caudex succulents; NC State Extension lists loam or sand texture with good drainage as ideal, and notes susceptibility to root rot on Pilea Peperomioides if overwatered. Tease circling roots at repot, but avoid bare-rooting healthy plants - stripping fine root hairs extends shock on a species that already pauses growth after disturbance.
Repotting also resets the relationship between soil volume and your watering rhythm. Fresh mix in a slightly larger pot dries more slowly until roots colonize the new space; plan lighter drinks for the first two to three weeks and skip fertilizer for at least a month while new root tips form.
Signs Your Pilea Needs Repotting
You do not need a calendar if you inspect the pot each spring. Plan a full repot when two or more of these signs appear during active growth.
Root-bound and offset overcrowding clues
White roots circling the drain holes or visible through the pot wall mean horizontal room is gone. Water that runs straight through in seconds without wetting the center usually indicates the root-and-pup mass has displaced most of the mix - the plant wilts quickly between sessions even though you water regularly. Stalled new coin leaves despite good light and feeding suggest exhausted soil or overcrowded roots. Four or more pups competing in a 12 cm pot creates the same stress as classical root-binding: each offset draws from the same limited mix.
Soil quality triggers repotting independently of crowding. Refresh when mix smells sour, stays dark and cool for many days after watering, or has white crust from fertilizer salts. The RHS advises checking roots each spring on fast-growing pileas and repotting when they start to get crowded - usually every couple of years.
Best Time of Year to Repot
Spring through early summer is the safest window while pilea is actively growing. NC State Extension notes propagation is best in spring or early summer during active growth - the same season when root regeneration is fastest. Clemson HGIC recommends repotting only while houseplants are actively growing in spring and summer, and avoiding dormant or ailing specimens unless necessary.
Avoid routine winter repotting in most homes. Cooler rooms, shorter days, and slower evaporation stack stress on disturbed roots. Exceptions: documented root rot needing fresh mix and trimmed roots, a pot so small the plant cannot hold moisture between waterings, or severe root-binding with declining health. The RHS notes pileas need less water in winter when growth slows - the same seasonal caution applies to stacking a full repot on top of winter rest.
Indoor pileas rarely flower; you do not need to delay repotting for bloom the way you might on a flowering orchid. Focus on root health and growth phase instead.
Top-Dress vs Full Repot
Not every tired pilea needs a full unpot. Top-dressing - removing the top 2–3 cm of old mix and replacing it with fresh compost - works when the root ball still fits comfortably, drainage is acceptable, and the main problem is depleted surface soil or minor salt crust. Clemson HGIC describes this as an option for large containers that are impractical to replace entirely; the same principle applies to a manageable indoor pilea that only needs a surface refresh.
Choose a full repot when roots circle the pot, water behavior has become unpredictable, mix smells sour, you plan to split pups, or you are upsizing one nursery size. Full repotting is mandatory after root-rot surgery - you need to remove infected mix and inspect every root section. A one-year-old specimen in a 10 cm pot with two small pups rarely needs more than top-dress; a three-year-old clump with six offsets in the same pot almost certainly needs upsizing or division.
Choosing Pot Size and Shape
The one-size-up rule is non-negotiable: choose a container 2–5 cm (about one inch) wider in diameter than the current pot. The RHS warns that an overly large pot keeps compost damp too long, leading to root rot - the primary post-repot failure mode on pilea. Measure the inside rim diameter, not the decorative outer lip. A plant in a 12 cm pot steps to 14 or 15 cm, not 20 cm.
Every new pot needs a drainage hole. Decorative cache pots without holes are display-only; plant into a functional inner pot and empty saucers after watering so roots never sit in standing water.
Wide shallow vs standard depth
Because pilea roots spread horizontally and the stem is top-heavy with coin leaves, a wide shallow pot usually beats a tall narrow cylinder for post-repot stability. A deep pot with unused soil at the bottom stays wet longer than the active root zone can dry, especially in plastic containers. A wider base lowers the center of gravity so the central stem wobbles less while new roots anchor.
| Pot profile | Stem stability | Dry-down speed | Best for |
|---|---|---|---|
| Wide shallow (azalea/bowl style) | High - low center of gravity | Moderate; less unused deep soil | Single-stem and pup clumps |
| Standard depth, one size up | Good if pot is heavy | Predictable in terracotta | Most routine upsizes |
| Tall narrow cylinder | Low - top-heavy wobble | Slow at bottom; rot risk | Avoid for pilea |
Terracotta pulls moisture through its walls and speeds dry-down - helpful if you tend to overwater or repot into a slightly larger volume. Plastic retains moisture longer, which can work if your home is dry and you already check soil before watering. Either material succeeds when drainage is good and pot volume matches root mass.
Worked example: a 12 cm plastic pot holding a mother plant and four pups with circling roots graduates to a 14 cm wide shallow terracotta bowl - enough fresh mix around the sides without creating a deep wet column beneath a modest root mass.
Soil Mix for Repotting
Use fresh peat-free indoor potting mix amended with 15–20% perlite for drainage - the same blend detailed in our pilea soil guide. NC State Extension specifies moist, well-drained potting mix in a container with drainage; the species is susceptible to rot in stagnant soil. Target a neutral pH range around 6.0–7.0, consistent with GRIN-Global habitat notes for shaded rocky forest substrates.
Do not reuse old soil - it loses structure and may carry salt buildup or fungus gnat larvae. Do not add a thick gravel layer at the bottom; Clemson HGIC notes that rock layers actually slow water movement through the pot. A small mesh or pottery shard over the drain hole is enough to prevent mix washout.
Separating Pups During Repot
Repot day is the best time to divide offsets because the whole root system is visible and you can pot pups immediately without a second disturbance. The RHS notes Chinese money plant readily produces offsets around its base - detach when large enough and pot individually. Full propagation technique, water-rooting options, and gift-pot sizing live in our propagation guide; this section covers the repot-specific workflow.
When a pup is ready to split
Wait until a pup has at least three to four leaves and stands roughly 5–8 cm (2–3 inches) tall, with visible roots at the soil line when you brush away the surface. Smaller pups can survive separation but wilt faster and root slower. If roots are minimal, detach during repot and root in water for one to three weeks before potting - same timing as the propagation guide recommends.
You do not have to split every pup. Leaving two or three attached creates a fuller display pot; removing four or more reduces competition when the mother is root-bound. Many growers separate half the pups at repot and leave the rest for the next cycle.
Step-by-Step: How to Repot Pilea Without Shock
Before you start: gather a new pot 2–5 cm wider, fresh mix per the soil guide, a hand trowel, clean scissors, newspaper, optional small pots for divisions, and a chopstick for settling soil. Water the plant the day before so the root ball holds together. Clemson HGIC recommends disturbing roots only as needed and selecting a pot 1–2 inches larger in diameter.
-
Prepare the new pot. Add dry mix to the bottom so the root ball will sit with the crown about 2 cm below the rim. Do not bury the central stem deeper than it grew before - deep burial invites stem rot in fresh wet mix.
-
Unpot gently. Tip the container on its side, support the base with one hand, and tap the rim. Slide the plant out; never yank coin leaves or petioles. If stuck, run a knife around the inner wall.
-
Inspect roots. Healthy tissue is white to tan and firm. Mushy brown roots smell sour - trim back to firm tissue with sterile scissors and discard contaminated mix entirely. Tease circling roots at the bottom and sides; keep most original soil around the ball.
-
Separate pups (optional). Brush soil from connection points. Cut each mature pup free with a clean knife, preserving its roots. Set pups aside in small pots or water jars per the propagation guide.
-
Position the mother plant. Center the root ball in the new pot. The stem should stand upright without leaning; a wide shallow pot helps here. Add mix around the sides, using a chopstick to settle soil without compacting.
-
Water lightly once. Water until excess drains, then empty the saucer. Do not soak repeatedly on day one - roots need oxygen while healing. Follow the lighter post-repot rhythm in our watering guide.
-
Place in bright indirect light. Same window as before, avoiding harsh direct sun for the first week. Rotate a quarter turn immediately so the plant does not lean harder toward the glass during recovery.
-
Hold fertilizer for four weeks. Fresh mix contains enough nutrients for moderate spring growth, and new root tips are vulnerable to burn. Resume feeding only after new coin leaves appear firm and domed.
Post-Repot Care and Recovery Timeline
Mild transplant shock on pilea - slight leaf droop, one or two yellow lower leaves, a brief pause in new growth - usually clears within one to two weeks in a typical home. Full root re-establishment takes roughly four to six weeks as a practical heuristic; exact timing depends on temperature, light, and how much root mass you disturbed. Firm new coin leaves at the top are the clearest recovery signal. Old damaged leaves will not heal, but new leaves arriving at normal size and gloss mean roots are working again.
Resume weekly rotation once the plant is stable - the RHS recommends turning bushy pilea a quarter turn every time you water to prevent lopsided growth toward the window. After repot, many pileas produce extra pups within a few weeks because fresh space and nutrients trigger offset growth - plan where those babies will go or detach them at the next repot.
Expect the pot to dry more slowly for the first month because soil volume increased faster than root mass. Check moisture by lifting the pot and feeling the top inch rather than watering on your old calendar. Persistent wilting with wet soil after three weeks points to overpotting or rot, not ordinary shock.
Common Repotting Mistakes and How to Recover
Oversized pots top the list. Jumping from 12 cm to 20 cm surrounds a modest root zone with wet compost it cannot colonize quickly - the classic path to rot on a species NC State already flags as overwatering on Pilea Peperomioides-sensitive. Bare-rooting healthy plants strips fine root hairs and extends shock by weeks. Burying the central stem to fix wobble trades short-term stability for stem rot; use a wider pot or temporary stake instead. Grabbing coin leaves during unpotting snaps petioles and leaves wounds that yellow slowly. Watering heavily every day after repot keeps disturbed roots oxygen-starved. Fertilizing immediately burns tender new root tips. Winter routine repotting on a plant that was already slowing stacks cold stress on disturbed roots. Separating tiny pups with no roots at repot forces a rescue water-rooting project you could have avoided by waiting one more month.
Recovery from overpotting: unpot, trim any mushy roots, repot into a smaller appropriate container with fresh mix, and water lightly only when the top inch dries. Recovery from petiole damage: remove snapped leaves cleanly and wait for new growth - the stem usually survives if roots are healthy.
When to use this page vs other Pilea Peperomioides guides
- Pilea Peperomioides overview - Start here for whole-plant context before deep-diving this topic.
- Pilea Peperomioides problems hub - Jump to symptom-specific fix guides when this care topic does not resolve the issue.
- Root Rot on Pilea Peperomioides - Escalate here when repotting adjustments are not enough.
Related Pilea Peperomioides guides
- Pilea Peperomioides overview
- Pilea Peperomioides watering
- Pilea Peperomioides light
- Pilea Peperomioides soil
- Pilea Peperomioides propagation
- Pilea Peperomioides fertilizer
- Root Rot on Pilea Peperomioides
- Pilea Peperomioides problems
Pet Safety During Repot
The ASPCA lists Pilea peperomioides as non-toxic to cats and dogs, which makes repot day less stressful in pet-friendly homes - but nibbling can still cause mild stomach upset and soil mess is not edible. Keep pets away from discarded mix and broken leaves on the floor. Contact your veterinarian if unusual symptoms appear after ingestion. Pilea is one of the safer popular houseplants for shared spaces, as covered in the overview pet section.
Conclusion
Pilea peperomioides repotting succeeds when you match the pot to the plant’s shallow root habit and top-heavy stem - not to a generic houseplant template. Repot in spring or early summer, step up one wide shallow size, refresh with 15–20% perlite mix, separate mature pups while the root ball is exposed, handle coin leaves by the pot not the petioles, water lightly while roots heal, skip fertilizer for a month, and resume weekly rotation once new leaves firm up. Use this post-repot checklist before you close the toolkit:
- Pot only 2–5 cm wider; wide shallow profile preferred over deep cylinder
- Fresh mix from the soil guide - not reused compacted soil
- Crown at same soil line - stem not buried deeper to fix lean
- Mature pups split at repot; tiny offsets left attached or water-rooted separately
- Light drinks per watering guide until roots fill new volume
- No fertilizer for four weeks; bright indirect light without scorch
- Quarter-turn rotation resumed within the first week
- Firm new coin leaves = recovered; persistent wilting on wet soil = inspect for rot
Get those points right and the Chinese money plant usually rewards you with stable stems, fresh coin foliage, and a new round of pups within the month - often before you need to search for a second opinion.