How to Propagate Philodendron Birkin: Stem Cuttings Guide
How to Propagate Philodendron Birkin: Stem Cuttings Guide
How to Propagate Philodendron Birkin: Stem Cuttings Guide
Philodendron Birkin propagation succeeds or fails on one anatomical detail: whether your cutting includes a node - the knuckle on an upright stem where leaves attach and roots can form. Birkin is a compact, self-heading aroid with thick vertical stems and unstable white pinstripe variegation, not a fast trailing vine you can chop every few inches. Take a leaf without node tissue and you may get roots in water that never become a plant. Take a cutting from reverting solid-green tissue and you may root a healthy philodendron that looks nothing like the striped parent you wanted to clone.
The North Carolina Extension Gardener Plant Toolbox lists stem cuttings as the recommended propagation strategy for Philodendron ‘Birkin’. That matches standard aroid practice and what Iowa State Extension describes for non-trailing philodendrons: stem sections with nodes root in water, perlite, or well-drained potting mix. This guide walks through water, sphagnum moss, and perlite methods with Birkin-specific decision points - upright crown anatomy, chimeric stripe cloning uncertainty, realistic 4–6 week rooting timelines, transplant thresholds with transparent source context, and safe handling around pets and irritating sap.
Why Birkin Propagation Starts With Nodes on Upright Stems
Every valid Birkin propagation starts with meristematic tissue at a node. The node is the junction where the leaf petiole meets the stem - a slight ring or bump on Birkin’s thick upright shoots. Cells in that zone can form callus, then adventitious roots, then new shoots. Without a node, a detached leaf may produce water roots through desperation physiology, but it cannot generate the stem and leaves that make a full plant. That single-leaf trap wastes weeks on social media and is the first mistake to avoid.
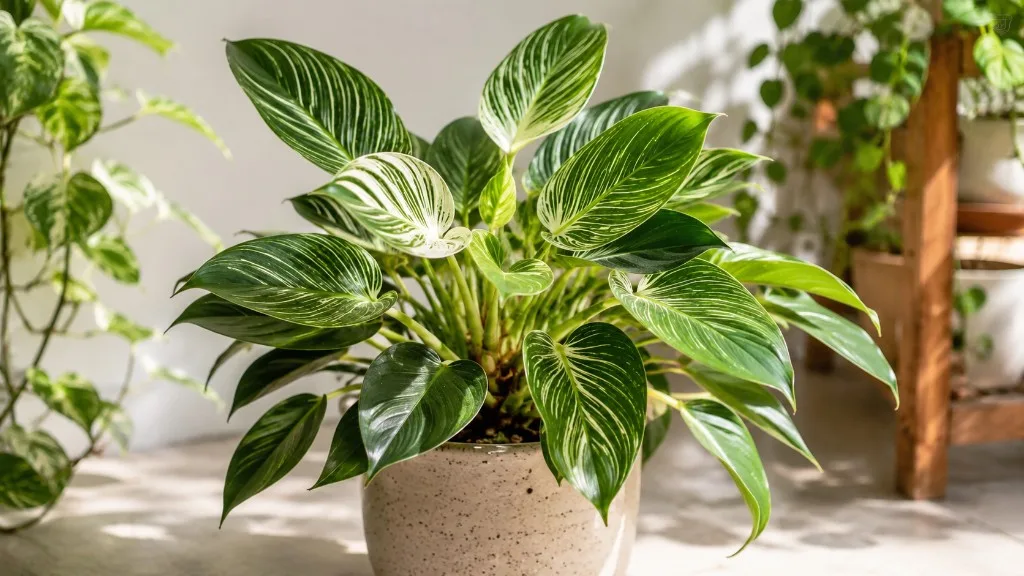
Self-Heading Crown Anatomy (Not a Trailing Vine)
Philodendron ‘Birkin’ has a dense, erect, self-heading growth habit - new leaves emerge from a central crown rather than from a lengthening vine. Stems are thick and upright, and mature size indoors runs from about 6 inches to 3 feet tall (NC State Extension). That architecture changes where you cut. On a heartleaf philodendron or Brasil vine, you might take a 4-inch segment between two nodes along a horizontal runner. On Birkin, you are usually working with vertical stem sections below a leaf on the main crown or a side shoot, not long internode chains.
A moss pole does not apply here. Birkin will not climb or produce dramatically larger leaves on a support structure. Propagation material comes from pruning the upright crown or removing a healthy side stem - often the same cuts you would make when managing reversion or shaping the parent plant. Internodes on Birkin stay relatively short when light is adequate, so your cutting may be only 3 to 6 inches (8–15 cm) total with one node and one or two leaves attached. Side shoots emerging lower on the stem are valid propagation material when they carry a firm node and healthy striped foliage; crown-top cuts remove the growing tip and are better reserved for plants you are deliberately downsizing.
Chimeric Variegation: Why Cuttings May Not Match Parent Stripes
Birkin’s pinstripes come from a chimeric mutation believed to originate from Philodendron ‘Rojo Congo’ or related Congo-line hybrids (NC State Extension). Chimeric plants carry genetically distinct cell populations in the shoot apical meristem; variegation depends on which layer dominates new growth (HortScience review on chimeras and variegation). When you propagate vegetatively, the new plant is a clone of the stem you cut, but chimeric tissue does not always divide evenly in the new meristem. A cutting from a beautifully striped parent can produce offspring with fainter stripes, uneven patterning, or gradual reversion toward solid green or Rojo Congo-type foliage - even when rooting succeeds perfectly.
Commercial tissue-culture Birkin sold in nurseries is stabilized for retail appearance, but home vegetative clones still inherit chimeric instability - the same biology that makes reversion possible on the parent plant. Propagate for a healthy philodendron first, treat stripe matching as a probabilistic bonus, and select parent stems with crisp, consistent pinstripes on recent leaves to improve odds. Avoid cuttings from stems already producing two or more consecutive solid-green or reddish-green leaves unless you accept a non-Birkin outcome. The Philodendron Birkin overview guide explains reversion management on the parent plant; propagation is where those genetics get copied forward.
Method Selection: Water, Sphagnum Moss, or Perlite Mix
All three methods work for Birkin stem cuttings because all keep a node in contact with moisture and oxygen while roots form. Your choice depends on how you like to monitor progress and how disciplined you are about moisture.
| Method | Best for | Typical timeline | Main risk |
|---|---|---|---|
| Water | Beginners who want visible root progress | 4–6 weeks to transplant-ready roots | Fragile water roots at soil transition |
| Sphagnum moss | Growers who want airy moisture without submerged stems | 4–6 weeks | Moss drying out or staying soggy |
| Perlite-heavy mix | Growers who want soil roots from the start | 4–8 weeks | overwatering on Philodendron Birkin causing stem rot |
Water is the most forgiving for spotting rot early - you see stems and roots through the glass. Moss and perlite skip the water-to-soil shock but demand tighter humidity and watering control. Birkin’s slow growth means none of these methods produces roots overnight; plan on roughly a month in warm, bright conditions before transplant.
Water vs Moss vs Perlite: Quick Comparison
Water propagation suits first attempts and rescue cuttings where you want daily visual checks. Sphagnum moss wrapped around the node in a small cup or propagation box holds moisture with more air than submerged stems - useful if your cuttings rot at the waterline. Perlite mixed with a little potting soil or used nearly straight matches what Iowa State Extension recommends for philodendron stem sections and produces tougher roots before pot-up. If you have lost cuttings moving from water to mix, try moss or perlite next round.
Best Time to Propagate Philodendron Birkin
Propagate when the parent plant is in active growth, not when it is recovering from shipping, repotting, root rot on Philodendron Birkin, or a cold draft. Spring through early summer aligns with lengthening days and faster callus formation in most homes. Birkin grows slowly (NC State Extension), so winter cuttings can sit nearly unchanged for weeks in cool, dim rooms - not dead, but not progressing either.
The calendar matters less than the plant’s condition. Green light: firm glossy leaves, visible new striped growth at the crown, no active pest outbreak, stable watering rhythm per the Birkin watering guide. Red light: yellowing lower leaves on wet mix, mealybugs in leaf axils, or a plant you repotted within the last two weeks. Stabilize the parent first, then take cuttings from the healthiest upright stem.
Tools, Materials, and Safety During Cutting
Gather supplies before you cut so open wounds spend minimal time exposed.
Tools: sharp bypass pruners or a knife, rubbing alcohol for sterilizing blades, a clean jar or propagation box, optional rooting hormone powder (helpful but not required per Clemson Extension cutting guidance).
For water: clear glass or jar tall enough that leaves stay above the waterline.
For moss: long-fiber sphagnum soaked until moist, small clear cup or bag for humidity.
For perlite: small pot with drainage holes, perlite or a 50/50 perlite and potting mix blend.
Safety: Philodendron Birkin contains calcium oxalate crystals and is toxic to cats and dogs if ingested, causing oral pain, drooling, vomiting, and swallowing difficulty (ASPCA). Sap can irritate skin (NC State Extension). Wear gloves if you are sensitive, wash hands after handling cuttings, and keep propagations off floor-level surfaces pets can reach. Propagate at a desk or shelf, not beside a dog bowl. If your pet chews any part of a Birkin cutting or parent plant, call ASPCA Animal Poison Control at 888-426-4435 and contact your veterinarian promptly - do not wait for symptoms to worsen.
Choosing the Best Parent Stem for Propagation
Select a stem that is firm, upright, and free of brown mushy spots at the base or node. The ideal cutting carries at least one healthy node and one or two leaves with visible pinstripes on recent growth. Birkin cuttings do not need to be long - Iowa State Extension suggests 3 to 6 inch stem sections with lower leaves removed - but they do need living node tissue.
Avoid stems with soft translucent tissue near the soil line (early rot), heavy mealybug or scale infestation, mostly damaged or brown variegated patches from sun scorch, or only reverting solid-green leaves for several nodes in a row. If you are pruning anyway to control height or remove reversion, the removed sections are ideal propagation material when the tissue above the cut is healthy.
Striped vs Reverting Tissue: What Offspring Inherit
| Parent tissue at cut | Typical offspring outcome | Worth propagating if you want stripes? |
|---|---|---|
| Crisp white pinstripes on recent leaves | Similar to fainter striping; evaluate leaf 2–3 | Yes - best odds |
| Mixed striped and pale new growth | Uneven pattern; watch next leaves | Maybe - monitor closely |
| Two+ consecutive solid-green or reddish leaves | Rojo Congo-type foliage likely | No - unless you want a green philodendron |
| Fully reverted crown shoot | Solid green philodendron clone | No |
A cutting clones the genetic line present in the stem you select, not the label on the pot. When a plant shows mixed striped and reverting shoots, propagate only from striped sections and prune reverting stems on the parent before they dominate the crown. Document which cutting came from which stem if you are running multiple jars; Birkin’s slow pace means you will live with the results for years.
Preparing Stem Cuttings Step by Step
- Sterilize blades with rubbing alcohol.
- Identify a node on the chosen stem - the ring below a leaf attachment point.
- Cut just below the node at a slight angle, exposing fresh tissue without crushing the stem (Clemson Extension).
- Remove leaves that would sit underwater or buried in moss or perlite - usually all but the top one or two.
- Optional: dip the cut end and node zone in rooting hormone powder after the cut surface dries slightly.
- Route immediately to water, moss, or perlite - do not let cuttings sit on the counter for hours.
Maintain proper stem orientation. Stem segments root upside down poorly (Iowa State stem cutting guide). The end that was closer to the soil on the parent plant stays the bottom in your setup.
Method 1: Rooting Philodendron Birkin in Water
Water propagation is the most visible method and the one most Birkin owners try first.
- Fill a clean jar with room-temperature water - filtered or dechlorinated tap water is fine.
- Place the cutting so the node is submerged and all leaves stay above the waterline.
- Position the jar in bright, filtered indirect light - the same band Birkin wants for mature growth (NC State Extension). Direct sun on a rootless cutting scorches pale variegated tissue quickly.
- Change the water every 3 to 5 days to limit bacterial growth and keep oxygen available (Iowa State philodendron FAQ).
- Watch for white or cream root initials at the node within 2 to 3 weeks in warm conditions; 4 to 6 weeks total is a realistic range before transplant.
- Transplant when roots are about 2 to 3 cm (roughly 1 inch) long with some branching - not paper-thin single strands only, and not 10 cm water roots that break on soil contact.
Why we transplant earlier than some extension guides suggest: Iowa State Extension recommends potting water-rooted philodendron once roots are several inches long - a threshold that suits vigorous trailing philodendrons with tough adventitious roots. Birkin is a slow self-header with fragile water roots that elongate quickly in glass and snap or rot when moved to heavy wet mix after growing 8–10 cm underwater. Moving at 2–3 cm with lateral branching, then potting into airy aroid mix with a gentle dry-down rhythm, reduces transplant collapse while still meeting Iowa State’s underlying goal: roots substantial enough to anchor in soil, not hair-thin callus only. If your water roots are thin, wait another week; if they are white, branched, and 2–3 cm, pot up rather than letting them overgrow the jar.
Method 2: Rooting in Sphagnum Moss
Moss suits growers who want high humidity around the node without submerging the stem.
- Soak long-fiber sphagnum until evenly moist, then squeeze out excess water so it is damp, not dripping.
- Wrap moss around the node zone of the cutting and place it in a small cup or propagation box.
- Keep leaves outside the moss; only the node-bearing section contacts the medium.
- Cover loosely with a clear bag or dome to raise humidity, propped so plastic does not crush leaves.
- Open the cover briefly every few days to exchange air and prevent mold.
- Keep moss consistently moist - never bone dry, never soggy enough to squeeze water streams.
- Gently tug after 3 to 4 weeks; resistance means roots are forming. Transplant at the same 2 to 3 cm branched root threshold as water cuttings.
Moss propagation pairs well with Birkin because the cultivar appreciates 50 to 60 percent humidity during establishment (NC State Extension). Match that range during rooting and the cutting loses less water through its remaining leaves while roots are still small.
Method 3: Rooting in a Perlite-Heavy Mix
Direct-to-substrate rooting avoids water-to-soil transition entirely.
- Fill a small pot with drainage holes using perlite alone or a 50/50 blend of perlite and well-draining potting mix.
- Moisten the medium before inserting the cutting.
- Use a pencil to make a hole; insert the stem so at least one node is buried and no leaves sit underground (Iowa State stem cutting protocol).
- Firm the medium lightly around the stem.
- Water once at planting, then let the top inch dry slightly before watering again - constant sogginess rots Birkin stems faster than underwatering on Philodendron Birkin stalls roots.
- Optional: a loose humidity tent (bag on stakes) reduces wilting for the first two weeks.
- Expect roots in 4 to 8 weeks depending on warmth and light; test with a gentle tug before assuming failure.
Rooting hormone can accelerate perlite rooting per Iowa State’s philodendron guidance. Powder form is easy to dip before sticking. Birkin’s slow metabolism means hormone helps marginally - it does not replace warmth, light, and a viable node.
Building the Right Rooting Environment
Rooting cuttings are more fragile than established Birkin plants, but they are not greenhouse orchids. Aim for conditions close to mature Birkin care, slightly gentler on moisture swings.
Light: Bright indirect light - enough for the remaining leaf to photosynthesize, not so intense that cream stripes bleach and brown. The Birkin light guide describes the mature-plant target; cuttings tolerate the same band once acclimated. In dim winter rooms, a full-spectrum grow light 12 to 18 inches above the jar for 10 to 14 hours daily prevents stagnation without scorching pale tissue.
Temperature: 65 to 85°F (18 to 29°C) supports steady root development (NC State Extension). Avoid cold windowsills in winter; glass chill slows callus formation and encourages rot in water jars.
Humidity: 50 to 60 percent reduces leaf desiccation while roots are small. A humidifier nearby beats misting, which only spikes humidity for minutes.
Airflow: Stagnant sealed bags breed mold. Vent humidity covers every few days. Water jars do not need lids.
Transplanting Rooted Cuttings Into Soil
Move cuttings from water or moss once roots are 2 to 3 cm long with lateral branching - see the Iowa State vs. early-transplant rationale in the water method section above. Use a small pot - often 8 to 10 cm (3–4 inches) - with drainage holes and fresh airy aroid mix (potting soil plus perlite and orchid bark per the Birkin soil guide). Plant at the same depth the node occupied in water or moss; do not bury leaves.
Water thoroughly once, then follow a careful dry-down rhythm: let the top inch of mix dry before the next drink. New soil roots are still fine and vulnerable to rot in heavy wet mix. Hold fertilizer for four to six weeks until you see firm new growth - the Birkin fertilizer guide explains why early feeding burns small root systems and when to start a dilute balanced schedule after establishment. For pot sizing and timing details, the Birkin repotting guide covers when to move up again after the seedling establishes.
Aftercare During and After Rooting
New Birkin plants need stability, not constant disturbance. Resist pulling the cutting to check roots every day - each tug damages fresh root hairs. Success looks like a firm remaining leaf, no stem mush at the node, and eventually a new leaf emerging from the crown or node zone.
Keep bright indirect light steady. Shifting from a bright propagation spot to a dim corner causes stretch and weaker striping on the first new leaves. Maintain moderate humidity and temperatures in the 18 to 26°C (65–79°F) comfort band Birkin prefers (NC State Extension).
Water on a check-before-water schedule aligned with the watering guide - typically allowing the top 3 to 5 cm of mix to dry during active growth. Do not feed until roots are clearly working; early fertilizer on a tiny root system burns tender tissue.
Variegation Expectations in Propagated Offspring
Set expectations before you cut: propagation success does not equal stripe matching. A rooted cutting may show strong pinstripes, patchy partial striping, or progressive greening over the first three to five new leaves even when culture is perfect. Chimeric instability is inherent to Birkin’s origin and is documented in chimeral meristem biology (HortScience).
Evaluate variegation on the second and third leaves after transplant, not the first immature leaf, which often emerges pale and develops pattern as it hardens. If striping weakens under good light, increase brightness before assuming genetic loss. If consecutive leaves arrive solid green, treat it as reversion on the clone - not a cultural failure - and use the decision framework in the Conclusion below.
Common Propagation Problems and Recovery
Mushy stem at the waterline: Remove the cutting, trim back to firm green tissue above the node if any remains, sterilize tools, and restart in fresh water or switch to moss with less submersion depth. Sour water means change water more often.
Cutting shrivels while medium is wet: Usually rot, not drought. Discard and take a new cutting from healthier tissue.
Cutting shrivels with dry moss or mix: Raise humidity with a vented bag; moss was too dry.
No roots after 8 weeks in cool dim conditions: Move to warmer brighter spot or wait through spring - Birkin is slow, but indefinite stagnation in a cold room is a setup problem, not patience.
Roots in water but plant collapses after soil: Roots were too long and fragile, or mix stayed too wet. Next time transplant at 2–3 cm with branching and use airier mix with a gentler first-month watering rhythm.
Algae in water jar: Normal in bright light; change water and optionally use an opaque vessel.
Is it failing or reverting? Firm stem, white roots, and a new leaf that emerges solid green means genetic reversion, not rot - culture succeeded; stripes did not. Mushy stem, blackening node, and wilting with no new growth means cultural failure - retry from striped parent tissue after fixing light, water, or rot source.
When Not to Propagate Philodendron Birkin
Do not propagate as a rescue move for active root rot, severe dehydration, or heavy pest infestation on the parent. Cuttings inherit weakness and fail at higher rates. Stabilize or discard compromised tissue first.
Skip propagation when the only available stems are fully reverted if your goal is a striped Birkin. You will grow a philodendron, but not the cultivar’s signature look.
Avoid taking more than one or two cuttings at a time from a small Birkin unless the plant is mature and vigorous - removing too much foliage stresses a slow self-header that cannot replace leaves quickly. A tabletop Birkin with only four to five leaves total should donate one cutting maximum until new striped growth returns on the parent.
Do not propagate immediately after repotting or shipping; let the parent settle for two to four weeks.
FAQs
Which propagation method works best for Philodendron Birkin? Stem cuttings with at least one node are the recommended method per NC State Extension. Water propagation is easiest for monitoring roots; sphagnum moss and perlite-heavy mix work well if you prefer to avoid water-to-soil transplant shock. All three need bright indirect light, warm room temperatures, and a node on the cutting - not a detached leaf alone.
Can I propagate Philodendron Birkin in water? Yes, when the cutting includes a viable node on the upright stem. Place the node underwater and leaves above the line, change the water every 3 to 5 days, and keep the jar in bright filtered light. Transplant to airy aroid mix once roots reach about 2 to 3 cm with branching - typically after 4 to 6 weeks in warm active-growth conditions.
How long does Philodendron Birkin take to root? Expect roughly 4 to 6 weeks for water- or moss-rooted cuttings to develop transplant-ready roots indoors during active growth, with slower progress in cool or dim winter rooms. Perlite rooting may take 4 to 8 weeks. Timelines depend on parent health, warmth, light, and whether the cutting was taken during spring or summer growth.
Will my propagated Birkin keep its white pinstripes? Not guaranteed. Birkin variegation is chimeric and genetically unstable, so vegetative clones often show stripes similar to the parent stem but may produce fainter patterning or revert toward solid green or Rojo Congo-type foliage even with excellent care. Take cuttings from crisply striped stems and provide bright indirect light after transplant to give variegation the best chance.
Is my Birkin propagation failing or just reverting? If the stem stays firm, roots form, and new leaves emerge solid green or reddish without pinstripes, rooting succeeded but the clone is reverting genetically - try another cutting from crisply striped tissue on the parent, or accept a green philodendron. If the stem turns mushy, roots blacken, or the cutting wilts with no new growth despite weeks of warmth and light, that is cultural failure - discard, fix your setup, and retry from healthier striped tissue.
How We Wrote and Verified This Guide
Recommendations were cross-checked against NC State Extension Philodendron ‘Birkin’ guidance, NC State Philodendron genus overview, Iowa State philodendron propagation FAQ, Iowa State stem-tip cutting protocol, Clemson HGIC propagation by cuttings, HortScience chimeras and variegation review, ASPCA philodendron toxicity, and LeafyPixels overview, pruning, watering, soil, light, fertilizer, and repotting guides. Claims validation runs after each substantive update.
Author: sai-ananth · Reviewer: LeafyPixels Review Board · Reviewed: 2026-06-15 · Methodology: Guide recommendations are reviewed against botanical or extension references, LeafyPixels plant-care data, and practical indoor growing constraints before publication.
Revision note (2026-06-15): Resolved Iowa State vs. early-transplant threshold on-page, added reversion-vs-failure decision framework, rendered FAQs and authorship, veterinarian escalation for pet ingestion, chimeric variegation HortScience citation, striped-vs-reverting outcome table, fertilizer cross-link, tissue-culture caveat, and grow-light winter note per E-E-A-T audit. Original propagation photos pending for a future update.
Conclusion
Philodendron Birkin propagates reliably by stem cuttings with at least one node - but the hard part is not rooting; it is deciding what to do when the clone behaves differently from the parent. Use this escalation ladder after transplant:
If roots formed and the first new leaves show strong pinstripes: Continue normal light, watering, and delayed fertilizer care. Evaluate pattern on leaves two and three before celebrating - immature first leaves often look pale.
If roots formed but striping fades on leaves two and three despite good light: Increase brightness incrementally. If a fourth consecutive leaf arrives without pinstripes, treat the clone as reverted - keep it as a green philodendron, gift it, or compost it. Take a fresh cutting from the crisply striped parent (if any striped tissue remains) rather than fighting reversion on the offspring.
If roots formed and new growth is solid green from leaf one with reddish petioles: The clone is Rojo Congo-type reversion. Accept the outcome or retry from striped parent tissue; do not assume more fertilizer or moss poles will restore Birkin striping.
If the cutting rotted, wilted, or never rooted after 8+ weeks in warm bright conditions: That is propagation failure, not reversion. Discard, sterilize tools, fix water/moss moisture or light, and retry from healthier striped tissue - not from the same compromised stem.
If the parent has only reverting shoots left: Propagation cannot manufacture stripes that the parent no longer expresses. Buy a new Birkin or accept a green philodendron clone.
For ongoing care after a successful pot-up, use the cluster guides linked throughout this page. Handle all cuttings and sap with pet safety in mind - philodendrons are toxic to cats and dogs (ASPCA), and cuttings left on low surfaces are an ingestion risk.
When to use this page vs other Philodendron Birkin guides
- Philodendron Birkin overview - Start here for whole-plant context before deep-diving this topic.
- Philodendron Birkin problems hub - Jump to symptom-specific fix guides when this care topic does not resolve the issue.
- Transplant Shock on Philodendron Birkin - Escalate here when propagation adjustments are not enough.