Philodendron Birkin Pruning: When, How, and Mistakes
Philodendron Birkin Pruning: When, How, and Mistakes to Avoid
Philodendron Birkin Pruning: When, How, and Mistakes to Avoid
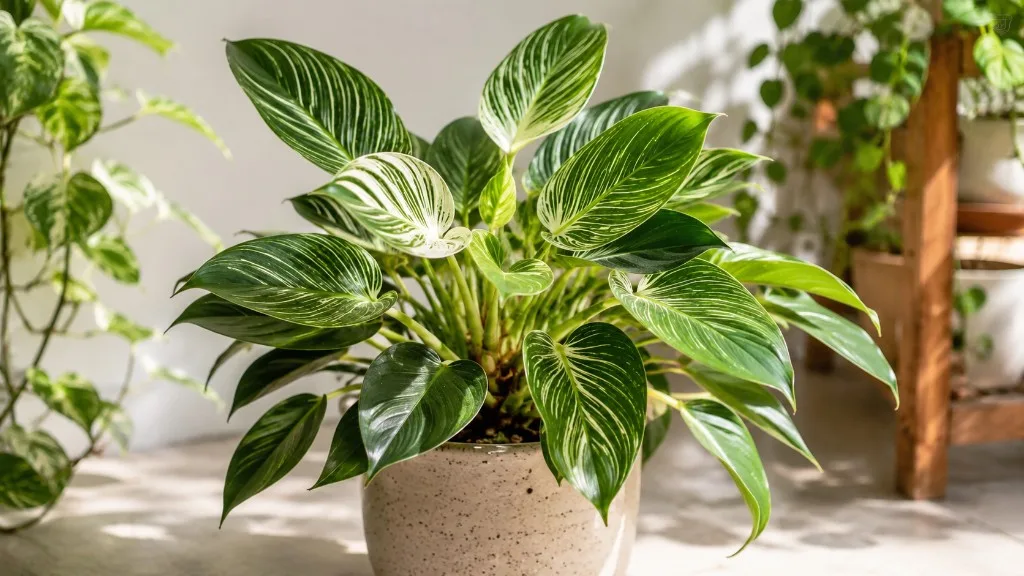
Philodendron Birkin (Philodendron ‘Birkin’) is a compact self-heading philodendron with white pinstripe variegation on dark green leaves - a slow-growing tabletop rosette, not a trailing vine like Brasil or a moss-pole climber like many classic philodendrons. That growth habit changes every pruning assumption copied from pothos guides.
First action: inspect the crown, then remove only fully yellow or dead leaves at the petiole base near the main stem with clean scissors. Do not strip green pinstripe foliage for shape until finished leaves are cleared and you know whether the real problem is light, water, or pest damage.
NC State Extension describes philodendrons as a diverse Araceae genus with climbing and non-climbing forms - self-heading types like Birkin produce upright leaves from a central crown rather than running vines. Birkin’s appeal depends on short internodes and crisp striping in Philodendron Birkin light guide; deep shade stretches stems and fades markings whether you prune or not.
The ASPCA lists philodendron as toxic to cats and dogs due to calcium oxalate crystals. Sap irritates skin - wear gloves and keep trimmings away from pets.
How Birkin Grows (and Why That Changes Every Cut)
Birkin holds its leaves erect from stiff petioles attached to a short central stem. New leaves unfurl from the crown in a tight rosette pattern with slow, deliberate growth. Unlike pothos, Birkin does not produce long internodes that root at every node along a hanging vine, and unlike climbing philodendrons it does not need a moss pole for mature foliage size.
Clemson HGIC notes that philodendron species vary widely in habit - understanding whether a plant climbs or self-heads determines whether you prune for vine length or crown cleanup. On Birkin, almost all routine pruning is selective crown grooming: dead leaf removal, cosmetic edge trim, and occasional stem shortening - not hard cutbacks for bushiness.
Pruning cannot substitute for bright indirect light, which is the primary stabilizer for pinstripe variegation. If striping fades in low light, fix placement before expecting cosmetic cuts to change new leaf color.
What to Inspect Before You Prune
Walk through the plant in this order before making any shaping decisions.
Fully yellow or brown leaves
Leaves that are more than half yellow or fully brown are finished - they will not green up. Check whether yellowing is isolated (one old leaf senescing) or widespread (overwatering on Philodendron Birkin, cold shock, root rot on Philodendron Birkin). Widespread yellowing means fix the underlying condition before bulk removal.
Brown edges on otherwise healthy pinstripe blades
Pale streaks scorched by direct sun or dried by low humidity often show stable brown margins on green tissue. If the center of the blade is firm and striped, edge trim is cosmetic. If the whole leaf is soft or spreading brown, remove it at the base instead.
Leggy stems and faded striping
When Birkin sits in insufficient light, internodes lengthen and new leaves may show weaker striping. A leggy stem is a light problem first - note which stem stretched and plan a node cut only after you have a brighter placement ready.
Reverted all-green leaves
Birkin’s variegation is a cultivated trait and can be unstable - some plants produce solid green leaves intermittently. Do not strip every green leaf from a small rosette; leave enough foliage to photosynthesize. Reversion pruning is optional and conservative.
Pest, rot, and stress signals
Sticky residue, webbing, soft stems at the base, or sour-smelling soil mean pests or root stress, not a simple trim job. Treat the cause and stabilize watering before cosmetic pruning on a stressed plant.
When to Prune Philodendron Birkin
Dead or dying foliage
Remove fully yellow, brown, or pest-damaged leaves any time of year. These leaves pull energy and can harbor fungus or insects.
Cosmetic edge trimming
Trim dry brown tips or margins when tissue is stable and crisp, not while edges are still spreading from active scorch or rot.
Stem shortening for legginess
Cut elongated stems in spring through summer when Birkin is in active growth. A node above the cut may produce one modest new shoot - expect weeks to months, not overnight fullness.
When to wait
Delay major cuts when the plant was recently repotted, exposed to cold drafts, recovering from root rot, or dropping multiple leaves from water stress. Birkin recovers slowly from stacked stress - stabilize care first, then prune.
The First Cut: Remove Fully Yellow or Dead Leaves at the Crown
Follow the yellow or brown petiole (leaf stalk) down to where it meets the main stem. Cut flush at that junction with sharp bypass pruners or scissors - one clean slice, no tearing.
Do not pull half-attached yellow leaves; tearing damages the crown and opens entry points for rot. If a leaf resists, cut lower rather than yank.
On a small Birkin with only five or six leaves, removing one fully dead leaf is normal. Removing three green leaves “for shape” on the same day is not.
Where to Cut - Petiole Base and Stem Nodes
Leaf removal: cut the petiole at the base near the main stem without nicking adjacent tissue or the stem itself.
Stem shortening: locate a visible node - the slight ridge where a leaf attaches or a bud may sit. Cut 5–8 mm above the node, angled slightly if that helps you see the bud point. Birkin typically produces one new shoot from an activated node, not the multi-branch explosion common on pothos.
Missouri Botanical Garden notes philodendrons prefer warm, humid conditions - clean cuts in stable humidity heal faster than ragged tears in dry, cold air.
Trimming Brown Leaf Edges Without Removing Whole Blades
When only the margin is damaged and the pinstripe center is healthy, use fine scissors to follow the natural leaf contour. Remove the minimum dry tissue - do not cut into green.
Brown edges from fluoride, low humidity, or sun scorch often return on new leaves if water quality or light is unchanged. Treat edge trim as cosmetic; investigate care if every new unfurl shows the same pattern.
Shortening a Leggy Birkin Stem
If one stem stretched toward a window while the rest of the rosette stayed compact:
- Move the plant to bright indirect light before or immediately after the cut.
- Identify the node where healthy striping last appeared on the leggy section.
- Cut just above that node with sterilized pruners.
- Wait - Birkin grows slowly; new growth may take several weeks in warm active season.
Do not cut the entire plant to soil level hoping for a bushier restart. Self-heading philodendrons do not respond like herbaceous perennials to hard crown cutback.
How Much Foliage You Can Safely Remove
Limit healthy leaf removal to one-quarter to one-third of total foliage per session. Birkin photosynthesizes through a small leaf count; over-trimming in low light can stall the rosette for months.
A practical rule: on a six-leaf plant, remove at most one healthy green leaf for reversion or shape - and only when several stronger striped leaves remain. Fully dead leaves do not count toward that cap.
What Not to Cut on Birkin
Avoid cutting:
- New leaves still unfurling - they are easily damaged and the plant has invested recent energy in them
- Every all-green leaf on a small plant - leaves without striping still feed the rosette
- The main stem below all remaining nodes - you cannot regrow from bare stem without an existing bud
- Healthy pinstripe foliage solely because the rosette looks asymmetric - Birkin is naturally compact, not symmetrical like a topiary
Do not install a moss pole expecting Birkin to climb into a large vine. Self-heading Birkin stays upright without support.
Can Pruning Restore Pinstripe Variegation?
Not directly. White pinstripes depend on genetics and bright indirect light during leaf development. Pruning an all-green leaf may improve the plant’s appearance but cannot force stripes on the next unfurl without adequate light.
If reversion persists after light improvement, you may remove one or two solid-green leaves while keeping enough striped foliage - but variegation stability in offspring and regrowth is unpredictable. Propagation from cuttings does not guarantee pinstripe copies.
Tools, Sanitation, and Handling Safety
Use fine scissors for leaf-tip cosmetic work and bypass pruners for thick petioles. Wipe blades with 70% isopropyl alcohol between cuts and between plants, per Iowa State Extension sanitizing guidance.
Wear gloves when handling cut tissue. Bag or discard trimmings where pets cannot chew them - oxalate crystals cause oral irritation in cats and dogs.
After Pruning Care and Recovery
Light, water, and humidity after cuts
Place Birkin in bright indirect light - an east window or filtered south or west exposure. Too much direct sun scorches pale streaks first; too little shade stretches the next internode.
Water when the top 3–5 cm of mix is dry, matching your normal rhythm. Hold fertilizer for two weeks after removing more than one leaf so the plant is not pushed while healing.
Missouri Botanical Garden recommends warm humid conditions for philodendrons - 50–60% humidity supports clean pinstripe unfurling after cuts.
Recovery timeline and success signs
Expect 2–6 weeks before a new leaf bud visibly swells at a cut node during active season; slower in winter. Signs pruning worked:
- No further yellowing spread beyond the removed leaf
- Firm petiole bases at cut sites, no soft rot
- A new leaf unfurling with comparable striping under improved light
- Stable rosette height without renewed leggy stretch toward the window
Signs you pruned too much or too soon: wilted remaining leaves, stalled growth for months, crown softening, or repeated yellowing on multiple leaves after a single session.
Using Pruning Trimmings for Propagation
Stem sections with at least one node can root in water or moist sphagnum, but variegation in rooted offspring varies. Clemson HGIC philodendron guidance covers stem-cutting propagation for the genus - treat Birkin cuttings as moderate-difficulty, separate from routine grooming.
Propagation is optional; discard trimmings safely if you are not rooting them.
Common Philodendron Birkin Pruning Mistakes
Installing a moss pole expecting a climber - Birkin stays self-heading; poles add no benefit.
Pruning for pothos-style bushiness - modest single-shoot node response only.
Removing too many striped leaves - sparse rosette with slow recovery on a small plant.
Pruning leggy stems without improving light - the next internode stretches again within weeks.
Hard cutback to bare stem - risky on slow self-heading philodendrons with limited bud points.
Ignoring oxalate toxicity - sap and trimmings hazardous to pets and irritating to skin.
Conclusion
Philodendron Birkin pruning is restrained crown grooming for a self-heading variegated rosette: remove finished leaves at the petiole base first, trim stable brown edges cosmetically, shorten leggy stems above nodes in spring, and prioritize bright indirect light over aggressive cutting. Birkin rewards stable placement and patience - not moss poles, hard cutbacks, or pothos-style shaping expectations.
When to use this page vs other Philodendron Birkin guides
- Philodendron Birkin overview - Start here for whole-plant context before deep-diving this topic.
- Philodendron Birkin problems hub - Jump to symptom-specific fix guides when this care topic does not resolve the issue.
- Leggy Growth on Philodendron Birkin - Escalate here when pruning adjustments are not enough.
- Plant Leaning on Philodendron Birkin - Escalate here when pruning adjustments are not enough.
- Brown Tips on Philodendron Birkin - Escalate here when pruning adjustments are not enough.
Related Philodendron Birkin guides
- Philodendron Birkin overview
- Philodendron Birkin watering
- Philodendron Birkin light
- Philodendron Birkin soil
- Philodendron Birkin propagation
- Philodendron Birkin fertilizer
- Leggy Growth on Philodendron Birkin
- Plant Leaning on Philodendron Birkin
- Brown Tips on Philodendron Birkin
- Philodendron Birkin problems