Philodendron Birkin Repotting: When, How, and Mistakes
Philodendron Birkin Repotting: When, How, and Mistakes to Avoid
Philodendron Birkin Repotting: When, How, and Mistakes to Avoid
Philodendron Birkin (Philodendron ‘Birkin’) is a compact, self-heading aroid - not a trailing vine - and that changes how you should think about repotting. Its upright rosette sits on a relatively small root ball for the leaf display it supports, which means the pot can feel tight long before the plant looks “large,” and a modest size increase holds moisture differently than it would for a fast-running heartleaf philodendron. Repotting is the maintenance step that restores drainage, replaces depleted mix, and gives roots room to support the pinstriped foliage this cultivar is grown for. Done in spring with one pot size up and a fresh aroid blend, a Birkin repot is usually straightforward: an hour of careful work, a week of slight adjustment, and then new leaves that tell you whether the move succeeded.
This guide walks through when self-heading Birkin actually needs repotting, an eight-step procedure with mix ratios, pot material choices, mistake recovery, and how to read pinstripe quality on new growth after the move. Cross-check light, soil, and watering guides if symptoms persist after repotting.
Reviewed by LeafyPixels Review Board · Author: sai-ananth · Methodology: Recommendations checked against NC State Extension, Iowa State Extension, RHS, and University of Minnesota Extension houseplant guidance, then aligned with LeafyPixels Birkin cluster data.
Philodendron Birkin Repotting: Quick Answer
Plan a full repot every 1–2 years for an actively growing indoor Birkin, or sooner when two or more root-bound signals appear together: roots circling drainage holes, water running straight through without soaking in, or growth stalling despite good light and feeding. Spring through early summer is the safest window. Choose a pot 2–5 cm (1–2 inches) wider with drainage holes, use a chunky aroid mix (about 65% potting soil, 20–25% perlite, 10–15% orchid bark), water once thoroughly after repotting, skip fertilizer for at least one month, and expect mild wilt for 1–2 weeks with full root re-establishment in roughly 4–6 weeks under warm, bright conditions - a home-climate heuristic, not a fixed species rule.
Why Birkin Repotting Differs From Trailing Philodendrons
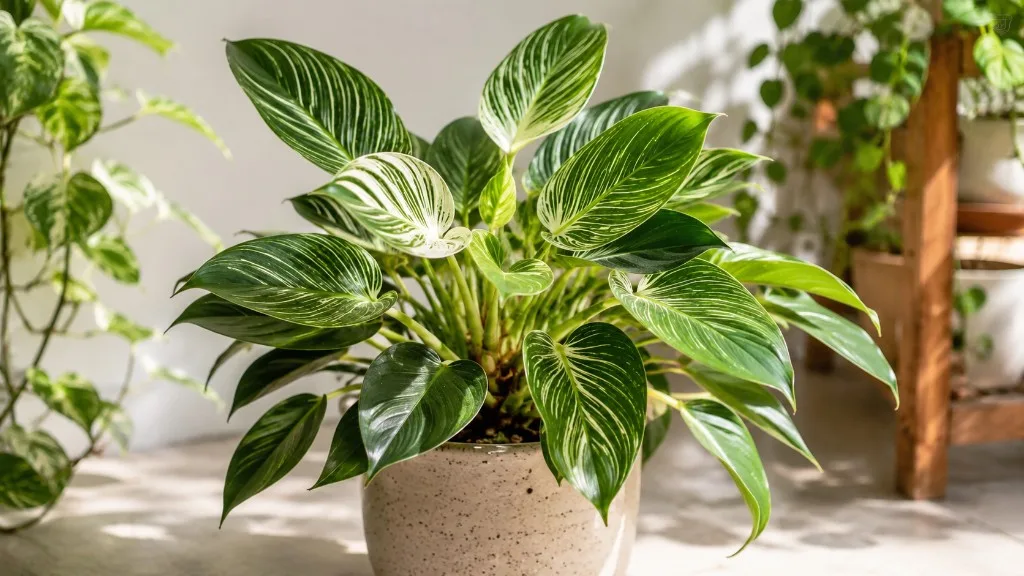
Iowa State Extension divides philodendrons into climbing and non-climbing (self-heading) types, listing ‘Birkin’ among compact hybrids alongside ‘Xanadu’ and ‘Moonlight’. Trailing heartleaf philodendrons like Brasil fill pots quickly with long runners and dense lateral roots; Birkin grows as an upright self-heading hybrid with thick, upright stems and a slow growth rate indoors, typically reaching 6 inches to 3 feet tall. That architecture means the root mass stays compact relative to the leafy crown, especially in a 15 cm tabletop display pot.
Self-Heading Root Mass and Compact Growth
A Birkin in a 15 cm pot may look full above soil while roots occupy only the center third of the volume - unlike a Brasil in the same pot size, where runners explore the outer edges aggressively. Iowa State notes philodendrons do well when slightly pot-bound because soil dries more quickly between waterings; Birkin’s slower fill rate means you can stay slightly tight longer, but compacted peat still breaks down and channels water around a hydrophobic root mat. Repotting resets structure before that mat causes chronic overwatering symptoms - wilt on wet soil, lower yellowing, sour smell - even when you water carefully.
Self-heading Birkin also does not need a moss pole at repot time. NC State describes a decorative, compact houseplant for desks and tabletops; stability comes from an appropriately weighted pot and firm planting depth, not climbing support. Offsets at the base can be separated during repot if they have their own roots - see the propagation guide - but that is optional, not required for a routine upgrade.
When to Repot Philodendron Birkin
Calendar reminders help you inspect, not automatically repot. NC State lists Birkin as a slow-growing indoor perennial; most tabletop specimens need fresh mix every 1–2 years, while a recently purchased nursery plant may sit comfortably for its first season if drainage is good and growth continues.
Root-Bound Signs Checklist
Repot when two or more of these show up during active growth:
- Roots visible at drainage holes or circling the surface when you lift the plant partway out
- Water runs through immediately without the mix absorbing - often a hydrophobic, spent root mat
- Growth stalls - no new pinstriped leaves for many weeks despite adequate light
- Pot dries in hours then the plant wilts between waterings - dense roots with little functional mix
- Mix smells sour or stays wet at the bottom while the surface looks merely damp
- Salt crust on soil surface that flushing no longer fixes
University of Minnesota Extension recommends spring repotting when roots circle tightly, emerge from holes, or soil dries unusually fast - the same triggers apply to Birkin, with the caveat that slow growth means “unusually fast” dry-down is relative to your pot’s prior rhythm, not a Brasil’s.
When Yellow Leaves Are Not a Repot Trigger
A single yellow lower leaf on Birkin often means natural aging, cold draft, or overwatering - not an automatic repot. NC State links overwatering to root rot and yellowing leaves; adding fresh soil around already damaged roots without fixing moisture management makes recovery harder. Inspect roots first: white and firm suggests a timing or light issue; brown and mushy means a rescue repot with trimming, not a routine upgrade. Read the yellow leaves guide before repotting for color alone.
Top-dress vs full repot: If roots are healthy but the top inch of mix is compacted, scrape and replace that layer in spring instead of disturbing the whole ball. Full repot when circling roots, spent structure throughout the pot, or rot is present.
What You Need Before You Start
Gather supplies before unpotting so the root ball does not sit exposed:
- New pot 2–5 cm wider with drainage holes (measure inner diameter)
- Fresh aroid mix - recipe below; do not reuse old soil
- Hand trowel, clean scissors or pruners, chopstick or pencil for settling mix
- Newspaper or tarp for mess; gloves if sap irritates your skin
- Watering can with narrow spout for the first post-repot soak
- Optional: diluted hydrogen peroxide for sterilizing trim cuts on rotted roots only
Water Birkin the day before repotting so the root ball holds together. Choose a workspace away from pets and children - sap and trimmed tissue are irritants.
Step-by-Step: How to Repot Philodendron Birkin
Follow these eight steps in order. The worked example below uses a common scenario: a 15 cm tabletop Birkin that has not been repotted in 18 months, wilts hours after watering, and shows roots at the drainage holes in early April.
-
Confirm timing. Repot during spring active growth if possible. Avoid repotting the same week you moved the plant to a new window or corrected a severe overwatering crisis - stabilize one variable first.
-
Prepare the new pot and mix. Add enough fresh mix to the bottom so the crown will sit at the same depth as before - burying the self-heading stem causes rot; leaving roots exposed dries them out. Target roughly one-third pot depth of mix before placing the plant, as RHS suggests when repotting philodendrons.
-
Unpot gently. Tip the Birkin sideways, support the crown with one hand, and slide the pot off. If stuck, squeeze plastic nursery pots or run a knife around the rim - never yank by the leaves.
-
Inspect and trim roots. Healthy roots are white or light tan and firm. Trim only black, mushy, or sour-smelling tissue with clean scissors. Tease circling roots at the bottom and sides with fingers - do not bare-root unless treating active root rot. Keep most original mix around the ball; stripping fine root hairs sets recovery back weeks.
-
Place in the new pot. Center the plant. For our 15 cm example, move to 17–18 cm - not 20 cm. Self-heading Birkin should feel stable without rocking; add mix around the sides in layers, tapping gently or using a chopstick to remove air pockets without compressing the blend.
-
Fill to the correct depth. Mix should sit 1–2 cm below the rim for clean watering. Do not pack heavily - aroid roots need air pores.
-
Water once thoroughly. Soak until water runs freely from drainage holes; empty the saucer. This settles mix around roots. Do not fertilize.
-
Recover in bright filtered light. Return Birkin to its prior spot or slightly brighter indirect light - not direct sun, which NC State warns can scorch leaves. Hold fertilizer at least one month. Expect mild wilt for several days; new pinstriped leaves in 2–4 weeks under warm conditions are the success signal.
In the worked example, the plant showed mild wilt for five days, then held steady. At week four, the first new leaf opened with crisp white pinstripes on a short internode - confirmation that root and mix conditions matched Birkin’s needs.
Best Soil Mix for Birkin After Repotting
NC State recommends moist, well-drained, slightly acidic soils of loam and sand for Birkin. Bagged “moisture control” peat mixes alone often collapse and suffocate aroid roots indoors. Use a chunky aroid blend aligned with the soil guide recipe:
- 65% quality peat- or coir-based indoor potting mix
- 20–25% perlite or pumice for aeration
- 10–15% orchid bark or coarse coco chips for structure
That approximates RHS guidance for philodendrons: a loose, free-draining compost slightly acidic (pH 5–6). Avoid garden soil, heavy clay, and unamended cactus mix. Replace all spent mix at full repot - reusing degraded peat reintroduces salt buildup and compaction. Do not add a gravel layer at the bottom; it does not improve drainage and reduces usable root volume.
Pot Size and Material: What to Choose
The critical decision is diameter, not decorative cachepot aesthetics. Iowa State advises repotting philodendrons in a container one size larger when overcrowded. University of Minnesota Extension warns that too much extra soil holds too much water and causes root problems - the most common Birkin repot failure.
Measure current inner diameter and add 2–5 cm (1–2 inches). Examples: 12 cm → 14–15 cm; 15 cm → 17–18 cm; 18 cm → 20 cm. Jumping from 15 cm to 23 cm “for growth” leaves a wet outer ring that Birkin’s compact roots cannot use for months.
Drainage holes are mandatory for long-term care. Cachepots without holes work only if the plant stays in a draining nursery pot you remove to water.
Material affects dry-down after repot: plastic retains moisture longer (helpful in dry, bright rooms); terracotta dries faster (helpful if you tend to overwater); glazed ceramic sits between. Match material to your watering habits - after repotting, extra soil volume already slows dry-down until roots fill in.
Seasonal Timing: Spring vs. Winter Repotting
Spring through early summer is the default window. Rising light and warmth match Birkin’s active growth phase; roots colonize fresh mix faster, and watering rhythm stays predictable. Iowa State repot guidance aligns with active growth periods when plants recover quickest.
Winter Repotting Exceptions
Avoid winter repotting if the plant is only slightly tight and still manageable. Short days and cool rooms slow uptake; disturbed roots sit in wet mix longer. Repot in winter only when delay would clearly harm the plant: severe root-binding with repeated wilting, active rot requiring trim and fresh mix, or a broken pot. If you must repot then, use the smallest acceptable size increase, keep room temperatures above roughly 18°C (65°F) per NC State’s 65–85°F range, provide bright filtered light, and water more cautiously until spring growth returns.
Fall is better suited to top-dressing than full repot unless emergency conditions apply.
Common Birkin Repotting Mistakes
Oversized pot. The unused soil volume stays saturated at the bottom while the top looks dry - classic path to root rot. Stick to one size up.
Bare-rooting or over-teasing. Fine root hairs absorb water; stripping them causes prolonged wilt. Tease only circling exterior roots unless performing a rot rescue.
Repotting for yellow leaves alone without inspecting roots or fixing watering and light first.
Immediate fertilizer. Fresh roots are vulnerable; wait at least one month. Iowa State suggests light fertilizing only while actively growing - not right after disturbance.
Heavy watering the first week. One thorough soak at repot, then let the top inch dry before the next. Constant dampness in new mix suffocates recovering roots.
Repotting during active stress - new purchase quarantine, pest treatment, or simultaneous light relocation. Birkin tolerates boring care better than stacked changes; the overview guide recommends learning the pot’s dry-down before repotting on day one.
No drainage holes or reused sour mix. Both recreate the conditions repotting was meant to fix.
Mistake Recovery: Oversized Pot and Over-Disturbed Roots
If you already repotted into too large a pot and see spreading yellowing with sour soil smell, stop watering, move to brighter filtered light if the plant has been dim, and inspect roots. Trim mushy tissue, repot again into an appropriately sized container with fresh airy mix if more than half the root mass is compromised - see root rot recovery. If roots are mostly healthy, reduce watering frequency and use a chopstick to check bottom moisture before each soak; do not add fertilizer to “push growth.”
If you over-disturbed the root ball and wilt persists beyond 2–3 weeks, maintain stable bright indirect light, keep upper mix barely moist - not wet - and avoid further handling. New growth with normal pinstriping confirms recovery; continued collapse may mean hidden rot or cold draft damage.
What to Expect After Repotting (Recovery Timeline)
Rule-of-thumb timelines for indoor Birkin in warm, bright conditions - adjust for cool rooms or low light:
- Days 1–7: Mild wilt, slight leaf droop, or paused new leaves - normal transplant adjustment. Keep out of direct sun.
- Weeks 1–2: Shock symptoms usually ease if pot size and moisture are correct.
- Weeks 2–4: First new leaf may emerge; inspect pinstripe quality and internode length.
- Weeks 4–6: Root re-establishment in fresh mix under favorable conditions; watering rhythm stabilizes toward your pre-repot check schedule, modified for larger volume.
Damaged leaves do not heal; judge success on new foliage. Older pinstripes may look unchanged even when roots are fine.
Pinstripe Variegation as a Recovery Signal
Birkin’s value is pinstriped variegation on glossy leaves with short internodes. After repot, healthy recovery looks like new leaves with crisp white or cream stripes, normal leaf size, and compact upright habit. Pale, narrow, or mostly green new leaves after repot often signal insufficient light - NC State notes loss of variegation and leggy growth in low light - not necessarily failed roots. Improve light before assuming the repot failed. Brown scorched streaks may mean too much direct sun during recovery.
Variegated cultivars may recover visually slower than all-green philodendrons because new tissue is sensitive; patience through one full leaf cycle (often 4–6 weeks) beats repeated repotting.
How Repotting Affects Watering and Feeding
Repotting resets the soil–water relationship. Extra mix without new roots holds moisture longer; disturbed roots absorb less until they re-establish. After repot:
- Water thoroughly once, then follow the watering guide check: top 3–5 cm dry before the next full soak
- Skip fertilizer at least one month; resume at half strength during active growth per the fertilizer guide only when new growth appears
- Relearn pot weight over two weeks - calendar habits from the old pot size will mislead you
RHS advises letting compost dry slightly between waterings and never standing in water. Fresh aroid mix makes that easier; oversized pots make it harder. Pair repot timing with honest light assessment - a Birkin pushed into a dim corner after repot will stay wet at the crown and lose striping quality even in perfect mix.
Pet and Child Safety During Repotting
Philodendron Birkin contains calcium oxalate crystals and is toxic to cats and dogs if chewed, causing oral pain, drooling, vomiting, and swallowing difficulty. NC State lists contact dermatitis from sap for sensitive skin. Wear gloves while handling cut tissue, keep pets out of the workspace, and dispose of trimmings in a closed bin. Keep the finished plant on elevated surfaces out of reach. If ingestion occurs, contact your veterinarian or ASPCA Animal Poison Control at (888) 426-4435 promptly.
Conclusion
Repot Philodendron Birkin when compact self-heading roots outgrow their mix - not on a calendar alone and not because one leaf yellowed. Spring, one pot size up, fresh aroid blend, minimal root disturbance, and a month without fertilizer give Birkin the best chance to reopen crisp pinstriped leaves within a few weeks. Match post-repot watering to the new pot volume, cross-check light if variegation fades, and treat root rot before cosmetic upgrades. That focused routine protects the tabletop display this slow-growing cultivar is grown for - without the duplicate guesswork of repotting a trailing philodendron by the same rules.
When to use this page vs other Philodendron Birkin guides
- Philodendron Birkin overview - Start here for whole-plant context before deep-diving this topic.
- Philodendron Birkin problems hub - Jump to symptom-specific fix guides when this care topic does not resolve the issue.
- Repotting Stress on Philodendron Birkin - Escalate here when repotting adjustments are not enough.
- Transplant Shock on Philodendron Birkin - Escalate here when repotting adjustments are not enough.
- Root Rot on Philodendron Birkin - Escalate here when repotting adjustments are not enough.
Related Philodendron Birkin guides
- Philodendron Birkin overview
- Philodendron Birkin watering
- Philodendron Birkin light
- Philodendron Birkin soil
- Philodendron Birkin propagation
- Philodendron Birkin fertilizer
- Repotting Stress on Philodendron Birkin
- Transplant Shock on Philodendron Birkin
- Root Rot on Philodendron Birkin
- Philodendron Birkin problems