Spider Mites on Hibiscus: Causes, Checks & Fixes
Quick answer
Spider mites on hibiscus cause fine stippling on glossy leaves and unopened buds, especially in dry winter rooms beside heat vents. First step: isolate the plant and rinse every leaf underside with lukewarm water before applying any spray.
Spider Mites on Hibiscus: Causes, Checks & Fixes
This guide covers spider mites on Hibiscus. See also the general Spider Mites guide, watering, and light pages for this plant.
Spider Mites on Hibiscus: Causes, Checks & Fixes
Quick answer
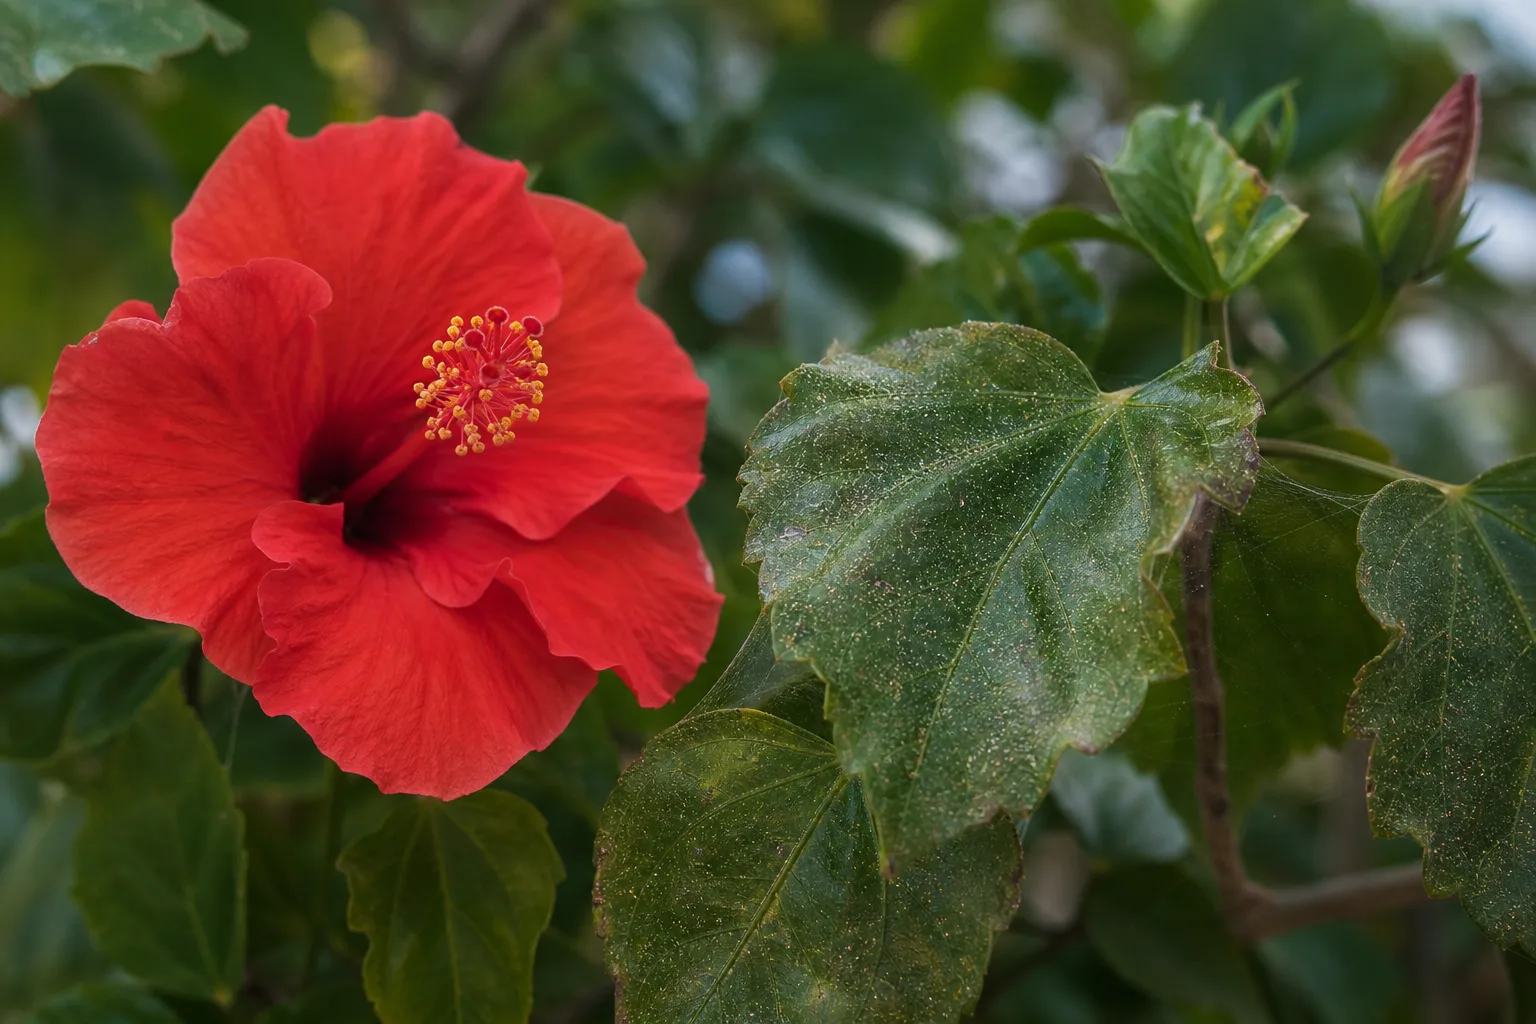
Spider mites on tropical hibiscus (Hibiscus rosa-sinensis) show up as fine yellow or white stippling on large glossy leaves and sometimes on unopened buds, often with silky webbing at leaf bases and around developing flowers. They are not insects-they are tiny arachnids that pierce leaf cells and suck sap, and they multiply fast in the warm, dry air common above radiators, beside sunny glass, and in rooms where a patio container just moved indoors for winter.
First step: isolate the hibiscus and rinse every leaf underside with lukewarm water. Aim the stream at the backs of large soft leaves and at swelling buds where mites hide. That single action knocks down live mites and webbing before you confirm severity or reach for sprays. Do not start with fertilizer, Hibiscus repotting guide, or a single oil application and walk away-most miticides are not effective on eggs, so one treatment rarely finishes the job.
Why hibiscus gets spider mites
Tropical hibiscus is a moisture-loving flowering shrub that prefers bright, humid conditions with good ventilation. The most common indoor hibiscus pests include aphids and spider mites. Several hibiscus-specific factors raise mite risk beyond generic houseplant advice:
Dry winter rooms beside heat vents. Hibiscus overwintering indoors often sits near a radiator or furnace register after coming off a humid patio. Spider mites thrive in dry, warm conditions while the plant still wants 50–70% relative humidity-exactly the mismatch that lets mite populations explode on glossy foliage and buds.
Patio-to-indoor transitions without humidity adjustment. A container hibiscus brought inside before nights drop toward 45–50°F (7–10°C) enters a smaller, drier air volume with less airflow. Mites that were minor outdoors can surge within days once windows close and heat runs.
Large glossy leaf surface. H. rosa-sinensis carries broad, soft, polished leaves that transpire heavily in full sun. Mites colonize undersides out of sight; stippling may spread across a whole branch before you notice one yellow patch on an upper surface.
Buds as early damage sites. Hibiscus concentrates tender tissue at swelling buds and new shoots. Mites stipple buds before webbing is obvious, and pest stress can trigger bud drop on a species already sensitive to environmental changes-so mite damage and aborted flowers overlap more here than on purely foliage houseplants.
Chronic underwatering stress. Hibiscus needs an even supply of water and should not be allowed to wilt repeatedly. A drought-stressed patio pot drying too fast in summer sun becomes more vulnerable to mite damage-see underwatering on hibiscus when the pot feels light and buds drop alongside stippling.
Dim corners with slow dry-down. A hibiscus kept in not enough light may dry unevenly while growth stalls, leaving stressed foliage that mites colonize unnoticed. Low light alone does not cause stippling, but the combination of weak growth and dry heated air is common on overwintering specimens.
What spider mites look like on hibiscus
Early feeding:
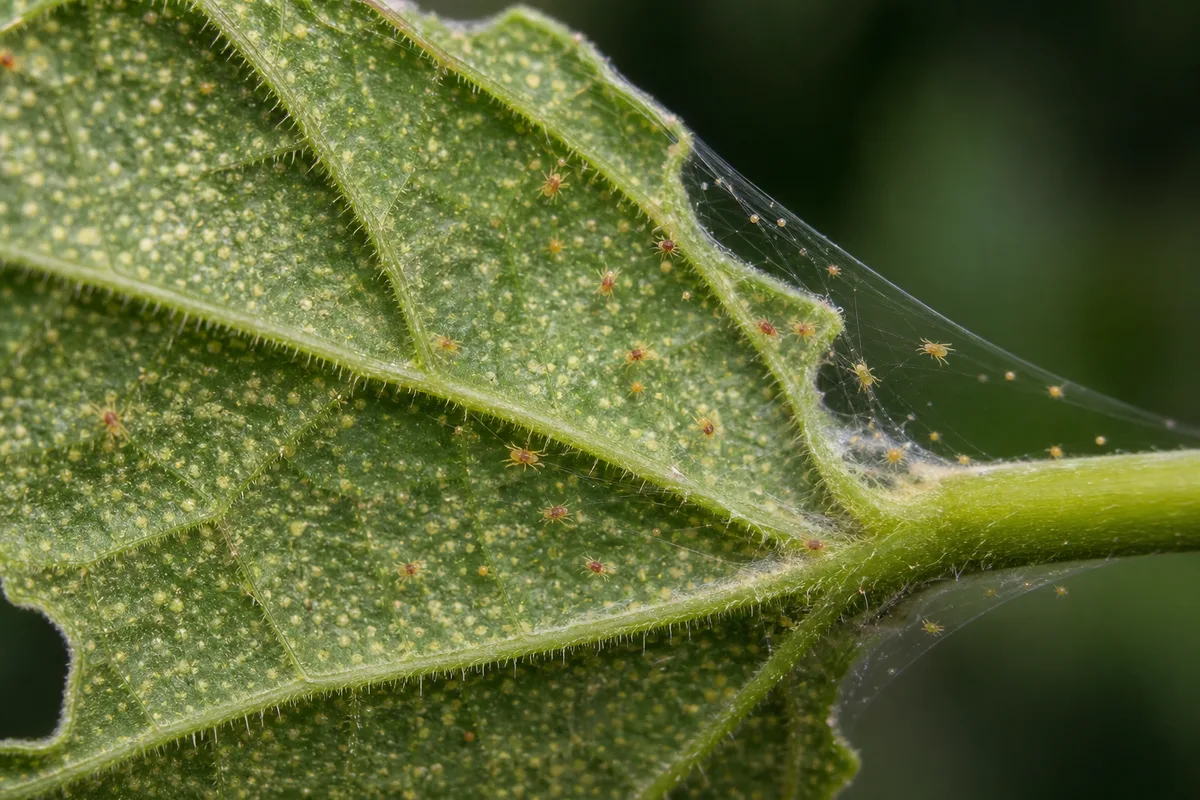
Spider Mites symptoms on Hibiscus - compare with healthy tissue on the same plant.
- Pinpoint yellow or pale dots on upper leaf surfaces-the classic stippled look on glossy green blades
- Faint dullness or bronzing on heavily fed leaves
- Pinprick stippling on swelling buds before obvious webbing
- Leaves still attached; bud development may slow before silk appears
Established colonies:
- Fine silk webbing at leaf petioles, stem joints, and around unopened buds
- Undersides feel gritty; amber eggs or black fecal specks visible with a hand lens
- Yellowing that follows the stipple pattern rather than uniform chlorosis from wet soil
- Interveinal swelling or raised yellow areas between veins on some hibiscus cultivars under heavy feeding
Advanced infestation:
- Leaves bronze or bleach pale, then drop
- Webbing covers stem sections and bud clusters; mites visible as moving dots when disturbed
- New leaves emerge small or fail to open; flower buds yellow and fall before blooming
- Entire bloom cycles abort on a plant that was loaded with buds a week earlier
To the naked eye, mites look like tiny moving dots-about 1/50 inch long. A 10× hand lens makes identification much easier on large hibiscus leaves.
How to confirm the cause
Work through these checks in order:
-
Tap test - Hold white paper under a suspect leaf or bud and tap the blade firmly. Watch for tiny moving specks on the paper. Static debris does not crawl; mites do.
-
Underside and bud inspection - Lift large leaves and examine backs, especially at the mid-vein and around swelling buds. Mites live in colonies mostly on undersides. Webbing at the leaf-stem joint or encircling a bud is a strong mite signal.
-
Pattern check - Stippling scattered across individual leaves or buds points to mites. Uniform yellowing from the soil line up on a heavy wet pot often fits overwatering-not a speckled upper surface.
-
Webbing vs. no webbing - Silk webbing confirms spider mites. Thrips cause silvery streaks but not silk. Aphids on hibiscus show soft-bodied clusters and sticky honeydew on buds, not uniform pinprick dots with webbing.
-
Environment check - Is the hibiscus beside a heat vent, above a radiator, in a sun-baked south window, or freshly moved indoors from a patio? That context fits mites better than root rot on Hibiscus.
-
Neighbor plants - Scan other houseplants on the same shelf or windowsill. Mites crawl from plant to plant when populations are high-especially dangerous beside other flowering containers.
If the tap test shows no movement, webbing is absent, and leaves are uniformly yellow with wet heavy soil, investigate overwatering before committing to a mite treatment cycle.
First fix for hibiscus
Move the hibiscus away from other plants and wash every leaf underside under lukewarm running water or a shower spray.
Support large soft leaves so water hits the backs directly, including tissue around unopened buds. Forceful washing reduces mite numbers and breaks up protective webbing. Let foliage dry in bright indirect light the same day-do not leave wet leaves in a dark cool corner overnight, because hibiscus is prone to foliar disease when large leaves stay wet in stagnant air.
Do not apply horticultural oil or insecticidal soap on day one before this rinse. Soap and oils work by contact; a pre-wash clears debris so later sprays reach mites. Do not repot, prune heavily, or fertilize a stressed hibiscus until you know the infestation level.
Step-by-step recovery
After the initial isolation and wash:
Light infestation (stippling on a few leaves, no webbing on buds)
- Repeat water washes every two to three days for one week. Re-check undersides and buds with a lens after each session.
- Raise humidity without soaking foliage nightly. Run a humidifier targeting 50–70% near the plant, or group containers on a pebble tray-avoid relying on misting alone, which wets glossy leaves without lasting humidity benefit.
- Keep watering steady using the top 2–3 cm dry check from our hibiscus watering guide-do not let the root zone swing from bone dry to soggy during recovery.
Moderate infestation (webbing on leaf bases, stippling on multiple branches)
- Apply insecticidal soap or horticultural oil after the initial rinse. Both smother mites on contact when undersides are coated completely. Repeat every five to seven days for at least three cycles to catch newly hatched nymphs-MSU Extension recommends two to three treatments at five-day intervals for houseplant mites.
- Inspect and treat adjacent plants on the same shelf, especially other flowering containers moved indoors together.
- Prune only heavily webbed leaves or buds that are mostly bronze or dead. Removing a few worst tissues lowers pest load and improves spray coverage on the rest of the shrub.
Heavy infestation (webbing on buds, widespread bronzing, bloom loss)
- Extend isolation to the whole collection if mites appeared on several plants within days.
- Repeat soap or oil on label intervals through at least three weeks while humidity improves-eggs often survive initial sprays.
- Consider discarding a severely webbed specimen in a shared space rather than risking months of reinfestation across a bloom collection-UMN Extension recommends bagging and removing plants when most foliage is covered.
Wash hands and tools after handling infested hibiscus so mites do not hitchhike to healthy plants.
Recovery timeline
Light infestations often show fewer new stipples within three to five days of repeated washing. A full soap or oil course typically takes two to three weeks with label-interval repeats. Old stippled leaves remain scarred-judge recovery by clean new leaves, buds that swell and open without stippling, and no fresh webbing, not by old foliage returning to solid green.
If new growth and developing buds stay clean for two weeks after your last treatment, consider the outbreak controlled. Resume normal feeding only after mites are gone-fertilizing during active infestation produces tender tissue mites prefer.
Lookalike symptoms to rule out
| What you see | Likely cause | Quick check |
|---|---|---|
| Fine stippling + silk webbing on glossy leaves or buds | Spider mites | Tap test shows moving specks |
| Silvery streaks, black specks, no webbing | Thrips | Adults fly when disturbed |
| Soft insects + sticky honeydew on buds | Aphids | See aphids on hibiscus |
| White cottony clumps in leaf axils | Mealybugs | Clumps wipe away as insects, not dots |
| Uniform yellow lower leaves, heavy wet pot | Overwatering | Soil sour or soggy-see overwatering |
| Crispy leaf edges, no stipple dots | Low humidity tip burn | Edges brown without pinprick pattern-see low humidity |
| Leggy pale growth, no buds | Not enough light | Dim placement slows dry-down-see not enough light |
Thrips leave silvery streaks or scuffed patches and black specks of excrement. They do not spin silk webbing. Shake a stem-adult thrips fly; mites crawl.
Aphids cluster on flower buds and tender shoots with sticky honeydew, not the dry gritty stippling mites create.
Overwatering yellows leaves more evenly, often with soft stems and sour-smelling soil on a heavy pot. Stippling on upper surfaces with appropriately moist mix and firm stems points away from root rot.
Mistakes to avoid
Do not stop after one spray because leaves look better for a day-eggs hatch on a short cycle and populations rebound within a week.
Do not spray only the tops of hibiscus leaves. Mites live on undersides and around buds; top-only treatment misses colonies.
Do not apply oil or soap to a drought-stressed hibiscus in direct hot sun. UC IPM warns against treating water-stressed plants or when temperatures exceed 90°F.
Do not use broad-spectrum insecticides aimed at other pests. Pyrethroids can kill mite predators and trigger mite outbreaks.
Do not mist large hibiscus leaves as your primary humidity fix-wet foliage in cool stagnant air invites fungal problems without lasting humidity benefit. Use a humidifier or pebble tray instead.
Do not soak unopened buds during rinsing; direct water at leaf undersides and stem joints rather than forcing water into tight bud clusters.
Do not fertilize during active infestation hoping to push new blooms-that produces tender tissue mites prefer.
Do not ignore neighboring plants because one hibiscus looks worse. Mites spread along shared shelves and windowsills, especially after patio plants move indoors together.
Hibiscus care cross-check
While treating mites, keep baseline care steady:
| Care factor | Target during treatment | Mite-related mistake |
|---|---|---|
| Water | Top 2–3 cm dry before deep soak; root zone consistently moist | Letting soil go bone dry for weeks-water-stressed plants suffer more mite damage |
| Humidity | 50–70% indoors when possible | Placing pot directly above a radiator or in blasting AC dry air |
| Light | Bright direct sun outdoors; brightest window or grow lights indoors | Dim corner that stalls growth while heat still dries air |
| Airflow | Good ventilation without hot drafts | Enclosed shelf with stagnant dry heat |
| Buds | Watch swelling buds for early stippling | Assuming bud drop is only a watering issue |
See the hibiscus overview for tropical vs hardy differences, the watering guide for pot-check rhythm, and light requirements when repositioning during recovery.
How to prevent spider mites next time
Quarantine patio hibiscus and other containers for at least two weeks after moving indoors before placing them beside established plants. Monitor for stippling during isolation.
Run a humidifier in dry winter rooms or move containers away from heat registers. The 50–70% humidity target from our overview matches what keeps mites from exploding on tropical hibiscus.
Inspect leaf undersides and swelling buds weekly during heating season-one quick check of a branch tip takes less time than treating a whole windowsill later.
Maintain even watering using the top 2–3 cm check rather than calendar guessing. Chronic drought stress on a sun-exposed patio pot compounds mite susceptibility.
Avoid placing hibiscus directly above radiators, beside open fires, or in the path of air-conditioning vents-the same spots the overview guide warns against for bud drop.
Rinse dusty foliage occasionally when you water at the base. Large glossy leaves collect household dust; clean foliage is easier to scout and less stressed.
When to worry
Treat as urgent when stippling appears on swelling buds, webbing encircles flower clusters, or mites show up on several plants in the same room within days. On hibiscus, bud damage often precedes obvious webbing-and lost buds will not reopen.
At that stage, isolation and repeated washing may need to extend to the whole collection. Escalate to a local extension office if defoliation spreads despite three weeks of labeled treatments.
Consider discarding a severely defoliated hibiscus in a shared bloom collection rather than risking reinfestation across multiple patio specimens overwintering together. Early stippling on one branch with no bud webbing yet is manageable-confirm with a tap test and start washing before populations build. That window closes quickly in warm dry rooms beside winter heat.
Conclusion
Spider mites on hibiscus are a dry-air, winter-indoor, and patio-transition problem as much as a pest problem. Isolate, rinse undersides and bud zones thoroughly, confirm with a tap test, then repeat soap or oil sprays through several generations while humidity reaches the 50–70% range this flowering shrub prefers. Stippled old leaves and dropped buds may stay lost, but clean new growth and swelling buds tell you the plant is winning-act on the first pinprick dots before silk webbing spans the whole bloom flush.
When to use this page vs other Hibiscus guides
- Hibiscus watering guide - Use for routine moisture checks before assuming spider mites is the main issue.
- Hibiscus problems hub - Browse all 20 common issues on this species.
- Low Humidity on Hibiscus - Different entry point when symptoms overlap with spider mites.
- Slow Growth on Hibiscus - Different entry point when symptoms overlap with spider mites.