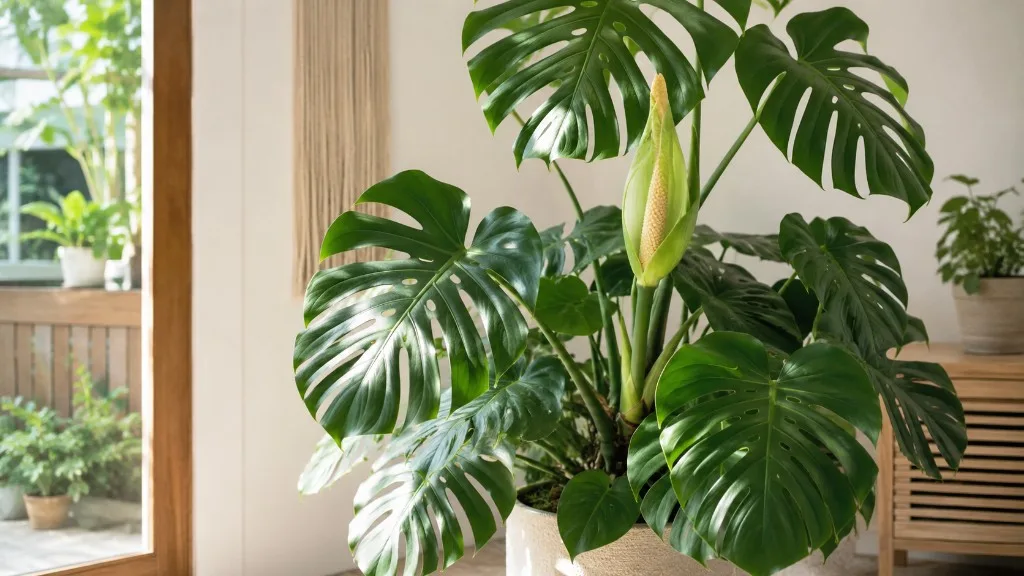
Monstera Water vs Soil Propagation: Which to Choose
Water or soil for Monstera cuttings? Compare visibility, root strength, rot risk, and transplant timing so you pick the medium that fits your cutting and habits.
Quick Answer: Water vs Soil for Monstera
Soil propagation is usually the better long-term finish for Monstera, because roots form in a medium closer to where the plant will live and often handle pot life with less transplant stress. Water propagation is usually the easier start, because you can see roots form, catch rot early, and build confidence with a healthy cutting. Both methods work when the cutting includes a node and your aftercare matches the medium you chose.
The real question is not which method is “correct.” It is which trade-off fits your risk tolerance, cutting value, and habits. Choose water when you want visibility and you can keep the jar clean on schedule. Choose soil (or an airy mix) when you want fewer transitions and stronger roots from day one. If you need the full propagation workflow—tools, moss method, air layering, and timeline tables—start with the Monstera propagation guide and the Monstera deliciosa propagation hub.
Who This Guide Is For
This page is for growers who already know they want to propagate Monstera and are stuck on medium choice. Beginners comparing a glass jar to a small pot will get a clear decision framework here. Intermediate growers with a valuable, variegated, or single-node cutting will get guidance on when soil or moss beats water.
This is not a full propagation encyclopedia. Node anatomy photos, tool lists, air-layering steps, and week-by-week moss timelines live on the Monstera propagation guide and species propagation page. This guide stays focused on water vs soil (and when moss fits) so you can pick a medium and execute without rereading the same primer three times across the cluster.
What Your Cutting Needs Before You Pick a Medium
Every propagation medium fails the same way when the cutting is wrong: no node, no new plant. University of Minnesota Extension states that Monstera deliciosa cuttings must include a node—the stem joint where leaves and buds emerge—and that leaves or petioles without a node will not produce new growth and eventually rot. Aerial roots help but do not replace that rule.
For medium choice, you mainly need a healthy one-node cutting with one leaf (two nodes can add buffer on large vines). If you are unsure what counts as a node or how to cut cleanly, read the node section on the Monstera propagation guide before you choose water or soil. Getting the cutting right matters more than debating jars versus pots.
The Node Rule (Non-Negotiable)
A node holds the axillary bud that can push roots and new shoots. A pretty leaf floating in water with no stem node is decoration, not propagation. UConn’s Monstera factsheet recommends taking stem cuttings a few inches below a node with aerial roots when possible—useful support, not a substitute for the node itself.
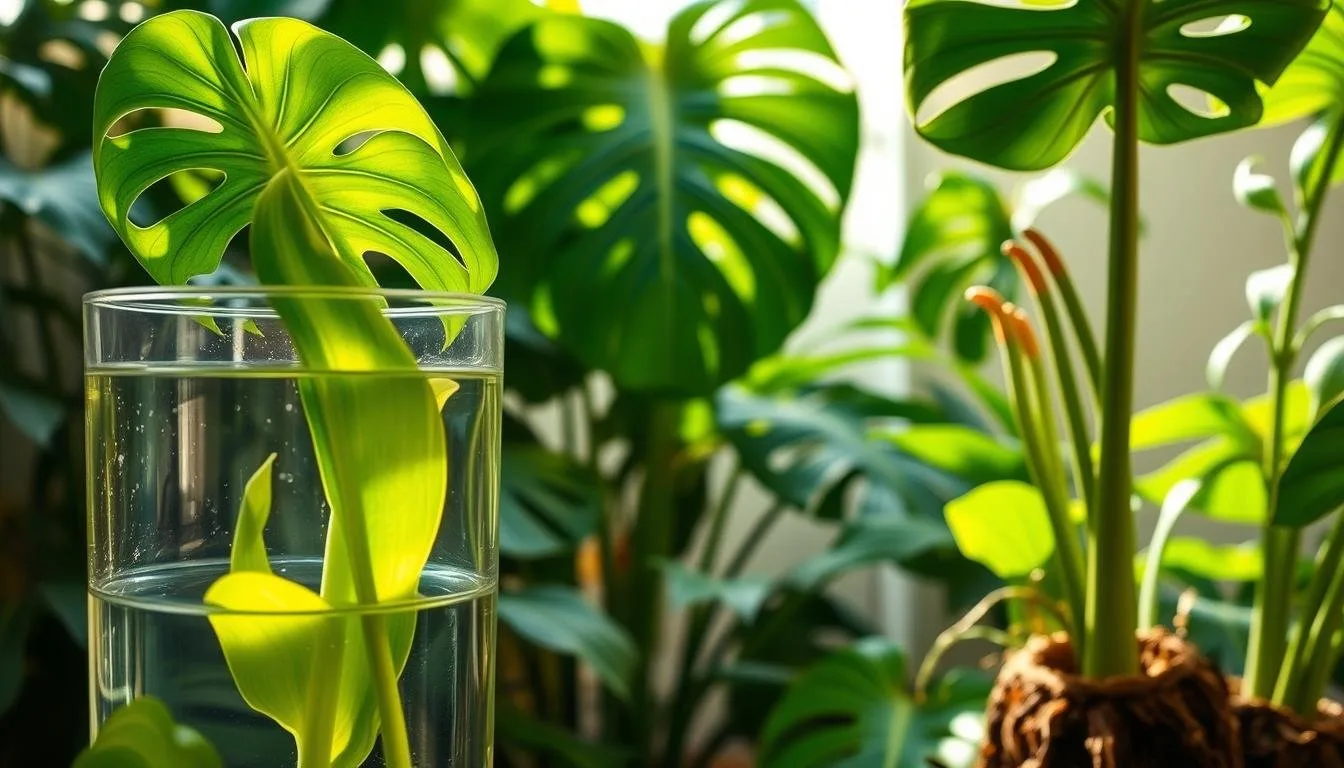
Water Propagation for Monstera
Water propagation means submerging the node (and any aerial root) in clean water while keeping the leaf above the line. UMN Extension lists plain water as valid media and notes you can watch roots develop, but warns that roots grown in water are weaker than roots formed in solid rooting media.
Water keeps the node evenly hydrated, which lowers early drying stress. The trade-off is hygiene and transition: stale water, submerged stem tissue, and long stays in a vase increase rot risk and can make the move into potting mix harder later. An Ask Extension answer on houseplant propagation notes that water can feel easier because growth is visible, but infection risk and the soil transition are real downsides.
Change water when it clouds or on a weekly schedule—the habit matters as much as the jar. Keep the leaf above the waterline and the node submerged; that weekly check is why water wins for growers who want a visible progress window.
Pros, Cons, and Best Use Cases
Water works best when monitoring matters. First-time propagators, inexpensive green cuttings, and growers who want proof the node is alive often do well in water. Change water when it clouds or on a weekly schedule, keep the jar in bright indirect light, and do not submerge more stem than necessary.
Water is weaker when the cutting is precious or you hate maintenance. Variegated Monstera, wet sticks, and one-node top cuts carry more financial and emotional risk; many experienced growers skip water for those and go straight to soil or moss. Water also tempts you to leave a cutting in a vase too long—roots that look great underwater can stall after potting while soil-adapted roots catch up.
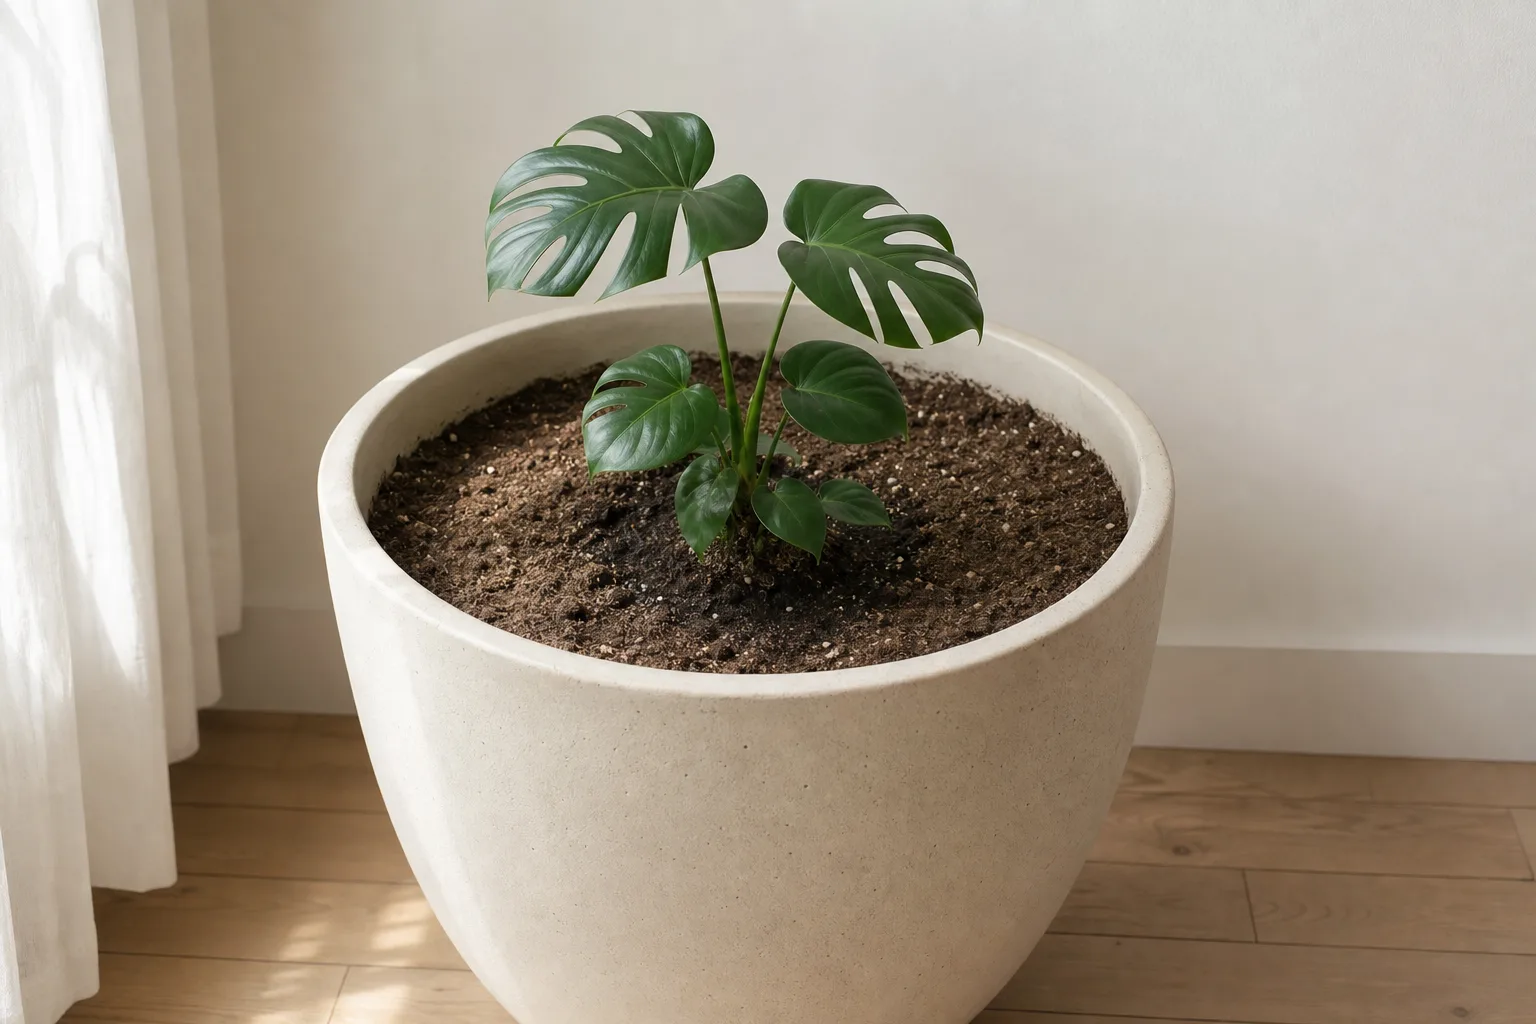
Soil Propagation for Monstera
Soil propagation here means rooting the node in a moist, well-draining medium from the start—chunky houseplant mix, perlite blend, or similar—not dense garden soil. UMN Extension emphasizes that rooting media must hold moisture, support the cutting, and drain well enough to prevent rot. Illinois Extension recommends sterile, aerated mixes (perlite, vermiculite, peat combinations) rather than heavy compost or garden soil that may carry pathogens and stay too wet.
Roots that form in particulate media are already adapted to oxygen and moisture cycles similar to a finished pot. That is why many growers report smoother establishment after rooting, even though you cannot watch roots appear day by day.
Pros, Cons, and Best Use Cases
Soil (or airy mix) fits valuable cuttings and growers who manage moisture well. If you want one transition instead of two, soil is the cleaner path. Pair it with a chunky Monstera soil mix and a pot with drainage; see the Monstera deliciosa soil guide for ratios.
Soil punishes overwatering. Without a visible root window, anxious watering is the main failure mode. Keep the mix lightly moist, not soggy, and judge progress by stability and new top growth—not by digging up the node every few days. Warmth and moderate humidity help; the Monstera humidity guide covers room-level support without turning propagation into a humidity project.
Sphagnum Moss and Perlite: A Third Lane
Water and soil are the headline comparison, but many Monstera growers root in moist sphagnum moss or perlite—especially for single-node or variegated cuttings. Moss and perlite hold moisture and air at the same time, which can reduce rot swings compared with a stagnant jar or dense potting mix. Iowa State Extension lists coarse sphagnum moss and perlite among workable rooting media and notes perlite’s balance of drainage and support.
Treat moss or perlite as a controlled soil-adjacent option: roots form in solid media, but you still monitor moisture carefully and pot up once roots are substantial. Full moss steps, propagation boxes, and timeline tables are on the Monstera deliciosa propagation page—use that resource when moss is your primary method rather than water or standard soil.
Monstera Water vs Soil Comparison Table
| Factor | Water | Soil / Airy Mix | Moss / Perlite |
|---|---|---|---|
| Beginner monitoring | Excellent—roots visible | Poor—roots hidden | Moderate—check moss moisture |
| Root strength at pot-up | Usually weaker initially | Usually stronger | Strong; similar to soil path |
| Rot risk | Stale water, dirty jars | Dense or soggy mix | Moss dried out or kept too wet |
| Transplant steps | Two (water → soil) | One | One (into potting mix) |
| Best for | Learning, cheap cuttings | Long-term establishment | Valuable or single-node cuts |
| Main weakness | Water-to-soil transition | Overwatering anxiety | Moss maintenance |
Rooting Timeline: When to Expect Progress
Extension guidance and indoor practice diverge on when roots appear versus when a cutting is truly established. Use this table to separate “first visible root” from “ready to pot up” and “stable in mix.”
| Milestone | Water | Soil / Airy Mix | Moss / Perlite |
|---|---|---|---|
| First visible roots | Often 2–4 weeks under warm, bright conditions (UMN Extension) | 3–5 weeks; confirm by gentle tug or one careful lift | 3–5 weeks; check through clear cup or bag |
| Pot-up / finish rooting | 2–3 inches with side branches (Monstera hub); Iowa State cites ~1 inch for generic houseplants | When mix holds cutting firm and new top growth starts | When roots fill moss/perlite and resist gentle pull |
| Post-transition adjustment | 1–3 weeks possible stall while soil roots rebuild | Minimal—roots already in mix | Minimal—same as soil path |
| Season note | Slower in winter; higher rot risk if cold or dim | Same; keep mix lightly moist, not wet | Moss drying out is the main winter risk |
Visible speed in water is not the same as finished plant speed. A cutting that roots quickly in a jar and then sits for months may lose momentum after potting.
Which Method Grows Stronger Roots?
Solid media usually produces stronger roots for long-term Monstera growth. UMN Extension states directly that plant roots grown in water are weaker than those grown in solid rooting media. Iowa State Extension adds that water-formed roots are coarser in texture and less adapted to potting mix, which can show up as wilting, leaf drop, or tip dieback after transplant—recoverable with steady care, but still a real transition tax.
Water roots are not fake roots. They just specialize for a different environment. When you pot up, the plant often rebuilds finer roots in mix while the water roots hand off. Soil-rooted cuttings skip much of that handoff, which is why soil often wins on overall establishment even when water wins on first visible root.
Which Is Faster, Easier, and Safer for Your Habits?
Water often feels faster because you see white roots within weeks under warm, bright conditions. UMN Extension notes roots typically form in about two to four weeks in favorable conditions. Visible speed is not the same as finished plant speed: a cutting that roots quickly in water and then sits in a jar for months may lose momentum after potting.
Ease usually favors water for beginners who struggle to judge soil moisture. Safety depends on your failure mode. If you forget water changes, water is riskier. If you water soil like a mature plant, soil is riskier. Illinois Extension advises against water rooting partly because those roots adapt poorly to mix—the safest method is the one you can execute consistently on your schedule.
LeafyPixels Side-by-Side Trial (March 2026)
In March 2026, we rooted two identical one-node Monstera deliciosa cuttings from the same parent vine under matched indoor conditions: 72°F (22°C), bright indirect light from an east window, and roughly 55% room humidity. One cutting went into a clean glass jar with weekly water changes; the other into moist perlite in a small propagation box with a vented lid.
Water jar: First white roots were visible at day 14. Roots reached about 2 inches by week 5. We potted at week 6 into chunky aroid mix. The cutting showed mild leaf droop for 10–14 days, then pushed a new leaf after soil roots took over.
Perlite box: No visible progress until week 3. Roots hit 2 inches by weeks 5–6. Pot-up at week 6 showed no post-transplant stall—roots were already adapted to solid media.
That small trial matches extension guidance: water shows roots sooner, but soil-adjacent media can catch up on establishment and skip the water-to-soil transition tax. Your room may run faster or slower; treat this as a pattern check, not a guarantee.
Step-by-Step: Propagate Monstera in Water (Abbreviated)
- Take a sterile cut just below a node on a healthy stem; include one leaf and an aerial root if present.
- Place the node in a clean jar of room-temperature water; keep the leaf above the waterline.
- Set in bright indirect light; change water when cloudy or about weekly.
- Watch for firm white roots from the node; remove mushy tissue immediately.
- Pot up when roots are roughly 2–3 inches (5–8 cm) with some branching—not at the first nub. Full jar-care detail and weekly checks are on the species propagation page.
Step-by-Step: Propagate Monstera in Soil (Abbreviated)
- Use the same node-bearing cutting; water the parent plant the day before so tissue is hydrated (Iowa State Extension).
- Fill a small pot with drainage and moist, airy mix—chunky aroid blend or perlite-amended potting soil, not heavy garden soil.
- Bury the node; keep the leaf above the surface; firm gently and water lightly to settle.
- Place in bright indirect light; keep mix lightly moist for the first one to two weeks, then let the top dry slightly between waterings as roots establish (UMN Extension).
- Confirm roots by gentle resistance when tugged—or lift carefully with a label if you must check once. Avoid repeated disturbance.
When to Move Water-Rooted Cuttings Into Soil
Move when roots are substantial, not symbolic. Iowa State Extension suggests transplanting water-rooted cuttings when roots are about 1 inch long, while Monstera-specific guidance on our propagation hub targets 2–3 inches with secondary branching for thick deliciosa stems. In practice, aim between those benchmarks: more than a single starter root, less than a water-bound plant that has forgotten life in mix.
Water-to-soil transition checklist:
- Roots are creamy white and firm, not brown or mushy
- Several roots 2–3 inches long with side branches (or at least 1 inch for small cuttings per Iowa State)
- Small pot with drainage and chunky aroid mix
- Medium evenly moist for the first one to two weeks—not bone dry, not soggy
- Bright indirect light and stable warmth; no direct sun on a stressed cutting
- Patience for 1–3 weeks of adjustment while soil roots take over
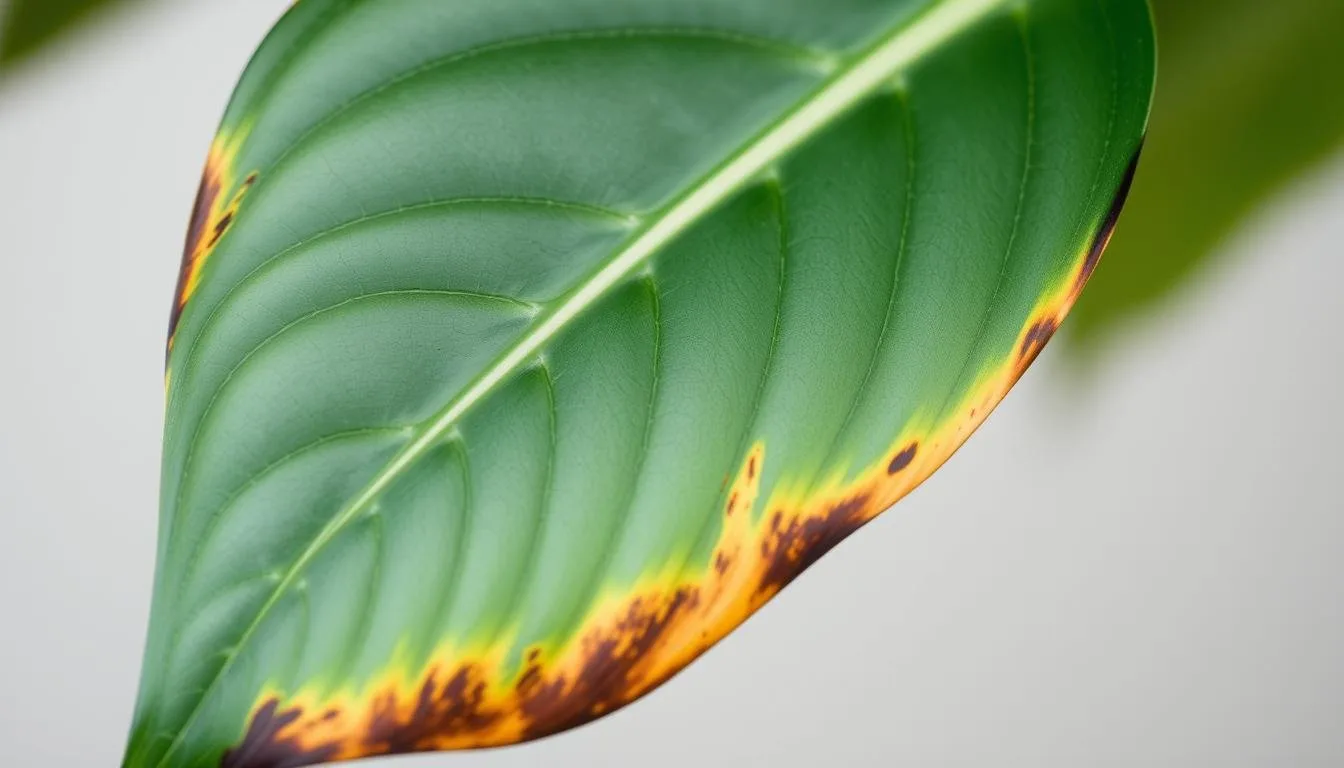
Common Propagation Mistakes
Propagating without a node remains the top failure—green leaves stay pretty, then rot. Rot by overkindness follows: stale water, submerged stems, or soggy mix. Impulse checking—pulling cuttings every few days—breaks fragile new roots. Wrong environment slows everything: dark corners, cold drafts, and dry heater air extend the vulnerable window. Monsteras root best with warmth, bright indirect light, and moderate humidity; propagation in a dim room raises rot odds even if the medium choice was sound.
Special Cases: Variegated Plants, Top Cuts, and Wet Sticks
Variegated Monstera grows slower and carries higher stakes; many collectors prefer soil, moss, or air layering over long water stays that add a second transition. UMN Extension’s variegated guidance notes slower growth and unstable variegation—plan conservatively. Top cuts with mature leaves and aerial roots often root confidently in either medium. Wet sticks (node sections with little leaf area) need tight moisture control; moss or careful soil usually beats a jar where there is little photosynthesis to balance rot risk.
Air layering roots while the stem is still on the parent—often the safest play for expensive cuttings. Steps and wrap technique are on the Monstera deliciosa propagation hub; this comparison page will not duplicate that workflow.
Conclusion
Pick water when visibility keeps you consistent on weekly jar care. Pick soil or moss when you want roots built for pot life from the beginning—or when the cutting is rare enough that a second transition feels like unnecessary risk. Neither method is wrong for a healthy node-bearing cutting if your aftercare matches the medium.
Your best medium is the one you will maintain well on a warm, bright windowsill—not the one that won a comment-section debate. When moss beats both water and soil for a one-node variegated cutting, that is the non-obvious takeaway worth remembering. Respect the node, manage moisture, and use the propagation guide cluster for everything this comparison page intentionally leaves to the hub.
Related Monstera Guides
- Monstera propagation guide — full workflow, tools, node primer, and method overview
- Monstera deliciosa propagation — step-by-step water, moss, air layering, and timelines
- Monstera deliciosa hub — species home for watering, light, soil, and problems
- How to make Monstera soil mix — chunky mix for potting rooted cuttings
- Monstera humidity needs — room humidity during rooting season