How to Propagate Monstera Deliciosa: Step-by-Step
How to Propagate Monstera Deliciosa: Step-by-Step
How to Propagate Monstera Deliciosa: Step-by-Step
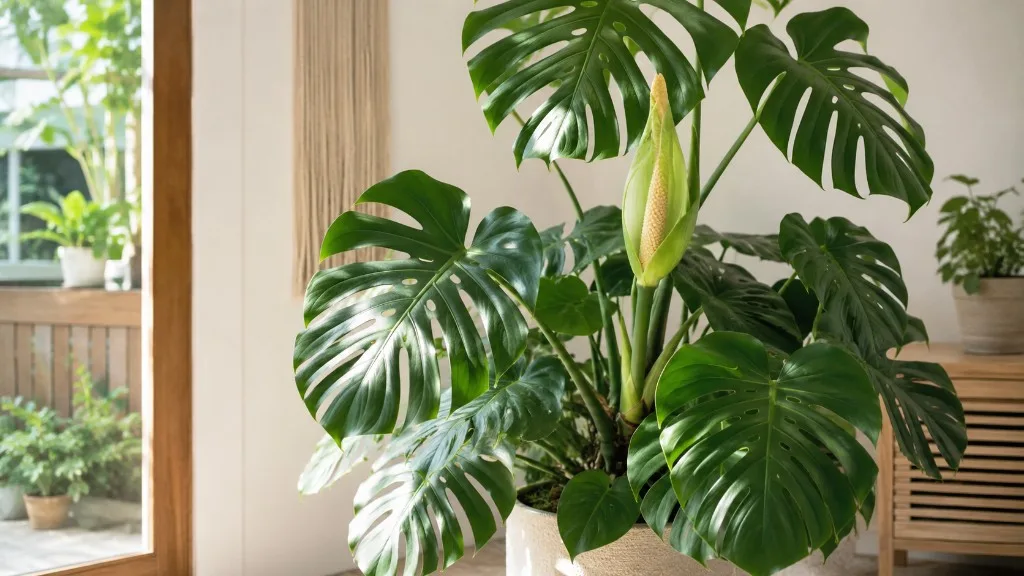
Monstera deliciosa propagation at home means stem cuttings with at least one node, optionally leveraging an aerial root, then rooting in water, sphagnum moss, or air layering on a vine still attached to the parent. Monstera deliciosa is a climbing woody vine in the Araceae family - the same group as peace lilies and true philodendrons - native from Mexico to Panama and sold as Swiss cheese plant, hurricane plant, and split-leaf philodendron. Unlike a pothos jar on a windowsill, deliciosa stems are thick, leaves are heavy, and mature plants need support once potted. The propagation mistake that wastes the most cuttings is taking a leaf without a node or letting a node sit in stale, cloudy water until the tissue rots.
The reliable home workflow: identify a healthy node (the swollen joint where leaf and aerial root meet the stem), cut with sterile shears, root in bright indirect light at 60–85°F (15–29°C), change water when it clouds or weekly, and pot up when roots are roughly 2–3 inches (5–8 cm) long with secondary branching - not at the first white nub. NC State Extension lists layering and stem cutting as recommended propagation strategies; Penn State Extension notes air layering and stem cuttings are the easiest paths for this species indoors.
This guide covers tools and timing, node anatomy on fenestrated stems, three rooting methods with step-by-step instructions, a rooting timeline table, pot-up and moss-pole aftercare, variegated cultivar cautions, and sap safety when you are working with sharp blades around pets.
Guide by sai-ananth. Reviewed against NC State Extension, UMN Extension, and Penn State Extension Monstera profiles by LeafyPixels Review Board.
What You Need Before You Cut
Propagation succeeds when the parent plant is healthy, the season supports active growth, and your tools and workspace reduce rot and sap exposure. You are performing minor surgery on a tropical vine - treat it like one.
Tools, Sanitation, and Workspace Setup
Gather before you cut:
- Sharp bypass pruners or a grafting knife - dull blades crush deliciosa stems and invite infection
- 70% isopropyl alcohol or a 10% bleach solution (1 part bleach to 9 parts water) to wipe blades between cuts
- Clear glass jar or vase (water method), moist sphagnum moss plus a clear bag or propagation box (moss method), or moss + plastic wrap + twist ties (air layering)
- Room-temperature filtered or dechlorinated tap water left out overnight
- Nitrile gloves - Penn State Extension recommends gloves because calcium oxalate crystals in all plant parts can cause contact dermatitis on sensitive skin
- A stable surface away from pets and children - the ASPCA lists Monstera deliciosa as toxic to cats and dogs due to insoluble calcium oxalates
Sterilize blades, then let them air-dry briefly. Work on a clean cutting board you can wipe down afterward. Have paper towels ready for sap drips from the thick stem.
Parent Plant Health and Best Timing
Take cuttings only from firm green stems with no active rot, pest webs, or widespread yellowing. If the parent is recovering from root rot or shipping shock, stabilize it first - propagation is a backup plan, not emergency triage.
Best timing is active growth: spring through early fall when light and warmth support rooting. Penn State Extension places Monstera in the 60° to 85°F comfort band; NC State Extension matches that range and adds moderate brightness without direct sun and high humidity for best performance. Winter propagation can work under supplemental grow lights and stable room temperature, but expect slower root and leaf development - UMN Extension notes propagated nodes may take up to two to three months before forming new leaves, longer in dim cool rooms.
Avoid cutting immediately after repotting, pesticide sprays, or a long drought stress event. Wait until the plant pushes one clean new leaf or shows steady turgor in existing foliage.
Understanding Nodes, Aerial Roots, and Viable Cuttings
A node is the point on the stem where a leaf petiole and often an aerial root attach. That junction holds the axillary bud that can produce the next vine segment. UMN Extension is explicit: Monstera deliciosa can only be propagated when the cutting includes a node. Cuttings that lack a node and axillary bud - including leaf-only pieces - will not produce new growth and ultimately will rot.
Aerial roots are the cord-like structures deliciosa sends from nodes to grip tree bark in habitat. On a cutting, an aerial root is bonus rooting tissue: submerge it in water or moss alongside the node and roots often appear faster than from the node alone. You do not need an aerial root for success, but include it when present.
Where to Cut on a Thick Deliciosa Stem
Plan two cuts - one for the cutting, one for the parent:
On the cutting: Cut approximately 1–2 inches (2.5–5 cm) below the node you want to root. That stub protects node tissue and gives you stem to submerge without drowning the bud.
On the parent: Cut about ¼ inch (0.5 cm) above the node below your take - the remaining node with its leaf often branches or pushes a new growth point, useful when you are shortening a leggy vine.
Single-node vs. multi-node cuttings: A one-node, one-leaf cutting is standard for water jars and gifts. A two-node section gives more energy reserves on large floor vines but is harder to fit in a container; prioritize one healthy node with a leaf for most home setups.
Leaf-only cuttings will not work - no matter how perfect the fenestration looks. If someone sells “Monstera leaves in water” without stem, they are decoration, not propagation.
Method 1: Water Propagation (Step-by-Step)
Water propagation is the most visible method: you watch roots form and catch rot early. UMN Extension lists plain water as valid rooting media with the trade-off that water-grown roots are weaker than roots formed in solid media - plan a careful transition to soil once roots are long enough.
Steps:
- Select a stem with at least one node and preferably one healthy leaf. Remove any lower leaf that would sit underwater.
- Cut with sterile shears 1–2 inches below the node. Include an aerial root if attached.
- Fill a clean glass jar with room-temperature water. Submerge the node and aerial root; keep the leaf and upper stem above the waterline.
- Place in bright indirect light - not direct sun, which heats the jar and grows algae.
- Change water when it becomes cloudy, or on a weekly schedule as preventive maintenance. Rinse the jar if algae or biofilm builds up.
- Wait until roots are roughly 2–3 inches (5–8 cm) with some secondary branching, then move to soil (see pot-up section). UMN Extension notes roots typically form in about two to four weeks in warm bright conditions; cool winter rooms take longer.
Pros: Easy monitoring, minimal supplies, great for beginners learning node anatomy.
Cons: Weaker root structure, rot risk if water stagnates, top-heavy cuttings may tip small jars - use a heavier vase or stake with a soft tie as UMN Extension recommends for top-heavy Monstera cuttings.
Weekly Water-Rooting Care
| Week | What to check | Action |
|---|---|---|
| 1 | Node not blackening; water clear | Change water if cloudy; wipe jar |
| 2 | White root nubs at node/aerial root | Keep light steady; no fertilizer |
| 3–4 | Roots lengthening | Prepare small pot and chunky aroid mix |
| 4+ | Roots 2–3 in. with branches | Pot up; install moss pole if upright growth desired |
Mist the leaf lightly if your room is below 40% relative humidity, but the priority is clean water at the node, not constant leaf wetting.
Method 2: Sphagnum Moss Propagation (Step-by-Step)
Sphagnum moss suits thick deliciosa stems when you want stronger roots than water before soil, or when a cutting is too short to stabilize in a jar. NC State Extension recommends stem cutting as a propagation strategy; moss acts as a moist, airy rooting medium similar to how deliciosa aerial roots grip bark in habitat.
Steps:
- Hydrate long-fiber sphagnum moss in water, then squeeze until damp - not dripping.
- Place moss in a clear cup, propagation box, or zip bag with the cutting node pressed into the moss. Aerial roots should contact moss.
- Seal partially for humidity - a bag with a few air holes or a box with vents prevents mold while keeping the node moist.
- Keep in bright indirect light at 60–85°F.
- Open weekly to check moisture. Remist moss if it lightens in color; never let it stay soggy and anaerobic.
- Transplant when roots weave through moss and reach 2–3 inches - gently tease moss away rather than ripping.
Moss propagation shines for variegated cultivars you do not want sitting in stagnant water, and for short internode cuttings that submerge awkwardly in jars.
Method 3: Air Layering on Mature Vines
Air layering roots a stem while it is still attached to the parent - lower risk on a long floor vine because the cutting keeps receiving water and sugars until roots form. NC State Extension lists layering among recommended propagation strategies; the NC State Extension Gardener Handbook describes serpentine layering for vining plants - stems partially covered with moist medium while still connected.
Steps:
- Choose a healthy stem with a node 6–12 inches below the growing tip (or wherever you want the new plant to start).
- Optional wound: Make a shallow upward cut or scrape a thin strip of outer stem just below the node to encourage rooting - do not sever more than one-third of the stem diameter.
- Optional: Dust wound with rooting hormone powder - UMN Extension notes auxin can promote faster, denser roots though Monstera often roots without it.
- Pack damp sphagnum moss about 1 inch (2.5 cm) thick around the node and wound.
- Wrap with clear plastic; secure above and below with twist ties so moss stays enclosed and humid.
- Check every 1–2 weeks - remist moss through a small opening if it dries.
- Sever the stem below the new root ball once roots are visible through moss and hold the ball together when you squeeze gently - typically four to eight weeks in active growth.
- Pot the layer in a small well-draining container with a moss pole or stake for support.
Air layering is ideal when a top-heavy vine has bare lower stem, when you want zero guesswork on whether roots exist before cutting, or when a rare variegated section is too valuable to remove blindly.
How Long Rooting Takes (Timeline Comparison)
Timelines vary with temperature, light, season, and cutting vigor. Use ranges, not guarantees.
| Method | First root nubs | Roots ready for soil | First new leaf after pot-up |
|---|---|---|---|
| Water | 7–14 days | 2–6 weeks | 4–12+ weeks |
| Sphagnum moss | 10–21 days | 3–6 weeks | 4–12+ weeks |
| Air layering | 2–4 weeks | 4–8 weeks | 4–12+ weeks |
UMN Extension reports roots in about two to four weeks for stem cuttings in favorable conditions and up to two to three months before new leaves emerge from propagated nodes - fenestrations on those juvenile leaves will not match a mature mother plant immediately. Splits and holes develop as the young plant matures, gains bright indirect light, and climbs a support.
When and How to Pot Up Rooted Cuttings
Pot up when roots are creamy white, firm, and roughly 2–3 inches (5–8 cm) long with some secondary roots - not merely a single stub. UMN Extension advises checking roots by gently lifting the cutting; brown soft roots mean rot and may require a fresh cut above healthy tissue.
Pot-up steps:
- Choose a 4–6 inch (10–15 cm) pot with drainage - UMN Extension warns oversized pots make moisture hard to judge.
- Fill with chunky aroid mix - potting soil plus perlite and orchid bark, targeting the well-drained structure NC State Extension describes.
- Plant the node just below the surface; do not bury the leaf petiole.
- Install a moss pole or bamboo stake immediately if you want upright growth - tying the stem loosely below the node encourages the climbing habit deliciosa uses in habitat.
- Water thoroughly once, let drain, then follow the moist-first-weeks rhythm below.
If transitioning from water, some growers plant directly; others add a handful of moist moss around the root zone for the first week to buffer the change. Avoid leaving the plant in water so long that roots become only adapted to submerged life - move once length and branching justify soil.
Aftercare for New Rooted Plants (First 4–6 Weeks)
Newly potted cuttings need stability, not excitement.
Weeks 1–2: Keep mix evenly moist but not waterlogged - UMN Extension recommends continually moist medium for the first one to two weeks, watering in the sink until excess drains. No fertilizer yet.
Weeks 3–4: Allow the top inch (2.5 cm) to dry between waterings as roots explore the pot. Maintain bright indirect light and humidity above 50% if possible - Penn State Extension notes deliciosa prefers humidity preferably above 50%.
Weeks 4–6: Shift toward standard Monstera watering - soak when the top 1–2 inches (3–5 cm) dry. First new leaf may appear; it will likely be smaller and less fenestrated than mature foliage.
Do not repot again immediately, do not move between rooms weekly, and do not fertilize until you see active new growth and roots have had four to six weeks in soil. When the plant outgrows the liner, follow repotting guidance - usually one pot size up every one to two years for established plants per UMN Extension.
Signs Propagation Is Failing
Stop hoping and restart clean when you see:
- Black or mushy node - tissue is dead; cut higher above healthy green stem or discard
- Sour-smelling water or slimy moss - bacteria overload; replace medium, trim rot, retry with sterile tools
- Stem shriveling while medium stays wet - rot or lack of oxygen; improve drainage or switch method
- Leaf yellowing with firm node - often normal as the cutting redirects energy; alarming only if the node softens
- No roots after 8+ weeks in warm bright conditions - node may have been damaged, leaf-only, or too cold; verify you included a true node
A failed jar is not a failed grower - deliciosa cuttings are forgiving when you reset with cleaner material.
When Not to Propagate
Do not propagate as a first response to every problem:
- Active root rot on the parent - stabilize or salvage clean nodes above rot only after triage
- Heavy pest infestation - treat scale, mealybugs, or spider mites before spreading hitchhikers to jars
- Immediately after shipping - let the plant acclimate two to three weeks
- Mid-winter in a cold dim room - wait for spring or add grow lights and warmth
- Because the plant is too tall - pruning and repotting with support may solve the display issue without multiplying weak cuttings
Propagation multiplies healthy plants; it does not cure chronic overwatering or dark-corner decline.
Variegated Cultivars: Node Selection and Reversion Risk
Variegated deliciosa - ‘Albo Variegata’, ‘Thai Constellation’, ‘Aurea’ - adds one rule: the node must carry variegation if you want patterned offspring. A green-only node on a variegated vine tends to produce green reverted growth. NC State Extension notes variegated cultivars need more sunlight than solid-green plants because white sectors photosynthesize less efficiently.
UMN Extension warns that some variegation mutations are unstable and non-variegated growth can outcompete variegated tissue over time. ‘Thai Constellation’ is generally more stable in tissue culture lines ; ‘Albo’ sections can revert without careful node selection. Never buy “variegated seeds” - UMN Extension states variegation is a post-germination mutation, not a seed trait.
For expensive cultivars, prefer moss or air layering over long water sits, and photograph the exact node before cutting for your records.
Safety: Sap Irritation and Pets During Propagation
All parts of Monstera deliciosa contain insoluble calcium oxalate crystals. The ASPCA lists the plant as toxic to cats and dogs, causing oral irritation, drooling, vomiting, and difficulty swallowing if chewed. Penn State Extension notes all parts are toxic if ingested (except fully ripe wild fruit, irrelevant indoors) and recommends gloves when handling because of contact dermatitis risk.
During propagation:
- Work on a counter pets cannot reach; dispose of trimmed leaves in a closed bin
- Wash hands and tools after cutting; wipe sap from surfaces
- Wear gloves if you have sensitive skin or open cuts
- Call ASPCA Poison Control at (888) 426-4435 and your veterinarian if a pet ingests tissue
Propagation produces tempting fresh leaves on the floor - treat cuttings like any other toxic houseplant material, not like benign decor.
For the full care picture after rooting, see the Monstera deliciosa overview, plus guides on light, watering, soil, fertilizer, repotting, and pruning.
Conclusion
Monstera deliciosa propagation works when you respect node biology on a climbing aroid: cut below the node, include aerial roots when present, root in clean water, damp sphagnum, or air layer valuable vines, and pot up at 2–3 inches of firm roots into chunky mix with a stake or moss pole ready. Match timing to warm active growth, keep bright indirect light, change water before it stinks, and treat sap and pet safety seriously. New leaves will start solid and small - fenestrations come with maturity, light, and climb, not from wishful thinking. Get the node right and deliciosa is one of the most rewarding floor plants to share as rooted cuttings or layered offspring.
When to use this page vs other Monstera Deliciosa guides
- Monstera Deliciosa overview - Start here for whole-plant context before deep-diving this topic.
- Monstera Deliciosa problems hub - Jump to symptom-specific fix guides when this care topic does not resolve the issue.