DIY Pebble Tray for Bathrooms and Kitchens
Stop soap rings and counter puddles with a DIY pebble tray sized for vanity and sink zones. Includes tray dimensions, glue choices, EPA mold tips, and a one-week build log.
If your bathroom counter always has a faint soap ring, or your kitchen sink zone looks fine until you lift the dish-soap bottle and find a sticky halo underneath, you do not need another decorative tray that hides the mess. You need a drainage-friendly surface that keeps wet items above the puddle instead of sitting in it. A DIY pebble tray does that by turning a shallow watertight base into a textured, slightly raised platform where drips can settle below your soap, brush, or small plant pot.
This guide is built for bathrooms and kitchens-the two rooms where counters get splashed, steamed, and wiped down every day. It is not a plant-humidity tutorial first. If you landed here looking for a humidity tray under a fiddle-leaf fig, start with how to set up a pebble tray instead. This page covers tray sizing for vanity and sink zones, which sealant survives wet counters, how to keep the tray from becoming a mold pocket, and a documented build you can copy with real dimensions.
Why Sink Counters Need a Drainage Tray, Not Just Decor
Wet rooms punish flat surfaces. A bar of soap dissolves faster in a puddle. A dish brush drips gray water onto quartz. A hand-lotion pump leaves a ring that collects dust and looks grimy by Tuesday. Even a well-sealed stone or laminate counter can develop water spots, mineral haze, or softened caulk edges when moisture sits in the same spot for days.
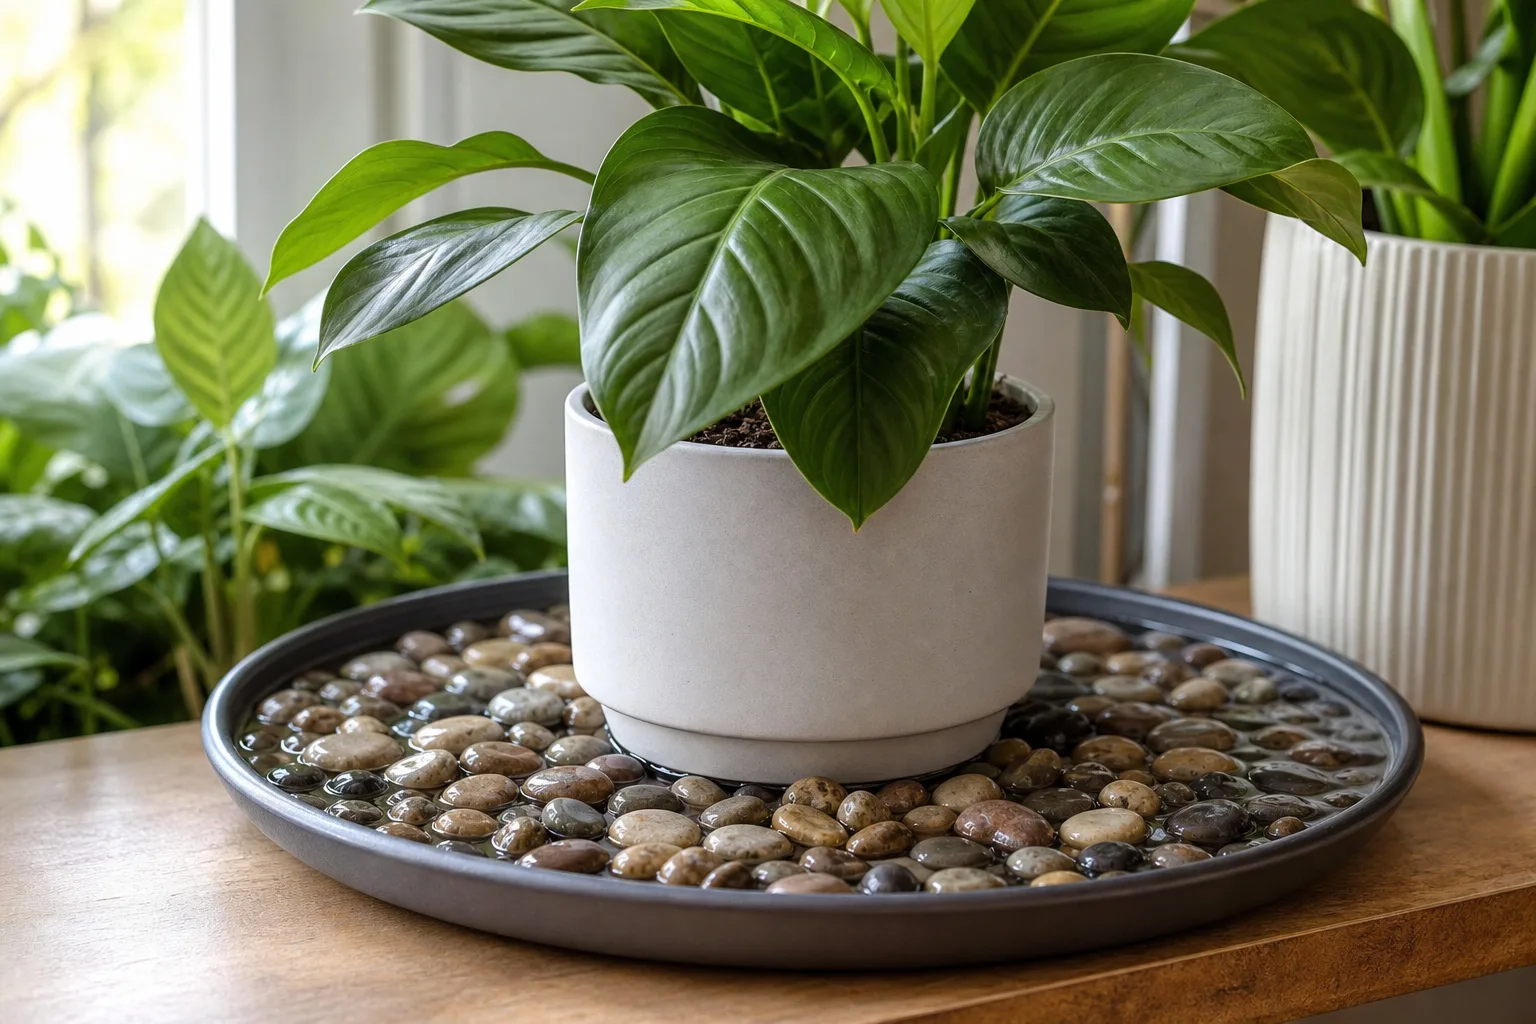
A pebble tray fixes the geometry of the problem. Instead of the bottle base touching a wet counter directly, it rests on stones that are roughly the same height, so air and gravity can move drips into the gaps below. You are not trying to waterproof the counter. You are giving everyday clutter one controlled place to be wet temporarily and dry out with ventilation and cleaning. That is the same logic behind raised soap dishes and boot trays filled with stones-elevation first, decoration second.
The bathroom-and-kitchen version also has to survive handling. Plant humidity trays often sit still under a pot for weeks. A sink-side tray gets bumped when you wipe the counter, splashed when you rinse a razor, and sprayed with cleaner on Saturday. Material choices here are about durability and cleanability, not evaporation math.
How a Pebble Tray Manages Drips and Airflow
The working principle is simple: objects stay above, moisture sits below. When you place a soap dispenser on smooth pebbles, the bottom of the bottle contacts stone, not pooled water. Splashes and drips run into the spaces between stones, where they can evaporate instead of forming a continuous film under everything on the tray.
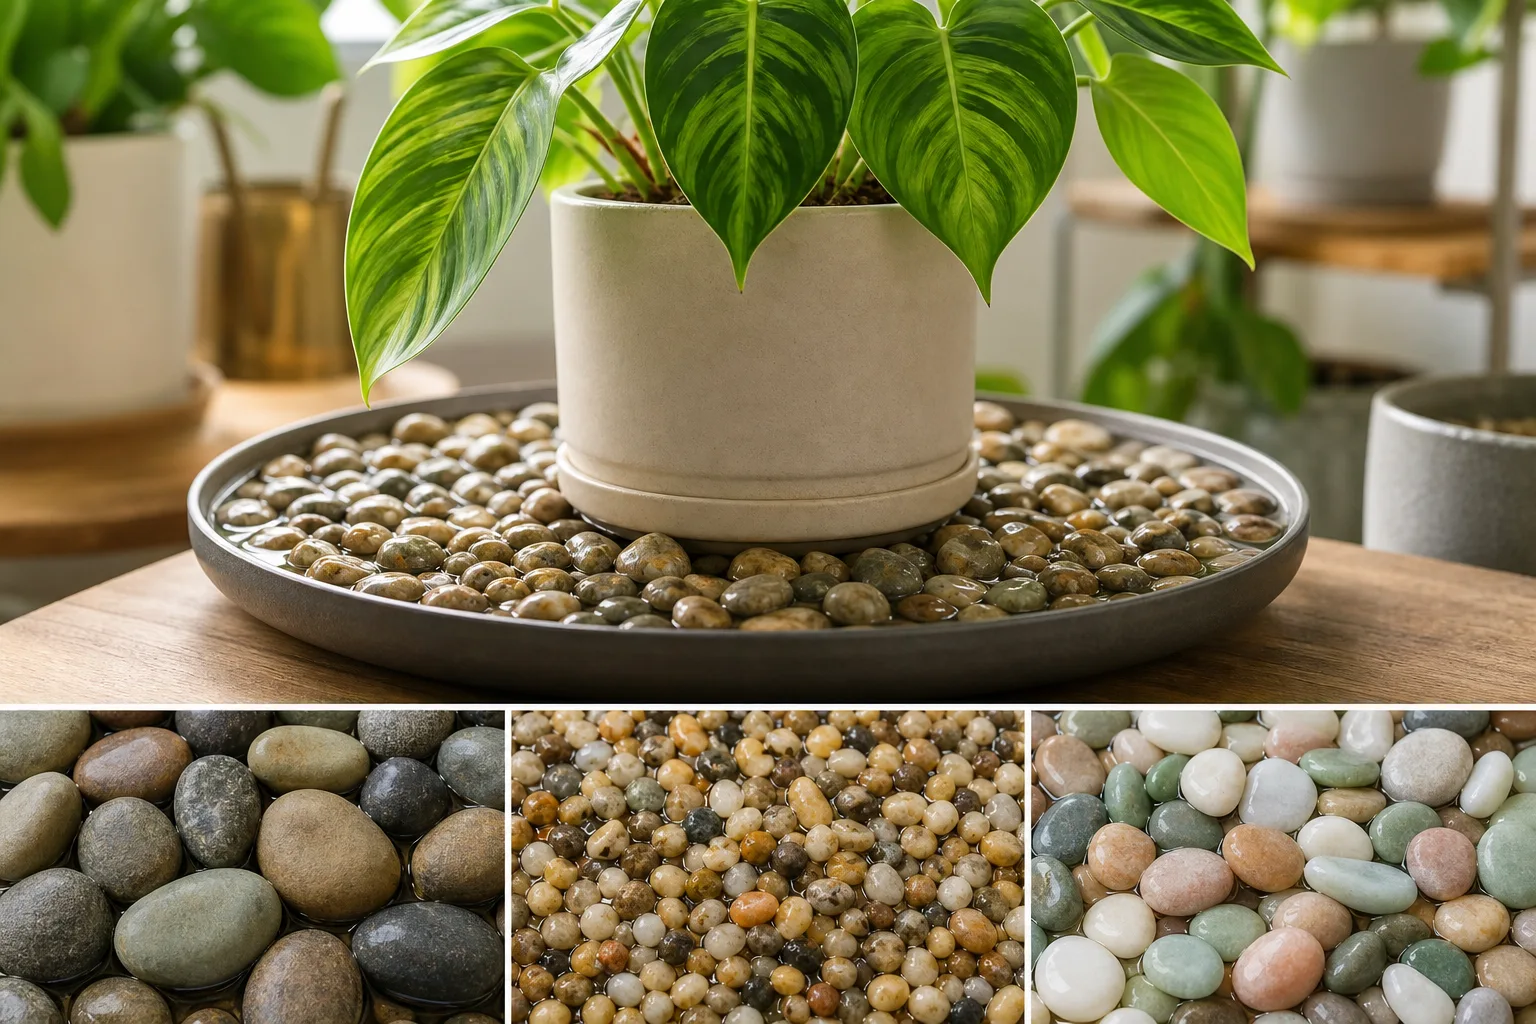
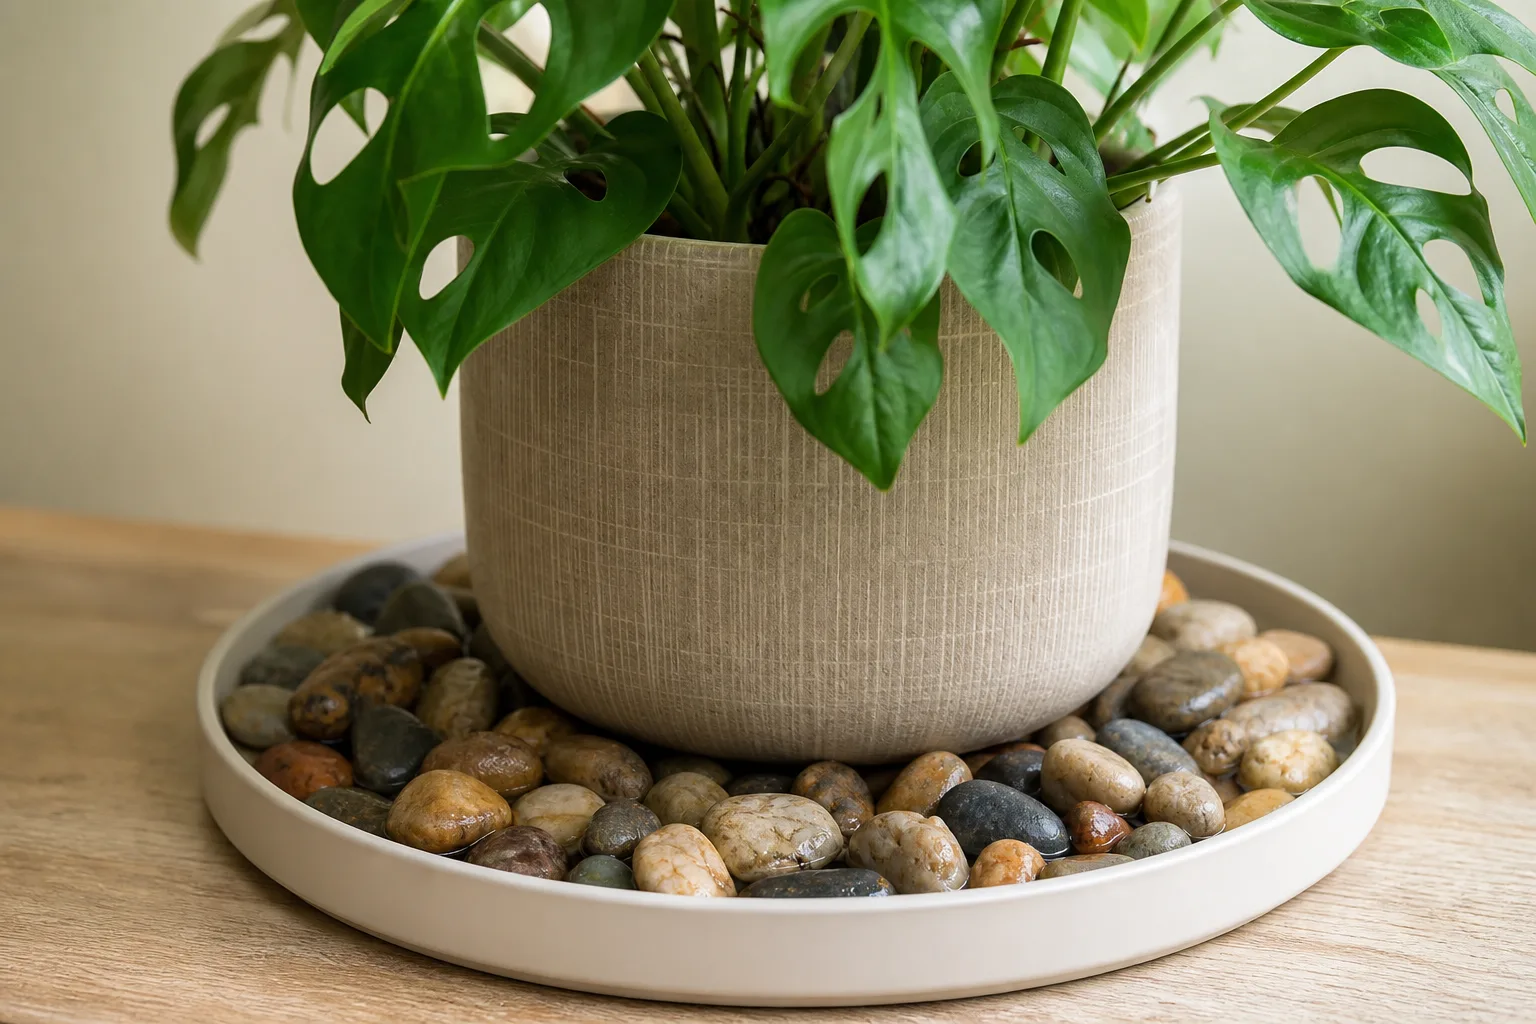
That only works if three conditions are met. First, the base must be watertight with a lip high enough to contain drips but low enough to wipe around easily-typically ½ to 1 inch of side wall for counter use. Second, the stones need similar thickness so bottles do not wobble; aim for ½ to 1½ inches in diameter with no more than ¼ inch height variation across the top surface. Third, the layout must leave micro-channels between stones so water is not trapped in a flat, sealed mosaic.
If you pack stones so tightly that the top surface behaves like a solid plate, you have rebuilt the same puddle problem with extra steps. A functional tray should pass a quick water-drop test after assembly: a few drops should disappear into gaps, not sit in a shiny pool on top.
Mold, Humidity, and Ventilation in Wet Rooms
Moisture control is not a styling detail in bathrooms and kitchens-it is a health and maintenance issue. The U.S. Environmental Protection Agency states plainly that the key to mold control is moisture control, and that wet or damp materials should be dried within 24 to 48 hours to help prevent mold growth. The CDC recommends keeping indoor relative humidity no higher than 50% when possible, using exhaust fans in bathrooms and kitchens, and fixing leaks quickly.
A pebble tray is not the problem in that framework; trapped moisture is. A tray that contains drips but never dries becomes a tiny habitat for biofilm and mold. A tray that lets splashes collect briefly, then dries with airflow and regular wiping, is a useful tool. Run the bathroom fan during and after showers, vent the kitchen fan when boiling or running the dishwasher, and treat a constantly damp tray as a design failure-not something to “clean harder” once a month.
Bathrooms and kitchens already run higher humidity than living rooms. That does not mean you should skip a tray; it means you should choose loose-fill or well-spaced glued layouts, empty standing water after heavy use, and avoid placing the tray in the wettest micro-zone (directly under a dripping faucet stream) unless you commit to daily maintenance.
When condensation collects on windows, walls, or pipes, the EPA advises acting quickly to dry the surface and reduce the moisture source-condensation is often a sign humidity is too high for the space. If your entire vanity stays damp for hours after every shower, fix ventilation before you assume any tray design will stay clean.
Where to Use a Bathroom or Kitchen Pebble Tray
Bathroom Vanity Tray
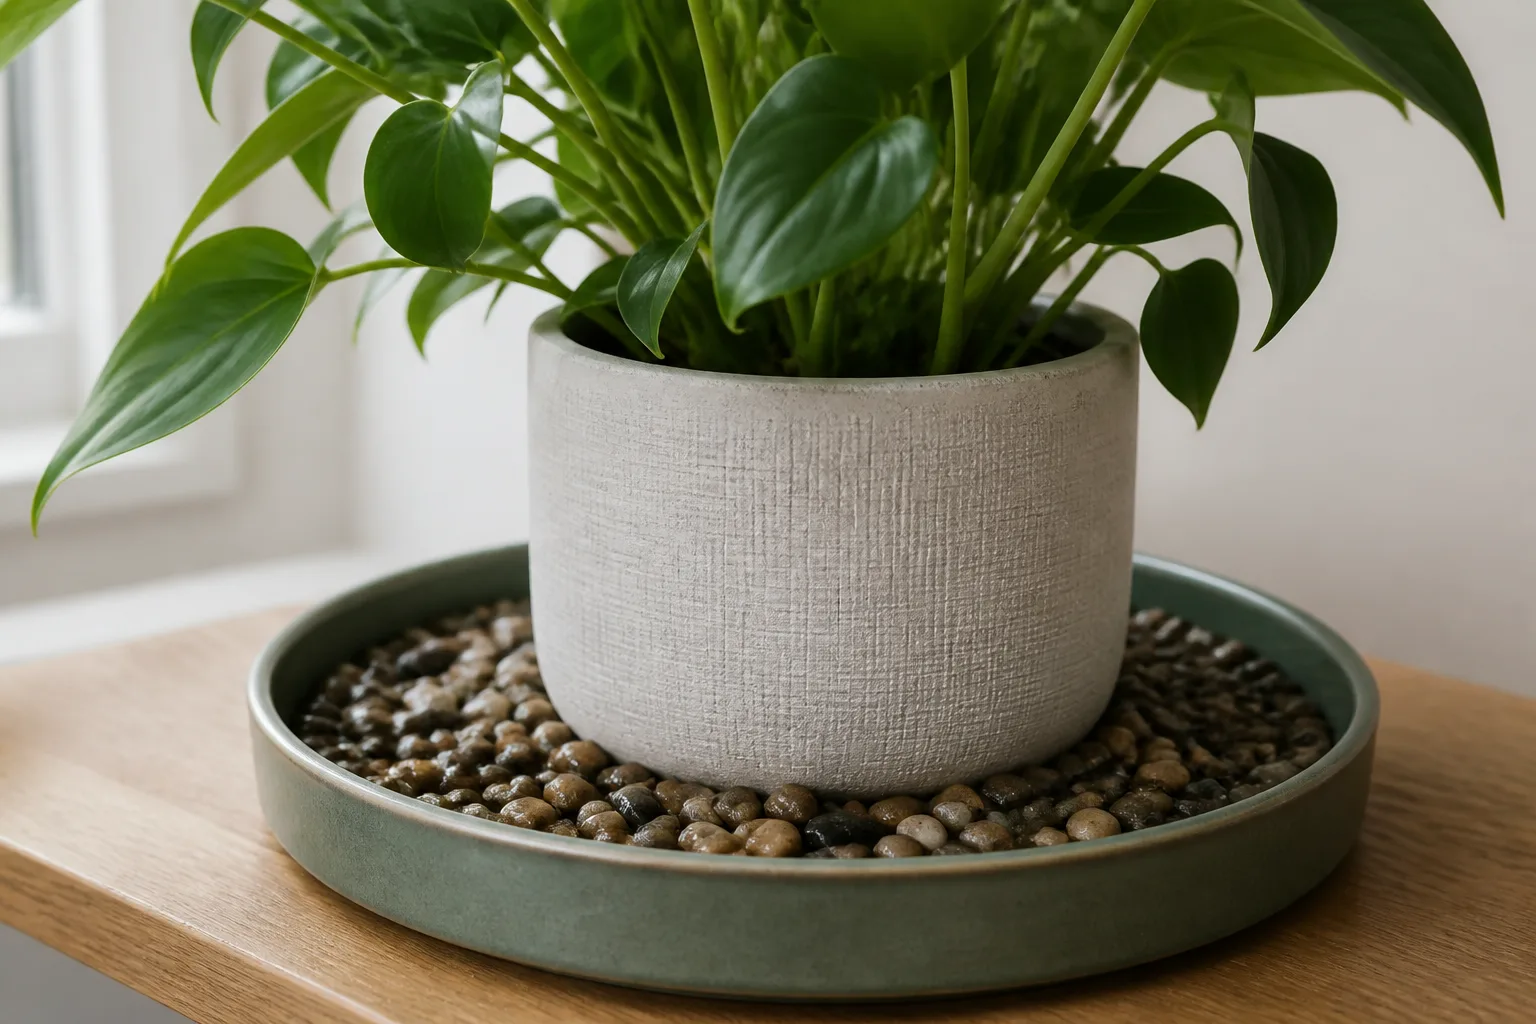
The vanity is the most natural home for a pebble tray because daily clutter concentrates there: soap, toothbrushes, face wash, a ring dish, maybe one small plant on a bright windowsill ledge. Without a tray, each item creates its own water halo and the whole surface looks messy even when you wiped it down.
Size that actually fits: For a standard single vanity, an 8 × 12 inch tray with a ¾ inch lip holds a soap pump, a cup, and a razor dish without eating the whole counter. On a 24 inch floating vanity, drop to 6 × 10 inches so you still have room to set down a hair tie or wipe the faucet area. Smooth, polished pebbles wipe easier than rough landscaping gravel, and stones of similar height keep pumps from leaning.
Keep the tray out of the direct splash cone of the faucet if possible. If it must sit close, prefer a loose-fill layout you can rinse weekly. For a glued decorative tray near heavy splash, 100% silicone kitchen-and-bath sealant beats craft glue because it is formulated for waterproof, flexible bonds in wet interior spaces-a point This Old House emphasizes when choosing caulk for tubs and sinks.
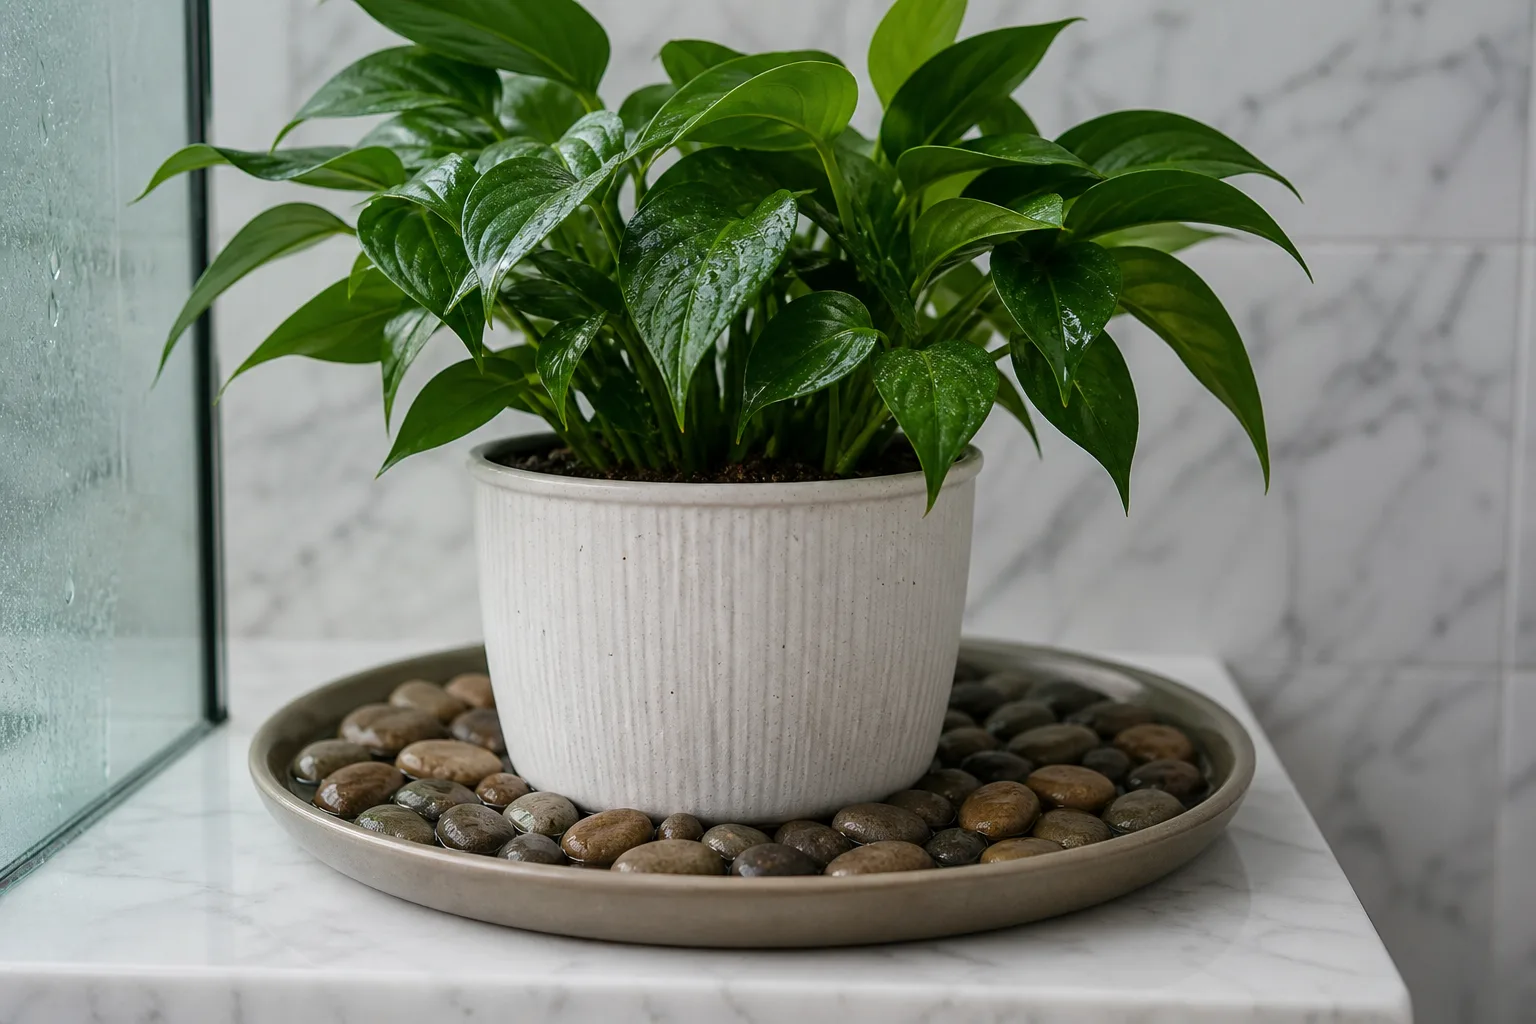
Kitchen Sink Zone Tray
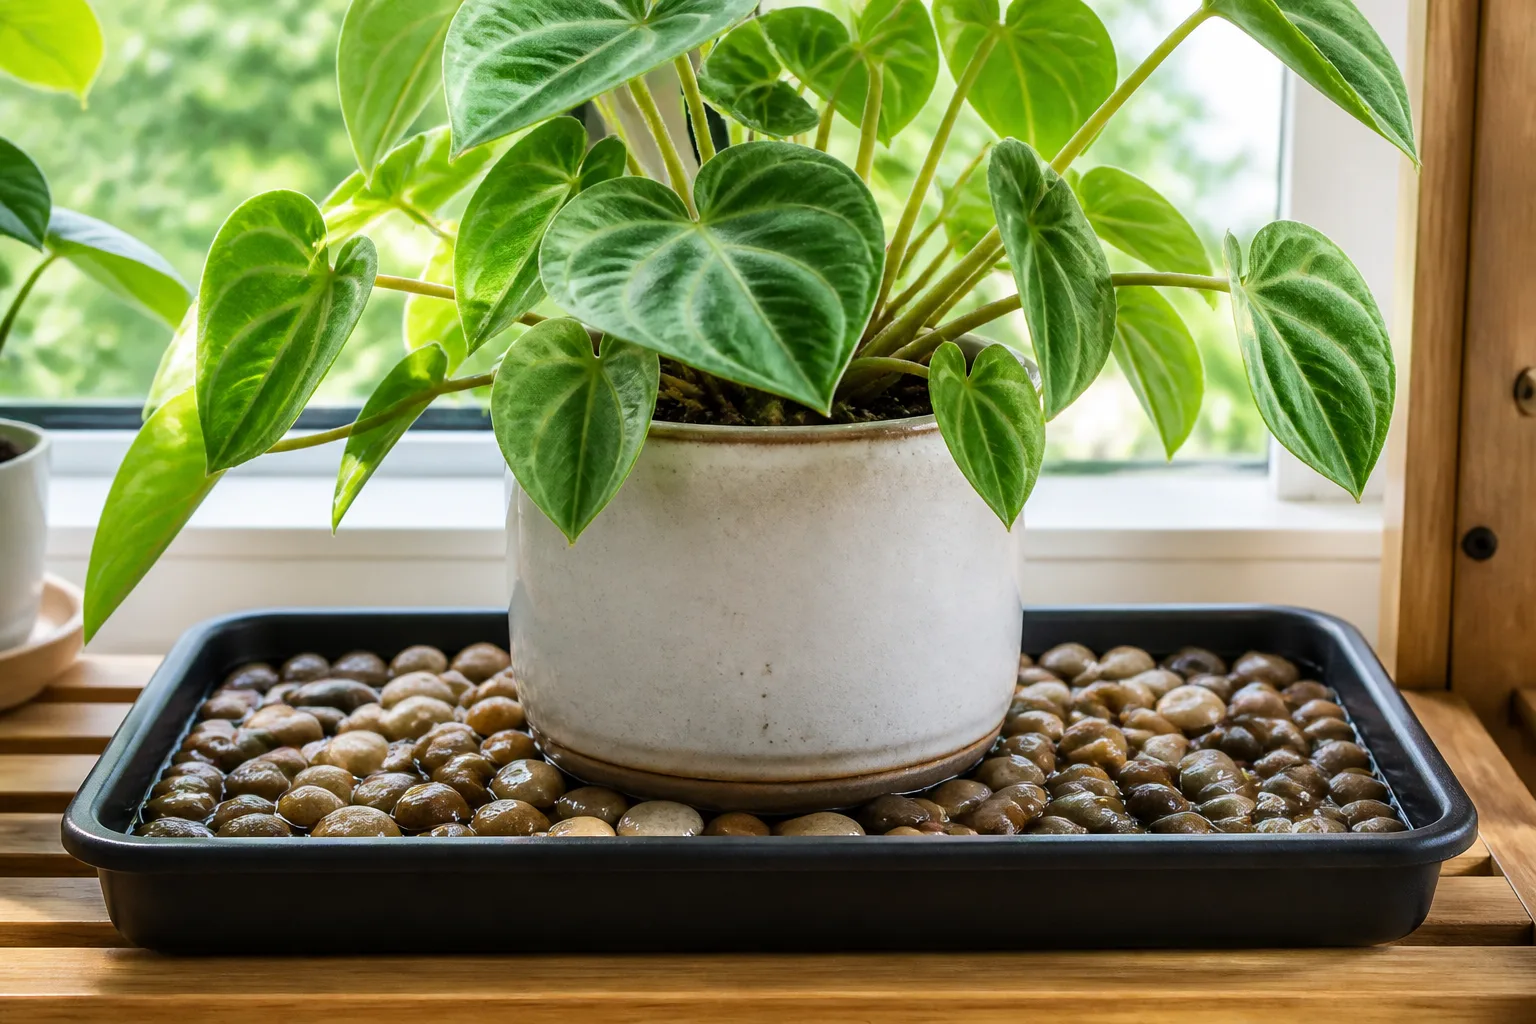
At the kitchen sink, the job is chaos control. Dish soap, hand soap, a scrubber, and a sponge often share one damp, grimy patch. A narrow tray-6 × 10 inches beside a standard sink, or 4 × 14 inches for a front-to-back layout on a deep counter-gives those tools a raised home and protects stone or laminate from the endless damp ring.
Kitchen trays need stronger material discipline. Grease mist, food splatter, and acidic cleaners show up here more than in a bathroom. If the tray sits near food-prep space, use a cured 100% silicone product rated for kitchen and bath. DAP’s technical sheet for its 100% Silicone Kitchen, Bath & Plumbing Sealant notes that when cured and washed, the product meets FDA Regulation 21 CFR 177.2600 for incidental food contact-meaning it is a better fit for a wet kitchen zone than random all-purpose glue. That does not make the tray a food surface or cutting board; it only means the adhesive choice matches how kitchens actually get cleaned.
Stone choice matters too. The Natural Stone Institute recommends mild, non-acidic cleaners because calcareous stone can react badly to acidic solutions. If you clean with vinegar on everything, polished glass pebbles or sealed smooth stone may outlast raw porous rock on a kitchen counter.
Soap, Brushes, Bottles, and Optional Small Plants
The most useful real-world tray often mixes categories: a soap dispenser plus a tiny herb pot by the kitchen window, or bar soap on one side and a ring dish on the other at the vanity. The tray works because it creates one stable, washable base for items that otherwise scatter drips across the room.
There is a hard scope limit. A pebble tray excels in small daily-use zones-one or two pumps, a brush, a sponge caddy, a 4-inch herb pot. It is a poor replacement for full toiletry storage, heavy glass canisters, or anything top-heavy. Think micro-organization, not under-sink backup.
Materials and Tools You Actually Need
| Item | Spec / notes | Approx. cost |
|---|---|---|
| Watertight base tray | 8×12 in (bath) or 6×10 in (kitchen); lip ½–1 in; ceramic, coated metal, or rigid plastic | $6–$14 |
| Decorative pebbles | ½–1½ in polished river rock or glass pebbles; 2–3 lb for 8×12 tray | $5–$10 |
| 100% silicone sealant (if gluing) | Kitchen & bath rated; clear or white | $6–$9 |
| Caulk gun | Standard 10 oz cartridge | $5–$12 (reuse) |
| Nitrile gloves | For glue layout and smoothing | $3 |
| Mild dish soap + brush | Pre-build cleaning | on hand |
| Optional stone sealer | Only for porous natural stone | $8–$15 |
| Rubbing alcohol or denatured alcohol | Wipe tray before silicone (per product label) | on hand |
Tools short list: scissors or utility knife (nozzle trim), toothpicks or craft sticks (spacing), level surface for curing, fan or open window for ventilation during silicone cure.
Base rules: Avoid unsealed terracotta or absorbent wood bases directly on counters-they wick moisture into the surface you meant to protect. A glazed ceramic saucer, enameled tray, or rigid plastic plant saucer works well. Wider bases add stability; deeper lips contain more splash but are harder to wipe around.
Pebble rules: Wash store-bought stones before use. If you collect outdoor rocks, scrub, rinse, and dry completely-outdoor stone can carry algae, grit, and uneven thickness that makes bottles wobble.
Loose-Fill, Glued, or Bath Mat: Pick One Format
| Format | Best for | Pros | Cons |
|---|---|---|---|
| Loose-fill | Plant-adjacent trays, easy deep-clean, rental-friendly | Rinse stones separately; restyle anytime | Stones shift if tray moves often |
| Glued (silicone) | Vanity display trays, fixed soap layout | Stable look; stones stay put | Harder to deep-clean; permanent |
| Pebble bath mat (full counter mat) | Shower exit, large vanity top | Covers more area | Higher stone volume; slower to dry; not ideal tight sink zones |
For most sink-side use, loose-fill wins on maintenance unless you specifically want a permanent styled tray that rarely moves.
Build Method: Three Steps That Work
Step 1: Clean, Dry, and Dry-Fit the Stones
Decide loose-fill or glued before you touch adhesive. Loose-fill is faster and easier to sanitize; glued is better when you want a fixed arrangement that survives daily bumping.
Wash the tray with dish soap, rinse, and dry completely. Wash pebbles the same way-dust and soap residue under stones weaken bonds and look dull. Silicone manufacturers specify clean, dry substrates; trapping moisture under stone is how you invite mold later, which aligns with EPA guidance to dry wet materials within 24 to 48 hours.
Dry-fit the layout: largest stones near the edges, smaller ones filling gaps. Place the actual soap bottle and cup on top and remove any rock that causes wobble. For loose-fill, an even single layer is enough. For glued trays, note which stones touch the rim-they define the finished silhouette.
Step 2: Layout and Adhesive Application
Loose-fill: Spread stones in one even layer, test your objects, done.
Glued: Work in sections. Apply a modest bead of 100% silicone to the bottom of each stone or directly on the tray, press firmly, and leave 1/16 to 1/8 inch gaps for drainage. Do not flood gaps-excess squeeze-out blocks channels and looks messy. GE Advanced Silicone 2 Kitchen & Bath lists 30-minute water-ready exposure on its product page, while DAP’s technical data sheet recommends allowing 24 hours for full cure-follow your specific tube, not a generic rule.
Every few minutes, set your real items on the tray to check stability. Fix leaners while adhesive is still workable.
Step 3: Cure, Water-Test, and Install
Stop touching the tray and let it cure in a ventilated room-silicone off-gasses during cure, and bathroom fans help clear odor without blowing dust onto wet adhesive. After the product’s minimum cure time, run the water-drop test: sprinkle a teaspoon of water on the surface and watch where it goes. It should sink between stones, not pool on a flat cap.
Add non-slip pads under the tray base if your counter is polished stone. Install away from the direct faucet stream when possible. On day one, wipe splashes at night and confirm the tray is dry by morning; if it stays wet for 48 hours with normal use, reduce stone density or switch to loose-fill.
Editorial Build Log: Two Trays, One Week
We built two trays for this guide in a 72°F apartment with normal bathroom and kitchen exhaust fans.
Bathroom vanity tray: 8 × 12 × ¾ inch white ceramic serving tray ( repurposed ), 2.4 lb of ¾ inch polished river pebbles, loose-fill. Holds one soap pump, a toothbrush cup, and a small ring dish. After seven days beside a single vanity sink with twice-daily use, the counter under the tray stayed dry; the pebbles needed a 30-second shake and wipe every three days to prevent soap-film haze between stones.
Kitchen sink tray: 6 × 10 × 1 inch rigid plastic saucer, 1.6 lb of mixed ½–1 inch glass pebbles, glued with DAP 100% silicone in a spaced pattern ( 38 stones ). Cure ran 24 hours with the window cracked. The scrub brush and dish-soap bottle no longer left a gray ring on quartz; grease mist required a weekly hot-water rinse over the stones. Water-drop test on cure day showed drips vanishing into gaps within 2 minutes at room temperature.
Cost snapshot: Bathroom loose-fill ~$14 total; kitchen glued ~$22 including caulk gun amortized over future projects.
These are one editorial test, not universal performance guarantees. Your fan strength, counter material, and splash habits will change drying time-but the dimensional starting points above beat vague “use a shallow tray” advice when you are standing in a store aisle.
Maintenance Schedule and Mold Prevention
| Cadence | Task | Why it matters |
|---|---|---|
| Daily | Wipe visible splashes; lift bottles and check for pooled water | EPA 24–48 hour drying window |
| Weekly | Rinse pebbles or tray base; wipe with mild non-acidic cleaner | Prevents soap scum and biofilm |
| Monthly | Deep-clean: dump loose stones or scrub glued layout; dry fully before reassembly | Stops mold-friendly trapped grit |
| Seasonal | Check caulk edges near sink and tray lip for swelling or dark spots | Catches counter moisture separate from tray |
Early mold warnings on the tray itself: musty smell when dry, black or green specks between stones that return within 48 hours of cleaning, or slime that reappears after a weekly rinse. Surface mold on hard materials can often be cleaned per CDC guidance with soap and water or appropriate cleaners-but if mold keeps returning while the tray stays wet, redesign the layout ( fewer stones, more airflow ) or move the tray to a drier zone.
When a Tray Is Not Enough
Call a plumber or remediation professional when you see mold or swelling under the counter, persistent dampness in the cabinet below the sink, or a leak that continues after tightening fixtures. A pebble tray manages surface drips from daily objects; it does not fix supply-line leaks, failed sink caulk, or hidden wall moisture. The EPA’s mold guidance is clear: clean up mold and fix the water problem, or the mold returns.
If indoor humidity stays above 60% despite ventilation-condensation on windows most mornings, musty closets, or peeling paint near the shower-address room-level humidity with exhaust, dehumidification, or building repairs before adding more water-holding decor anywhere in the room.
Optional Plant Crossover (Brief)
The same tray geometry appears in plant humidity setups: watertight base, stones, water below the pebble line, pot base above standing water. That crossover works when a small humidity-loving plant already lives on a bright bathroom windowsill or kitchen ledge-but the pot must never sit in standing water, or you trade a dry counter for root rot. For plant-specific water depth, sizing, and refill rules, use how to set up a pebble tray and the what is a pebble tray? hub rather than duplicating humidity math here.
Related Guides
- What is a pebble tray? - definition and limits before you build
- How to set up a pebble tray - plant humidity setup when your tray doubles under a pot
- Pebble tray alternatives - when stones are not the right tool
- Pebble tray FAQs - water level, refills, and common mistakes
- DIY pebble tray - cluster hub for humidity-focused builds
- Indoor humidity and pebble trays - room-level context if your bathroom runs dry in winter
Conclusion
The best DIY pebble tray for bathrooms and kitchens is the one that matches how you actually splash, wipe, and ventilate the room-not the one that photographs best. Choose a watertight base sized to your vanity or sink zone, use smooth pebbles of similar height, and prefer loose-fill unless you need a permanently styled layout. If you glue, use 100% silicone kitchen-and-bath sealant, cure it with ventilation, and water-test before loading the tray with daily gear.
Maintain it on a simple schedule: wipe daily, rinse weekly, deep-clean monthly, and treat any tray that stays wet for two days as a design problem. Fix ventilation and leaks at the room level when condensation or cabinet moisture persists-a tray manages counter drips; it does not replace plumbing or mold remediation. For plant humidity crossover, keep one short rule in mind: pot above the waterline, then read the dedicated pebble tray setup guide instead of guessing depth from a sink tutorial.