Tillandsia Propagation: Pup Removal Guide
Tillandsia Propagation: Pup Removal Guide
Tillandsia Propagation: Pup Removal Guide
Tillandsia propagation at home almost always means working with pups - the offsets that form at the base of a blooming mother plant. Unlike succulents you can chop and root on demand, air plants follow a bromeliad life cycle: they bloom once, divert energy into reproduction, produce one or more genetically identical pups, and gradually decline while those pups mature. Your job is not to force propagation on a schedule but to recognize when pups are large enough to survive alone, remove them without tearing tissue, let wounds dry, and keep supporting the mother through her final productive months. Seed starting exists for advanced growers willing to wait years, but pup separation is the method that delivers free plants reliably within a single growing season.
This guide covers the full decision path: why pups appear after bloom, the one-third parent size rule for safe separation, twist versus cut techniques, callusing before you water again, whether to leave pups attached as a clump, how to care for the declining mother plant, and when seed propagation is worth the patience. If you own a single Tillandsia ionantha on a windowsill or a mounted Tillandsia xerographica centerpiece, the biology is the same - only the scale and attachment tightness change.
How Tillandsia Reproduces in Nature and at Home
Tillandsia belongs to Bromeliaceae, the bromeliad family shared with pineapples and many tank-forming epiphytes. Most cultivated air plants are atmospheric tillandsias - they absorb water and nutrients primarily through leaf trichomes rather than a soil root system - though mesic species with more visible roots follow similar pup production rules. In native habitats from Mexico and Central America through the Andes and into Florida, seeds disperse on wind-borne comas while clumping colonies form when pups remain attached through multiple generations. Home propagation mirrors the clumping path far more often than the seed path because pups arrive ready-made with the same trichome structure and water needs as the parent.
Understanding reproduction starts with accepting that bloom triggers the process. A non-blooming juvenile plant may eventually produce pups in rare cases, but the standard home experience is post-flowering offset formation. That is not a bug in your care routine; it is how monocarpic bromeliads allocate resources once their reproductive phase begins. Propagation success therefore depends less on rooting hormone and potting mix - there is no mix - and more on timing, wound hygiene, and airflow after separation.
Monocarpic Life Cycle and Why Pups Appear After Bloom
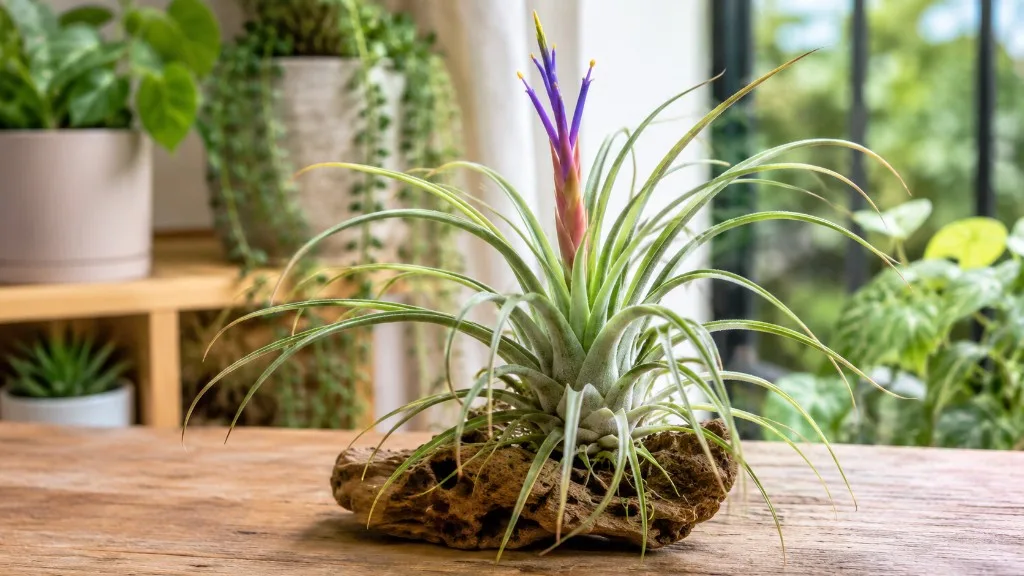
Tillandsia is monocarpic: each individual rosette flowers once, then senesces over months or years while raising pups. The bloom itself can last days on small ionanthas or many months on large xerographicas, during which the plant pours carbohydrates into bracts and flowers. When blooms fade, energy shifts toward pup initials - tiny bumps at the base or tucked between lower leaves that slowly develop their own central growing point. Most species produce between one and eight pups, depending on genetics, age, and how well you maintained light and water through the bloom period.
Pups are not emergency backup plans; they are the intended next generation. In the wild, the fading mother still photosynthesizes and may even contribute stored nutrients while pups enlarge - which is why removing pups too early starves them of both internal reserves and ongoing maternal support. Many guides skip this and jump straight to “twist when big enough.” The size rule exists because premature separation removes a pup before its trichome system and internal water storage can sustain independent soak-and-dry cycles.
Removing the spent inflorescence after flowers die is optional but helpful. A dried bloom stalk no longer photosynthesizes meaningfully and can hold moisture against the crown. Snip the stalk near its base with clean scissors once color fades and bracts crisp - not while flowers are still attractive if you want to enjoy them. This redirects marginal energy toward pup growth without harming the plant. Pollination is only relevant if you want seeds; unpollinated flowers still produce pups in virtually all hobby scenarios.
Pup Propagation Versus Growing From Seed
For home growers, pup separation is the default Tillandsia propagation method because it clones a proven survivor in your conditions, requires no specialized germination setup, and produces a display-sized plant orders of magnitude faster than seed. NC State Extension notes that many Tillandsia reproduce by making pups and that starting by seed is possible but a very slow process. Pups arrive with the same species traits - leaf curvature, trichome density, bloom color potential - as the mother. Seed propagation introduces genetic variation, demands fresh seed and airy substrates, and yields seedlings that may need three to ten years to reach maturity depending on species and culture generosity.
Seeds are not impossible; they are a long project. Bromeliad specialist Mark A. Dimmitt notes that atmospheric tillandsia seed remains viable only weeks under normal conditions unless refrigerated, germinates on open mesh with bright light and constant airflow, and produces seedlings that should not be individually separated until they are large enough to handle without crushing fragile roots. Gardening Australia demonstrated a practical outdoor mesh-pouch method with germination appearing around four months and flowering potentially a decade away. Treat seed as an advanced side quest, not the answer when a friend asks how to multiply a kitchen windowsill ionantha.
When Tillandsia Pups Are Ready to Separate
The most common Tillandsia propagation failure is enthusiasm outpacing biology. Pups look adorable at pea size, and it is tempting to “give them their own home” early. Those micro-pups rarely survive because their leaf surface area cannot yet manage evaporation after soaking, and their base attachment point is still actively importing resources from the mother. Patience here is not passive - you continue normal mother-and-pup care while watching measurable growth week to week.
Readiness is a size threshold plus attachment behavior, not a calendar date. Some ionanthas reach separable size in two months after pup emergence; a xerographica pup may take half a year to clear the bar. Compare pup to parent at the same life stage, not to other species on social media.
The One-Third Rule Explained
Industry consensus - echoed by air plant retailers, extension-style guides, and experienced collectors - holds that pups should reach at least one-third to one-half the parent plant’s size before separation. At one-third, the pup typically has enough leaf mass to photosynthesize independently, a defined central growth point, and a base wide enough to heal when severed. Half-size is safer for slow-growing or unusually small mothers where one-third still looks tiny in absolute terms.
Assess size by overall rosette volume, not leaf count alone. A pup with three short leaves may be one-third of a compact ionantha but nowhere near ready on a sprawling stricta. Hold the cluster side by side at eye level. If the pup looks like a credible miniature of the mother - similar proportions, firm leaves, visible center - you are likely in range. If it still reads as a nubbin with no clear architecture, wait.
The gentle tug test confirms readiness: grasp the pup at its base, stabilize the mother, and apply slow downward pressure. A ready pup releases with modest resistance or a clean twist. If you white-knuckle the mother to avoid tearing her leaves, the pup is undersized or the bond is still vascularly active. Waiting two more weeks beats forcing a tear that damages both plants.
Species That Stretch the Size Guideline
The one-third rule is a guideline, not a law, and species habit matters. Tillandsia caput-medusae and other species with loosely attached pups often separate cleanly slightly earlier because the connection is mechanical rather than deeply fused. Tight-cluster species - many ionantha cultivars, stricta forms - may need to approach half size before a twist will not strip tissue. Large xerographicas produce pups that look small relative to the mother for a long time; use absolute firmness and tug response over visual ratio alone.
Multi-pup clusters sometimes mature unevenly. Remove only the pups that pass the size and tug tests; leave smaller siblings attached until they catch up. There is no requirement to harvest every offset in one session. Staggered separation reduces stress on the mother and gives you backup if one pup struggles after mounting.
Best Timing for Pup Removal and Division
Division timing in Tillandsia propagation means both the pup size threshold above and the seasonal context for healing. Air plants lack true dormancy like temperate trees, but metabolic rate still tracks warmth, light, and humidity. Separating pups during active growth gives wounds faster suberization and pups quicker establishment; winter separation in cold dim rooms works if you adjust drying time upward and avoid enclosed terrariums until callus completes.
Avoid propagation during compound stress: immediately after shipping, mid-mealybug treatment, or while the mother is severely dehydrated. Stabilize hydration first - a 20–30 minute soak, thorough shake-out, full dry within four hours - then proceed when leaves are firm again. Propagation is multiplication, not rescue.
Active Growth Windows for Faster Recovery
Spring through early summer is the ideal pup removal window in most homes. Longer days and temperatures in the 18–27°C (65–80°F) range support callus formation and early pup growth without the rot risk of stagnant winter indoor air. If your plants live under consistent grow lights and stable warmth year-round, calendar season matters less than visible new leaf movement at pup centers.
After separation, hold new pups in Tillandsia light guide with good airflow - the same conditions that kept the mother healthy, minus the first soak until callus finishes. Direct midday sun on a freshly cut base can desiccate tissue before it seals. Morning sun for mesic species accustomed to it is fine once watering resumes. Match timing to your Tillandsia watering guide: if you soak weekly, plan separation a few days before a scheduled soak so you do not instinctively drench a open wound.
How to Remove Tillandsia Pups Safely
Tillandsia propagation tools are minimal: sharp scissors or a thin craft knife, 70% isopropyl alcohol for sterilization, and a dry work surface. Gloves are optional; what matters is clean cuts and stable hands. Work over a towel so dropped pups do not bruise, and label separated pups if you are running multiple species - juvenile tillandsias look alike longer than you expect.
Assess each pup individually. Mixed clusters may yield two ready offsets and one holdover on the same mother. There is no prize for clearing the base in one pass.
Twist Method for Loose Attachments
The twist method suits pups with a narrow connection at the base - common on caput-medusae, bulbosa, and many ionanthas once they reach size. Penn State Extension recommends stabilizing the mother with one hand, grasping the pup firmly at its base where it meets the parent, and applying a firm downward twisting motion until the pup releases. Downward pressure reduces tearing upward through maternal leaves. The pup should come away with its base intact, not a sheared face missing tissue.
If twist produces white stringy tearing instead of release, stop. That is a signal to switch methods or wait longer, not to apply more force. Forcing twists on tight pups creates entry points for rot on both plants. A successful twist leaves a dry-looking scar on the mother and a complete basal plate on the pup - the disk of tissue that will callus and anchor the plant when mounted.
Cutting Method for Tight Clusters
When pups nest deep between overlapping leaves or resist twisting, cutting is safer. Sterilize blades, identify the narrowest connection point, and slice as close to the mother as possible without gouging her tissue. The goal is to sacrifice a thin sliver of maternal base rather than scoop tissue out of the pup. Pup bases contain the meristem; maternal leaf wounds heal more readily than amputated pup centers.
Thin scissors excel in tight gaps; a sharp craft knife handles thick connections on large species. One decisive cut beats sawing, which crushes cells and slows healing. After cutting, inspect both surfaces. Trim any ragged flap on the pup with a secondary sterile cut so the wound face is smooth. Do not rinse under tap immediately - air-dry first.
If multiple pups share a fused base - occasional in clumped ionantha balls - you may divide the cluster into smaller groups rather than isolating every rosette. Fully separating tiny pups from each other can cause more damage than leaving pairs attached until they size up.
Aftercare for Separated Pups
Newly separated pups are not harder to care for than adults; they are smaller reservoirs with fresh wounds. The same soak-and-dry philosophy applies once callus completes, but the error margin on overwatering on Tillandsia is thinner because less leaf mass moves water outward after soaking. Treat the first month as establishment: consistent light, disciplined drying, no fertilizer until you see active new center growth.
Display choice affects drying speed. Open wire holders, cork mounts, and slatted terrarium panels with airflow outperform sealed glass globes immediately post-separation. You can return pups to aesthetic terrariums after wounds heal and a normal soak cycle succeeds without softening at the base.
Callusing the Wound Before Watering
Callusing is non-negotiable in Tillandsia propagation. Both pup and mother need two to three days minimum - often up to a week in humid climates - with no soak, no mist-heavy enclosure, and no terrarium condensation pooling at the cut. Penn State Extension advises allowing plants to dry at least four hours after watering before returning them to enclosed displays. Callus is the dry suberized layer that blocks bacteria from entering trichome-rich tissue. Skipping this step to “help a thirsty pup” is the fastest route to basal rot.
Place separated pups upside down or tilted on a dry rack in bright indirect light so no cut surface touches a wet counter. Mothers stay in their usual spot but skip the next scheduled soak if the wound is still glossy. When the cut face looks matte, tan, and firm to a gentle press, resume normal watering. First post-callus soak should be standard duration - 20–30 minutes for most mesic species, shorter dips for xeric types - followed by the usual aggressive shake and full dry within four hours.
Watch the base for brown spreading softness in the first two weeks. Early rot sometimes stops if you cut back to healthy tissue, re-callus, and improve airflow; advanced rot means discard and learn timing. Success looks like unchanged firm leaves and a pup center that begins producing new inner leaves within a few weeks.
Leaving Pups Attached Versus Dividing
Tillandsia propagation is optional in the sense that pups can remain attached indefinitely, forming natural clumps prized in display culture. A mother fading among her offspring is normal; pups inherit space and slowly overgrow the senescing center. Many growers never separate ionantha balls, letting generations stack into sculptural spheres. Division is a choice driven by gifting, sales, spatial limits, or fear of losing pups when the mother collapses - not a horticultural requirement.
Leave attached when you enjoy the clump aesthetic, the mother is still partially green and photosynthesizing, or pups are unevenly sized. The mother continues contributing until she fully dries; pups accelerate once her shade reduces. Minimal intervention wins here - maintain soak-and-dry rhythm, remove only dead mother leaves that pull away cleanly, and avoid prying pups early just because the center browns.
Divide when you want individual mountable plants, need to quarantine one pup with damage, or the cluster outgrew its holder. Division also makes sense before the mother becomes a mushy decay hazard in a tight terrarium - remove ready pups, discard or compost the spent rosette once it is fully dry and brittle, not when it is still half-green. There is no moral superiority to either path; clump culture is authentic to how tillandsias grow on branches.
Caring for the Mother Plant After Separation
The mother does not vanish when pups leave. She enters monocarpic senescence - a slow fade that can run many months - and may even produce a second flush of pups on some specimens before fully declining. Your role shifts from propagation harvest to hospice-with-benefits: keep her functional while offsets finish sizing.
Removing pups does not kill the mother overnight. Separating only ready pups leaves her with less competition for water at the crown and often extends usable green leaf area. Stripping every pup prematurely, by contrast, wastes energy she already invested and yields weak plantlets.
Watering and Light During Pup Formation
Mother plant care during pup formation mirrors pre-bloom care with extra drying vigilance. Continue bright indirect light and some direct morning sun for species that tolerated it before bloom. Soak on your normal schedule unless fresh separation wounds are healing - mothers with recent cut sites skip one cycle. After bloom, many mothers look slightly wilted; increased watering frequency without improved drying causes crown rot, not revival.
Bromeliad fertilizer at quarter strength during pup formation can support offset growth if you already fertilize lightly; it is optional, not mandatory. Never foliar-feed immediately after pup removal on open wounds. Air circulation matters more than humidity boosts - stagnant moist air around a fading crown invites fungus. If lower leaves brown sequentially from the tip inward while pups stay green, that is typical senescence, not sudden disease.
When the mother is mostly dry and papery but pups are firm, you may remove the spent rosette by hand once it detaches with a gentle tug, or trim it away to prevent moisture trapping. Do not pull a half-green mother apart prematurely; she may still be feeding undersized pups you chose to leave. Document bloom time if you want to predict when future pups from the same species will mature - ionanthas often bloom in one to three years from pup to flower under good light, while xerographicas take longer.
Growing Tillandsia From Seed for Advanced Growers
Tillandsia seed propagation suits collectors who want species unavailable as offsets, enjoy multi-year projects, or can pollinate their own blooms to harvest comas. Seeds are dust-fine, attached to fluffy comas that carry them on wind in nature. Viability drops quickly; Dimmitt advises sowing as soon as possible after collection, with refrigerated storage buying months at best. Store-bought seed packets vary in freshness - germination rate is inherently lower than pup success.
Pollination requires transferring pollen between flowers on blooming plants - often two clones or cross-compatible individuals - before blooms collapse. Unpollinated plants still set pups; they simply will not yield viable seed. If you are not deliberately breeding, ignore seed and focus on pups.
Germination Setup and Substrate Choice
Successful seed germination demands light, moisture, and airflow without sogginess. Soggy organic media grows algae that smothers seedlings. Standard approaches include:
- Plastic window screen or nylon mesh suspended in open flats so seeds sit on mesh with air below and above
- Tree fern fiber chunks or coarse non-decaying substrates that drain instantly
- Flywire pouches (as demonstrated by Gardening Australia) hung in sheltered bright shade with occasional splashing to mimic rain
Sow seeds on the surface; press lightly for contact without burying. Enclose flats loosely to raise humidity while guaranteeing daily air exchange - stagnant plastic tents fail. Temperature 18–27°C (65–80°F) supports germination over weeks to months depending on species freshness. Mist to maintain film moisture, never flood.
Seedlings resemble tiny green threads before maturing into miniature rosettes. Do not separate individuals until they reach roughly 2.5 cm (1 inch) height or the age at which handling will not destroy them - often two to four years in generous culture. Crowded trays can be divided into clumps of several seedlings spread onto fresh mesh rather than single-plant pricking out. Flowering from seed may take five to ten years even under expert care; Dimmitt notes some popular species reach maturity in five years or less with generous light and feeding, but home windowsill culture runs slower.
If that timeline does not excite you, return to pup propagation - that is what most of the tillandsia world runs on, and it is the method this article recommends for practical multiplication.
Conclusion
Tillandsia propagation rewards patience and clean technique more than gadgetry. Let pups reach one-third to one-half the parent size, confirm readiness with a gentle tug, twist loose offsets or cut tight ones with sterile blades toward the mother, and callus both plants two to three days before the next soak. Support the fading mother with normal light, disciplined drying, and optional light fertilizer while she finishes her cycle. Leave pups attached when clumps serve your display; divide when you want individuals to mount, gift, or replace a senescing center before it traps moisture.
Seed starting belongs in the advanced tier - fresh seed, airy mesh, years of waiting - while pup removal remains the reliable path from one air plant to many. Mark bloom dates, photograph size comparisons, and adjust timing by species rather than copying a single calendar from a forum post. Done correctly, each bloom becomes not an ending but a handoff: the mother exits, the pups carry forward, and your collection grows without another checkout cart.
When to use this page vs other Tillandsia guides
- Tillandsia overview - Start here for whole-plant context before deep-diving this topic.
- Tillandsia problems hub - Jump to symptom-specific fix guides when this care topic does not resolve the issue.
- Stem Rot on Tillandsia - Escalate here when propagation adjustments are not enough.