Tillandsia Fertilizer: When, How, and Mistakes to Avoid
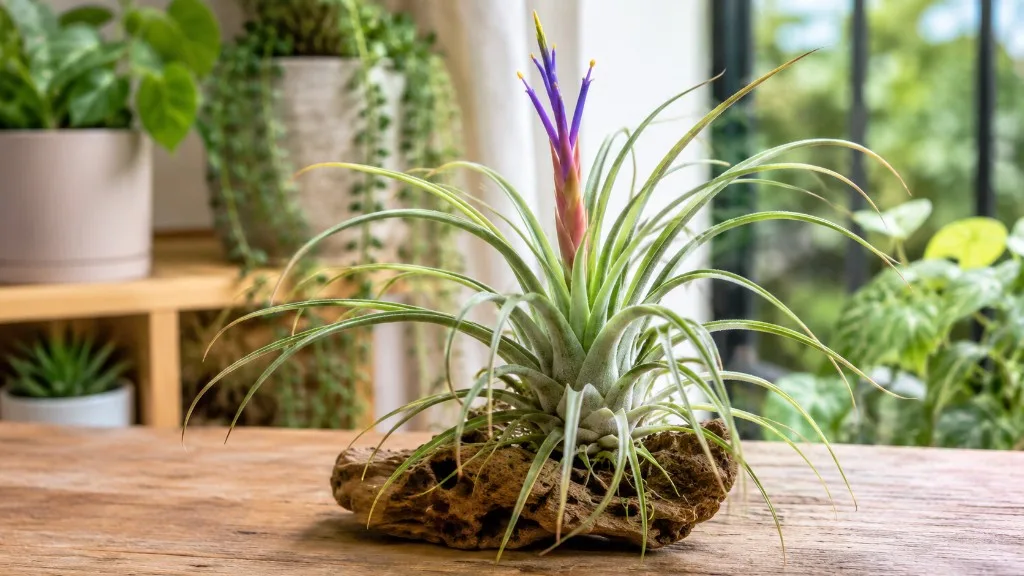
Tillandsia Fertilizer: When, How, and Mistakes to Avoid
Tillandsia Fertilizer: When, How, and Mistakes to Avoid
Tillandsia fertilizer is one of the few care topics where doing less, more carefully, beats doing more with the wrong product. Air plants in the genus Tillandsia are epiphytes - they do not root into soil and pull nutrients the way a potted fern or philodendron does. Instead, specialized leaf structures called trichomes absorb water and dissolved minerals directly from rainfall, humidity, and organic debris in their native canopy habitats. That biology changes everything about how you feed them. A standard houseplant fertilizer at label strength, especially one heavy in urea nitrogen, can coat trichomes with salts, burn leaf tissue, and stall growth long before you notice the damage.
The practical goal for most home growers is straightforward: use a bromeliad or air-plant-specific liquid fertilizer formulated without urea, dilute it to one-quarter of the label strength, add it to soak water once a month during the active growing season (spring and summer), and pause entirely in late fall and winter. Hydrate the plant with plain water first if it is dry. After the fertilized soak, shake off excess moisture and dry the plant upside down so no liquid pools in the crown. Skip feeding while a plant is stressed, dehydrated, or pushing a bloom spike if you want the flowers to last.
This guide covers when to fertilize, which formulas work, how to dilute and apply them safely during a soak bath, how to read under-feeding versus burn, and the mistakes that cause more damage than skipping a month ever would.
Why Fertilizer Matters for Tillandsia
Tillandsia can survive for years on water and bright light alone. That survival fact leads many growers to assume fertilizer is optional decoration - something you add when you remember, with whatever bottle is already on the shelf. Survival and thriving are different outcomes. Without periodic nutrients, most indoor air plants hold their size, color, and shape for a long time but slow pup production, shorten bloom cycles, and produce smaller new leaves than well-fed specimens of the same species.
In nature, Tillandsia receives a steady trickle of dissolved minerals from rainwater filtered through forest canopy, bird droppings, decaying leaf litter, and dust. Indoors, tap water, distilled water, and reverse-osmosis water carry little or none of that background nutrition. Distilled and RO water are excellent for avoiding mineral deposits on trichomes, but they also remove the incidental feeding wild plants get. A light, consistent foliar feed during active growth replaces a fraction of what the canopy used to supply - enough to support offset (pup) formation, stronger inflorescences, and faster leaf replacement without pushing the plant into the salt-stress zone.
Think of feeding as maintenance for a healthy, actively growing air plant - not a rescue tool for a Tillandsia that is browning because it never dries properly, sits in a dark hallway, or was glued into a terrarium with no airflow. Fix hydration, light, and drying first, then add nutrients on a conservative schedule. Quarter-strength bromeliad formula in soak water once a month matches how Tillandsia handles foliar nutrition far better than full-strength general-purpose plant food sprayed on dry leaves.
The New York Botanical Garden Plant Information Service recommends a bromeliad fertilizer or acidic formula at quarter strength, applied with a sprayer or at low concentration in water, and explicitly warns to avoid fertilizers containing boron, copper, or zinc, which damage air plants (NYBG - Tillandsia re-bloom fertilizer). That guidance aligns with how trichomes work: they are efficient absorbers and equally efficient at trapping anything toxic or too concentrated at the leaf surface.
When to Fertilize Tillandsia: Active Growth vs Rest
Timing follows the plant’s metabolism more than the date on the calendar. Feed when Tillandsia is actively producing new leaves, roots, or pups, and stop when growth slows sharply. Outdoors in frost-free climates, that rhythm tracks warm weather and long days. Indoors, heated rooms and bright windows extend the window - but most collections still slow noticeably in late fall and winter even when leaves look green.
A Tillandsia on a windowsill in January may appear unchanged while its internal growth rate has dropped. Feeding on a summer schedule through short-day months stacks unused nutrients on leaf surfaces and in the limited water held by trichomes. The result is often tip burn, washed-out silvering, or a stalled spring comeback - problems that look like “my air plant hates fertilizer” when the real issue was timing.
Spring and Summer Feeding Window
Start feeding when you see fresh growth - new leaves emerging from the center, active root tips on mounted plants, or pups enlarging at the base. In temperate climates with indoor collections, that usually means mid-spring through late summer, roughly March through September depending on your light and room temperature. Species from warmer native ranges may wake earlier under grow lights; xeric types with pronounced rest periods may accept food for a shorter window.
During this active window, one fertilized soak per month at quarter strength is the default most experienced growers use. Penn State Extension recommends diluting liquid bromeliad or orchid fertilizer to one-fourth the label rate and applying it monthly during regular watering - not weekly, not with every soak - because nitrogen accumulates on foliar surfaces faster than rooted plants can flush salts. If you also mist between soaks, keep those sessions plain water unless you have deliberately reduced fertilizer frequency elsewhere.
| Month (temperate indoor climate) | Growth phase | Feeding guidance |
|---|---|---|
| March–April | Waking up, new leaves | Start monthly quarter-strength soak when growth is visible |
| May–August | Peak growth, pup development | One fertilized soak per month; plain water soaks between |
| September | Slowing slightly | Optional final light feed if still growing, then taper |
| October | Wind-down | Skip fertilizer; plain water only |
| November–February | Low growth indoors | No fertilizer for typical room-grown plants |
The table is a framework, not a law. A Tillandsia ionantha cluster under strong grow lights in July may metabolize faster than a T. xerographica in the same room. Watch the plant: if it is building new tissue steadily and drying fully between soaks, the timing is right. If it is static, solve light and hydration before adding food.
Fall Taper and Winter Pause
Taper feeding in early fall as day length drops and room temperatures cool. One practical approach: give a final quarter-strength soak in early fall if you still see new growth, then stop entirely from late fall through winter. Most indoor Tillandsia do fine with no fertilizer from November through February, especially in cooler rooms or lower light.
Winter rest is not full dormancy for every species, but metabolic demand drops across most common retail air plants. Feeding a plant that is not building tissue concentrates salts on trichomes that stay closed longer in cool, dim conditions. That is an easy path to brown leaf tips and stiff, brittle foliage.
Exception: if you grow under strong supplemental grow lights and the plant keeps producing pups or center leaves all winter, you can feed lightly - still at quarter strength - but extend the interval to every six to eight weeks and watch closely for white residue on leaves. Even then, skipping winter feeds is safer than forcing growth with nutrients the plant cannot use.
Best Fertilizer Type for Tillandsia
The best Tillandsia fertilizer for most homes is a low-nitrogen, non-urea liquid formula labeled for bromeliads, Tillandsia, or air plants. You want nitrogen in forms Tillandsia can absorb directly through trichomes - primarily ammonium and nitrate - plus moderate phosphorus and potassium to support blooming and pup development. Micronutrients on the label matter, but so does what is not on the label: copper, zinc, and boron are toxic to bromeliads at concentrations many general fertilizers use without warning.
Avoid shopping by the cheapest “all-purpose” bottle unless you have read the entire label and confirmed nitrogen sources and micronutrient content. A dedicated bromeliad formula diluted correctly outperforms most houseplant products applied at any strength.
Bromeliad and Air-Plant Formulas
Bromeliad fertilizer is the standard recommendation across botanical institutions and specialty growers because Tillandsia belongs to the Bromeliaceae family and shares its foliar feeding biology. Products marketed for air plants or Tillandsia are typically pre-diluted foliar sprays or concentrates designed for trichome absorption - convenient if you want zero mixing math, but not required if you understand dilution.
Low-nitrogen bromeliad feeds are preferred because excess nitrogen can push leaf growth at the expense of flowering and offsets - the two outcomes most collectors actually want from fertilizer (NYBG tillandsia fertilizer guidance).
Orchid fertilizer can work as a substitute if it meets the same criteria: non-urea nitrogen, no copper, no zinc, no boron, and diluted to quarter strength. Many orchid formulas are already gentler and foliar-friendly, but the label still deserves a full read. “Orchid” on the front of the bottle does not automatically mean urea-free.
Application methods fall into two main categories:
- Soak method (recommended for most growers): Add quarter-strength fertilizer to room-temperature soak water, submerge plants 15–30 minutes, shake dry, dry upside down.
- Mist method: Spray leaves until thoroughly wet, once monthly, after a plain-water hydration - useful for mounted specimens you cannot submerge easily.
Do not combine a full fertilized soak and a fertilizer mist in the same week. That is a common path to nitrogen burn even when each method alone would be safe.
Why Urea-Heavy Fertilizers Fail on Air Plants
Urea-based nitrogen is the single most important ingredient to avoid in Tillandsia fertilizer. Urea is common in inexpensive all-purpose plant foods because it is cheap and concentrated. In soil-grown plants, soil bacteria convert urea into ammonium and then into forms roots can absorb. Tillandsia is not planted in soil and does not have that bacterial conversion layer. Urea applied to trichomes largely sits unavailable or concentrates as salts on the leaf surface - burning tissue while providing little usable nitrogen (Bromeliad Society of Houston).
Check the label’s nitrogen source line. You want ammoniacal nitrogen, nitrate nitrogen, or calcium nitrate. You do not want urea or urea-form listed as a primary source. Fish emulsion and other organic feeds that depend on microbial breakdown in soil are equally poor fits for the same reason - the biology is wrong for an epiphyte.
Beyond urea, watch for copper, zinc, and boron in micronutrient blends. NYBG and multiple bromeliad specialists flag these as damaging to air plants even at low doses (NYBG - Tillandsia re-bloom fertilizer). General “complete” fertilizers often include copper and zinc because terrestrial houseplants tolerate them. Tillandsia does not.
How Much Tillandsia Fertilizer to Use
If you remember one number, make it quarter strength - one-fourth of whatever the label recommends for the product’s intended use, even when that intended use is already “bromeliad” or “orchid.” Penn State Extension advises diluting liquid fertilizer to one-fourth the recommended rate for monthly tillandsia feeding.
Houseplant and bromeliad labels assume a range of application methods and species tolerance. Tillandsia sits in the light feeder category with high sensitivity to concentration errors because nutrients contact absorptive tissue directly with no soil buffer. Cutting the label rate to one-quarter is the safest default for soak-water feeding during active growth. Some cautious growers use one-eighth strength on xeric species with dense trichomes or on plants recovering from prior burn.
Example: if the bottle says 1 teaspoon per gallon for bromeliads, use ¼ teaspoon per gallon for Tillandsia. If it says 4 pumps per quart for foliar spray, use 1 pump per quart unless the product is pre-diluted for direct application. Measure with a syringe or measuring spoon - inconsistent dilution is how experienced collectors still lose plants.
For a final fall feed, quarter strength is enough. Go weaker still if you see white crust on leaves, stiff brown tips after the last feed, or a plant that took longer than usual to dry. Pale, slow new growth usually means light or hydration stress, not hunger.
How Often to Feed Tillandsia
Frequency should follow growth rate, species type, and salt management - not enthusiasm about your new fertilizer bottle.
For most indoor Tillandsia collections:
- Once per month with quarter-strength bromeliad formula in soak water from mid-spring through late summer
- Every six to eight weeks in early fall if growth is still visible, then stop
- No fertilizer from late fall through winter for typical room-grown plants
- Optional light feed every six to eight weeks only if plants keep actively growing under bright light or grow lights in winter
- Plain water soaks on the normal weekly or biweekly schedule between fertilized soaks
That monthly rhythm beats fertilizing at every soak for most owners because even quarter-strength nutrients stack on trichomes when applied four times a month. Tillandsia responds to a clear monthly feeding window and plain water between feeds far better than constant low-level exposure.
| Situation | Suggested frequency | Strength |
|---|---|---|
| Active growth, bright light, mesic species | Once monthly | Quarter label strength in soak water |
| Active growth, moderate light | Once monthly | Quarter strength; watch for salt crust |
| Xeric species (T. xerographica, T. tectorum) | Once monthly max | Quarter strength; shorter soak (15–20 min) |
| Early fall, slowing growth | Once, then pause | Quarter strength |
| Winter indoors, low light | Skip | - |
| Winter under grow lights, new pups forming | Every 6–8 weeks | Quarter strength |
| During bloom (flowers open) | Skip or pause | Resume after bloom fades |
| Recovering from over-fertilizing | Pause 6–8 weeks | Plain water soaks only |
| Newly acquired or stressed plant | Wait 4 weeks | Then resume quarter strength |
The table is a starting framework. Your room humidity, mounting style, water quality, and species mix matter. Collections in hard tap water carry a double mineral load - if you see tip burn while feeding modestly, switch to filtered or rainwater for all soaks before increasing fertilizer.
Step-by-Step: Fertilizing During a Soak Bath
The soak method is the most reliable way to deliver even, dilute nutrients across all leaf surfaces - especially for ball-shaped species and clustered ionantha types where misting misses the inner leaves. Safe feeding is mostly about order of operations: hydrate first, dilute correctly, soak for the right duration for your species, then dry aggressively.
Here is a reliable routine:
- Check the calendar and the plant. Confirm you are inside the active growth window and see new leaves, roots, or enlarging pups. If it is winter and nothing is growing, stop here.
- Inspect for brown tips or white crust on leaves. Salt residue or recent tip burn means skip feeding and use plain water soaks only for the next month.
- Hydrate with plain water first if the plant is dry. A dehydrated Tillandsia takes up concentrated solution too fast and burns. If the plant already had a plain-water soak within 24 hours and trichomes are open and supple, proceed.
- Mix bromeliad or air-plant fertilizer at quarter strength in room-temperature water in a bowl or basin large enough to submerge the plants.
- Submerge fully for 15–30 minutes (mesic types toward 20–30; xeric types toward 15–20). Gently swish to release trapped air bubbles.
- Remove, shake off excess, and dry upside down on a towel for several hours until no moisture pools at the base.
- Mark the date so you do not fertilize again until next month - even if you water with plain soaks in between.
Morning or midday feeding works well because the plant has hours of light and airflow ahead to complete drying. The quarter-strength rule and full drying matter more than the clock.
Pre-Soak Checks and the Quarter-Strength Rule
Before every fertilized soak, run a quick three-point check: hydration status, leaf surface condition, and season.
Hydration status comes first. Pick up the plant. If it feels brittle, unusually light, or looks gray and tightly closed, give a plain-water soak and wait at least a day before fertilizing. Trichomes on a well-hydrated plant are open and receptive; on a dry plant they are closed and vulnerable to salt shock.
Leaf surface condition tells you whether prior feeds are still cycling through. White chalky residue, stiff brown tips, or dark translucent patches at the base mean hold food and flush with plain water soaks for several weeks. Healthy Tillandsia leaves feel firm and look clean aside from normal trichome silvering.
Season is the gatekeeper. Active growth gets one monthly feed. Slow winter metabolism gets plain water. That discipline is what separates collections that bloom and pup reliably from collections that slowly brown at the tips year-round.
Signs Your Tillandsia Is Under-Fed
Under-fertilizing is real but less common than over-fertilizing among indoor Tillandsia growers, especially when plants arrive from nurseries that fed them recently. Most “hungry” diagnoses are actually insufficient light, incomplete drying, or normal post-bloom decline.
When a plant truly needs more nutrients, signs are gradual and appear across new growth and reproductive effort:
- Slower pup development during peak spring and summer despite good light and proper drying
- Smaller new center leaves than the previous generation on the same plant
- Pale or washed-out foliage color beyond normal species variation, on new tissue only
- Weak or short-lived inflorescences on species that should bloom robustly when mature
- Overall static size for multiple growing seasons with no offsets forming
If older outer leaves brown while the center looks fine, suspect natural senescence, underwatering on Tillandsia, or rot from poor drying before fertilizer. Tillandsia sheds lower leaves periodically; that is not automatically a nutrient call.
When you do adjust feeding, add one extra quarter-strength soak in mid-summer - not double concentration and not weekly feeds. Tillandsia responds to modest frequency adjustments more safely than concentration spikes.
Signs of Over-Fertilizing and Leaf Burn
Over-fertilizing is the most common fertilizer mistake on Tillandsia, and it shows on leaves within days to two weeks because foliar feeding bypasses the soil buffer entirely. Symptoms include:
- Brown or black leaf tips that spread inward after a feed
- White crust or crystalline residue on leaf surfaces, especially along edges
- Dark water-soaked patches at the base where fertilizer solution pooled
- Sudden leaf loss from the center or base after an aggressive soak
- Stiff, brittle leaves that feel over-salted and no longer flex normally
- Silver trichomes turning dull gray-brown uniformly rather than in isolated sunburn patches
Nitrogen burn from feeding too often or at too high a strength is the usual cause. Using urea-heavy general fertilizer accelerates the damage because the plant cannot metabolize the nitrogen but still absorbs the salts. Combining fertilized soaks and fertilizer mists in the same month produces similar results.
If you are unsure whether brown tips come from fertilizer or dehydration, trace the timeline. Fertilizer burn typically follows a feed within two weeks and may show white crust. Dehydration browning usually follows a missed soak or incomplete drying and feels preceded by a lighter, more wrinkled plant.
How to Recover Tillandsia After Over-Feeding
Recovery is possible if the center meristem is still healthy, but burned leaf tissue does not heal - you are waiting for new growth while you flush salts from trichomes.
- Stop all fertilizer immediately. Switch to plain water soaks only for six to eight weeks minimum.
- Soak in room-temperature plain water for 20–30 minutes, shake, and dry upside down - repeat on your normal Tillandsia watering guide. Each plain soak leaches surface salts.
- Improve airflow during drying. A fan on low speed or an airy rack speeds recovery.
- Trim fully dead leaves with clean scissors only if they pull away easily or are completely dry; do not cut into living tissue.
- Resume fertilizer at quarter strength only after new center growth looks normal for two to four weeks - one monthly feed, no mist supplementation the first month back.
Badly burned plants may survive on a single tiny pup while the parent declines. If that happens, focus recovery on the pup with plain water and delay feeding until it establishes.
Seasonal and Situational Adjustments
Beyond the monthly spring-summer rhythm, a few situations call for deliberate pauses or tweaks. The theme is the same: feed growing tissue, not resting or stressed tissue.
After shipping or purchase: Wait three to four weeks before the first fertilizer soak. Plants need to acclimate to your light and humidity; the nursery may have fed recently.
After mounting or gluing: Wait until you see new root activity or center growth - often four to six weeks - before feeding. Stressed plants do not use nutrients efficiently.
During open bloom: Many growers pause fertilizer from bud formation until flowers fade to extend bloom life. NYBG notes that while some feeding can support rebloom attempts, individual plants rarely rebloom on the same rosette; pups are the practical path to future flowers (NYBG - Tillandsia re-bloom fertilizer).
Hard water households: If tap water leaves mineral spots on glass and plants, use filtered or rainwater for all soaks and reduce fertilizer concentration slightly. Mineral plus fertilizer salt doubles the trichome burden.
Mesic vs Xeric Species and Inflorescence Pause
Not every Tillandsia species uses nutrients at the same rate. Mesic types - greener, less silvery species from humid forests like T. bulbosa and many T. ionantha forms - have fewer but more open trichomes and often accept slightly longer soaks (20–30 minutes). Xeric types - heavily silvered desert species like T. xerographica and T. tectorum - store water in dense trichomes and are more prone to rot and salt trapping with long soaks. Keep xeric fertilized soaks to 15–20 minutes and err on the weaker end of dilution.
Within a mixed collection, one calendar reminder for “fertilizer soak day” still works if you adjust soak duration per species rather than concentration. Never compensate for a short soak by doubling fertilizer strength - that targets the wrong variable.
When a plant is blooming or budding, pause feeding unless you are deliberately pushing pup production on a non-blooming offset. The inflorescence is a metabolic peak; adding nitrogen can shorten flower duration. Resume monthly quarter-strength soaks after the bloom dries and you remove the spent spike.
Fertilizer and Other Tillandsia Care
Fertilizer only matters when light, water, and drying are already in range. Tillandsia in Tillandsia light guide or filtered direct sun uses nutrients to build pups and replace leaves. The same plant in a dim bathroom uses almost nothing and burns easily if fed on a summer schedule year-round.
Light drives the whole system. Under strong light, monthly quarter-strength feeds support visible pup and leaf growth. Under marginal light, even perfect fertilizer produces little new tissue while salts accumulate.
Watering rhythm must stay independent of feeding. Fertilizer does not replace soaks or misting. The standard pattern is weekly or biweekly plain-water hydration with one fertilized soak per month during the growing season - not fertilizer at every soak.
Drying is non-negotiable after every soak, fertilized or not. Pooling water at the base causes rot that fertilizer cannot fix and often accelerates when nutrient solution sits against meristem tissue.
Temperature modulates uptake. Warm spring and summer conditions support monthly feeding. Cool winter rooms slow metabolism - another reason to pause.
Common Tillandsia Fertilizer Mistakes
Most fertilizer damage comes from a short list of repeatable errors. Avoiding these does more for your collection than upgrading to a premium bottle.
Using general houseplant fertilizer at full or half strength. Even half of a urea-heavy label rate is too much for foliar feeders. Use bromeliad or air-plant formula at quarter strength.
Feeding every soak. Monthly is enough during active growth. Weekly fertilized soaks stack nitrogen on trichomes and produce tip burn even at low concentrations.
Fertilizing dry plants. Always hydrate first. Dry trichomes absorb concentrated salts too quickly.
Combining soak and mist fertilizer in the same month. Pick one delivery method per feed cycle.
Ignoring urea, copper, and zinc on the label. The wrong chemistry hurts more than the wrong schedule.
Feeding in winter on a summer calendar. Pause when growth pauses.
Skipping the upside-down dry after a fertilized soak. Pooled solution at the base concentrates salts against the meristem.
Expecting fertilizer to fix rot, sunburn, or dehydration. Nutrients support healthy plants; they do not reverse cultural damage.
Conclusion
Tillandsia fertilizer is not about feeding more - it is about feeding correctly through the leaves the plant actually uses. A non-urea bromeliad or air-plant formula at quarter strength, added to soak water once a month during spring and summer, gives most collections enough nitrogen, phosphorus, and potassium to pup, bloom, and replace leaves without the salt damage that ruins trichomes. Pause in fall and winter, skip stressed and blooming plants, hydrate before you feed, and dry thoroughly after.
If your air plants look static, check light and drying before you reach for stronger fertilizer. If tips brown after a feed, flush with plain water soaks and wait six to eight weeks before trying again at the same quarter strength - not higher. Tillandsia tolerates a skipped month far better than it tolerates a doubled dose. Get the product chemistry right, keep the concentration low, and let the growing season tell you when to start and stop.
When to use this page vs other Tillandsia guides
- Tillandsia overview - Start here for whole-plant context before deep-diving this topic.
- Tillandsia problems hub - Jump to symptom-specific fix guides when this care topic does not resolve the issue.
- No Flowers on Tillandsia - Escalate here when fertilizer adjustments are not enough.