Stem Rot and Base Decay on Hornwort: Causes, Checks & Fixes
Quick answer
Root rot on Hornwort means mushy buried stem bases and decaying tissue-not wet potting soil. Ceratophyllum has no true roots. First step: remove weights, trim mushy bases back to firm green tissue, and float healthy tops in clean tank water.
Stem Rot and Base Decay on Hornwort: Causes, Checks & Fixes
This guide covers root rot on Hornwort. See also the general Root Rot guide, watering, and light pages for this plant.
Stem Rot and Base Decay on Hornwort: Causes, Checks & Fixes
Quick answer
When aquarium keepers search root rot on Hornwort (Ceratophyllum spp., coontail), they usually mean mushy stem bases, bare lower stems, and decaying tissue in the water-not brown roots in potting mix. Hornwort has no true roots and absorbs nutrients from the water column through stems and whorled leaves. Unpotting, Hornwort repotting guide into drainage mix, or stopping watering cannot fix a rootless submerged plant.
First step: remove anchor weights or buried sections, trim every mushy base back to firm green tissue, and float healthy tops in clean tank water. Test ammonia if decay was advanced, and do a partial water change if readings are elevated. Do not bury stems deeper to stabilize the bunch.
”Root rot” on hornwort is not houseplant root rot
Houseplant root rot means saturated soil starving roots of oxygen. Hornwort never grows in a pot with drainage holes. Penn State Extension describes coontail as lacking true roots and growing very loosely anchored or floating freely in freshwater. UC Davis notes that roots are lacking on Ceratophyllum demersum; modified basal structures called rhizoids grip sediment loosely but do not function as a nutrient-absorbing root system.
For hornwort, “root rot” maps to stem-base decay:
- Buried stems in gravel, sand, or aquatic soil that go anaerobic underground
- Constricting weights, rubber bands, or ties that trap moisture and crush tissue at the bind point
- Foul water and decaying biomass that softens stems and spikes ammonia
- Dense mat layers where shed needles compost anaerobically against the substrate
Knocking a plant out of a pot to inspect pale roots is meaningless here. Your diagnostic workflow starts at stem bases, anchor method, and water tests-not soil moisture at the surface.
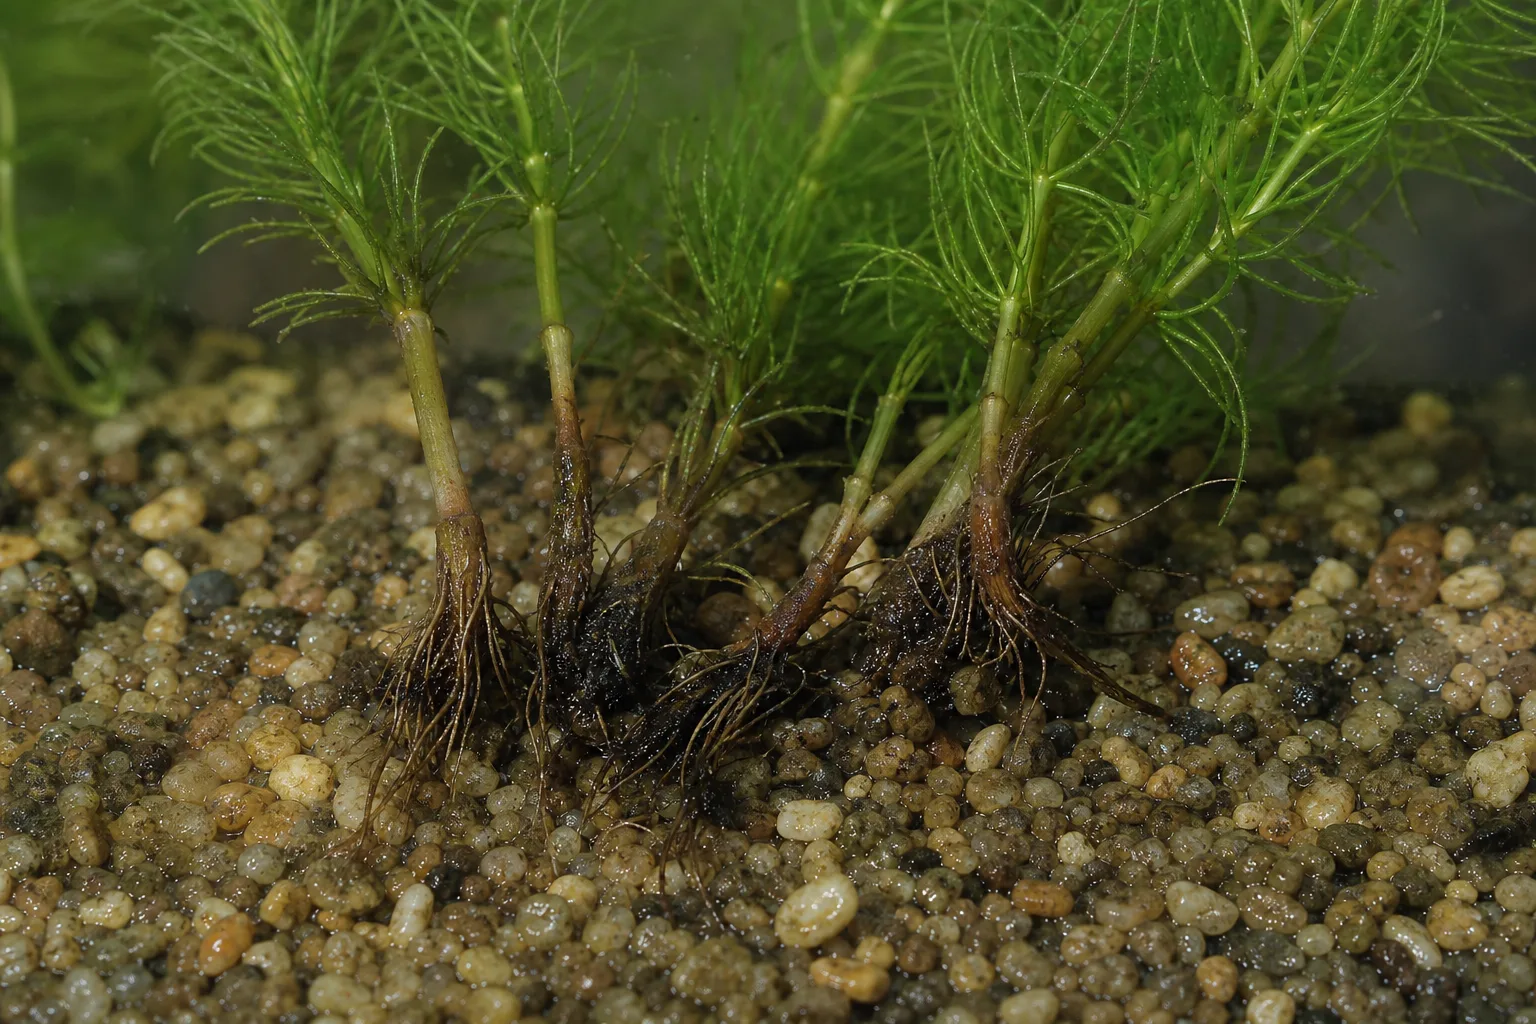
What stem-base decay looks like on Hornwort
Stem rot on hornwort follows predictable visual signatures that differ from terrestrial root rot.
Root Rot symptoms on Hornwort - compare with healthy tissue on the same plant.
Early signs
- Mushy, brown, or translucent tissue at the lowest inch of anchored or weighted stems
- Bare stringy lower stems with bushy green tips still attached-the classic “failed planting” silhouette
- Slimy feel when you gently pinch the base underwater; healthy tissue stays firm
- Stem shedding needles faster than normal acclimation, concentrated at the rotting base
- Weight or tie slipping because decay weakened the hold point
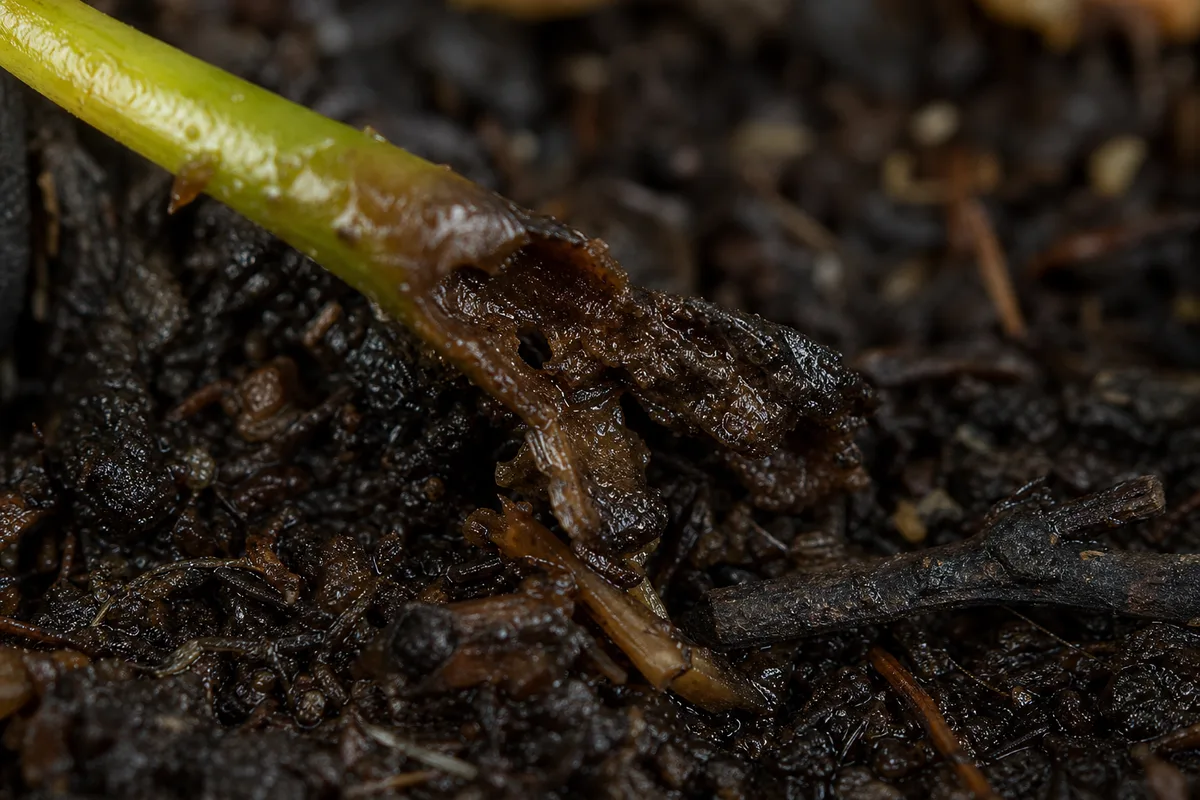
Advanced signs
- Foul or sour smell when you lift the bunch or disturb debris under a floating mat
- Ammonia or nitrite above 0 ppm on liquid tests after significant tissue breakdown
- Total stem collapse-green tips detach and float away as the connection rots through
- Cloudy water that persists after filtration when decay outpaces cleanup
- Blackened or dissolving stem sections that break apart when handled
Healthy contrast: Firm green whorls along the full length of floating stems, slow needle loss only in the first one to two weeks after purchase, and new side shoots forming within days on drifting portions.
Floating hornwort fails differently from anchored hornwort. Floating masses usually rot when debris composts under a dense canopy or stems get pinned above the waterline. Anchored bunches fail at the weighted or buried base first while upper whorls look fine-until the stem severs.
Why Hornwort stems rot
Buried stems and anaerobic decay
The most common trigger is burying living hornwort tissue in substrate the way you would plant Anacharis or a sword. Hornwort is not built for subterranean stem life. Buried soft tissue is cut off from light and flow, goes anaerobic, and decays-regardless of whether the gravel is inert or premium aquasoil. Rutgers FS1236 notes coontail reproduces from fragments but does not tolerate buried stem tissue; rot spreads upward and releases ammonia into the water column.
Even “just the bottom inch” buried is risky in warm, nutrient-heavy, or low-flow tanks where decay outpaces new growth. The safe planted look keeps all living stems above the substrate line with only a weight resting on gravel.
Constricting weights and poor anchoring
Store bundles often arrive rubber-banded or zip-tied tight. Those constrictions trap moisture, score stems, and create a rot point exactly where the tie sits. Metal twist ties and crushed ceramic weights cause the same failure. Remove every shipping wrap before anchoring, and clip weights snugly but not so tight that stems cannot breathe in open water.
Foul water and organic overload
Decay does not require burial. Shed needles, uneaten food, and mushy fragments on the substrate break down and load the water with organics. Maryland DNR documents that coontail drops fragments and senesces rapidly when conditions shift-fast decomposition is normal for the species but foul in a small closed aquarium if you do not vacuum debris. Column-feeding hornwort sits in the same water quality as the decay; when ammonia climbs, stem tissue softens.
Turtle tanks, goldfish setups, and overstocked community tanks accelerate this pattern. Warm water, shredding, and leftover food compound under gravel faster than hornwort can export nutrients.
How to confirm the cause
Work through these checks before blaming light, fertilizer, or disease:
- Stem-base inspection - Pull the bunch gently. Mushy, brown, or translucent lowest inches confirm rot. Firm green bases on floating stems point away from burial rot.
- Anchor method - Are living stems buried in gravel or sand, or only a weight on top with tissue exposed? Check rubber bands and ties at the bind point.
- Liquid test ammonia and nitrite - Elevated readings after rot often mean decay outpaced filtration. Stable 0 ppm with mushy bases still confirms local stem failure at the anchor.
- Smell and debris - Sour odors and sludge piles under mats suggest organic overload feeding rot.
- Water line check - Portions pinned above the surface dry and crisp (underwatering), not slimy underwater.
- Tissue texture - Slimy and brown underwater means rot or melt. Dry and brittle means air exposure, not stem-base anaerobic decay.
- Timing - Rot at buried bases within the first week after planting usually means burial depth or tight weights-not gradual foul-water decline over weeks.
Lookalike symptoms
| What you see | More likely cause | Differentiating check |
|---|---|---|
| Gradual needle shed, firm green stems, ammonia 0 ppm | Acclimation melt | First one to two weeks after purchase; bases firm |
| Dry, crispy brown tips above waterline | Air exposure / underwatering | Stems sat on counter or rode above surface |
| Pale thin growth, ammonia 0 ppm, soft not slimy | Low light or nitrogen deficiency | See not enough light |
| Cloudy water, ammonia rise, mushy stems tank-wide | Foul-water organic overload | Smell and sludge; see overwatering |
| White fuzz on gravel only | Decaying debris / water mold | Living stems green; see mold on soil |
First fix for Hornwort
Remove weights or buried sections, trim mushy bases back to firm green tissue, and float healthy tops.
Gather the bunch, cut away every softened brown section with sharp scissors, and release green portions to drift freely at the surface or lie fully submerged. If decay was heavy, test ammonia and nitrite and do a 25 to 30 percent partial water change with temperature-matched dechlorinated water in the same session.
Do not re-bury trimmed stems to “hold them down,” dose fertilizer, or apply liquid carbon on a rotting bunch until water tests normalize and firm tissue remains.
Step-by-step recovery
After the initial trim-and-float rescue:
- Gravel-vacuum shed needles and mush - Target piles under floating mats, around weights, and near filter intakes so decay does not recycle.
- Re-anchor correctly if you must - Use a lead-free weight on top of gravel with only the weight touching substrate; stems stay in open water. See the hornwort substrate guide for weight-on-top mechanics.
- Remove constricting ties - Replace rubber bands with loose bundles or cotton thread on hardscape that dissolves over time.
- Improve gentle flow - Redirect filter output so water moves through stems without pinning them against dead corners.
- Retest ammonia in 24 hours - If readings stay elevated, repeat a partial change and remove more decaying biomass.
- Hold chemicals - Skip glutaraldehyde liquid carbon and copper medications until new whorls appear; both commonly melt hornwort.
- Watch for new whorls - Side shoots on firm floating stems mean recovery is underway. Propagate from those sections if the original base was mostly lost.
If only a small green fragment survives, float it and wait. Hornwort reproduces readily from fragments once water quality stabilizes.
Recovery timeline
24–48 hours: Mushy shedding should stop on trimmed stems; ammonia should trend down after debris removal and a partial change if decay was advanced.
One to two weeks: New side shoots and tighter whorls on firm floating stems are realistic when tests stay at 0 ppm ammonia and nitrite.
Three to four weeks: A thinned bunch can look bushy again if you removed decay early and kept weekly partial changes.
What will not recover: Brown, slimy, or translucent needles and rotted base sections-they stay dead. Judge success by new green whorl formation, not old tissue re-greening.
Worsening signs: Entire stems dissolve into slime despite clean tests, smell stays rotten after two water changes, or ammonia rebounds within 24 hours-remove more biomass, check filter function, and review stocking and feeding.
What not to do
Do not unpot, repot, or add potting soil, garden dirt, or terrestrial mix-hornwort is a fully submerged freshwater plant, not a windowsill houseplant. Do not bury stems deeper to stabilize a rotting bunch. Do not stop watering or let substrate dry-there is no moist-soil reservoir to manage. Do not mist hornwort like a terrestrial plant. Do not inspect a root ball; there is none. Do not fertilize rotting tissue before water tests normalize. Do not assume yellow lower needles mean overwatered soil and drain the tank-check stem bases and ammonia first.
How to prevent stem-base rot on Hornwort
- Float by default - Fastest growth, zero burial risk; thin mats weekly so debris does not compost underneath.
- Weight-on-top anchoring only - Bury the weight if needed, never living stems; follow the hornwort substrate guide.
- Remove store wraps - Cut rubber bands and tight zip ties before placing in the tank.
- Vacuum shed needles every water change - Decay under mats is a common rot trigger.
- Weekly 25 to 30 percent partial water changes - Stable chemistry per the hornwort watering guide prevents foul-water softening.
- Trim before biomass wins - Export clippings from the tank instead of letting them sink and decay.
- Test ammonia monthly - Catches decay-driven spikes before stems melt tank-wide.
Match everyday care to how hornwort actually lives: always submerged in clean freshwater, moderate light, gentle flow, and mechanical hold only when your layout demands it.
Hornwort care cross-check
Stem-base rescue sits on top of normal hornwort husbandry. Confirm stable temperature and pH per the overview guide, adequate light without shading lower stems into rot zones, and gentle flow that does not strip needles above the waterline. After salvage, review hornwort pruning and propagation habits so trimmings export nutrients instead of recycling under gravel. If anchoring keeps failing, switch problematic bunches to permanent floating-the safest fix for repeat base rot.
When to use this page vs other Hornwort guides
- Hornwort watering guide - Use for routine moisture checks before assuming root rot is the main issue.
- Hornwort problems hub - Browse all 16 common issues on this species.
- Overwatering on Hornwort - Different entry point when symptoms overlap with root rot.
- Yellow Leaves on Hornwort - Different entry point when symptoms overlap with root rot.
- Wilting on Hornwort - Different entry point when symptoms overlap with root rot.