Fishbone Cactus Pruning: When, How, and Mistakes to Avoid
Fishbone Cactus Pruning: When, How, and Mistakes to Avoid
Fishbone Cactus Pruning: When, How, and Mistakes to Avoid
Quick Answer - Start With Dead or Damaged Segments
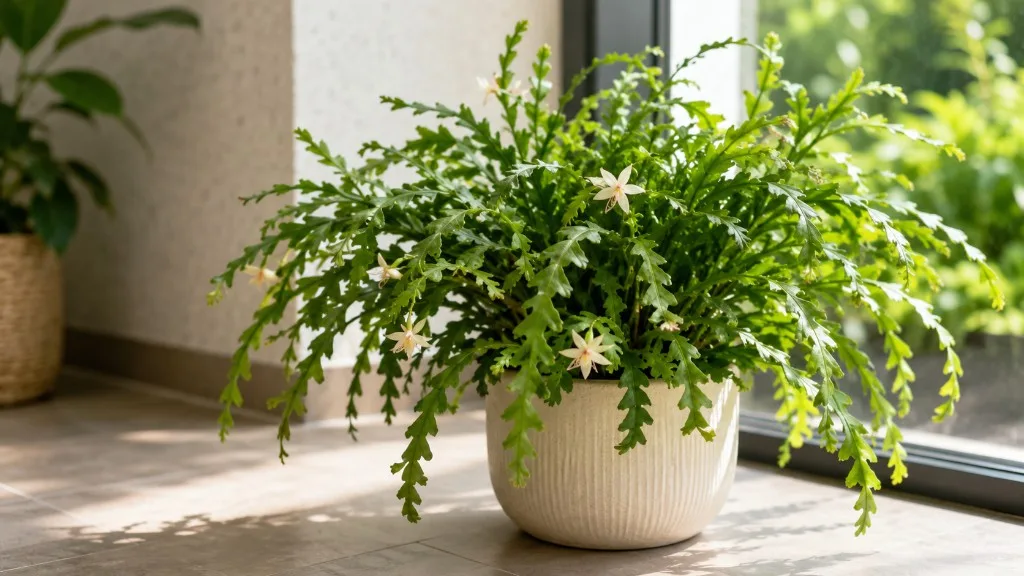
First action: inspect the entire plant in good light and remove any yellowed, mushy, sun-scorched, or pest-infested flat stem segments, cutting back to firm tissue just above the nearest healthy lobe joint. Fishbone cactus - Disocactus anguliger, also sold as ric rac cactus, zig zag cactus, and under the older name Epiphyllum anguliger - is an epiphytic cactus from Mexican cloud forests that trails from hanging baskets indoors. It does not need heavy pruning to survive, but sanitation cuts and selective shortening keep the zig-zag silhouette manageable. Save structural reshaping, leggy cleanup, and propagation harvests for late spring through early summer when flat segments are actively extending.
Only after dead tissue is gone should you decide whether to shorten overlong stems, remove thin etiolated shoots, or harvest cuttings. The ASPCA lists fishbone cactus as non-toxic to cats and dogs, which makes routine trimming less stressful in pet households - though chewed plant material can still cause mild stomach upset.
What Pruning Does for a Trailing Epiphytic Cactus
Unlike desert barrel cacti, fishbone cactus stores limited water in its flat stems and depends on stem surface area for photosynthesis. Pruning therefore serves practical goals rather than survival needs: length control when trails interfere with shelves or walkways, shape and fullness when tip removal redirects growth to side lobes, sanitation when decay or pests threaten healthy tissue, and propagation material when healthy trimmings can thicken a sparse pot or replace a rotting base.
Pruning cannot fix chronic overwatering on Fishbone Cactus, root rot on Fishbone Cactus, or low light on its own. It removes symptoms - leggy strings, damaged lobes, excessive length - while you stabilize care. Cuts placed just above lobe joints during active growth often produce new segments within two to four weeks; mid-segment stubs, dull tools, winter reshaping, or removing more than one-third of healthy mass on a stressed plant produce brown dieback and long recovery stalls.
Read the Stems Before You Cut
Fishbone cactus anatomy is simple once you learn the landmarks. Healthy flat stems show the characteristic zig-zag lobe pattern - wide segments connected at sharp angles. Each lobe joint is a branching point where the plant can produce new side segments after the dominant tip is removed. Areoles sit along these segments; on Fishbone Cactus overview they are subtle, but the visible joint angles tell you where to cut.
Etiolated stems look completely different: thin, round, smooth, spaghetti-like growth with no pronounced lobes. The BBC Gardeners’ World Magazine describes leggy growth or thin and rounded stems as a sign the plant is not getting enough light. This is etiolation - the plant abandons the energy-intensive flat form and stretches toward available light. Once a segment has elongated in this thin shape, it will not widen back into flat zig-zag form even after you move the plant to a brighter window. The correction is removal at the point where it connects to healthy flat tissue, plus better light on what remains.
Stretched flat stems still show lobes but with unusually long spaces between them. Shorten these just above a lower joint and improve light; new growth from the cut should emerge tighter if conditions are adequate. Treat repeated stringy growth as a lighting problem first and a scissors task second.
When to Prune Fishbone Cactus
Timing splits into two categories. Urgent cleanup - dead, blackened, mushy, sun-scorched, or pest-ridden segments - can be removed whenever you see them. Decaying tissue holds moisture and can allow problems to travel toward the crown. Planned shaping - shortening multiple trailing stems, removing etiolated growth, harvesting propagation cuttings, or thinning up to one-third of healthy mass - belongs in the active growing season, roughly late spring through early summer in the Northern Hemisphere, when new flat segments are visibly extending.
Avoid heavy reshaping in fall and winter when growth slows and wounds may sit unchanged for months. Growers hoping for nocturnal flowers on mature plants should also avoid major cuts before the typical late-summer or autumn flowering window, since bud initials form on stem tissue you might remove. Light cleanup still works in slower months; reserve structural work for the first warm growth flush.
If the plant was repotted within the past four to six weeks, recently moved, or showing wrinkled stems, basal softening, or active pest pressure, stabilize care first and postpone shaping cuts.
Tools and Sanitation
Fishbone cactus stems are succulent but not woody. Sharp bypass pruning shears or clean household scissors handle most indoor cuts - bypass blades slice rather than crush. Keep 70% isopropyl alcohol nearby to wipe blades before you start, between plants, and between cuts when removing diseased or pest-infested tissue. The RHS notes this species may be susceptible to mealybugs, aphids, and glasshouse red spider mite; clean tools reduce spread when you trim infested sections.
Work at eye level by unhooking hanging baskets when possible. Rotate the pot so joint placement is accurate, and support trailing stems while cutting so falling weight does not tear uncut tissue. You do not need wound sealants or cinnamon on cuts - open wounds callus naturally within a day or two in normal indoor humidity, and sealants can trap moisture on succulent stems.
Where to Cut - Lobe Joints Are Your Landmarks
The most important technique rule is placement: cut 5–10 mm (about ¼ inch) above a healthy lobe joint, never below it and never halfway between joints on a bare stem section. Below-joint cuts remove the tissue that would have produced new segments. Mid-section cuts leave a stub that often dies back brown and rarely branches cleanly.
When shortening a long flat stem, choose a joint where the remaining stem still looks balanced for the hanging habit you want. Step back after every two or three removals and assess the trailing silhouette. Fishbone cactus looks best with varied stem lengths that create depth - not a blunt haircut where every stem ends at the same line.
Removing Damaged, Mushy, and Pest-Heavy Segments
Start every session here before touching healthy growth. Trace damaged stems backward toward the crown until you reach firm flat tissue, then cut just above the next healthy lobe joint below the damage. Remove sun-scorched segments that have penetrated through the flat stem thickness. For pest-heavy sections where wiping with alcohol is impractical, cut them out and treat the remaining plant.
Yellowing alone does not always mean cut immediately - it can signal overwatering, underwatering on Fishbone Cactus, cold damage, or natural senescence of older lobes. Remove mushy or mostly discolored segments; leave firm segments with limited older-lobe yellowing if the plant is otherwise vigorous. Widespread yellowing or basal softening means pause on heavy pruning and check soil moisture, drainage, and roots first.
If rot has started at the base but upper segments remain healthy, cut the sound upper portion above the damage, callus it, and root it as a rescue propagation while discarding the rotting base.
Trimming Leggy and Overlong Flat Stems
For stretched flat stems, shorten just above a lower lobe joint, then move the plant gradually to Fishbone Cactus light guide - an east- or west-facing window, or a few feet back from a south-facing pane - over one to two weeks. Rotate the basket weekly so all sides receive similar exposure. New growth from the cut point should emerge with tighter lobe spacing if light is adequate.
For etiolated stringy stems, cut them off at the point where they emerge from healthy flat tissue, or at the crown if the entire stem has lost flat form. Do not wait for them to fill out. If thin strings reappear within weeks of every trim, improve light before cutting again - pruning removes the symptom; unchanged light produces it again.
During active growth, pinching soft growing tips - removing the last one to two flat segments from selected stems - encourages light bushiness without a hard reshape.
How Much You Can Safely Remove
Fishbone cactus tolerates light pruning well and moderate pruning when timing and health align. The practical ceiling most experienced growers follow is no more than one-third of total healthy stem mass per session. This species depends on flat stem surface for photosynthesis; removing more at once can shock a plant that is already stressed, recently repotted, or growing in dim light.
If the specimen is wildly overgrown - trails to the floor, mostly etiolated, or hopelessly tangled - stage the work across two or three spring sessions spaced three to four weeks apart. Session one removes dead tissue, obvious stringy etiolation, and worst crossing stems. Session two shortens remaining flat stems for balance. Session three fine-tunes length and harvests final propagation material if needed.
Removing too much on an overwatered plant is particularly risky. Saturated mix plus a sudden reduction in stem surface area can stall recovery for months.
Step-by-Step Pruning Routine
- Inspect the entire plant and note dead tissue, etiolated strings, pest signs, and stems to shorten.
- Sterilize shears with alcohol.
- Remove dead and damaged segments first, cutting back to firm tissue just above healthy lobe joints.
- Remove etiolated stringy stems at their point of origin on flat tissue or at the crown.
- Shape healthy flat stems by shortening selected tips just above lower joints, stepping back after every two or three cuts.
- Set aside healthy cuttings at least 10–15 cm (4–6 inches) long with multiple lobes for propagation.
- Adjust light gradually over seven to ten days if legginess motivated the session.
- Hold fertilizer for two to three weeks while wounds callus.
Using Healthy Trimmings as Cuttings
One advantage of fishbone cactus pruning is that healthy trimmings are propagation material. Select firm, flat, green segments with at least two to three visible lobe joints. Avoid mushy, yellowed, or etiolated stringy sections.
Make the cutting with the same joint technique as pruning, leaving the segment 10–20 cm (4–8 inches) for manageable rooting. Orientation matters: plant the end that was attached to the parent into soil or water - upside-down cuttings root poorly because vascular tissue flows in one direction.
You can root in epiphytic potting mix - potting compost, perlite, and orchid bark - or in water if you want to monitor root formation. Soil tends to produce sturdier long-term roots; water lets you confirm success before committing pot space.
Callusing Before You Plant
Callusing is the step between pruning and planting. Place cuttings on a dry surface in warm, shaded air for one to seven days depending on humidity. The cut end should dry and seal before soil or water contact. Skipping callus is the leading cause of basal rot on fishbone cactus cuttings.
For soil rooting, insert the callused end 2–5 cm (1–2 inches) into barely moist mix and place in bright indirect light. Water lightly when the top of the mix approaches dry. For water rooting, suspend the callused end with only the bottom 2–3 cm (1 inch) submerged, change water every few days, and transplant once roots reach 2–5 cm (1–2 inches). The BBC Gardeners’ World Magazine uses ~10 cm stem cuttings and notes roots typically form within a few weeks during the growing season - winter attempts without supplemental warmth and light stall far longer.
Aftercare and Recovery Timeline
Hold fertilizer for two to three weeks so the plant is not pushed into tender growth before wounds callus. Keep bright indirect light steady - do not jump from a dim room to direct sun the same week you cut, but do not leave the plant in the spot that caused legginess. Water slightly less if you removed substantial stem mass, checking moisture with your finger rather than a calendar. Avoid Fishbone Cactus repotting guide in the same month as a heavy prune unless rescue conditions demand it.
During active spring and summer growth, fishbone cactus typically shows new lobes or side shoots from cut joints within two to four weeks after a well-placed cut on a healthy plant. Full visual refill of a thinned crown takes six to eight weeks depending on light and how much you removed. Out-of-season pruning in late fall or winter may show little visible response until March or April when light and warmth return.
Watch cut points for blackening or mushiness over the first ten days. If a joint turns mushy below your cut, remove another segment back to firm tissue, sterilize tools, and let the plant dry slightly longer between waterings.
Mistakes That Stall Recovery
The most common errors are predictable: cutting too much at once, cutting mid-segment or below the joint, pruning with dull or dirty tools, heavy winter reshaping on an underlit plant, pruning without fixing light when etiolation keeps returning, skipping callus on cuttings, watering heavily right after a major trim, and fertilizing immediately after pruning when the plant is still allocating energy to wound response.
Less obvious: pruning right before flowering on a mature specimen removes stem tissue that held bud initials. Ignoring basal rot while shortening upper stems wastes effort if the crown is collapsing regardless of how tidy the trails look.
Conclusion
Fishbone cactus pruning works best when you match cuts to this plant’s epiphytic trailing habit. Remove damaged and mushy segments anytime; save structural shaping, etiolation cleanup, and propagation harvests for late spring through early summer. Cut just above lobe joints, take no more than one-third of healthy mass per session, callus healthy trimmings before rooting, and fix light when thin stringy stems keep returning. Hold fertilizer briefly, keep bright indirect light steady, and adjust watering to the reduced canopy. Done with clean tools and honest assessment, pruning leaves a tidier trailing display - and often a handful of cuttings ready to root.
When to use this page vs other Fishbone Cactus guides
- Fishbone Cactus overview - Start here for whole-plant context before deep-diving this topic.
- Fishbone Cactus problems hub - Jump to symptom-specific fix guides when this care topic does not resolve the issue.
- Leggy Growth on Fishbone Cactus - Escalate here when pruning adjustments are not enough.
- Slow Growth on Fishbone Cactus - Escalate here when pruning adjustments are not enough.
- Brown Tips on Fishbone Cactus - Escalate here when pruning adjustments are not enough.