Fishbone Cactus Propagation: Stem Cuttings Guide
Fishbone Cactus Propagation: Stem Cuttings Guide
Fishbone Cactus Propagation: Stem Cuttings Guide
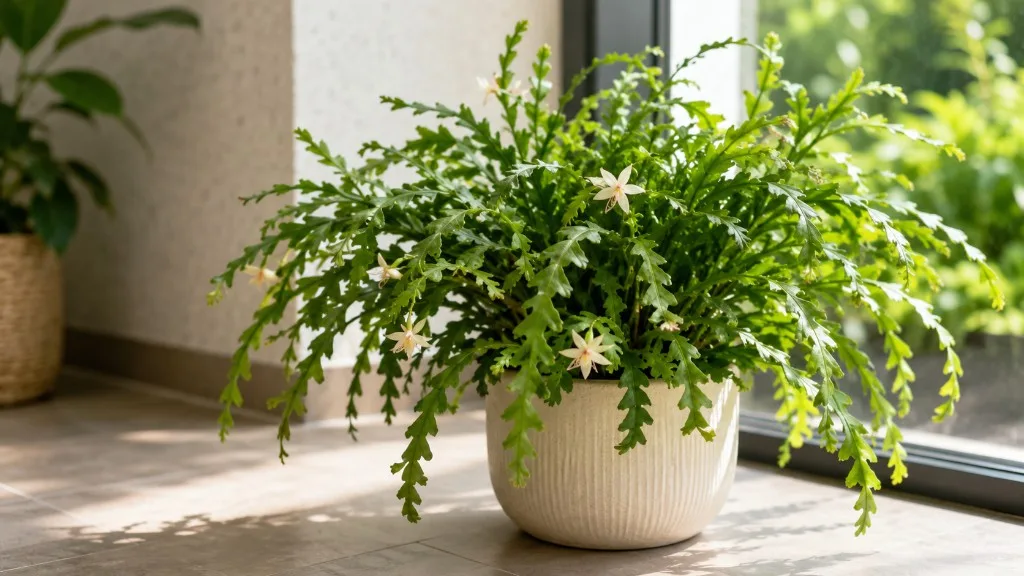
Fishbone cactus propagation is one of the most forgiving projects in indoor plant care because the plant is built for it. Disocactus anguliger - the accepted name for what most people call fishbone cactus, zig zag cactus, or ric rac cactus - produces flat, segmented stems that root readily from cut sections once the wound has dried. You are not fighting the plant’s biology; you are cooperating with an epiphytic cactus that naturally colonizes tree branches by anchoring stem tissue where moisture and air meet. That is why stem segment cuttings outperform seed starting, grafting, and other specialist methods for home growers who simply want more trailing plants for hanging baskets or gifts.
The core workflow is straightforward: take a healthy segment, let the cut end callus before planting, set it in airy well-draining mix or clean water, keep Fishbone Cactus light guide, and wait. What separates success from a mushy failure is almost always timing and moisture discipline, not propagation skill. This guide walks through every decision - when to cut, how long to dry, how deep to plant, how to read rooting progress, and what to do when a stem breaks off before you planned to propagate at all.
What Makes Fishbone Cactus So Easy to Propagate
Fishbone cactus belongs to the Cactaceae family, but it behaves more like a tropical epiphyte than a desert cactus. In the cloud forests of Mexico, it grows on mossy branches with roots that grab organic debris in filtered light and humid air per Missouri Botanical Garden. Those stems store water, tolerate brief drying, and can regenerate roots from areole-bearing tissue along the zigzag margins. Home propagation mimics that restart: a severed segment seals its wound, then sends roots when warmth, light, and lightly moist - not saturated - conditions align.
Compared with finicky houseplants that demand precise node placement or division of a crowded root ball, fishbone cactus rewards a minimal toolkit. Sharp sterilized scissors, a small pot, perlite-heavy mix, and patience cover most scenarios. The Royal Horticultural Society lists fishbone cactus as a trailing epiphytic cactus suited to indoor cultivation and notes propagation by stem cuttings. If you have ever rooted a pothos or a Christmas cactus, the rhythm will feel familiar - with one non-negotiable extra step: callus before contact with water or soil.
Why Stem Segment Cuttings Work Best
Stem segment cuttings are the highest-success method for fishbone cactus propagation because each zigzag lobe carries living tissue capable of producing roots and new stem tips. Unlike a single flat leaf from a succulent that may root but never branch, a cutting with two or three complete segments already contains the architecture for a small trailing plant. You are cloning the parent genetically, so variegation patterns, stem width, and flowering potential carry over intact - useful when you are sharing a specimen you have grown for years.
Cuttings also scale well. One long trailing stem can yield several independent plants without stressing the parent if you leave enough segments behind to keep it attractive. Division - splitting a multi-stem pot at the root level - works when a mature plant has filled its container, but it requires more root disturbance and is harder to execute cleanly on a hanging basket. For most readers, stem cuttings are the default; division is the backup when Fishbone Cactus repotting guide day arrives and the root mass clearly supports multiple crowns.
The method aligns with how the plant recovers in nature. Broken branches that fall onto a mossy limb can root if they land in stable humidity and shade. Your job indoors is to recreate the dry-then-moist transition: dry wound first, then gentle moisture at the base once roots initiate. Skip the dry phase and fungi enter through the open cambium - the most common propagation failure for epiphytic cacti.
Propagating From Accidentally Detached Segments
One reason fishbone cactus propagation feels “easy” is that detached segments often root without a planned cutting session. Trailing stems snag on furniture, get bumped during watering, or break when a pot is moved. If the piece is firm, green, and at least a few inches long with multiple zigzag lobes, treat it as a ready-made cutting rather than compost.
Lay the segment flat or stand it upright in a dry, shaded spot for the same callus period you would give a fresh cut. Detached pieces sometimes arrive with a ragged break instead of a clean slice; trim the damaged end with sterilized scissors to expose healthy tissue, then restart the drying clock. Ragged tears heal slower and invite rot, so a fresh cut is worth the extra day of waiting. Once callused, plant or water-root exactly as you would a deliberate cutting. Many growers first learn fishbone cactus propagation this way - the plant teaches the method before you read a guide.
When to Propagate Fishbone Cactus
Timing is not about superstition or lunar calendars; it is about metabolic activity. Fishbone cactus roots fastest when the parent is pushing visible new segments, the room stays warm, and daylight hours support photosynthesis. Propagation during a stress period - immediately after shipping, mid-root-rot recovery, or while mealybugs are active - stacks the odds against you even though the technique is sound.
That said, Fishbone Cactus overview is more forgiving on timing than strict seasonal dormancy plants. Indoor growers with stable warmth and grow lights can root cuttings in winter, just expect a longer wait and a higher rot risk if humidity is high and airflow is poor. Match your ambition to the season when you can, and match your moisture to the slower winter pace when you cannot.
Best Season for Rooting Success
Spring through early summer is the best window for fishbone cactus propagation in most homes. Rising temperatures in the 18–27°C (65–80°F) comfort range speed cell division at the wound site, and increasing light fuels the cutting without the harsh direct sun that can desiccate a rootless segment. If your parent plant shows fresh pale green tips along the stem margins in March or April, that is your green light.
Late autumn and winter bring slower rooting - not impossible, but patience-testing. Short days and cooler rooms mean a cutting may sit unchanged for six weeks before you feel resistance in the pot. Reduce watering frequency accordingly; a mix that stays damp for ten days in July might stay wet for three weeks in January, and wet idle mix is where rot begins. If you propagate in winter, use the smallest pot that fits the cutting, maximize bright indirect light, and resist misting “for humidity” unless your air is genuinely dry.
Outdoor growers in frost-free climates (USDA zones 10–11 where Disocactus anguliger can live outside year-round) should align propagation with the same warm-season flush. Bring cuttings under cover if nights drop below about 10°C (50°F); cold tissue roots slowly and may collapse before anchoring.
Signs Your Parent Plant Is Ready
A healthy parent is the silent prerequisite every propagation guide underplays. Before you cut, confirm the donor plant shows firm stems with even green color, no widespread yellowing, and no sticky honeydew suggesting scale or mealybugs. Check the pot: if the mix drains within a few days after watering and the plant is actively trailing, you are working with strong material. Weak, shriveled stems from chronic underwatering on Fishbone Cactus or root loss can still callus, but they often rot instead of rooting because their internal water reserves are already depleted.
Also consider aesthetics and recovery time. Removing more than one-third of visible stem length at once can make a sparse hanging basket look bare until side branches fill in. Stagger cuttings across two sessions two weeks apart if you want both new plants and a full parent display. If the parent recently moved windows or was repotted, wait three to four weeks so it exits transplant shock before you add cutting stress.
How to Take Fishbone Cactus Cuttings
Taking the cutting is the shortest step and the one most people rush. Slow down here: clean tools, correct joint placement, and right-sized segments determine everything that follows. You are harvesting living stem tissue, not trimming dead foliage - treat it like minor surgery, not a haircut.
Gather sharp pruning shears or scissors, 70% isopropyl alcohol or a flame for sterilization, a clean cutting board or paper towel, and labels if you are running multiple batches. Work over a surface you can wipe down; sap is minimal compared with milkweed or figs, but cleanliness still reduces bacterial load at the wound.
Choosing Healthy Stem Segments
Select stems that are at least 10–15 cm (4–6 inches) long with two to four complete zigzag segments. Shorter pieces can root but take longer to become attractive plants and desiccate faster during callus. Longer cuttings work too - up to about 20 cm (8 inches) - though they may need staking in loose mix until roots anchor.
Run a finger along the stem: it should feel plump and firm, not papery or squishy. Avoid segments with brown soft spots, sun-scald bleaching that covers most of the lobe, or mechanical crush damage from tight packaging. The best material is often mid-stem - mature enough to store water, not the very oldest basal tissue that may be woody and slow. If you want a bushy new plant sooner, choose a cutting that includes a growing tip; tipless mid-stem sections root reliably but need more time to produce a new lead shoot from an areole.
When propagating to share with friends, note that fishbone cactus is listed as non-toxic to cats and dogs by the ASPCA. That does not make broken stems edible, but it eases concern when passing cuttings to pet-owning households - a practical detail gift-givers appreciate.
Making Clean Cuts at the Zigzag Joints
Cut just below a stem joint - the V-shaped notch where two lobes meet. That junction concentrates vascular tissue and areoles capable of rooting. A straight diagonal cut through the middle of a flat lobe heals more slowly and roots less predictably. One clean snip; sawing crushes cells and invites infection.
Sterilize blades between cuts if you are taking multiple segments from one parent or if you previously trimmed diseased tissue. Angle the cut slightly so water sheds off the wound surface during callus - a flat horizontal face stays wet longer in humid kitchens. After cutting, remove any dust or sap with a dry paper towel; do not rinse under tap water yet. Label the segment if you are comparing soil versus water batches side by side.
If the parent bleeds a little clear moisture, that is normal for succulents and cacti. Let it air-dry seconds, then move the cutting to its callus station. You now have a finite window before the segment begins losing turgor; extremely long callus periods in hot dry air can shrivel cuttings, which is why the next section gives humidity-adjusted time ranges rather than one rigid rule.
Callusing Before You Plant
Callus formation is the step beginners skip and experts never do. Callus is the dry, sealed layer of suberized tissue that forms over a fresh cut, physically blocking waterborne fungi and bacteria from entering the stem while interior cells prepare to divide into root initials. Planting an uncalled fishbone cactus cutting into moist soil is inviting rot; standing an open wound directly in water often dissolves the stem from the inside out before roots appear.
Think of callus as a bandage the plant applies itself. Your role is to provide warmth, airflow, and shade while it works. Direct sun during callus accelerates desiccation and can sunburn the flat stem face. A kitchen counter away from the sink steam, or a shelf with bright room light but no window beam, is ideal.
How Long to Let Cuttings Dry
Most fishbone cactus cuttings need one to seven days to callus per BBC Gardeners’ World Magazine propagation guidance, with the exact duration driven by ambient humidity and wound size. In dry air-conditioned rooms, 24–72 hours often suffices for a clean joint cut. In humid bathrooms or rainy spring weather, five to seven days is safer before planting. When in doubt, add an extra day; an over-callused cutting still roots, an under-callused one frequently does not.
Lay cuttings horizontally on dry paper towel or a rack so air reaches both faces of the flat stem. Standing them vertically in a cup works if the base is not crushed against a wet surface. Do not refrigerate cuttings to “pause” them - cold damages epiphytic cactus tissue. If the cutting looks slightly softer after two days but the cut face is dry to touch, it is usually fine; if the whole segment is wrinkling, move it to slightly brighter indirect light and check that heat is not excessive.
Water propagation still requires callus first. The internet is full of tutorials skipping straight to a jar; for fishbone cactus, that shortcut produces cloudy water and slimy stem bases. Callus, then submerge only the bottom 2–3 cm (about 1 inch) - never the entire flat stem.
What a Proper Callus Looks Like
A ready callus appears dry, slightly matte, and firm - often a thin tan or whitish film over the cut surface. It should not feel tacky or look glossy wet. Press the edge gently with a fingernail; mature callus does not dent easily. If you see green juicy tissue glistening, give more time.
An over-dry callus on a shriveling stem is the opposite problem: the seal formed, but the plant lost too much water waiting. Plant slightly sooner next time or shorten the drying period. Balanced callus on a firm segment is the target. Once met, move promptly to soil or water within a day; indefinite shelf storage after callus still slowly dehydrates the cutting.
Rooting Cuttings in Soil
Soil propagation is the most reliable fishbone cactus propagation method for long-term health because roots that form in mix transition to normal pot culture without the shock of water-to-soil transfer. Success rate is high when callus, mix, and watering discipline align - most experienced growers default here and treat water rooting as a visual demo or backup.
Choose a small pot - 7–10 cm (3–4 inches) - with a drainage hole. Tiny pots dry faster, which protects idle cuttings from sitting in wet mix before roots exist. A terracotta thumb pot is excellent for single cuttings because it breathes.
Best Potting Mix for New Cuttings
Fishbone cactus is epiphytic; its roots expect air as much as moisture. Use a loose, chunky mix rather than heavy peat. A proven starting formula:
- 40% quality potting compost or coir
- 30% perlite or pumice
- 30% orchid bark or coarse coconut husk chips
Some growers add a handful of horticultural charcoal for extra drainage; that is optional, not mandatory. Pre-moisten the mix so it holds together when squeezed but does not drip - lightly damp throughout, not wet. Fill the pot, poke a pilot hole with a pencil, and you are ready to plant.
Rooting hormone containing indole-3-butyric acid (IBA) can speed root initiation on slow batches but is not required for fishbone cactus. If you use powder hormone, dip the callused base lightly, tap off excess, and plant immediately. Liquid hormones work too; follow label dilution. Skip hormone on water-rooted transfers where roots already exist.
Planting Depth and Stem Orientation
Insert the callused end about 2–3 cm (1 inch) deep - deep enough to anchor, shallow enough that buried stem tissue does not suffocate before roots form. Orientation matters: the end that was closer to the parent plant’s pot goes into the soil; the distal end points upward. Flat stems look symmetrical, but vascular flow is directional; upside-down cuttings sometimes root slowly or produce twisted new growth.
Firm the mix lightly around the base without compacting it. Do not water immediately if the mix was pre-moistened; wait two to three days, then water lightly around the edge of the pot so moisture approaches the base without flooding the stem. Place the pot in bright indirect light - an east window or a few feet back from south glass is typical. Avoid direct midday sun on a rootless cutting; it dehydrates through stomata faster than roots can replace water.
Rooting time usually falls between two and six weeks depending on season, warmth, and light - the BBC Gardeners’ World Magazine notes signs of growth within a couple of weeks once cuttings are planted in bright indirect light. Resist daily pulling; instead, watch for subtle signs: slight resistance on a very gentle tug after week three, or a faint green flush at the areoles near the soil line. New stem tips may appear before you feel tug resistance - that is also success. Once roots are active, water when the top centimeter of mix dries, matching mature fishbone cactus rhythm but with slightly more forgiveness the first month.
Water Propagation as an Alternative
Water propagation lets you observe root emergence in real time, which is satisfying and educational - especially if you are helping a child or friend visualize the process. It works for fishbone cactus when you respect the same callus rule and keep only the base submerged. Expect roots in roughly three to five weeks in warm bright conditions, sometimes faster than soil, though transferred plants need careful hardening off.
Use a clear glass or jar tall enough that the cutting rests on the rim without the stem bending. Add room-temperature water to cover the bottom 2–3 cm (1 inch) of the callused end only; the flat zigzag body stays in air. Place in bright indirect light. Change water every three to five days to limit bacteria - cloudy water is a warning sign, not normal patina.
When roots reach 2–5 cm (1–2 inches), transplant to the same airy mix described above. Water the mix thoroughly once, then let the top dry slightly before the next drink. The first two weeks after transfer are the fragile window; keep light bright but filtered and avoid fertilizer until new growth hardens. Many growers report higher rot rates on water-started plants compared with soil-started ones; if your priority is a mature hanging basket rather than a demo jar, soil remains the safer default.
Aftercare for Newly Rooted Fishbone Cactus
Newly rooted fishbone cactus is not a mature trailing specimen yet - it is a seedling-equivalent with a small root mass and limited water storage. Treat the first four to eight weeks after confirmed rooting as a stabilization phase. Light should stay bright indirect; acclimate gradually to slightly stronger exposure only after the plant produces a second wave of new segments.
Water when the mix approaches dry one knuckle deep, typically every 7–10 days in active growth and less in cool months. Fertilizer is unnecessary until roots clearly support new stem length; a quarter-strength balanced liquid feed once monthly in spring is enough after the first mature segment appears. Do not repot into a huge hanging basket immediately - upsize one pot size at a time so roots colonize mix evenly.
Humidity near 40–60% matches typical indoor comfort and suits this cloud-forest epiphyte without demanding a greenhouse. If your home is very dry, a pebble tray beneath the pot adds ambient moisture without wetting the stem base. Airflow matters as much as humidity; a small fan in a stagnant room reduces fungal pressure on young tissue.
When the plant fills its starter pot with roots visible at the drainage hole - often two to four months after rooting - move to a hanging basket or larger container with the same epiphytic mix ratio. Quarantine new propagations from your main collection for two weeks if pests were ever an issue on the parent; mealybugs hide in stem notches and transfer on cuttings silently.
Common Propagation Mistakes and How to Fix Them
Even an easy propagator fails when basic rules stack wrong. Most fishbone cactus propagation problems trace to moisture at the wrong time, not mysterious bad luck.
Rot at the base almost always means planting before callus or watering too soon after planting. Remove the cutting, inspect the base, trim back to firm green tissue with a sterile blade, re-callus three to five days, and restart in fresh dry mix. Discard severely mushy segments; they rarely recover.
Shriveling during callus signals excessive dry heat or a cutting that was too thin to begin with. Move to bright indirect rather than dark or blazing sun; mist the air lightly once if humidity is below 30%, but never mist the cut face directly. If the segment is more than mildly soft, plant in barely moist mix and hope for rescue roots - sometimes it works.
No roots after eight weeks in cool dim conditions is often slow metabolism, not death. Move warmer and brighter, verify callus was adequate, and confirm the base is not silently rotting underground. A gentle unpot check beats repeated tug tests that break fragile new roots.
Upside-down planting produces roots but odd growth direction. If you catch it early, repot right-side up; if new tips already emerged, leave it unless aesthetics bother you.
Propagating from a sick parent spreads pests and weakness. Stabilize the donor first - treat mealybugs, fix chronic overwatering on Fishbone Cactus, refresh mix if sour - then take cuttings from clean regrowth.
Overpotting leaves a tiny root system swimming in wet mix. Match pot size to cutting size until trailing stems justify a statement basket.
Conclusion
Fishbone cactus propagation rewards patience at the start and generosity later. Stem segment cuttings - taken below a zigzag joint, callused until the wound is dry and firm, then rooted in airy epiphytic mix or clean shallow water - mirror how Disocactus anguliger restarts in nature. Spring and early summer give the fastest results, but firm material and correct moisture matter more than the calendar. Detached segments you would otherwise discard are often viable plants waiting for a dry week and a small pot.
If you remember only three rules, make them these: never skip callus, keep the mix lightly moist rather than wet until roots work, and plant with the same orientation the stem grew on the parent. Get those right and fishbone cactus becomes one of the easiest plants to multiply - a trailing specimen for every bright room, shared freely with the confidence that comes from understanding the process rather than hoping for luck.
When to use this page vs other Fishbone Cactus guides
- Fishbone Cactus overview - Start here for whole-plant context before deep-diving this topic.
- Fishbone Cactus problems hub - Jump to symptom-specific fix guides when this care topic does not resolve the issue.