How to Prune Dischidia: When, Where & What to Cut
How to Prune Dischidia: When, Where & What to Cut
How to Prune Dischidia: When, Where & What to Cut
First, trace any yellow, translucent, or mushy strand back to firm green stem and cut it out with sterilized snips - before you shorten healthy vines for shape. On Dischidia, rot travels quickly along thin succulent stems in humid terrariums and wet bark mix; removing failing tissue immediately matters more than cosmetic trimming.
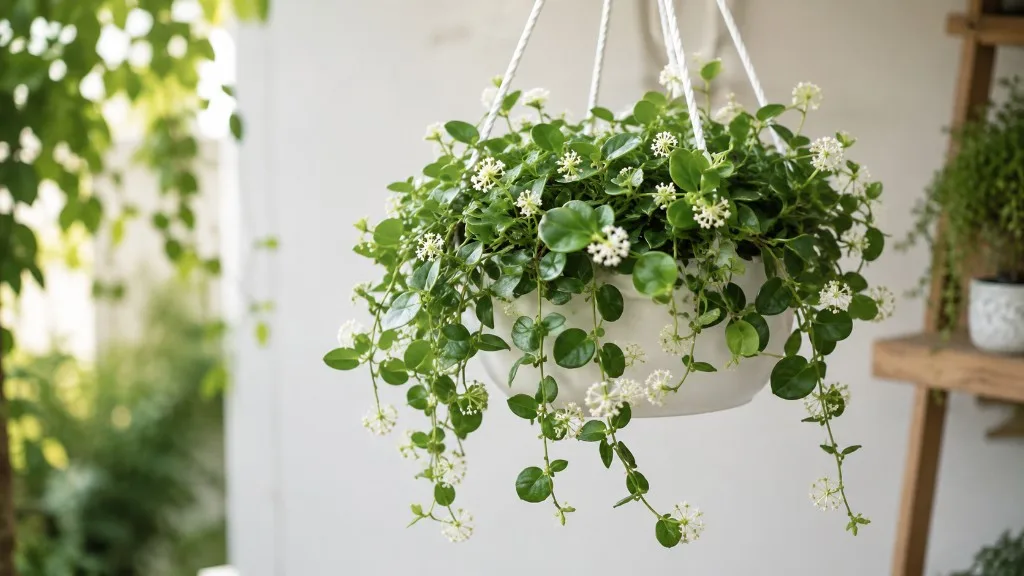
Dischidia (Dischidia spp.) is an epiphytic Apocynaceae vine - a close relative of Hoya - that climbs and trails using adventitious roots at nodes rather than anchoring in dense potting soil. Most indoor specimens grow on orchid bark mix, cork, or sphagnum mounts, where stems stay airy and water drains fast. Pruning here is light grooming and propagation harvesting: remove diseased tissue, shorten stretched internodes, and encourage branching at nodes - not heavy shearing.
If every strand looks firm, green, and appropriately spaced for your display, you may not need to cut anything for months. Dischidia grows slowly; many mounted plants need only occasional dead-leaf pickup until legginess or rot appears.
What Dischidia Pruning Actually Does
Trimming serves four practical jobs on Dischidia overview:
- Stops rot before it reaches the mount base by removing soft, discolored stem sections
- Redirects energy from failing tips to nodes that can break new side shoots
- Corrects legginess after light improves - shortened vines with shorter internodes look fuller on mounts
- Supplies propagation material - node-bearing cuttings root readily on moist sphagnum
Pruning does not fix chronic overwatering on Dischidia, dim light, or a mount that stays soggy. Cut healthy-looking vines in a dark corner and they will stretch again within weeks. Fix the underlying care issue first, then shape.
What to Inspect Before You Cut
Spend two minutes reading the plant before scissors touch tissue.
Stem firmness: Pinch suspect sections. Healthy Dischidia stems feel plump and snap cleanly. Mushy, hollow, or stringy tissue is rot - note how far discoloration runs toward the mount.
Node health: Look for slightly swollen joints where leaf pairs attach and tiny root nubs may appear. Cuts must land near these points; internode stubs without nodes rarely branch.
Leaf condition: Fully yellow or shriveled leaves on firm stems can be removed at the node anytime. Yellowing with soft stem tissue indicates rot surgery, not cosmetic leaf plucking.
Mount moisture: If bark or moss at the base feels wet and heavy days after watering, delay shape pruning until the root zone dries - fresh cuts on saturated epiphytes rot before they callus.
Light context: Long gaps between leaves (leggy internodes) mean the plant reached for light. Moving it to brighter indirect exposure should accompany any shortening cut, or the same stretch returns.
When to Prune Dischidia
Remove Rot and Yellow Tissue Immediately
Treat soft, brown, or fully yellow strands as urgent. Epiphytic stems store water in fleshy tissue; once rot starts in a humid enclosure, it can travel several nodes within days. Cut back to cross-sections that look green and dry inside, not waterlogged brown.
This emergency removal has no season restriction - winter rot still spreads in a closed terrarium.
Shape and Legginess: Spring Through Summer
Structural shortening - taking length off healthy trailing vines to encourage branching - works best during active growth, typically late spring through early fall in temperate homes when warmth and Dischidia light guide support new node breaks within two to four weeks.
Light tip pinching during this window prevents extreme legginess before it requires hard cutbacks. RHS guidance on related Hoya recommends light pruning in late winter or early spring and cutting just above a side-shoot or leaf - the same node logic applies to Dischidia’s thinner stems.
When to Wait
Hold major shape cuts when:
- The mount or pot mix has been wet for days and has not dried since the last soak
- The plant was recently repotted or remounted - give it two to three weeks of stable new growth first
- You are in low-light winter and the goal is cosmetic fullness only (not rot rescue)
- Pest treatment is underway - sap and open wounds complicate oil or soap sprays
Tools and Sap Safety
Use sharp micro snips or fine bypass pruners. Thin succulent stems crush easily; jagged wounds brown and fail to root.
Wipe blades with 70% isopropyl alcohol before and between plants. Iowa State Extension notes alcohol disinfection is easy, inexpensive, and effective for home pruner sanitation - worthwhile when collections share terrarium humidity.
Dischidia, like Hoya and other Apocynaceae, may exude milky sap when cut. RHS advises wearing gloves when pruning related vines because sap can irritate skin. Pet safety for Dischidia is not conclusively confirmed on ASPCA species lists; as Apocynaceae relatives include toxic plants like oleander, keep trimmings out of reach and use gloves if sap contacts skin.
Where to Cut: Nodes, Angles, and Stubs to Avoid
A node is the joint where leaves attach and adventitious roots form. On string of nickels (D. nummularia), nodes appear as slight swellings every few centimeters along the trailing stem. On million hearts (D. ruscifolia), paired heart-shaped leaves mark each node clearly.
Cut 3–6 mm (⅛–¼ inch) above the node, angled slightly. The segment below the cut can produce a side shoot from the remaining node. The segment above - with at least one node and healthy leaves - becomes propagation material.
Never leave a long internode stub above the nearest node on a strand you want to branch; the stub often dies back without activating buds. Never cut mid-internode on a propagation piece - segments without nodes cannot produce new shoots.
Shortening Leggy Trailing Vines
For a single long strand with gaps between small leaves, cut back to a node about two-thirds of the way toward the mount, leaving enough foliage on the base segment to photosynthesize. One moderate cut beats several drastic chops on slow epiphytes.
If the mount top looks bare while tips trail long, shorten extending tips first - that redirects growth energy toward lower nodes, a common fix for sparse basket tops.
Removing Rot Back to Healthy Tissue
Follow discoloration toward the mount until stem cross-sections look firm and green. If rot reaches the attachment point, unmount the plant, trim all soft tissue, and let cut surfaces air-dry 24–48 hours before remounting in fresh dry bark or sphagnum. Pruning alone cannot save a mount that stays waterlogged.
Variegated and Shingle-Form Notes
On variegated cultivars, remove fully green reversions if you want to preserve variegation - green sections often outgrow variegated tissue. Remove all-white stems that cannot photosynthesize; they drain the parent vine.
Shingle-forming species like D. imbricata flatten leaves against mounts. Trim only damaged or detached sections; aggressive tip removal disrupts the flat overlap pattern and slows reattachment.
How Much You Can Safely Remove
Limit healthy green tissue removal to about one-third of total leaf-bearing length per session. Dischidia replaces foliage slowly; stripping a mount bare in winter can leave a sparse display until the next warm growth period.
Dead, yellow, or rotting tissue does not count toward the limit - remove all of it in one pass when tracing rot.
If you need more than one-third removed for shape, spread cuts across four to six weeks of active growth rather than one session.
Step-by-Step Pruning Session
- Sterilize tools and inspect stems as described above.
- Remove all failing tissue first - trace yellow or mushy sections to firm green stem.
- Assess legginess - if internodes are long and leaves small, confirm brighter light is available before shortening.
- Shorten selected healthy vines above nodes, staying within the one-third limit.
- Pin or set aside node-bearing cuttings on moist sphagnum if propagating; discard rotted material outside closed terrariums.
- Check mount moisture - if mix is wet, skip watering until it dries; do not soak on pruning day.
Using Trimmings for Propagation
Healthy segments with one to three nodes root well pressed onto moist long-fiber sphagnum or pinned to the same mount - the most practical use for pruning leftovers. RHS describes similar stem propagation for Hoya in spring or early summer; Dischidia follows the same node requirement.
Allow cut surfaces to callus two to four hours before contact with wet moss. Rooting typically takes two to four weeks in warm bright indirect light. Water propagation is possible but rot-prone on thin Apocynaceae stems; moss or bark contact at nodes is more reliable indoors.
Aftercare and Recovery Timeline
After pruning:
- Keep bright indirect light - leggy recovery depends on light as much as cuts
- Allow bark or moss to dry almost completely between soaks; overwatering after pruning is the most common post-trim failure
- Maintain 50–70% humidity with airflow - stagnant humid air promotes fungal issues at fresh cuts
- Hold fertilizer until new growth appears; quarter-strength monthly feeding during summer is enough for most Dischidia
Recovery expectations:
- Rot removal: Decline should stop within days; new node breaks in two to four weeks during active growth
- Leggy shortening: Side shoots from lower nodes in two to four weeks when light and warmth are adequate
- Hard cutback on a slow plant: Visible fullness may take six to eight weeks or longer in cool, dim conditions
Signs Pruning Worked - and Signs It Went Too Far
Success looks like: firm remaining stems, no spread of discoloration past the cut, and new leaves or side shoots emerging from nodes below the trim within a month in active season.
Too aggressive or badly timed: widespread yellowing after a heavy session, cut nodes turning black and soft in wet mix, or no new growth for six or more weeks in warm bright conditions. If nodes blacken, unmount, trim further to healthy tissue, dry, and remount in fresh airy medium.
Mistakes to Avoid
- Pruning into wet, compacted mix - cut nodes rot before branching
- Cutting without nodes on propagation pieces - segments fail to root or produce vines
- Over-trimming a slow epiphyte - bare mounts sit unchanged for months
- Ignoring legginess cause - dim light produces re-stretch after every cut
- Leaving rotted strands in closed terrariums - remove diseased material from the enclosure
- Stacking prune + repot + fertilizer on one day - stabilize the plant between stress events
Conclusion
Dischidia pruning is epiphyte-aware grooming: remove rot first, cut healthy vines above nodes, limit green-tissue removal to one-third per session, and root worthwhile trimmings in sphagnum rather than discarding them. Match cuts to fast drainage, sparse watering, and bright indirect light - the conditions that keep these Apocynaceae epiphytes branching on mounts instead of melting at the cut.
When to use this page vs other Dischidia guides
- Dischidia overview - Start here for whole-plant context before deep-diving this topic.
- Dischidia problems hub - Jump to symptom-specific fix guides when this care topic does not resolve the issue.
- Leggy Growth on Dischidia - Escalate here when pruning adjustments are not enough.
- Slow Growth on Dischidia - Escalate here when pruning adjustments are not enough.
- Brown Tips on Dischidia - Escalate here when pruning adjustments are not enough.