Spider Mites on Dieffenbachia Camille: Causes, Checks &
Quick answer
Spider mites on Dieffenbachia Camille (*Dieffenbachia seguine* 'Camille') show as fine stippling and webbing on broad cream-and-green leaves in warm, dry indoor air. First step: isolate the plant and rinse leaf undersides with a strong water stream before any spray.
Spider Mites on Dieffenbachia Camille: Causes, Checks & Fixes
This guide covers spider mites on Dieffenbachia Camille. See also the general Spider Mites guide, watering, and light pages for this plant.
Spider Mites on Dieffenbachia Camille: Causes, Checks & Fixes
Quick answer
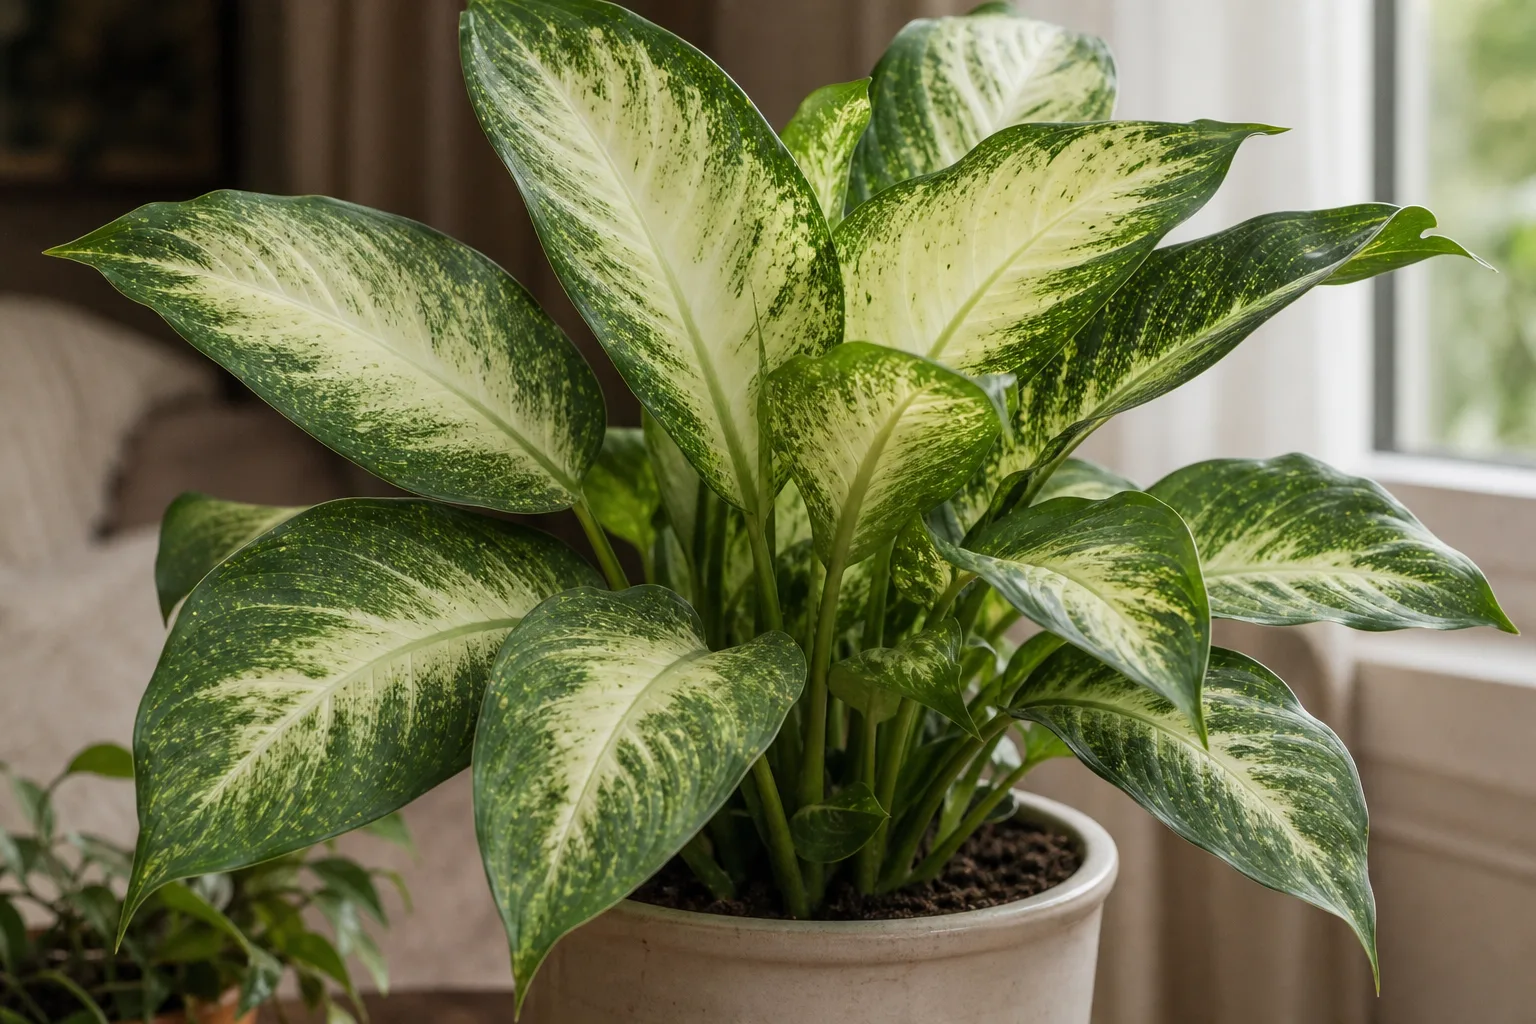
Spider mites on Dieffenbachia Camille - Dieffenbachia seguine ‘Camille’, the cream-and-green dumb cane cultivar - are tiny sap-sucking arachnids that explode in warm, dry indoor air. On Camille they show up as fine yellow or white stippling on broad leaf blades, delicate webbing at petiole bases along upright canes, and eventual bronzing or crisping when colonies go unchecked.
Camille’s pale cream centers can hide early damage until you inspect leaf undersides in good light - stippling often reads clearer on green margins first. The same winter heating that crisps cream tissue (see our low-humidity guide) also favors two-spotted spider mites near vents and sunny glass.
First step: isolate the plant and rinse leaf undersides with a strong stream of water. Move Camille to a sink, tub, or shower, angle the sprayer upward so water runs across the underside of each broad blade and along petiole bases, and knock mites off before reaching for oils or soaps. One rinse rarely clears a colony - confirm survivors with a hand lens or white-paper tap test before adding any product.
What spider mites look like on Dieffenbachia Camille
On Camille, mites rarely announce themselves on the crown first the way aphids do. They settle on mature to mid-cane leaves with large surface area - exactly the broad, smooth ovals Camille is grown for.
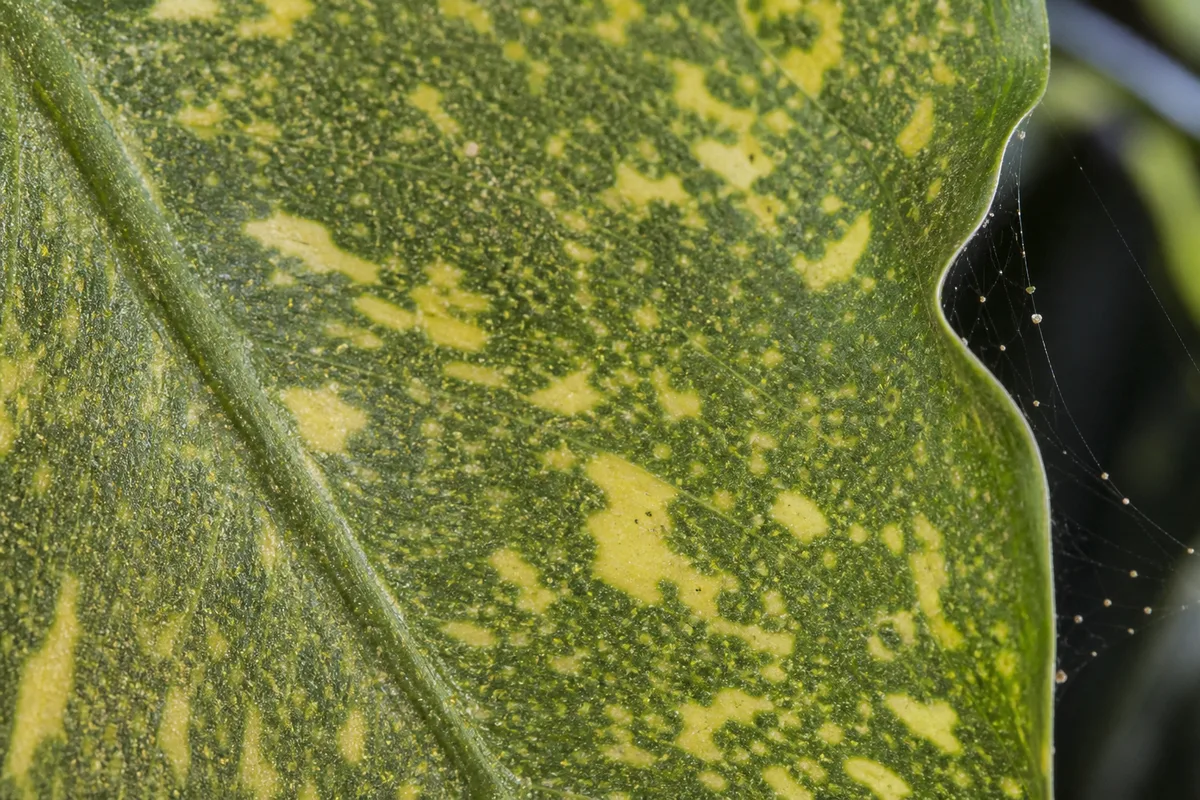
Spider Mites symptoms on Dieffenbachia Camille - compare with healthy tissue on the same plant.
Early signs on variegated foliage
- Pinpoint yellow or white specks scattered across the blade, often denser along green margins where chlorophyll-rich tissue is easier to read
- Dull, sandy look on cream centers that does not wipe off - different from mineral water spots, which leave dry crust
- Fine silk threads at the junction where petioles meet the cane, especially on the side facing a heat vent
- Slight bronzing on sun-facing halves of leaves when mites plus dry air stack stress
Established infestation
- Webbing bridging leaf undersides, petioles, and cane nodes - visible without magnification on heavy cases
- Bronzed or tan panels across large sections of a leaf; cream zones may collapse to crisp brown while green edges hang on longer
- Leaf drop on lower cane segments when feeding has gone on for weeks
- Slow new growth at the crown - mites stress the whole plant even when damage looks worst on older blades
Two-spotted spider mites are tiny arachnids that feed on leaf undersides, not insects. Stippling and webbing distinguish mites from thrips, which leave silvery scars without the same fine silk at petiole bases.
Camille’s smooth, semi-glossy blades make paper-tap confirmation straightforward on mature leaves - there is no fuzzy surface to trap debris. That same smooth finish means water spots from hard tap water can look like stippling until you wipe the top surface and find no live mites underneath.
Why Dieffenbachia Camille gets spider mites
Mite outbreaks on Camille follow this cultivar’s indoor placement and leaf architecture, not random bad luck.
Winter dry air beside heat sources. Camille is often staged on a plant stand near a bright window - exactly where forced-air heat, radiators, and winter sun on glass pull humidity below 40% RH. Mites are common on houseplants stressed by low humidity and heat. NC State Extension lists spider mites among pests to monitor on Dieffenbachia. The same dry spell that triggers brown crispy margins on cream centers weakens tissue mites prefer.
Large leaf area on upright canes. Each Camille blade offers acres of feeding surface compared with small-leaf species. Mites establish on undersides where casual top-down watering never reaches. Petiole clusters along the cane give them sheltered corners to spin webbing.
Pale variegation and delayed visual detection. Cream-centered panels contain less chlorophyll; early chlorosis from mite feeding can masquerade as normal variegation fade until stippling density climbs. Growers who only glance at the tops of leaves often miss the first generation.
Collection spread without quarantine. Mites crawl leaf to leaf on crowded stands and hitchhike on tools, sleeves, and newly purchased tropicals. Skipping isolation lets one infested pothos or croton seed mites onto Camille’s broad undersides within days.
Indoor conditions without predators. Houseplant rooms lack the predatory mites, lady beetles, and minute pirate bugs that keep spider mite numbers down outdoors. Once established indoors, populations double quickly in warm dry air.
Lookalike symptoms to rule out
| What you see | More likely cause | Quick check |
|---|---|---|
| Crisp brown margins on cream only, no speckling | Low humidity or salt burn | Hygrometer at canopy; paper tap shows no mites |
| Even brown tips on many leaves, white crust on soil | Fluoride or mineral burn - brown tips | No webbing; soil and water history fit |
| Silvery scratches on young crown leaves, insects jump | Thrips | Fast slender insects; less webbing at cane base |
| White cottony masses in axils | Mealybugs | Waxy clumps, not moving dust specks |
| Dry white film on leaf tops | Hard-water residue | Wipes off; no stippling on undersides |
| Sticky honeydew at crown | Aphids | Pear-shaped colonies on soft new growth |
Stippling with webbing and moving specks on paper confirms mites. Stippling without those two signs deserves a humidity and watering cross-check before you spray.
How to confirm the cause
Work through these checks in order:
- Paper-tap test - Hold white paper under a suspect leaf and tap the blade firmly. Slow-moving dark specks that smear when crushed confirm live mites. Static dust does not crawl.
- Underside inspection - Tilt each broad leaf toward a window or use a phone light. Look for stippling density, webbing at the midrib, and clusters along the petiole base on the cane.
- Variegation read - Compare cream centers to green margins on the same leaf. Mite feeding usually shows as uniform tiny dots on undersides even when the top looks uneven on variegated tissue.
- Environment scan - Note heater vents, fireplace proximity, and winter sun on glass within three feet of Camille. Dry indoor air increases pest pressure on foliage. Measure humidity at leaf height with a hygrometer.
- Collection survey - Check every broad-leaf tropical on the same stand. Mites spread sideways across leaves that touch.
- Webbing location - Silk at petiole bases and along cane nodes fits mites. Webbing only in tight crown crevices with honeydew suggests aphids or mealybugs instead.
- Thrips cross-check - Thrips scar young tissue and jump when disturbed; they rarely build the fine sheet webbing mites spin on mature Camille blades.
If paper-tap tests are negative, webbing is absent, and humidity is below 35% RH with crisp cream margins only, treat dry air first per the low-humidity guide before assuming a mite infestation.
First fix for Dieffenbachia Camille
Isolate the plant and rinse leaf undersides with a strong stream of water.
Move Camille away from other pots to a sink, tub, or shower. Use firm sprayer pressure, angling from below so water sheets across the underside of each broad leaf, along petioles, and down the cane. Support heavy wet blades so petioles do not snap - Camille leaves hold substantial water weight.
Repeat the rinse every three to five days for at least three sessions while live mites remain visible on paper taps. Washing with a jet of water forces off mites and eggs and is among the most effective first steps on houseplants when done consistently over several weeks.
Wear gloves - Camille sap contains irritating calcium oxalate crystals. Keep pets and children away until foliage dries. Rinse in the morning or early day so blades dry in Dieffenbachia Camille light guide; avoid leaving the crown soaking in a cool dark corner overnight.
After each rinse, run the paper-tap test on two leaves. Do not apply soap or oil the same day as the first heavy rinse unless foliage will dry within a few hours - saturated variegated tissue plus soap burns more easily on Dieffenbachia.
If rinsing is not enough (weekly spray cadence)
When paper taps still show live mites after three thorough rinses, or webbing is spreading between cane nodes, add a contact spray labeled for mites:
- Patch-test first - Dieffenbachia is among houseplants sensitive to insecticidal soap. Test a small hidden leaf area and wait 48 hours for burn signs before treating the whole plant.
- Choose a mite-appropriate product - Horticultural oil or insecticidal soap labeled for spider mites on ornamentals. Horticultural oils smother mites on contact but have no residual effect.
- Cover undersides completely - Spray until runoff on leaf undersides, petioles, and cane joints where webbing started. Mites hide on the bottom surface of Camille’s broad blades.
- Repeat every five to seven days for two to three cycles - MSU Extension recommends treating two to three times at five-day intervals because oils and soaps do not kill eggs. Continue until paper taps stay clear and new webbing stops.
- Timing and light - Apply in early morning or evening so residues dry before strong midday sun hits cream variegation. Do not spray water-stressed plants or when temperatures exceed 90°F.
- Hold fertilizer - Skip nitrogen boosts until two weeks pass with clean new growth. Feeding during active mite pressure produces soft tissue that does not help recovery.
- Collection-wide treatment - If multiple plants on the same stand show mites, treat or rinse every host - isolating only Camille while neighbors stay infested usually restarts the cycle.
Do not reach for general insecticides labeled only for insects - many do not control mites and can kill natural enemies and worsen mite outbreaks.
Recovery timeline
First rinse: many adult mites wash off immediately; stippling stops spreading within days if colonies are knocked down and humidity improves.
One to two weeks: with rinsing alone or careful oil or soap cycles after a clean patch test, paper taps should show few or no live mites. Look for clean new leaves unfurling from the crown without fresh stippling on undersides.
Two to four weeks: bronzed or stippled blades present before treatment stay damaged - damaged leaves may not fully recover; judge progress by new growth. Trim worst blades for appearance once the plant is stable. Camille pushes new crown leaves steadily in warm months; do not judge success by lower cane foliage alone.
Six to eight weeks: a full canopy refresh may take one to two flushes of crown growth in active season. Heavily webbed leaves rarely recover cosmetically; removal speeds a tidier look.
Worsening signs: webbing climbing the cane toward the crown, multiple plants on the stand infested, or new stippling on freshly unfurled leaves after three full spray cycles mean escalation - consider removing the worst lower leaves, treating the whole group, and reviewing whether Camille should stay in its current drafty winter window.
What not to do
Do not assume insecticides labeled for insects will kill mites - mites need oils, soaps, or products specifically labeled for mites. Pyrethroid sprays can flare populations.
Do not skip the patch test on insecticidal soap - Dieffenbachia can burn from soap sprays. Cream variegation scorches faster than all-green dumb cane cultivars in direct sun after treatment.
Do not use harsh dish soap - UMN Extension warns that homemade soap products can burn plants. Use plant-labeled products only.
Avoid one rinse and done - mite eggs survive single passes. Weekly repetition until paper taps clear is the norm.
Do not return an isolated Camille to a plant grouping until at least two weeks pass with zero live mites on paper taps after the last treatment cycle.
Do not handle infested plants bare-handed - sap irritation is real, and the plant is toxic to cats and dogs. Store sprays out of pet reach.
Do not leave rinsed leaves in direct hot sun while wet - broad cream panels can scorch. Dry foliage in bright indirect light.
Do not flood the pot to compensate for dry air - when soil is already moist and mites are active, extra water stresses roots without fixing the humidity problem that favored mites.
How to prevent spider mites on Dieffenbachia Camille
Raise humidity at canopy height through winter heat - target roughly 50% RH when you can; see the low-humidity guide for humidifier placement and hygrometer checks on cream variegation.
Quarantine new plants for two weeks before placing them beside Camille on a shared stand. Inspect undersides at purchase - retail Dieffenbachia often arrives from dry greenhouse air with early mite colonies.
Scout weekly on the underside of two leaves per cane during heating season. A ten-second check catches most Camille infestations before webbing blankets petiole bases.
Keep Camille off radiator lips and drafty AC paths - the overview care guide notes bright indirect placement; moving one foot away from a winter heat blast often lifts RH several points at the leaves.
Wipe dust from broad blades during dry spells - clean leaves make stippling easier to spot and support general plant health.
Space plants for airflow on stands. Crowded tropical rows trap stagnant dry air and hide webbing between touching leaves.
For genus-wide mite biology and products, the Dieffenbachia spider mites page covers dumb cane as a group - this guide focuses on Camille’s variegation, cane architecture, and winter placement patterns.
When to worry
Escalate quickly if webbing reaches the crown during active growth, multiple houseplants on the same stand show mites simultaneously, or new unfurled leaves emerge already stippled after two full treatment cycles.
A light stippling patch on one mid-cane leaf with clear paper-tap counts after rinsing is manageable with patience and humidity work. Silk sheets along most of the cane with bronzing on cream centers is not a wait-and-see case.
If new growth stays clean but old damage looks severe, you are winning - trim worst leaves and keep humidity up. If stippling returns on every new leaf, the environment or neighboring hosts still harbor mites.
Dieffenbachia Camille care cross-check
| Symptom cluster | Likely issue | Next read |
|---|---|---|
| Stippling + webbing + crawling paper specks | Spider mites (this page) | Rinse, humidify, weekly oil or soap |
| Crisp cream margins, no mites on paper tap | Dry air | Low humidity |
| Brown tips, white soil crust, no webbing | Minerals or fluoride | Brown tips |
| Sticky crown, pear-shaped insects | Aphids | Aphids |
| Cottony axil masses | Mealybugs | Mealybugs |
Conclusion
Spider mites on Dieffenbachia Camille follow winter dry air and broad-leaf architecture - stippling hides on cream centers until you check undersides and petiole bases on upright canes. Confirm with paper taps and webbing, isolate, rinse repeatedly, then use labeled oils or soaps on a weekly cadence with a patch test because Camille can burn from soap and scorch in sun after treatment. Prevention is humidity at leaf height, weekly underside scouts, and quarantine - the same dry conditions that crisp Camille’s pale tissue invite the mites that feed on it.
When to use this page vs other Dieffenbachia Camille guides
- Dieffenbachia Camille watering guide - Use for routine moisture checks before assuming spider mites is the main issue.
- Dieffenbachia Camille problems hub - Browse all 16 common issues on this species.
- Low Humidity on Dieffenbachia Camille - Different entry point when symptoms overlap with spider mites.
- Slow Growth on Dieffenbachia Camille - Different entry point when symptoms overlap with spider mites.