Best Soil for Dieffenbachia Camille: Mix & Drainage
Best Soil for Dieffenbachia Camille: Mix & Drainage
Best Soil for Dieffenbachia Camille: Mix & Drainage
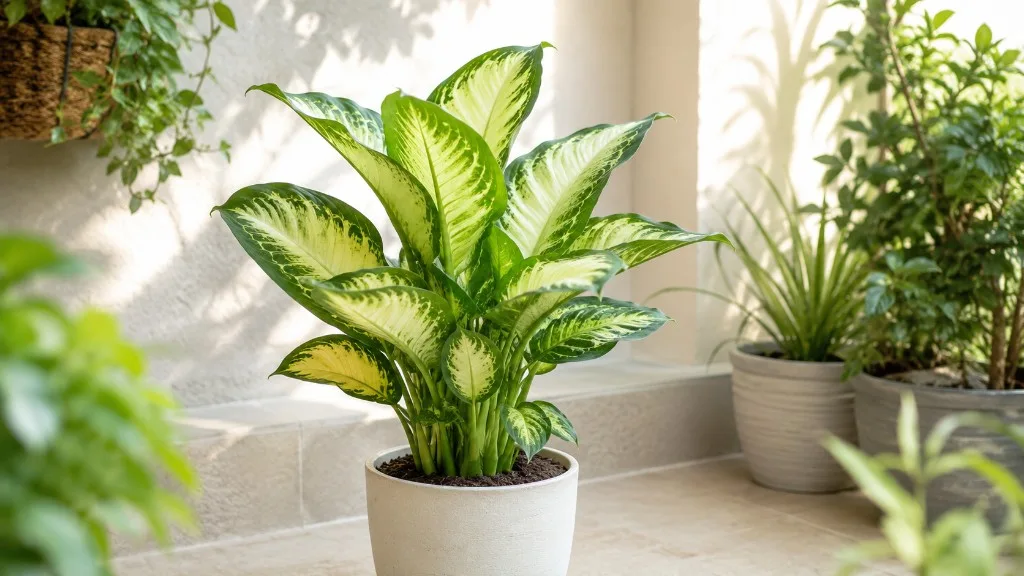
Dieffenbachia Camille (Dieffenbachia seguine ‘Camille’) earns its place on side tables and plant stands with broad leaves whose cream centers stay bright only when the root zone breathes. That pale variegation is less forgiving than deep green dumb cane foliage: chronic wet peat at the bottom of a plastic pot often shows up first as yellowing lower leaves, a perpetually heavy pot, or brown patches inside the cream panels-symptoms growers misread as a light problem long after the mix has failed. Camille is a compact, tabletop cultivar, not a floor-scale cane; its smaller root mass in a decorative pot dries differently than a towering Tropic Snow in a 25 cm nursery container. The soil question here is not generic “aroid mix” advice-it is how to keep a moist but oxygenated root zone in a pot that may sit in an office corner, a cachepot, or a bright window with sheer curtains.
This guide is the cultivar-specific soil page for Camille. For genus-wide dumb cane mix ratios and UConn’s equal-parts recipes, see the genus Dieffenbachia soil guide. For how often to water once the mix is right, use the Camille watering guide. For timing and pot sizing at refresh, see Camille repotting. The Camille overview ties light, water, and soil together.
Why Camille Soil Differs From Genus and Floor Cultivars
Camille shares dumb cane biology with every Dieffenbachia cultivar-thick stem, fleshy aroid roots, preference for loamy, peaty, well-drained indoor media-but the container scale and variegation stress change how the same recipe behaves in your home. A Camille in a 15 cm plastic pot on a desk holds far less mix than a multi-stem Tropic Snow in a floor planter; the smaller volume dries faster on the surface and stays wet longer at depth if the peat has collapsed, which is why perlite and bark percentages matter more in compact pots than the headline recipe suggests. Cream-centered leaves carry less chlorophyll than all-green growth; when roots are oxygen-starved, Camille often pushes mostly green new leaves or loses contrast before a floor cultivar shows obvious decline.
The genus Dieffenbachia soil page documents UConn’s 1:1 peat-perlite and 1:1:1 soil-peat-perlite blends for any dumb cane. This page keeps those ratios as the baseline but adds Camille-only adjustments: slightly chunkier mixes for low-light offices, tighter pot sizing to avoid unused wet volume, and variegation-aware troubleshooting when the pot feels heavy but you are afraid to move the plant to brighter light. If you grow both Camille and Tropic Snow, do not assume one bag blend fits both pots without tuning aeration to each container’s dry-down speed.
What Dieffenbachia seguine ‘Camille’ Needs From Its Root Zone
Dieffenbachia seguine ‘Camille’ is a bushy upright cultivar reaching roughly 90 cm to 1.5 m (3 to 5 feet) indoors, with broad cream-and-green leaves that need filtered light to hold variegation but scorch faster than darker cultivars when stressed. It spreads through thick roots and a moisture-storing stem-a sign it wants consistent moisture with fast drainage, not waterlogged peat packed around an oversized root ball. NC State Extension advises watering thoroughly and letting the top inch of soil dry before the next drink during active growth, which only works if the mix drains and re-airs between sessions.
Camille is an Araceae aroid native to the Caribbean through South Tropical America, where it grows in loose, organic forest-floor humus-not heavy clay or standing water. Indoors you are compressing that habitat into a pot a fraction of natural scale. The functional target: evenly damp mix at depth, dry top inch before watering, and excess water exiting within a minute after a thorough soak.
The Tropical Forest Floor Model
In habitat, dieffenbachia sits in warm, humid understory where leaf litter and bark create a loose upper layer, rain drains through quickly, and deeper humus holds moisture without excluding air. Temperatures align with typical indoor comfort, roughly 18 to 27 °C (65 to 80 °F), with moderate humidity around 50 to 60%. Your container mix should mimic that function: organic matter for moisture and cation exchange, coarse particles for macropores, and a pot matched to roots so you are not maintaining a large unused wet zone.
When growers say Camille wants “even moisture,” they mean damp like a wrung-out sponge, not saturated like a sealed wet towel. Roots need oxygen after every watering; starve them and rot develops long before the cream centers tell the full story on the leaves.
Four Jobs Your Aroid Mix Must Do
Every ingredient should serve at least one of four jobs. Moisture retention keeps roots from swinging between flood and drought. Drainage and aeration let excess water leave and air refill pore spaces. Structure over time resists peat collapse into an anaerobic block within one to two seasons. Nutrient and pH compatibility supports feeding without rapid salt crust on variegated foliage.
Fail any job and expect lower yellowing, soft stems, brown margins, or mostly green new growth-symptoms that overlap with watering mistakes and light issues, which is why checking how the mix actually behaves comes first.
Signs Your Current Camille Soil Is Wrong
Soil failure on Camille announces itself indirectly. Water sits on the surface then runs down the gap between root ball and pot wall-often hydrophobic peat from hard dry-down or aged media. The pot stays heavy for days after one watering while the top inch looks merely damp, common with dense commercial mix, nursery peat, or oversized pots. Lower leaves yellow and drop with a soft stem base even when you watered “carefully.” A sour smell from the drainage hole signals anaerobic conditions.
On Camille specifically, pair cream centers turning brown with soil that never dries at depth before blaming sun. Chronic wet roots often show bottom-up yellowing and a pot that never lightens. If you lift the plant-wear gloves; sap contains calcium oxalate crystals that irritate skin-and find dark mushy roots or a rock-hard dry root ball, you need fresh airy mix, not another calendar watering.
Decision shortcut: cream centers browning plus a heavy pot plus cool-wet mix at depth → check bottom moisture and mix texture before moving to brighter light or feeding.
| Observation | Likely soil issue | First adjustment |
|---|---|---|
| Top dry, bottom wet for days | Dense or degraded peat; oversized pot | Repot airier; reduce pot size |
| Water beads on surface | Hydrophobic aged peat | Bottom-water once; repot; pre-moisten mix |
| Wilting with wet soil | root rot on Dieffenbachia Camille from past overwatering on Dieffenbachia Camille | Inspect roots; rescue mix |
| Wilting with hard dry soil | underwatering on Dieffenbachia Camille or compacted mix | Rehydrate; refresh mix |
| Salt crust on surface | Mineral buildup | Flush or repot |
| Soft stem at soil line | Crown rot from chronic wetness | Unpot, trim rot, chunkier mix |
Best Soil Mix for Dieffenbachia Camille
The best soil for Dieffenbachia Camille is a well-draining peat-perlite aroid blend-rich in organic matter, light enough for airflow, structured so water moves through freely while the root zone stays evenly moist between waterings. NC State Extension classifies D. seguine in high-organic, well-drained soil with pH from acidic through neutral (roughly 6.0–8.0 on their plant toolbox scale). For indoor Camille culture, most growers land near 6.0–7.0 in practice because peat-coir blends naturally sit there and extreme alkalinity interferes with micronutrient uptake on variegated leaves-that narrower target is a practical indoor band, not a contradiction of the wider extension range.
The mix should feel light and crumbly when moist. Squeeze a handful: brief shape, then crumble. A tight ball means more perlite and bark; instant runoff with next-day wilting means too coarse or too small a pot for the light level.
Default Peat-Perlite Recipe
| Ingredient | Proportion | Role |
|---|---|---|
| Quality peat- or coir-based potting soil | 40% | Organic base, moisture, starter nutrients |
| Perlite or coarse pumice | 30% | Drainage channels, non-decomposing air space |
| Orchid bark or pine bark fines | 20% | Chunky structure, forest-floor mimic |
| Compost or worm castings | 10% | Slow fertility, microbial activity |
Simpler alternatives: 2 parts peat or coir : 1 part perlite, or 2 parts potting soil : 1 part orchid bark : 1 part perlite. For a Camille that dries too slowly in plastic under office light, shift to 35% base / 35% perlite / 20% bark / 10% compost. In bright filtered light with terracotta, try 45% / 25% / 20% / 10% to slow dry-down slightly without sacrificing drainage.
Moisten dry peat or coir before blending so the first watering penetrates the whole root ball-dry peat repelling water is a common reason Camille wilts right after repotting.
Camille vs Genus vs Tropic Snow Mix Differences
| Factor | Camille (this page) | Genus dumb cane | Tropic Snow (floor habit) |
|---|---|---|---|
| Typical pot | 12–18 cm tabletop | Variable | 20–30 cm floor |
| Default aeration | 30% perlite + 20% bark | UConn 1:1 peat-perlite OK | Often same recipe, larger volume |
| Dry-down watch | Surface dries fast; bottom may stay wet | Match recipe to pot | Slower dry-down in big pots |
| Variegation tie-in | Cream centers fade with root stress | General yellowing | Broader green margins tolerate stress longer |
| When to read other page | Genus chemistry, fluoride detail | Genus soil | Tropic Snow soil if you grow floor scale |
Core chemistry is the same peat-perlite aroid family; Camille’s difference is pot scale, dry-down speed, and variegation diagnostics-not a separate cactus mix.
Core Ingredients for an Aroid Mix
Understanding components lets you tune without remaking every batch when the plant moves from a bright window to a dim office.
Peat Moss and Coconut Coir
Sphagnum peat holds moisture evenly and supports slightly acidic conditions Missouri Botanical Garden describes as peaty and well-drained. It compacts and can turn hydrophobic within 12–18 months of active indoor growth-hidden root stress when the bottom densifies while the surface looks fine.
Coconut coir rewets more easily than aged peat and typically sits near pH 5.8–6.5. Use low-salt horticultural coir; poorly rinsed coir adds salts over a feeding season. Coir alone can stay wet in cool, low-light rooms-pair with generous perlite and bark.
Perlite, Bark, and Aeration Amendments
Perlite creates non-decomposing air space-the main defense against root rot. Use coarse grade. Orchid bark or pine bark fines maintain macropores peat cannot sustain after repeated watering. Pumice substitutes where available. Compost or worm castings at ~10% add slow fertility without loading synthetic salts into the root zone.
Avoid sand as the primary amendment in small indoor pots; it adds weight and can settle. Avoid garden soil; it compacts in containers per standard MBG container guidance. Avoid gravel at the pot bottom-it reduces root volume and can worsen the perched water table, keeping the lower root zone wetter, not drier.
pH, Minerals, and Fluoride for Dumb Cane
NC State Extension lists soil pH from acidic through neutral (6.0–8.0) for D. seguine. Most peat-coir aroid blends land near 6.1–6.5 without adjustment. You do not need a meter on every repot if growth is steady; test when leaves stay pale despite corrected watering and drainage.
Practical indoor target: 6.0–7.0. Below ~5.5, degraded peat can lock out magnesium and show chlorotic new growth. Above ~7.5, iron and manganese availability drops-margins brown on variegated panels. The extension’s wider 6.0–8.0 band describes field and landscape tolerance; container peat culture rarely benefits from chasing the alkaline end.
Fluoride and hard tap water matter for dumb cane. Clemson HGIC and UConn’s Dieffenbachia factsheet note sensitivity to fluoride and excess fertilizer salts, which show as tip and margin burn on leaves while roots are otherwise healthy. Michigan State University Extension reports fluoride injury on sensitive foliage crops irrigated with fluoridated municipal water; maintaining pH near 6.0–6.8 and adequate calcium in the medium can reduce fluoride availability. If margins brown despite even moisture, switch to rainwater, distilled, or filtered water for a month, flush salts, and avoid superphosphate-heavy fertilizers-not a soil swap alone.
Salts also accumulate from feeding and hard water. White crust, worsening edge burn, or stalled variegation → flush monthly in summer or repot into fresh mix; never reuse salt-laden old peat at refresh.
Drainage Speed and Moisture Retention Balance
Drainage for Camille means excess water leaves quickly while the mix holds even moisture for aroid roots-not bone-dry grit. After a thorough watering, water should exit the drainage hole freely. The root ball should feel heavier and evenly moist, not sodden.
One-minute check: water until runoff, lift the pot-streaming should slow within 30 to 60 seconds (editorial home test, not an extension mandate). If the saucer keeps filling for many minutes, the mix is too dense, holes are insufficient, or a cachepot traps runoff. Empty saucers within 15 minutes.
The top-inch dry rule pairs with soil texture: stick a finger 2.5–5 cm (1–2 inches) into the mix. Barely dry at the surface during active growth → water. Cool-wet surface with a wet bottom for days → density or pot-size problem, not calendar underwatering.
Container Choice and How It Changes Soil Behavior
The same recipe behaves differently by pot type. Plastic and glazed ceramic retain moisture-common for Camille on desks. Terracotta pulls water through walls, speeding dry-down-helpful for overwaterers, risky in bright windows. Cachepots work only when the inner pot drains and you never leave standing runoff.
Every long-term pot needs a drainage hole. Missouri Botanical Garden treats well-drained container culture as standard for dumb cane.
Pot size matters as much as mix. Match the pot to the root ball, not the leaf spread. On repot, move up only 2.5–5 cm (1–2 inches) in diameter. Oversized pots hold unused wet mix; roots colonize slowly while energy goes underground instead of into cream-centered foliage.
Plastic + low light → lean heavier on perlite and bark. Bright terracotta → slightly more retentive blend without sacrificing drainage.
Commercial Aroid Mixes vs DIY Blends
Commercial indoor potting soil works as a base if light and visibly perlite-rich-not peat mud. African violet mix plus 20–30% extra perlite and a handful of bark is a workable shortcut for dumb cane. Unamended store mix in a small plastic pot often stays wet too long; plan to refresh within 6–12 months of purchase.
Premium peat-based blends (any quality bagged indoor mix with visible structure) can serve as the 40% organic base in the table above-add perlite and bark rather than using straight from the bag long term. Cactus mix alone dries too fast unless blended 50/50 with potting soil plus ~10% compost. Dedicated aroid or chunky houseplant mixes save time; DIY lets you tune for plastic vs terracotta. Either path works with visible aeration amendments and a drainage hole.
When to Refresh or Replace Camille Soil
Peat-based mixes decompose and compact; dieffenbachia generally needs repotting as needed to refresh soil and root space. Plan full refresh every 12–18 months for active Camille, sooner if performance drops.
Repot into entirely fresh mix when roots circle the bottom or emerge from holes; water runs straight through collapsed structure; mix smells sour; salt crust survives flushing; lower yellowing and soft stems pair with a heavy pot; or new leaves emerge mostly green despite better light-chronic root stress, not simple variegation fade. Spring and early summer are safest; avoid winter repot unless rescuing rot or severe compaction. Top-dressing the upper 3–4 cm can bridge one season if roots are not bound, but advanced compaction needs a full repot workflow.
Repotting Into Fresh Mix: Step-by-Step
Repotting is when soil theory becomes root health. Wear gloves-sap contains calcium oxalate.
Water lightly the day before so the root ball holds together. Choose a clean pot one size up with drainage. Prepare moistened peat-perlite aroid mix. Slide the plant out and inspect roots: healthy tissue is pale, firm, white to tan. Trim dark mushy roots with sterilized scissors. Extensive crown rot → cut to firm tissue, rescue mix (30% base / 50% perlite / 20% bark), reduced watering until new growth.
Loosen only the outer 2–3 cm of the old ball-aroid roots tear easily. Set the stem at the same depth (never bury the crown). Fill sides with fresh mix, settle gently without compacting. Water lightly to runoff, empty the saucer, place in Dieffenbachia Camille light guide without direct sun for one to two weeks. Hold fertilizer three to four weeks.
Some drooping for a few days is normal. Persistent yellowing after three weeks → oversized pot, wet mix, or damaged roots.
Soil Mistakes That Damage Dieffenbachia Roots
Root decline is almost always prevention failure. Unamended dense potting soil or straight peat in a large plastic pot tops the list-the bottom stays wet while the surface looks fine, so growers water on schedule again. Oversized pots, blocked drainage holes, gravel layers, and reusing compacted peat import the same anaerobic stress. Burying the crown deeper at repot invites stem rot on a moisture-storing cane. Cachepots holding stale water, garden soil in pots, and buying the largest plant in the wettest nursery pot repeat the pattern.
If rot is suspected, unpot with gloves, trim mushy roots, repot into airy fresh mix, and hold feed until new growth-see Camille repotting for the full rescue sequence.
Conclusion
Dieffenbachia Camille soil checklist:
- Mix: ~40% peat/coir base, 30% perlite, 20% bark, 10% compost; chunkier if plastic + low light.
- pH: Extension allows ~6.0–8.0; aim 6.0–7.0 indoors on peat blends.
- Water pairing: Top inch dry before soak; empty saucers; see watering guide.
- Pot: Drainage hole; one size up at repot only.
- Refresh: 12–18 months or when compacted, salty, sour, or root-bound.
- Variegation: Heavy pot + wet bottom + cream browning → check mix before light or feed changes.
- Fluoride: Tip burn with good moisture → filtered water, flush salts, review fertilizer.
- Genus reference: Shared chemistry on Dieffenbachia soil; this page covers Camille scale and diagnostics.
Build airy, fresh, well-drained mix-then let watering and light do their jobs on top of a root zone you can actually read.
When to use this page vs other Dieffenbachia Camille guides
- Dieffenbachia Camille overview - Start here for whole-plant context before deep-diving this topic.
- Dieffenbachia Camille problems hub - Jump to symptom-specific fix guides when this care topic does not resolve the issue.
- Root Rot on Dieffenbachia Camille - Escalate here when soil adjustments are not enough.
- Mold on Soil on Dieffenbachia Camille - Escalate here when soil adjustments are not enough.
Related Dieffenbachia Camille guides
- Dieffenbachia Camille overview
- Dieffenbachia Camille watering
- Dieffenbachia Camille light
- Dieffenbachia Camille propagation
- Dieffenbachia Camille fertilizer
- Dieffenbachia Camille repotting
- Root Rot on Dieffenbachia Camille
- Mold on Soil on Dieffenbachia Camille
- Dieffenbachia Camille problems
How this guide was reviewed: Recommendations were checked against NC State Extension Dieffenbachia seguine, Missouri Botanical Garden Dieffenbachia, UF/IFAS Gardening Solutions Dieffenbachia, Clemson HGIC Dieffenbachia, UConn Dieffenbachia, and ASPCA Dieffenbachia toxicity. Cross-linked with LeafyPixels Camille overview, watering, repotting, and genus soil guides.