Watering Dieffenbachia Camille: Schedule, Soil Checks &
Watering Dieffenbachia Camille: Schedule, Soil Checks & Mistakes
Watering Dieffenbachia Camille: Schedule, Soil Checks & Mistakes
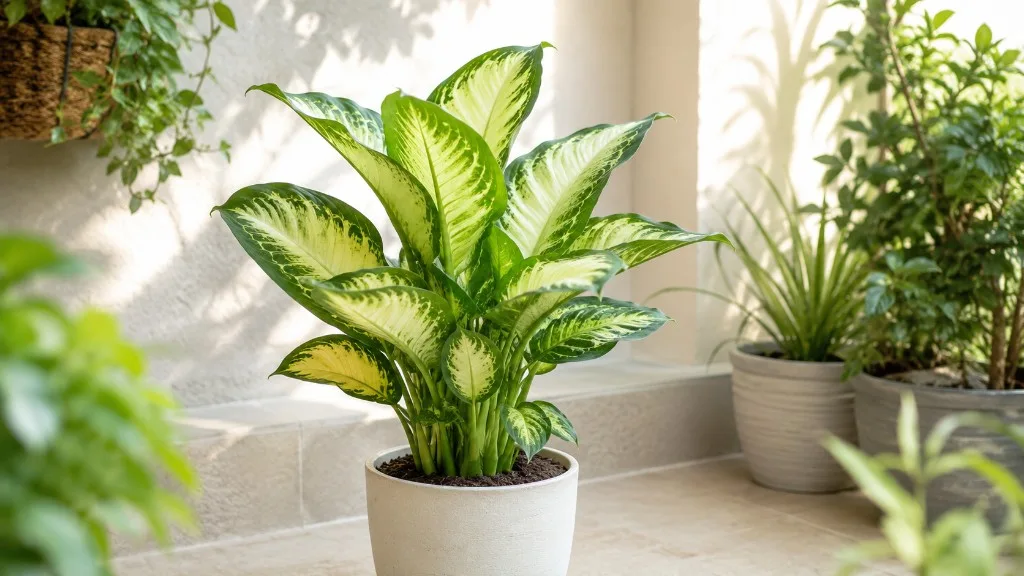
Dieffenbachia Camille - the cream-centered dumb cane cultivar - looks thirsty, but its aroid roots need moisture and oxygen at the same time. Water on autopilot and yellow lower leaves, soft stems, and root rot on Dieffenbachia Camille follow faster than on deeper-green varieties because Camille’s variegated panels carry less chlorophyll and forgive soggy soil poorly in dim corners. The fix is the top-inch dry rule, a full drink followed by drainage, and adjustments for season, pot size, light, and humidity. Dieffenbachia seguine ‘Camille’ stays compact on a side table or plant stand, with cream-and-green leaves that need filtered light to hold contrast but scorch faster than all-green dumb cane when care goes wrong.
Why Camille’s Variegated Leaves Change the Watering Equation
Dieffenbachia Camille sends the same contradictory signals as other dumb cane varieties - yellow leaves, drooping, brown edges - but the variegation adds a layer of misdirection. Cream center panels lose water differently than the green margins. In low light, Camille uses water more slowly than a fully green cultivar would in the same spot, yet many growers keep a bright-window watering schedule and overwater. In dry winter air, the pale portions show stress as brown patches or crispy edges before the whole leaf yellows, which can look like a watering problem when humidity is the missing piece.
The core confusion comes from treating Camille like a moisture-loving fern or a drought-tolerant succulent. It is neither. Camille prefers consistently moist, well-drained soil - a pairing that only works when you check the pot instead of the calendar. Moist means the root zone should not swing from dust to mud. Well-drained means excess water leaves through drainage holes and does not pool in a saucer or cachepot. Missouri Botanical Garden recommends letting the top inch of soil dry between waterings for dumb cane, and pouring out any excess water pooling in saucers so plants are not sitting in soggy soil. That single detail - empty the saucer - already separates a healthy Camille from the plant that yellows despite “good care.”
Camille in medium to Dieffenbachia Camille light guide near a sheer-curtained window transpires far more water than the same plant several feet back in a dim room. University of Connecticut notes that Dieffenbachia prefers evenly moist soil, bright filtered light, and temperatures between roughly 65 and 75°F, with reduced watering in winter when growth slows. Water by current placement, not a care-tag interval - and rotate weekly because variegated leaves lean toward the strongest light.
How Much Water Dieffenbachia Camille Actually Needs
A useful starting principle for Dieffenbachia Camille is evenly moist, well-drained soil across the active root zone - not a fixed cup volume per week. In practice, that means a slow, thorough soak that wets the mix several inches down rather than a daily sprinkle that only dampens the surface. Water until moisture moves through the full depth of the mix and exits the drainage holes. Then stop until the top inch approaches dry again. That cycle - full drink, partial dry-down, full drink - is the rhythm this aroid prefers.
The amount of water per session matters less than how thoroughly you rewet the root ball. A half-cup dribbled on the surface every morning often keeps the top wet while the center stays dry - then Camille wilts, you add more sips, and the roots never get a coherent drink. Conversely, flooding a pot that was already saturated at depth pushes oxygen out of the mix and starts the path toward root rot. NC State Extension advises watering thoroughly and allowing the top 1-inch surface to dry completely before watering again to help prevent root rot. Camille wants a deep watering event followed by enough dry-down for roots to breathe.
Humidity, pot material, and soil texture change how much water Camille uses, not how much you pour per session. When the top inch is dry and the pot feels light, water fully. When it is still damp, wait. The thick cane stores some moisture, so the plant can look fine above soil while roots are already stressed below.
The Top-Inch Dry Rule for Dieffenbachia Camille
The top-inch dry rule is the most reliable everyday trigger for watering Dieffenbachia Camille: water only when the top inch of potting mix feels dry to the touch. Not the surface crust alone - push to a full inch depth near the pot edge, away from the stem. If that layer is dry and the pot has lost noticeable weight, water thoroughly. If the inch is still cool and clings to your finger, wait.
Why one inch specifically? Camille roots sit mostly in the lower two-thirds of the pot. The top inch acts as an early-warning layer. When it dries, the root zone below has used available moisture but has not yet been starved for days. When you water before the top inch dries - because the cream leaves look dramatic or because Tuesday is “watering day” - the lower roots stay waterlogged. Aroids are especially sensitive to that pattern because their roots need air pockets in the mix between drinks.
Some growers extend the check to one and a half or two inches in winter or in low light, when evaporation is slow. That is reasonable as long as you stay consistent and watch the plant’s response. A Camille that stays perky with a two-inch dry-down in December may need a one-inch check in July. The rule is a depth, not a religion - adjust within that framework, not outside it with blind weekly pours. If you buy a Camille and the pot feels heavy with yellowing leaf edges, assume the roots have been kept too wet and start with a longer dry-down before the next drink.
Finger Test, Skewer Probe, and Pot Weight for Camille
The finger test is the fastest daily check. Press your finger into the mix one inch deep near the pot edge. If the soil feels cool and clings slightly, wait. If it feels dry and crumbly at that depth, water. If only the surface is pale and dry but your finger comes out with damp particles below, wait - surface colour lies, especially on peat-based indoor mixes.
The pot weight test is the most reliable signal once you learn your Camille’s rhythm. Lift the pot right after a thorough watering and notice the weight. Lift it every few days. A pot that feels dramatically lighter has lost much of its available moisture. Combine weight with the finger test when you are unsure: light pot plus dry top inch equals water; heavy pot plus wilted leaves equals trouble, not thirst. A healthy Camille should feel upright and springy at the crown; a heavy pot with limp cream panels points the opposite direction.
A wooden skewer or chopstick works as a low-tech backup. Insert it to mid-pot depth, wait sixty seconds, pull it out. Damp streaks mean wait; dry with a light pot means water. A soil moisture meter can help beginners, but treat it as confirmation, not a substitute for learning how your specific Camille pot dries in your specific room.
How Often to Water Dieffenbachia Camille Indoors
Indoor Dieffenbachia Camille typically needs watering every seven to ten days in summer and every fourteen to twenty-one days in winter, but those ranges are starting points until you confirm them against your pot. A bright east or west window with a sheer curtain in active growth may push you toward the shorter end. A cool north-facing room or a Camille sitting far from windows in winter may stretch toward three weeks. A small six-inch pot in dry, air-conditioned air can surprise you by drying in five days. The schedule is a guess until you run the moisture checks for two weeks in the same spot.
Check indoor Camille at least every three to four days during the growing season. Do not water by default. Run the top-inch test first, then water or walk away. After two weeks in the same location, you will know whether your plant behaves like a seven-day Camille or a ten-day one. That personal baseline is more accurate than any blog chart because it accounts for your pot material, your mix, your light, and your humidity.
Plants in low-light rooms deserve extra caution. Camille’s variegation means less chlorophyll per leaf area, so it often uses water more slowly in dim corners - yet many growers keep a bright-window schedule and overwater. If your Camille lives on an office desk or a side table away from windows, lean toward longer intervals and trust the finger test over memory. If new leaves emerge mostly green, increase light gradually before changing water frequency; pale variegation loss is usually a light signal, not a thirst signal.
Seasonal Watering Adjustments for Dieffenbachia Camille
Dieffenbachia Camille is a tropical foliage plant whose water use tracks temperature, day length, and growth speed more than the day of the week.
In spring and summer, stronger light and warmth shorten dry-down windows. Many indoor Camille plants settle into a seven-to-ten-day rhythm when the top inch dries, though air conditioning near small pots can accelerate drying. In fall and winter, stretch intervals and verify with soil checks - cool, dim rooms may need water only every fourteen to twenty-one days. Reduce frequency, not thoroughness: when you water, water fully and drain completely. UF/IFAS guidance aligns with reduced watering from fall to late winter when growth slows. Fresh mix in a larger spring repot holds moisture longer until roots fill the new volume - do not keep your old frequency.
Summer Growth and Winter Slowdown
Summer mistakes cluster around two extremes: forgetting the pot during a heat wave when Camille sits near a sunny window, and watering every week out of habit even when the mix is still wet from the last session. Heat increases evaporation and transpiration; it does not suspend the need for drainage. If Camille wilts at midday and perks up by evening without your intervention, that may be heat stress or low humidity on the cream panels, not drought. If it stays wilted into the next morning despite wet soil, suspect root damage.
Winter slowdown does not mean neglect. Camille dislikes cold wet feet. A pot that took seven days to dry in July may take eighteen in January in the same room. Adjust by check, not by memory of summer frequency. overwatering on Dieffenbachia Camille during winter dormancy is one of the most common triggers of root rot in dumb cane - the plant is not using water quickly, but the grower is still pouring on schedule. Brown patches inside the pale portions in dry heated rooms often track humidity more than watering, but chronic wet soil in winter still kills roots first.
Watering Camille by Pot Size, Light, and Placement
Pot size changes the schedule immediately. A six-inch Camille on a plant stand may need water every five to seven days in summer; a larger floor pot may go ten to fourteen days in the same location. After Dieffenbachia Camille repotting guide into a larger pot, expect slower dry-down until roots fill the new volume - many growers overwater because they keep the old schedule while extra mix stays wet around a small root ball. Plastic retains moisture longer than terracotta; adjust check frequency to the pot, not the other way around.
Light placement is the hidden variable Camille growers underestimate. Camille looks best close to a bright window with a sheer curtain rather than several feet back in dim light. Brighter placement dries the pot faster and supports the cream variegation. Dim placement slows water use but increases overwatering risk because the same weekly habit continues. Every light change should trigger a watering recalibration: brighter spot means check every three days; dimmer spot means longer dry-down windows.
Rotate the pot weekly because variegated leaves lean toward the strongest light. Uneven light can make one side of the canopy look stressed while the other looks fine, which sometimes sends growers to water when only placement is wrong.
The Right Way to Water Dieffenbachia Camille
Technique matters because Dieffenbachia is susceptible to crown and stem issues when water sits against the base of the plant. Use a watering can with a narrow spout and aim at the soil surface, not the leaf axils or the cream centers. Water slowly enough for the mix to absorb rather than shed water down the inside wall of the pot. Dry peat sometimes repels water - if runoff happens within seconds, water in two passes five minutes apart, or bottom-water the pot in a tray until the surface darkens, then drain.
Water until excess runs freely from drainage holes. That confirms the root ball received a full drink. Immediately empty the saucer within thirty minutes. Standing water re-saturates the bottom root zone, blocks oxygen, and causes the classic paradox: wilting Camille, wet soil. If you use a decorative cachepot, lift the inner nursery pot to water, drain fully, then return it - never let the outer pot hold standing water.
Use room-temperature water. Cold water can shock warm roots and slow uptake. Some Dieffenbachia cultivars are sensitive to fluoride and chlorine in tap water, showing brown leaf tips over time; Camille’s cream margins can show this stress early. If tips brown despite good watering rhythm, try filtered or distilled water for a month and compare. That is a water-quality issue, not a reason to water more often.
Avoid splashing the crown when possible. Large leaves can funnel water toward the stem base where rot begins. If foliage gets wet accidentally, ensure good airflow so it dries within a few hours. Camille’s broad, flat leaves are poor candidates for misting as a watering substitute - water pooling on cream panels in stagnant indoor air invites fungal spotting.
Root Rot Prevention for Dieffenbachia Camille
Root rot is the catastrophic end of chronic overwatering - and it is largely preventable with drainage discipline and the top-inch dry rule. Camille roots need oxygen. When mix stays saturated for days, anaerobic conditions favor pathogens that turn firm, pale roots into mushy, dark brown or black tissue. Prevention is simpler than recovery: never let the pot sit in runoff, never water on calendar alone, and never use a mix that stays shiny-wet on the surface for more than a day or two after a thorough drink.
Start with drainage holes - non-negotiable. A beautiful pot without holes belongs to a different plant or needs the nursery pot lifted for every watering. Use a well-draining rich potting mix with perlite or similar amendments so water moves through rather than pooling. Match pot size to the root mass; an oversized pot holds excess wet mix the roots cannot use.
After watering, empty saucers and cachepots every time. If you notice soil still wet at the top inch when your schedule says water, skip the session - that is prevention in action. Reduce frequency automatically in winter and in low light rather than hoping the plant will “use it up.”
If you suspect early trouble - yellowing across multiple leaves, a musty smell, or drooping that does not resolve after careful watering - gently unpot and inspect roots. Healthy Camille roots are firm and pale; rotted roots are soft, dark, and sour-smelling. Trim affected tissue, repot into fresh airy medium, and water sparingly until new growth confirms recovery.
Recognizing Early Root Stress on Variegated Camille
Root stress appears before full rot. Watch for yellowing spreading faster than one lower leaf every few weeks, a soft stem base, soil wet five or more days after watering, or persistent drooping with wet soil - damaged roots cannot move water even when the mix is saturated. On variegated Camille, cream centers dulling on multiple leaves while soil stays damp points to roots first; brown patches only on sun-facing cream panels with normal soil rhythm suggest sun stress instead.
Yellow Leaves on Dieffenbachia Camille: Overwatering vs Other Causes
Yellow leaves from overwatering are among the most common Dieffenbachia Camille problems - and among the most misdiagnosed. Overwatered Camille typically shows soft, yellow lower leaves that may spread upward if saturation continues. The soil feels wet or heavy several days after watering. The stem base near the soil line may feel spongy. Sometimes a faint musty or sour smell rises from the mix when you disturb the surface. Dark splotches on leaves paired with soggy soil strongly suggest investigating roots for root rot, a common dieffenbachia problem when soil stays wet.
Not every yellow leaf is overwatering. Natural aging drops the oldest lowest leaf occasionally - often one at a time, with firm tissue and dry soil rhythm unchanged. underwatering on Dieffenbachia Camille yellows leaves too, but the mix is dry deep down and the pot feels light; leaf edges may be crispy, especially on cream margins. Low light can pale and yellow leaves gradually while the plant stretches and new growth emerges mostly green. Nutrient deficiency tends toward uniform paleness on newer growth rather than soft yellowing on lower leaves with wet soil.
The diagnostic sequence that saves time: check soil moisture at one inch, then pot weight, then stem firmness, then light level. If moisture is high and the stem is soft, overwatering or early rot is the leading suspect - and adding fertilizer or moving the plant to a sunnier window will not fix it. Pause watering, empty any saucer water, and let the top two inches dry before the next careful drink. If multiple leaves yellow within a week despite adjusted watering, unpot and inspect roots.
Signs Dieffenbachia Camille Is Thirsty or Underwatered
Underwatered Camille shows drooping leaves, crispy cream edges, and a light pot with dry mix one to two inches down. After a thorough watering with full drainage, the plant typically perks up within hours. Repeated drought damages fine roots; rehydrate thoroughly once, then return to the top-inch dry rule rather than alternating extremes. Temporary afternoon droop that resolves by evening is often heat or low humidity, not thirst - check soil before pouring. Crispy cream margins in dry winter air may need humidity as much as a drink.
Soil Mix and Drainage for Camille
Your watering technique is only as good as the soil mix it works with. Camille needs a well-draining rich potting mix with perlite or similar amendments - heavy garden soil or pure peat in a dim room is a recipe for chronic sogginess. Mix should hold moisture in the root zone without staying waterlogged for days. Target a slightly acidic to neutral pH, though exact pH matters less than structure and airflow for most indoor growers.
Compacted old mix is a hidden cause of overwatering symptoms. The top dries while the core stays wet, or water channels down the pot wall without wetting the root ball. If your Camille has been in the same soil for two or more years, repotting into fresh mix often fixes mysterious yellowing faster than adjusting water frequency alone.
Drainage gravel at the pot bottom does not replace holes or good mix. When buying Camille, choose firm stems and clean cream centers; a heavy pot with yellow edges usually means roots have been kept too wet.
Humidity and Variegated Foliage on Dieffenbachia Camille
Humidity and watering are related but not interchangeable - and on Camille, humidity matters more for variegated foliage than on all-green dumb cane. Dieffenbachia prefers relatively high humidity, typical of its tropical understory origin, and tolerates average indoor levels near thirty to forty percent in many homes. Camille’s cream center panels are thinner in chlorophyll and more prone to transpiration stress; in dry air they often show brown patches or crispy margins before the whole leaf fails.
Humidity affects transpiration and dry-down speed but does not replace root-zone moisture. In dry winter air near heating vents, Camille may dry out sooner - water only when the top inch confirms dryness. A humidifier or pebble tray reduces edge burn on cream panels without encouraging the fungal spotting that misting can cause on broad, flat leaves. In high humidity with poor airflow, soil stays wet longer while foliage looks fine, masking overwatering. If cream centers brown with correct watering rhythm, raise humidity before adding more water.
Water Quality, Temperature, and Timing
Water room-temperature water that has sat out for a few hours if your tap runs cold. Morning watering gives any incidental splashes time to dry during the day and matches when many growers do their plant rounds. Evening watering is acceptable if you water the soil, not the foliage, and the mix is not left soggy overnight in a cold room.
If brown tips persist on cream margins despite correct dry-down rhythm, consider filtered water to reduce fluoride and chlorine exposure - some Dieffenbachia cultivars are more sensitive than others. Over-fertilizing can also burn tips; flush the soil occasionally if you feed heavily. Water quality fixes tip burn; it does not solve yellow lower leaves from saturated mix.
Common Dieffenbachia Camille Watering Mistakes
Weekly autopilot watering tops the list - use the calendar as a reminder to check, not a command to pour. Leaving water in the saucer re-saturates roots; empty it every time. Watering a wilted Camille without checking soil often adds water to an already wet pot. Cachepots without lifting trap runoff - remove, drain, return. Small daily sips dampen the surface while the center stays dry; switch to full drinks at proper intervals. Misting instead of watering when soil is dry does not hydrate roots and risks spotting on cream leaves. Ignoring winter slowdown and watering every seven days through December invites root rot - extend checks to fourteen to twenty-one days when growth is slow. Keeping Camille in dim light with a bright-window water schedule is a variegated-cultivar classic - slow water use plus frequent pours equals yellow leaves and soft stems.
Building a Weekly Check Routine for Camille
Every three to four days, run the top-inch finger test and lift the pot. When dry at one inch, water until runoff, empty the saucer within thirty minutes, and note how many days passed - that becomes your personal baseline. Expect longer gaps from October through February. Batch checks across houseplants and water only the pots that pass the test. Rotate Camille when you check so variegation stays even. Camille rewards boring consistency more than rescue sessions.
Conclusion
Watering Dieffenbachia Camille comes down to a few non-negotiable habits: the top inch of mix must dry before the next drink, every pour should be thorough enough to reach the root ball and drain completely, and the calendar is a reminder to check - not a command to water. Season, pot size, light, and humidity change how fast soil dries, but they do not change the gate. Yellow soft lower leaves with wet, heavy soil point to overwatering and possible root trouble, not a call for more water. Root rot prevention is mostly drainage discipline applied before symptoms appear. Humidity shapes how cream variegated panels hold their color and how quickly the plant uses moisture, but never replaces soil checks at the roots. Learn your Camille pot’s dry-down rhythm for two weeks, adjust through winter slowdown, protect the cream centers from dry air and soggy soil at the same time, and Camille stops being a guessing game - it becomes a compact dumb cane that holds its variegation and pushes new leaves because the roots finally get both water and air.
When to use this page vs other Dieffenbachia Camille guides
- Dieffenbachia Camille overview - Start here for whole-plant context before deep-diving this topic.
- Dieffenbachia Camille problems hub - Jump to symptom-specific fix guides when this care topic does not resolve the issue.
- Overwatering on Dieffenbachia Camille - Escalate here when watering adjustments are not enough.
- Underwatering on Dieffenbachia Camille - Escalate here when watering adjustments are not enough.
- Root Rot on Dieffenbachia Camille - Escalate here when watering adjustments are not enough.
Related Dieffenbachia Camille guides
- Dieffenbachia Camille overview
- Dieffenbachia Camille light
- Dieffenbachia Camille soil
- Dieffenbachia Camille propagation
- Dieffenbachia Camille fertilizer
- Dieffenbachia Camille repotting
- Overwatering on Dieffenbachia Camille
- Underwatering on Dieffenbachia Camille
- Root Rot on Dieffenbachia Camille
- Wilting on Dieffenbachia Camille
- Drooping Leaves on Dieffenbachia Camille
- Mold on Soil on Dieffenbachia Camille