Dieffenbachia Camille (Dumb Cane) Repotting: Spring Timing
Dieffenbachia Camille (Dumb Cane) Repotting: Spring Timing & Pot Size
Dieffenbachia Camille (Dumb Cane) Repotting: Spring Timing & Pot Size
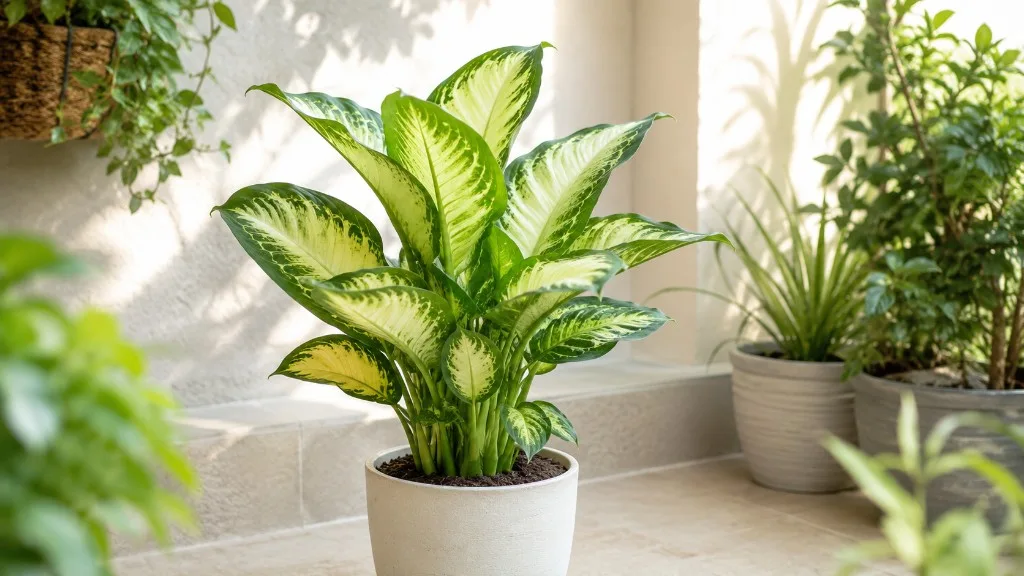
The first fear most Dieffenbachia Camille owners have after repotting is not wilting - it is cream leaf scorch. Dieffenbachia seguine ‘Camille’ is the compact, cream-centered dumb cane sized for a plant stand or side table, typically reaching 3 to 5 feet indoors (Clemson HGIC - Dieffenbachia lists most dieffenbachias at 3 to 6 feet tall), not a towering floor specimen. Its pale central panels carry less chlorophyll than the green margins, which means stressed roots show up as brown patches inside the cream zones long before an all-green cultivar looks damaged. Repotting fixes root congestion and degraded soil, but the recovery window is when Camille is most vulnerable to too much direct sun, oversized pots, and stacked care changes.
Dieffenbachia Camille repotting success means matching spring-through-early-summer timing, a one-size-larger pot with drainage, fresh airy aroid mix - not a duplicated recipe pasted from a generic dumb cane template - and stable bright filtered light for the first three to four weeks. Wear gloves: sap contains calcium oxalate crystals that irritate skin and are toxic to pets if ingested (ASPCA - Dieffenbachia).
Reviewed by LeafyPixels Review Board · Author: sai-ananth
Use this page for Camille-specific cream-variegation recovery, compact-pot sizing, and side-table aftercare. For genus-wide dumb cane biology and division defaults, see the Dieffenbachia repotting hub. For the full Camille care picture, start at the overview hub.
Dieffenbachia Camille Repotting: Quick Answer for Side-Table Growers
When: March through June for routine repots while active growth resumes; winter only for active root rot on Dieffenbachia Camille or daily wilting from severe root-binding (Clemson HGIC - Dieffenbachia recommends early spring when repotting is necessary).
Pot size: Go one nursery size up - 1 to 2 inches (2.5 to 5 cm) wider in diameter, with a drainage hole (Clemson HGIC - Indoor Plants Repotting; Penn State Extension - Repotting Houseplants).
Soil: Fresh 40/30/20/10 peat-perlite aroid blend per the Camille soil guide - do not repot into straight bagged potting soil.
Aftercare: Light watering when the top inch dries; bright filtered indirect light - no direct afternoon sun on cream panels for two to three weeks; hold fertilizer three to four weeks until a new leaf unfurls at normal size and variegation.
Success metric: A new cream-centered leaf at full size means recovery is complete - not whether old lower leaves still look perfect.
Why Camille Repotting Differs From Other Dieffenbachias
Most dieffenbachia repotting advice is interchangeable at the genus level: spring timing, one size up, tease circling roots, hold fertilizer. Camille adds three cultivar-specific constraints that a floor-caned Tropic Snow or a generic genus repotting page underemphasizes.
First, compact habit and smaller pots. Camille usually lives in a 6-inch or 8-inch container on a stand, not a 12-inch floor planter. A “modest” upsize in absolute inches is still a large relative jump in soil volume around a small root mass - oversizing causes rot faster on Camille than on a taller cultivar in a big pot.
Second, cream variegation is a stress indicator. Pale leaf panels scorch when transpiration demand outpaces disturbed roots. After repot, Camille needs slightly brighter filtered light than a deep-green dumb cane to fuel new growth - but less direct sun than you might give an all-green plant recovering in the same window. That paradox drives most post-repot cosmetic damage.
Third, display value ties to root health. When soil compacts in a small pot, Camille pushes greener, smaller leaves before stems stretch. Repotting is often a variegation-preservation move, not just a root-housing upgrade. Clemson HGIC describes ‘Camille’ as a bushy variety with creamy yellow leaves bordered in rich green and a full growth habit - the cultivar growers choose for tight spaces, which makes pot-size discipline matter more.
What Repotting Resets for Cream-Variegated Roots
In habitat, dieffenbachia roots spread through loose forest-floor litter that drains fast and rewets evenly (NC State Extension - Dieffenbachia seguine). Indoors, peat and bark decompose within 12 to 18 months in active growth, fine particles settle, and a perched wet zone forms at the bottom even when the surface looks acceptable. Repotting replaces that degraded matrix with open, airy mix and gives roots a modest new radius to explore.
For Camille, the functional goal is restoring even moisture delivery to pale leaf tissue. Cream panels cannot tolerate the boom-bust hydration cycle that degraded soil creates - water channels down the pot wall while the root ball center stays dry, then the bottom sits wet for days in low light. Fresh mix plus correct pot size re-establishes the steady dampness Missouri Botanical Garden describes as rich, well-drained, loamy soil in bright filtered light.
Repotting is also your best inspection point. Slide the plant out once a year in late winter and you see whether roots are white and firm, whether circling has started, and whether a multi-stem clump has natural division points before display value collapses.
Cream Panels and Root Stress After the Move
Variegation pattern is set when each leaf opens - repotting cannot paint cream back onto an existing green leaf. What repotting protects is the next generation of foliage. When roots are suffocating in collapsed mix, new leaves emerge smaller and greener; after a successful spring repot with stable light placement, the following leaves should return to wide cream centers with crisp green margins.
During the first two weeks after repot, expect mild wilting or one dropped lower leaf - normal transplant shock if the crown stays firm. If cream centers brown while green margins still look glossy, suspect too much direct sun or oversized wet soil, not underwatering on Dieffenbachia Camille alone.
Editorial observation - March repot timeline: A Camille repotted in mid-March in a temperate home often shows its first post-repot leaf unfurling in two to four weeks, with full cream variegation clarity by week six if light and watering stayed conservative. Judge recovery on that new leaf, not on older panels that yellowed during the move.
How Often Camille Needs a New Pot
Inspect Camille every spring; fully repot only when roots or soil fail - not because the calendar says so (Penn State Extension - Repotting Houseplants). Most side-table Camille plants need a full repot every 12 to 18 months if growth is active, aligning with the Camille soil guide refresh interval. Slow specimens in stable 8-inch pots may stretch toward two years if the mix still drains and rewets evenly.
UF/IFAS Gardening Solutions notes dieffenbachias should be repotted as needed when roots outgrow the container - calendar repotting without inspection is how growers oversize healthy plants into rot.
Young nursery Camilles arrive in peat-heavy greenhouse mix. If yours has been home three to four months and is actively growing, a first spring repot one size up into proper aroid blend is often the highest-impact upgrade you can make - especially if you have not yet dialed in watering rhythm.
Calendar Cues vs. Root-Bound Signals
Use the calendar as a reminder to lift the root ball, not as a command to repot. Once a year in late February or March, slide the plant out:
- Wait if roots are mostly surrounded by visible soil, white or light tan, and not circling densely.
- Repot at the next spring window if roots circle the bottom, protrude from drainage holes, or form a solid wall around the soil.
- Repot even without circling if mix smells sour, drains in seconds without wetting evenly, or has shrunk away from the pot wall.
Degraded soil alone justifies repotting - sometimes into the same cleaned pot with all-new mix rather than a larger one.
Best Time to Repot Dieffenbachia Camille
Early spring through early summer is the best window - when new leaves begin unfurling and roots push white tips (Penn State Extension identifies spring as when houseplants naturally begin seasonal growth and roots grow into fresh mix). Clemson HGIC - Dieffenbachia advises repotting in early spring when necessary.
Camille prefers 65–80°F (18–27°C) (Missouri Botanical Garden - Dieffenbachia). Stable warmth during recovery matters as much as season label.
Early Spring Through Early Summer Window
In most temperate homes, aim for March through June - when you first notice crown activity after winter slowdown. Early spring gives the full growing season to fill the new pot with roots; early summer still works if you protect cream panels from west-facing afternoon sun that spikes leaf temperature during recovery.
Missed spring and it is late summer? Wait until next spring unless the plant is clearly failing. Fall repotting often means dormant months in fresh wet soil with no root growth to use it. Top-dressing - replacing the top 1 to 2 inches of mix - is a safer fall compromise (Clemson HGIC - Indoor Plants Repotting).
When Winter Repotting Is Still Warranted
Winter repotting is a rescue tool, not routine care. Repot immediately if you see active root rot - mushy stems at the soil line, sour smell, black slimy roots at drainage holes. Leaving the plant in saturated decomposed soil is more dangerous than off-season disturbance.
Severe root-binding causing daily wilting despite correct watering is a second exception. Repot with minimal disturbance, keep stable bright filtered light away from heating vents, and hold fertilizer at least four weeks.
For healthy plants with merely old soil - wait for spring. Patience in winter is legitimate care.
Signs Your Camille Is Root-Bound or Soil-Degraded
Camille sends physical signals rather than calendar reminders. Plan a spring repot when two or more of these align:
- Roots circling the bottom or growing through drainage holes
- Water running straight through within seconds while the plant wilts a day later
- Stalled growth despite adequate light and feeding during warm months
- Soil drying in hours because roots displaced most substrate
- Yellow lower leaves with mix that stays wet for days (degraded, compacted media)
- White salt crust on the rim after months of feeding
One yellow leaf after a cold draft is not a repot signal. Persistent decline over several weeks with roots visible at the pot bottom is.
Drainage Failures and the Water-Channel Pattern
The subtlest root-bound pattern: you water thoroughly, water exits the bottom in seconds, the plant looks fine for a day - then lower leaves droop while the top inch feels bone dry. Water is channeling down the gap between the root ball and pot wall instead of penetrating the mass. Camille’s cream panels are first to show stress because they have less physiological buffer.
Lift the pot and inspect the underside. A mat of roots over drainage holes confirms congestion. Slide the plant out: a solid disk of circling roots with almost no visible soil in the center means act at the next suitable window - or immediately if rot is present.
Choosing the Right Pot: One Size Up Only
The single most important pot decision: go one size up, not two. That means 1 to 2 inches (2.5 to 5 cm) wider in diameter (Clemson HGIC - Indoor Plants Repotting). Every pot needs a drainage hole; cachepots are display only.
Depth matters for compact Camille. Dieffenbachia roots spread outward more than downward. A slightly wider, not dramatically deeper pot avoids a wet bottom zone the roots never reach. Do not add gravel layers at the pot bottom - research shows that slows drainage rather than improving it (Clemson HGIC - Indoor Plants Repotting).
Plastic retains moisture - good for dry homes. Terracotta breathes and suits overwaterers or humid bathrooms. Glazed ceramic behaves like plastic; use as cachepot around a draining nursery pot.
Worked Example - 6-Inch to 8-Inch Upgrade
Suppose your Camille has lived 18 months in a 6-inch plastic nursery pot. Growth stalled last summer despite good care. You slide it out in March and see roots circling the bottom third, little loose soil visible, and the root ball lifts as one solid cylinder - but roots are still mostly firm and cream-colored, not mushy.
Correct move: Repot into a 7- or 8-inch pot (one size up), not a 10-inch decorative planter. An 8-inch pot adds roughly 75% more soil volume - already a significant jump for a compact root mass. Pre-moisten fresh 40/30/20/10 aroid mix, tease outer circling roots, plant so the crown sits 1/2 to 1 inch below the rim, water lightly once, and place 3 to 5 feet back from a west window or behind a sheer curtain on an east exposure for recovery.
Wrong move: Jumping to a 10-inch cachepot “so you never repot again” - the unused wet soil around small roots is the most common post-repot rot pathway on Camille.
Aroid Soil for Repotting (See Full Camille Soil Guide)
Do not repot Camille into unamended bagged potting soil. Use the 40% peat- or coir-based potting soil, 30% perlite, 20% orchid bark, 10% compost or worm castings blend detailed in the Camille soil guide - the same ratios that page recommends for refresh and repot so your care stack stays consistent.
Missouri Botanical Garden describes dieffenbachia as preferring peaty, well-drained mix with mildly acidic pH around 6.1 to 6.5. Pre-moisten dry peat before planting so the first watering penetrates evenly - dry peat repels water and leaves the root ball center dry while the surface looks wet.
If your home is very dry, shift toward 45% base mix / 25% perlite per the soil guide’s bright-light terracotta note. If you overwater, increase perlite and bark. Sterilize reused pots with 10% bleach solution (one part bleach to nine parts water) (Penn State Extension - Repotting Houseplants), rinse, and dry before planting.
Avoid garden soil, vermiculite-heavy mixes, and reused soil from other plants.
Step-by-Step Camille Repot Workflow
Repotting takes 20 to 30 minutes with preparation. Wear gloves throughout - dumb cane sap irritates skin (ASPCA - Dieffenbachia).
- Water lightly one day before. Slightly damp soil holds the root ball; soggy soil falls apart; dry soil crumbles.
- Gather supplies. New pot (one size up), pre-moistened mix, sterilized scissors, gloves, tarp, chopstick for settling soil.
- Remove the plant. Tip on its side; run a butter knife around the rim if stuck. Never yank stems - petioles snap easily.
- Inspect roots and crown. White or light tan roots are healthy. Trim black, mushy roots with sterilized scissors. Tease circling outer roots; do not bare-root the entire plant. Soft dark crown tissue suggests crown rot - repotting may not save the plant.
- Trim rot optionally. Some growers dust cut root surfaces with ground cinnamon as a home folklore step - it is not extension-backed and does not replace removing wet soil and correcting drainage. Let cut surfaces air-dry an hour before replanting.
- Add mix to the new pot. Root ball top sits 1/2 to 1 inch below the rim (Penn State Extension - Repotting Houseplants).
- Fill and settle. Work mix into gaps with a chopstick; do not compact.
- Water lightly once. Enough to settle soil; not a heavy soak on day one.
- Recovery placement. Bright filtered indirect light, stable temperature, no fertilizer for three to four weeks.
Trim no more than one-third of healthy root mass unless treating active rot.
Dividing Multi-Stem Camille Plants at Repot
Many Camilles grow as multi-stem clumps from several rooted cuttings in one pot. Repot time is the natural moment to divide if each section has its own stem and adequate roots - or to keep the clump together in one size-up pot if it is healthy and not overcrowded.
Divide when:
- Three or more stems compete for the same soil volume
- You want a second plant for another room or to propagate via division
- Natural separation points appear between stem groups in the root ball
Skip division if there is only one stem, no natural separation, the plant is pest- or rot-stressed, or you are doing a non-emergency winter repot. NC State Extension lists division among recommended propagation methods when multi-stem plants outgrow their container.
Brush away soil to find stem-to-root connections. Tease sections apart by hand; cut only where necessary with sterilized shears. Each division needs at least one stem and a fist-sized healthy root portion. Pot divisions in 4- to 6-inch containers matched to root mass, not oversized pots. Group divisions for slightly higher humidity; resist overwatering on Dieffenbachia Camille wilting leaves.
Aftercare for Cream-Variegated Recovery
The first three to four weeks after repotting are recovery, not a growth push. Mild wilting, paused new leaves, or one yellow lower leaf is normal if the crown stays firm and wilting resolves within two weeks.
Watering: Light drinks when the top inch dries - same principle as the Camille watering guide. Do not keep soil soggy to “help it settle.”
Fertilizer: Hold three to four weeks to match the soil guide - fresh roots need time to heal before absorbing nutrients. Resume normal feeding when a new leaf unfurls.
Humidity: Camille tolerates 50–60% household humidity. Stable conditions beat frequent moves.
Full root establishment typically takes four to six weeks. Success equals new leaves at normal size with clear cream centers.
Post-Repot Light Placement for Pale Leaf Panels
Camille needs bright filtered indirect light after repot - slightly more intensity than a deep-green dumb cane needs to produce the next leaf - but no direct sun on cream panels for two to three weeks minimum.
Practical placements:
- East window with sheer curtain: Ideal recovery spot - morning brightness without afternoon scorch.
- North window: Acceptable if the plant was already acclimated there; watch for slow recovery, not immediate sun move.
- West or south window: Keep 3 to 5 feet back or behind diffusion until new growth appears; afternoon sun on stressed cream tissue causes irreversible brown patches.
- Office fluorescent: Stable; avoid moving between home and office during recovery.
UF/IFAS Gardening Solutions notes dieffenbachia prefers bright light, including some direct sun in winter at the genus level - Camille is the cultivar exception during recovery, when cream panels behave like sun-sensitive tissue even if the green margins could tolerate more.
Do not stack repotting with a major light relocation or fertilizer change in the same week.
Repot Now, Top-Dress, or Wait: Decision Table
| Situation | Best action | Why |
|---|---|---|
| Healthy plant, spring arriving, roots circling or mix 18+ months old | Full repot, one size up | Active growth supports root repair; aligns with genus spring guidance |
| Healthy plant, fall or winter, no rot | Wait until March; optionally top-dress top 1–2 inches | Dormant roots cannot use extra wet volume (Clemson HGIC - topdressing for large pots) |
| Active root rot any season | Emergency repot into fresh mix; possibly one size down if roots removed | Staying in wet soil is worse than off-season disturbance |
| Water channels through, daily wilting | Repot at next suitable window or immediately if severe | Channeling means functional root failure |
| One root at drainage hole, otherwise healthy | Wait; recheck next spring | Single root ≠ full congestion (Penn State Extension) |
| Mix degraded but roots not circling | Repot into same-size cleaned pot with all-new mix | Refreshes media without oversizing |
Common Repotting Mistakes on Camille
Jumping two pot sizes. Oversized containers stay wet around small Camille roots. If you already overshot, water sparingly and consider replanting into a correct size if yellowing starts within two weeks.
Bare-rooting the entire plant. Stripping all soil destroys fine root hairs. Tease outer circling roots only; keep the center intact.
Fertilizing immediately. Flush with plain water if you fed by mistake; wait three to four weeks before resuming.
Dry peat straight from the bag. Pre-moisten mix so the root ball center receives water.
Dividing without roots per section. Wilting divisions after two weeks often lack adequate roots - see the propagation guide for stem-cutting alternatives.
Ignoring sap safety. Wear gloves, wash hands, keep plants off pet-accessible floors during recovery (ASPCA - Dieffenbachia).
Changing light, pot, soil, and fertilizer simultaneously. Fix the root zone first; adjust light only gradually after the first new leaf.
Camille vs. Genus and Tropic Snow: Which Guide to Use
| Topic | This Camille guide | Genus repotting hub | Tropic Snow repotting |
|---|---|---|---|
| Best for | Side-table Camille with cream scorch recovery | Any dumb cane cultivar; division defaults | Wide-spreading Tropic Snow floor habit |
| Pot context | 6–8 inch typical; oversizing risk high | General one-size-up rule | Often larger starter pots |
| Variegation recovery | Cream panel scorch focus; filtered light rules | Genus light guidance | White-vein blotches; less scorch-prone centers |
| Soil detail | Links to Camille soil 40/30/20/10 | Genus-wide aroid principles | Separate cultivar page |
| When to read genus instead | Multi-cultivar collection, basic division biology, non-variegated dumb cane | - | - |
If you grow only Camille on a plant stand, stay on this page for recovery light and compact-pot examples. If you manage several dieffenbachia cultivars, bookmark the genus repotting hub for shared biology, then return here for cream-variegation aftercare.
Conclusion
Dieffenbachia Camille post-repot checklist:
- Timing: Routine repot March–June; winter only for rot or severe binding.
- Pot: One size up (1–2 inches wider), drainage hole, no gravel layer - see 6→8 inch example above.
- Soil: Fresh 40/30/20/10 aroid mix; pre-moisten peat.
- Light: Bright filtered indirect - east sheer or 3–5 feet from west/south; protect cream panels two to three weeks.
- Feed & water: Top inch dry before watering; no fertilizer three to four weeks until a new cream-centered leaf opens.
Get those five decisions right and Camille returns with firm roots, full-size variegated foliage, and a stable foundation for watering, light, and feeding for the next 12 to 18 months.
How this guide was reviewed: Recommendations were checked against Clemson HGIC Dieffenbachia, Clemson HGIC Indoor Plants Repotting, Penn State Extension Repotting Houseplants, UF/IFAS Gardening Solutions Dieffenbachia, NC State Extension Dieffenbachia seguine, Missouri Botanical Garden Plant Finder, and ASPCA Dieffenbachia toxicity. Cross-linked with LeafyPixels soil, watering, light, overview, propagation, and genus repotting guides. Methodology: botanical and extension references plus practical indoor growing constraints before publication.
When to use this page vs other Dieffenbachia Camille guides
- Dieffenbachia Camille overview - Start here for whole-plant context before deep-diving this topic.
- Dieffenbachia Camille problems hub - Jump to symptom-specific fix guides when this care topic does not resolve the issue.
- Root Rot on Dieffenbachia Camille - Escalate here when repotting adjustments are not enough.