Dieffenbachia Camille Propagation: Stem & Cane Guide
Dieffenbachia Camille Propagation: Stem & Cane Guide
Dieffenbachia Camille Propagation: Stem & Cane Guide
Author: sai-ananth · Reviewed by: LeafyPixels Review Board (2026-06-17) · Methodology: Botanical and extension references plus practical indoor growing constraints before publication.
Why ‘Camille’ Propagates From Nodes, Not Leaves
Dieffenbachia seguine ‘Camille’ - the cream-centered dumb cane sold on plant stands and side tables across the houseplant world - multiplies the same way every other Dieffenbachia does: through stem tissue that carries nodes, not through detached leaf blades. A node is the slightly swollen ring or ridge on the cane where a leaf once attached. Inside that node sits meristematic tissue capable of producing both adventitious roots and a new shoot. The smooth internode between nodes stores moisture and structural strength, but it cannot restart a plant on its own. That biology is non-negotiable, and it is the first thing to understand before you pick up shears.
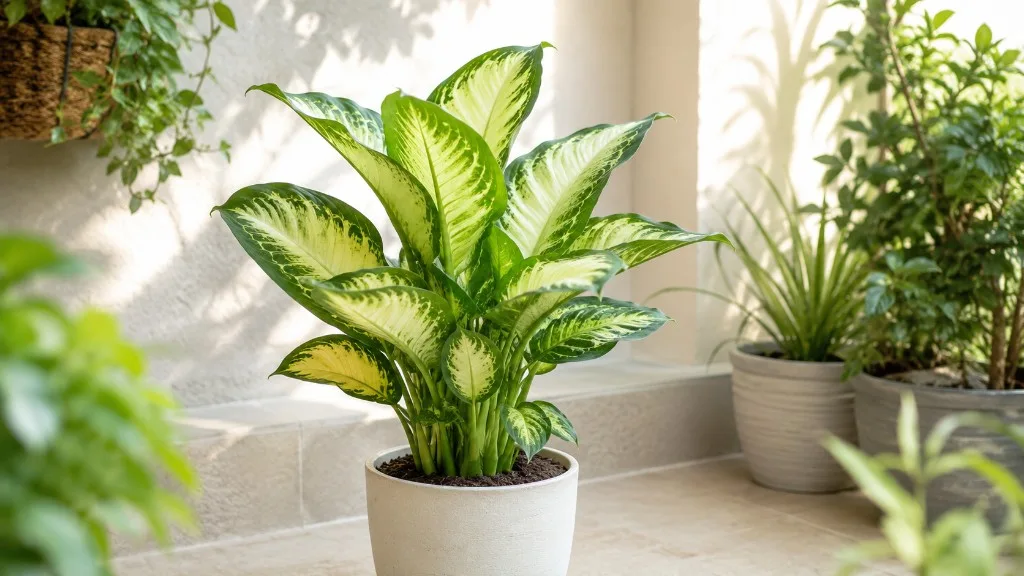
‘Camille’ is the softer, cream-centered choice in the dumb cane group. Its pale center panels need enough filtered light to stay bright after propagation, but they scorch faster than deeper green cultivars like ‘Reflector’ or ‘Tropic Snow’. In a real room, a propagated Camille looks best close to a bright window with a sheer curtain rather than several feet back in dim light. If new leaves emerge mostly green, increase light gradually before changing fertilizer or pot size. Propagation does not change the plant’s genetics - every clone from a stem or cane section will carry the same variegation pattern and the same light sensitivity as the parent.
The two methods that work reliably for Camille are top stem cuttings (the leafy crown plus a few inches of stem below the lowest leaf) and cane section cuttings (3–6 inch segments cut from bare stem, each with at least one node). Top cuttings root faster because they already have active leaves photosynthesizing while roots form. Cane sections are slower but far more efficient when you want multiple plants from one leggy specimen - a single bare stem can yield four or five new starts if you cut it carefully. Neither method involves placing a leaf in water and waiting. That approach fails every time, regardless of how healthy the leaf looks.
Toxic Sap Safety: What to Do Before the First Cut
Every cut you make on Dieffenbachia ‘Camille’ releases sap loaded with insoluble calcium oxalate crystals - microscopic needle-shaped raphides stored in specialized cells throughout the plant - plus co-occurring proteolytic enzymes that amplify and prolong the irritation. This is why the plant earned the name dumb cane: historical accounts describe ingestion causing enough mouth and throat swelling to temporarily impair speech. The ASPCA lists Dieffenbachia as toxic to both dogs and cats, with clinical signs including oral irritation, excessive drooling, vomiting, and difficulty swallowing. Propagation is the moment sap exposure peaks, because you are making multiple fresh wounds in quick succession.
Treat sap safety as a setup step, not an afterthought. Wear nitrile or latex gloves for the entire session - disposable gloves you discard immediately afterward. If you have sensitive skin, double-glove. Eye protection is worth adding when you are making several cuts on a tall cane, because sap can splash when a stiff stem snaps free. Work on newspaper or a disposable sheet you can roll up with all trimmings inside. Keep children and pets out of the room entirely during propagation and for at least an hour afterward, while cut surfaces are still weeping sap.
Sterilize your blade with 70% isopropyl alcohol between every cut, not just at the start. Dieffenbachia tissue is soft and sap-rich; a dull or dirty blade crushes the stem and invites bacterial rot into wounds that are already chemically irritated. After you finish, wash your hands thoroughly with soap and water even if you wore gloves, before touching your face, eyes, or food. Wrap all cut stem pieces in the newspaper and dispose of them where curious pets cannot reach them - a cane segment on the floor looks like a chew toy and carries the same toxicity as a leaf.
If sap contacts skin, wash the area immediately with soap and cool water. Most people experience mild tingling or a rash that resolves within hours. If sap gets in your eyes, flush with clean water for at least 15 minutes and seek medical attention. If a child or pet chews any part of the plant, contact Poison Control at 1-800-222-1222 for human exposure or the ASPCA Animal Poison Control Center at 888-426-4435 for pets. Do not wait for symptoms to worsen before calling - mouth and throat swelling can escalate quickly with calcium oxalate ingestion.
When to Propagate Dieffenbachia ‘Camille’ for the Fastest Roots
Camille follows a tropical growth rhythm: strong active growth from mid-spring through early fall, slower progress in late fall, and near-stall in winter when daylight shortens and indoor temperatures drop. NC State Extension identifies stem cuttings and division as standard propagation methods for Dieffenbachia seguine, and timing those cuttings to active growth dramatically shortens rooting time. The practical window is spring through early summer, when the plant has been pushing firm new leaves for several weeks and room temperatures hold steady between 65 and 85°F (18–29°C).
You can propagate in winter, but expect slower root formation and higher rot risk in cool, dim rooms. Root initiation on aroid cane cuttings slows sharply below 65°F (18°C) - a cane section sitting on a cold windowsill in January may look unchanged for two months and then rot when you finally overwater it out of impatience. If you must propagate off-season, add a seedling heat mat thermostatted to 75–80°F (24–27°C) under the propagation tray and a grow light on a 12-hour timer. Reduce watering enthusiasm: cold wet mix is the main reason cane sections turn to mush between December and February.
The best practical triggers for propagation are leggy height (Camille lost lower leaves and now looks like a palm on a stick), desire to multiply a favorite plant for another room, or recovery from accidental damage where you already must remove the top. Propagation turns a cosmetic problem into new plants rather than compost. Avoid propagating from a stressed parent - one with active root rot, severe pest damage, or recent cold shock. Weak tissue fails at a higher rate in propagation trays, and you may spread rot to healthy cuttings through shared water or contaminated tools.
Tools, Sanitation, and the Rooting Setup That Stops Rot
Gather everything before you touch the plant so sap-soaked stems are not sitting on the counter while you hunt for a jar. You will need sharp bypass pruning shears or a knife, nitrile gloves, 70% isopropyl alcohol for sterilizing blades, rooting hormone powder or gel (optional but helpful for cane sections), and containers matched to your method. For water rooting, use a clear glass or jar so you can monitor water level and root development without disturbing the cutting. For soil or mix rooting, prepare well-draining potting mix - standard indoor mix amended with perlite or coarse bark in roughly a 2:1 ratio works well. Aroid roots rot in dense, soggy media.
Use small 4-inch nursery pots or propagation trays with drainage holes rather than oversized containers that stay wet for weeks. Optional but valuable: a clear humidity dome or loose plastic bag supported on stakes so it does not touch leaves, a heat mat with thermostat, and labels with the date and method. Dieffenbachia cane sections look identical once leaves are removed, and you will forget which end was “up” on a horizontal segment within an hour - mark the top with a dot of permanent marker or a piece of tape before you cut.
The propagation environment matters as much as the tools. Bright, indirect light is the baseline: direct sun through glass overheats water in a jar to lethal temperatures and scorches the cream variegation on a cutting that has no roots to replace lost moisture. A spot two to three feet from an east- or north-facing window, or the same distance back from a shaded south-facing window, is the sweet spot for Camille. If your home runs cool overnight, bottom heat under the propagation pot cuts rooting time meaningfully - aroid propagation literature consistently reports that root-zone temperatures in the 75–80°F (24–27°C) range speed initiation compared with ambient air alone.
How to Identify Nodes on a Camille Cane
Nodes on Dieffenbachia ‘Camille’ appear as slightly raised rings or bumps along the stem, often marked by a leaf scar - a pale half-moon or circular mark where a petiole once attached. The internode above and below each node is smooth and cylindrical. On a healthy Camille cane, nodes are spaced roughly 1 to 3 inches apart, tighter near the top where growth is most recent and wider on older bare stem. When you run a gloved finger along the cane, nodes feel subtly thicker than the internodes; that tactile difference is often easier to detect than visual inspection alone, especially on green stem tissue without obvious scars.
Each node carries a dormant eye bud - a tiny bump on the upper side of the node that can activate into a new shoot when roots form and conditions are warm and humid. On cane sections with no leaves, the eye bud is your future plant. On top cuttings, the lowest node on the stem piece is where roots emerge; leaves above continue photosynthesizing while that node works underground or underwater. A cutting that includes two or three nodes gives you backup if one bud fails to activate, which happens occasionally on older bare cane.
Before cutting, trace the cane from top to bottom and mark at least one node on each piece you plan to remove. For top cuttings, your cut line sits just below the lowest node you want on the new plant - the node itself stays on the cutting side of the blade, not on the parent stump. For cane sections, each piece must contain at least one complete node; a segment cut through the middle of an internode with no node at either end will never root. This is the single most common propagation failure on social media tutorials that show pretty leaf-in-water setups without explaining stem anatomy.
Method 1: Top Stem Cuttings With Nodes
Top stem cuttings are the fastest way to reset a tall Camille while producing one strong new plant. Choose a healthy stem with several leaves at the top and bare cane below. Count down to where you want the parent to branch - usually 6–12 inches of bare stem remaining on the parent is enough for new shoots - and make a clean horizontal cut just below a node on the cutting piece. Your cutting should be 4–8 inches long with two to four leaves at the top and at least one clear node at the base.
Remove leaves from the bottom one-third of the stem so nothing sits underwater or buried in mix. Camille’s broad cream-variegated leaves lose water quickly when roots are absent; if the remaining leaf span is very large, you may roll the largest leaf loosely or trim its tip by one-third to reduce transpiration. Dieffenbachia tolerates this better than many houseplants because the stem stores moisture, but do not strip all foliage - the cutting needs some leaf area to fuel root formation.
Let the cut end callus for 2–24 hours on a dry tray if you are rooting in soil; water propagators can proceed immediately but should change water promptly if it clouds. Dip the base node lightly in rooting hormone if you have it - optional for fresh top cuttings but not harmful. Proceed to water or soil as described below.
Rooting Camille Top Cuttings in Water
Water propagation lets you watch roots form and avoids mix-borne rot early on. Place the stem in a clean jar so at least one node sits below the water line and all leaves stay above the surface. Use room-temperature filtered or dechlorinated water, refresh it every 5–7 days, and keep the jar in bright indirect light. Roots typically appear in 2–4 weeks during warm active-season conditions.
Transplant to mix once roots reach 2–3 inches long - waiting until roots circle the jar or grow six inches makes the transition to soil harder and increases transplant shock. When potting, use the same well-draining mix described earlier, bury the node 1–2 inches deep, and keep the medium slightly moister than you would for an established Camille for the first week. The cream variegation on new leaves may look pale for the first two weeks after potting; that is normal stress response, not a permanent loss of pattern, as long as light stays bright and indirect.
Rooting Camille Top Cuttings in Soil
Soil propagation skips the water-to-soil transition and often produces sturdier long-term roots. Insert the cutting so the bottom node sits 1–2 inches deep in moist mix. Enclose in a humidity dome or bag with small ventilation holes, and open daily for a minute to exchange air. Keep mix lightly moist, never soggy - the stem rots from the base up when the medium stays waterlogged. Expect roots in 4–6 weeks under good warmth; test gently after week four by giving the stem a very light tug to feel resistance.
Do not fertilize during rooting. Do not pull the cutting out to inspect roots - every disturbance breaks fragile new root hairs. New leaf unfurling from the top is the reliable signal that roots are working below. On Camille, that first post-propagation leaf is your checkpoint for light: if it emerges mostly green, the new plant needs a slightly brighter spot; if the cream panels show brown edges, back it away from direct sun.
Method 2: Cane Section Cuttings From Bare Stem
Cane section cuttings are the most efficient multiplication method for Camille. After you remove the top of a leggy plant, the remaining bare stem is not waste - it is raw material for multiple plants. Cut the cane into segments 3–6 inches long, each with at least one node and preferably two or three. Allow cut surfaces to dry and callus for a few hours on a dry tray to reduce rot entry. Dust cut ends and nodes lightly with rooting hormone, then lay segments in a propagation tray or individual small pots.
Cane sections root more slowly than top cuttings because they have no leaves to photosynthesize until a bud opens. Timeline: 4–8 weeks for visible roots and first leaf unfurl in warm, humid conditions; cool rooms can stretch this to 10 weeks without indicating failure, as long as the cane stays firm and green. Patience plus bottom heat near 75°F (24°C) beats frequent checking and overwatering.
Vertical Cane Placement
Vertical planting mimics natural stem orientation: insert the lower end into mix so one node is buried and at least one node sits at or just above the surface. Mark which end was toward the original top before cutting - planting upside down can delay or prevent bud activation because eye buds orient upward on the stem. The buried node roots; the upper node or eye bud pushes a new shoot. Do not bury the entire section deep - one to two inches of depth is enough. Deep planting in wet mix suffocates the cane and is a common cause of mushy sections that never sprout.
Horizontal Cane Placement
Horizontal planting lays the section on its side with the eye bud facing up if you can identify it. Lightly cover the node with mix so it has contact with moisture but the cane is not entombed - roughly ¼ to ½ inch of mix over the node is sufficient. Horizontal placement works well under a humidity dome on a heat mat and is the classic dumb cane propagation technique taught in extension literature. Multiple buds may activate along one section; you can later separate them into individual pots or grow them as a multi-stem clump for a fuller display on a plant stand.
When a new shoot has two or three leaves and resists a gentle tug, pot it individually into a 4-inch container. Treat the young Camille as you would a newly purchased plant: bright filtered light, careful watering, and no fertilizer for the first month.
Method 3: Division at Repotting
NC State Extension lists division alongside stem cuttings as a standard Dieffenbachia seguine propagation method. Division fits Camille when a nursery pot holds two or more separate canes with their own root clusters - common on multi-stem displays sold as full-looking side-table plants. The natural window is spring repotting, when you already have gloves, fresh mix, and workspace open. See the Camille repotting guide for timing and mix; use division only when stems pull apart with minimal tearing.
Unpot the clump and rinse or gently shake away loose mix so you can see where roots separate. Each division needs firm cane tissue, several roots, and at least one active or dormant bud. Cut connecting rhizome with a sterilized blade rather than ripping stems apart. Pot each section into its own 4–6 inch container with the same well-draining aroid mix used for cuttings. Water lightly once, then keep bright indirect light and top-inch-dry watering until new growth resumes - usually two to four weeks in warm conditions.
Division is faster than cane sections when you already have rooted stems, but it does not work on a single bare cane with no side shoots. For one leggy stem, use top or cane cuttings instead. For genus-wide air layering or larger specimen division, see Dieffenbachia propagation.
What Happens to the Parent Stem After You Cut
The parent Camille does not die when you remove the top - it resprouts from dormant buds on the remaining cane. After a top cutting, the bare stump you left behind will develop one or more new shoots from nodes below the cut within 4–8 weeks in warm conditions. Those shoots emerge from eye buds that were inactive while the terminal crown dominated growth. You may get a single replacement leader or a cluster of two or three shoots that eventually give the parent a bushier habit than it had before.
Keep the parent in the same bright indirect light it prefers, water when the top inch of mix dries, and do not overwater out of sympathy - a stump with no leaves transpires far less water than a full canopy, and wet mix on a root system sized for a tall plant invites rot. Hold fertilizer until new shoots have two or three leaves each. If the parent stem was very tall and you removed most of the leafy top, consider shortening the remaining bare cane further: a 6-inch stump with one or two nodes is easier to manage than an 18-inch stick that wobbles in its pot.
If you took cane sections from the middle of the stem and left a base portion in the original pot, that base behaves the same way - buds activate along remaining nodes. The propagation session can yield both multiple cane-section babies and a refreshed, branched parent from a single plant. That is one reason stem and cane propagation beats attempting leaf cuttings: you gain plants without sacrificing the original specimen.
Water vs Soil: Choosing the Right Medium for Camille
Both water and soil work for top cuttings with nodes; neither works without a node present. The choice depends on your tolerance for rot risk, your desire to watch roots form, and how soon you need a potted plant.
Water wins for beginners who fear unseen rot in mix and for quick visual confirmation that the node is alive - you see roots within weeks or know to start over. The trade-offs are transplant shock when moving to soil, stagnant water rot if you forget weekly changes, and weaker initial soil roots compared with mix-rooted cuttings. Use water when you have a healthy top cutting with two or more leaves and a warm bright room.
Soil or perlite mix wins when you want one step to a finished potted plant, when the cutting already looks slightly stressed, or when you propagate cane sections that have no leaves and benefit from stable moisture contact at the node without submerging the entire segment. The trade-offs are invisible progress for weeks, overwatering risk in enclosed humidity setups, and mold if ventilation is poor. Use mix for cane sections, for top cuttings you plan to keep long-term in potting soil anyway, and for any propagation in a home that runs cool where water in a jar drops below 65°F overnight.
Cane sections should always start in mix, not water - a leafless segment submerged in a jar rots more often than it roots. Top cuttings can go either way; there is no cultivar-specific reason Camille prefers one medium over the other beyond the general aroid pattern above.
| Method | Best for | Typical timeline | Plant count from one leggy Camille |
|---|---|---|---|
| Top stem cutting | Resetting height; fastest single new plant | 2–4 weeks (water) or 4–6 weeks (soil) | 1 new plant + branched parent stump |
| Cane section | Multiplying from bare stem | 4–8 weeks | 3–5 plants from one bare cane |
| Division at repot | Multi-stem nursery clump already rooted | 2–4 weeks to resume growth | 2+ plants if clump separates cleanly |
| Leaf in water | - | Does not work | 0 |
Rooting Conditions That Speed Success on ‘Camille’
Temperature drives Camille rooting more than almost any other variable. Root formation slows sharply below 65°F (18°C) and stalls on cold drafty windowsills. A heat mat under propagation trays - thermostatted to 75–80°F (24–27°C) - often cuts weeks off cane section timelines. Do not place trays directly over heating vents where air is hot but humidity is zero; that combination desiccates cuttings without warming the root zone effectively.
Light should be bright and indirect. Direct sun through glass overheats humidity domes and scorches Camille’s cream variegation on cuttings that cannot yet regulate water loss. Low light slows bud activation on cane sections and produces etiolated pale growth on top cuttings. A grow light 12–18 inches above the tray on a 12-hour timer fixes dim winter rooms without risking sun scorch on variegated panels.
Humidity around cuttings should stay roughly 60–80% while leaves or buds are developing, but stale enclosed air promotes mold. If you use a bag or dome, vent daily for a minute or punch small holes in the plastic. The pairing of high humidity plus airflow separates reliable propagators from those who lose trays to fuzzy mold every winter. Rooting hormone helps cane wounds and slow-to-root sections more than fresh top cuttings with leaves, but it is not magic - cold wet conditions defeat hormone every time.
Realistic timelines in warm active-season conditions: top cuttings in water, 2–4 weeks to visible roots; top cuttings in mix, 4–6 weeks; cane sections, 4–8 weeks to roots plus first shoot. Cool rooms add weeks; a firm green cane at week six is still a live cane. Do not assume failure at day 30 if tissue remains turgid and nodes have not turned black.
Aftercare After Camille Propagation
Newly rooted Camille is fragile even when it looks triumphant. Do not fertilize until the plant has been in its final pot for 4–6 weeks and is pushing new growth - fertilizer on roots only a few centimeters long burns tissue. Keep bright indirect light and temperatures stable. Water when the top inch of mix dries; newly rooted plants have small root volume and cannot handle drought or flood.
Watch the cream variegation on the first one or two new leaves. Camille’s pale centers need enough light to stay bright but scorch faster than all-green cultivars. If new leaves emerge mostly green, move the plant gradually closer to the light source over two weeks. If cream panels show brown patches, increase distance from the window or add a sheer curtain. Variegation recovery is a light problem more often than a propagation failure.
Increase pot size only when roots circle the drainage holes - a 4-inch pot is appropriate for several months after rooting. Camille is a compact plant best displayed on a stand or side table while young; resist upsizing into a floor pot before the root system justifies it. Rotate the pot weekly so variegated leaves do not lean hard toward one window. Keep the plant away from narrow walkways where broken petioles leave it lopsided for months, and maintain sap-safe handling whenever you prune or repot.
Why Leaf Cuttings Will Not Work on Dieffenbachia
No - you cannot propagate Dieffenbachia ‘Camille’ from a leaf cutting. A detached leaf blade, even with a short petiole, lacks the stem node that contains meristematic tissue capable of producing roots and shoots. Meristem cells live in the node region where the petiole joins the cane, not in the leaf lamina itself. A Camille leaf placed in water may stay green for weeks through stored moisture, and social media posts sometimes mistake that persistence for rooting progress. It will never develop into an independent plant.
This limitation applies to every Dieffenbachia cultivar, not just Camille. The same rule holds across most Araceae grown as houseplants: philodendrons, monstera, and aglaonema require stem nodes; leaves alone fail. If someone shows you a “rooted” dieffenbachia leaf, look closely - there is always a stem segment with a node attached, or the photo shows roots on a different plant entirely. Save yourself the jar, the stale water, and the false hope by cutting stem tissue from the start.
The practical takeaway: when you propagate Camille, your cutting must include cane with at least one node. A top cutting with leaves plus stem qualifies. A cane section qualifies. A leaf floating alone does not. If your plant has only leaves and no accessible stem - which should not happen on a healthy Camille - wait until you have bare cane from natural leaf drop or trim the top first to expose stem tissue below.
Common Mistakes and How to Fix Them
Taking cuttings without nodes is the most common failure, usually from copying leaf-in-water trends that ignore aroid anatomy. Fix: trace the cane, identify nodes by feel and leaf scars, and cut so each piece includes at least one complete node. Planting cane sections upside down delays bud activation because eye buds orient upward. Fix: mark the top before cutting with tape or a dot of marker. Overwatering in humidity domes or water jars causes mushy stems from the base up. Fix: vent domes daily, change water weekly, and let mix approach dry on the surface between waterings.
Propagating in cold rooms below 65°F stalls root formation for weeks and then rots tissue when impatience triggers extra water. Fix: add bottom heat, move propagation to the warmest bright room, or wait until spring. Skipping gloves leads to skin irritation and sap transfer to eyes or mouth. Fix: treat gloves as mandatory equipment, not optional. Discarding the bare cane after a top cut wastes four or five potential plants. Fix: section the remaining stem before you clean up the workspace.
Fertilizing too early burns fragile new roots and yellows the cream variegation on first leaves. Fix: wait for four to six weeks of established growth. Direct sun on propagation trays cooks cuttings inside domes and scorches Camille’s pale leaf panels. Fix: bright indirect light only until the plant is rooted and acclimated. Leaving cut trimmings accessible to pets creates a toxicity emergency. Fix: wrap and dispose of all stem pieces immediately.
When Not to Propagate a Stressed Camille
Propagation is not a rescue tool for every struggling plant. If your Camille has active root rot - soft lower stem, sour-smelling mix, yellowing leaves across the whole plant - stabilize it first by correcting watering and inspecting roots, or take cuttings only from stem tissue clearly above the rot line after you verify that tissue is firm and green. If spider mites, mealybugs, or scale are present, treat the infestation before propagation so you do not multiply pests across new jars and trays.
Do not propagate immediately after shipping or repotting; the plant needs two to three weeks to recover from transplant stress before it can spare energy for wound healing on cut surfaces. Do not propagate from a cold-shocked plant that lost leaves after sitting near a drafty window in winter - wait for new growth to resume. Propagation from a healthy parent during the active season succeeds far more often than propagation as a last-ditch effort on a dying one.
If the only material you have is a single leaf with no stem access, you cannot propagate - buying a replacement or nursing the parent back to health are the realistic options. Forcing a leaf into water wastes time that would be better spent fixing the conditions that weakened the plant in the first place.
Related Dieffenbachia Camille guides
- Camille overview - culture hub
- Light - keeping cream variegation after rooting
- Watering - parent stump and seedling rhythm
- Repotting - division window and fresh mix
- Genus Dieffenbachia propagation - air layering and species-wide methods
Conclusion
Dieffenbachia Camille propagation checklist:
- Safety: Nitrile gloves, sterilized blade, sap contained; pets and children out of the room.
- Material: Stem or cane with at least one node - never a detached leaf.
- Timing: Spring through early summer; bottom heat if room is below 65°F (18°C).
- Method: Top cutting for speed; cane sections for multiples; division when a multi-stem clump separates at repot.
- Aftercare: Bright filtered light, top-inch-dry watering, no fertilizer for 4–6 weeks; judge variegation on the first new leaf.
Get the node, handle the sap, and match the method to the stem you actually have - that is the complete Camille propagation formula.
How this guide was reviewed: Recommendations were checked against NC State Extension Dieffenbachia seguine, UF/IFAS Gardening Solutions Dieffenbachia, Missouri Botanical Garden Dieffenbachia, and ASPCA Dieffenbachia toxicity. Cross-linked with LeafyPixels Camille light, watering, repotting, and genus propagation guides.